Get ready to treat your taste buds with a creamy, citrusy delight! This No-Bake Orange Creamsicle Cheesecake combines the nostalgic flavor of orange creamsicles with a smooth cheesecake texture. It’s simple to make, with no baking required. Perfect for warm days or special occasions, this dessert will impress everyone. I’ll walk you through the ingredients, easy steps, and fun tips to create this refreshing treat! Ready to dive in?
Ingredients
Main Ingredients
To create the No-Bake Orange Creamsicle Cheesecake, you will need the following:
– 1 ½ cups graham cracker crumbs
– ¼ cup granulated sugar
– ½ cup unsalted butter, melted
– 16 oz cream cheese, softened
– ¾ cup powdered sugar
– 2 teaspoons vanilla extract
– 1 cup heavy whipping cream
– ½ cup freshly squeezed orange juice
– Zest of 1 orange
– ¼ teaspoon orange extract (optional)
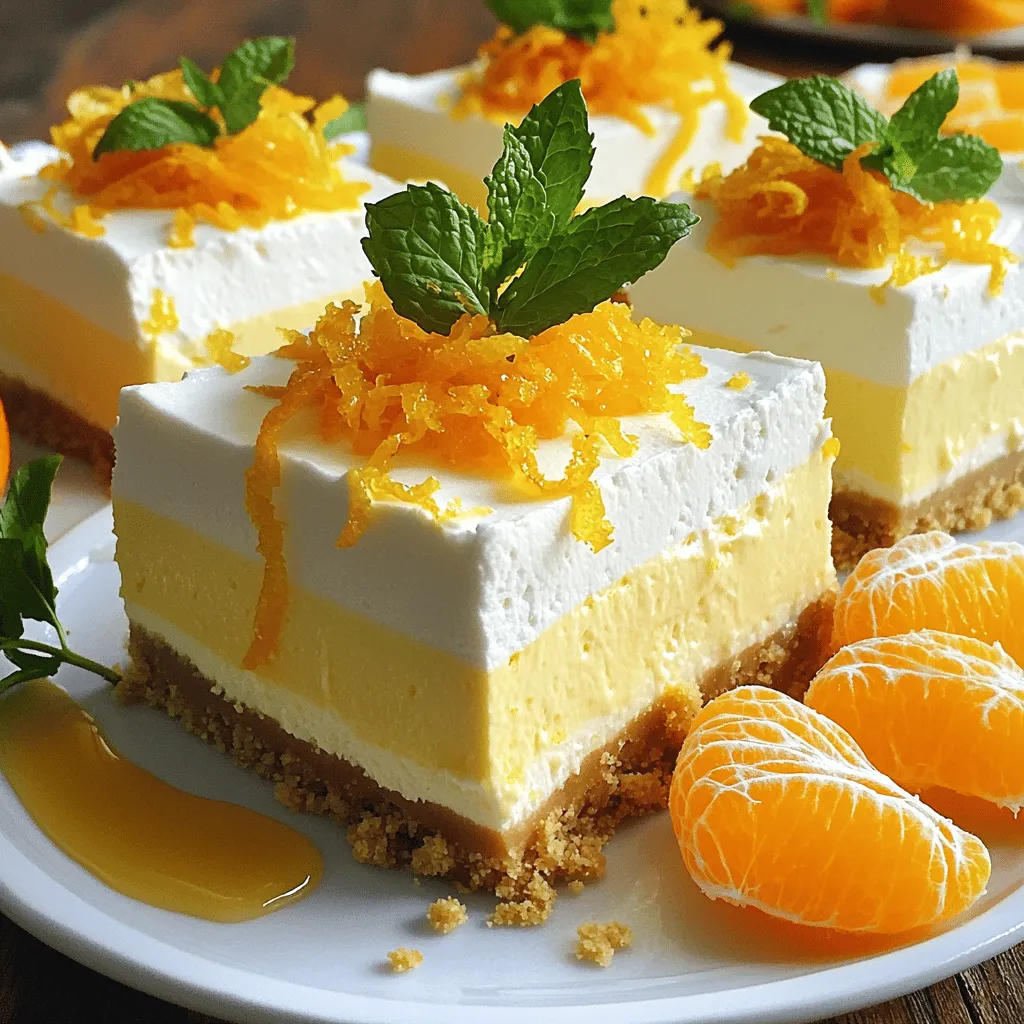
These ingredients come together to form a creamy and zesty cheesecake that reminds me of summer days. The graham cracker crust adds a nice crunch, while the cream cheese filling is rich and smooth.
Optional Garnishes
You can enhance your cheesecake with these fun garnishes:
– Fresh orange segments
– Mint leaves
– Orange syrup
Adding fresh orange segments and mint leaves gives a fresh touch. Orange syrup adds sweetness and a lovely finish. These garnishes make your cheesecake look even more inviting.
Step-by-Step Instructions
Preparing the Crust
– Combine 1 ½ cups graham cracker crumbs, ¼ cup granulated sugar, and ½ cup melted unsalted butter in a bowl.
– Mix until it looks like wet sand.
– Press this mixture firmly into the bottom of a 9-inch springform pan.
– Chill the crust in the fridge while you work on the filling.
Making the Cheesecake Filling
– In a large bowl, beat 16 oz of softened cream cheese until very smooth.
– Add ¾ cup powdered sugar and 2 teaspoons vanilla extract to the cream cheese.
– Mix well until fully combined.
– Pour in ½ cup of freshly squeezed orange juice, the zest of 1 orange, and ¼ teaspoon orange extract (if using).
– Stir until the mixture is smooth and creamy.
Whipping the Cream
– In a separate bowl, whip 1 cup of heavy cream until stiff peaks form.
– Gently fold the whipped cream into the cheesecake mixture.
– Be careful not to deflate the whipped cream as you mix.
Assembling the Cheesecake
– Spoon the smooth filling over the chilled crust.
– Spread it evenly with a spatula.
– Cover the cheesecake with plastic wrap and refrigerate for at least 4 hours, or overnight for the best results.
– Once it sets, carefully remove the sides of the springform pan.
– You can garnish it with extra orange zest or segments for a fresh look.
Follow these steps carefully to make the No-Bake Orange Creamsicle Cheesecake Delight come out perfectly!
Tips & Tricks
Achieving the Perfect Texture
To get the best texture for your No-Bake Orange Creamsicle Cheesecake, start with soft cream cheese. If the cream cheese is cold, it will be hard to mix. Take it out of the fridge and let it sit for about 30 minutes before you start. This way, it will blend smoothly. When you whip the heavy cream, make sure to whip it until stiff peaks form. Then, when you fold the whipped cream into the cream cheese mixture, do it gently. This keeps the air in the whipped cream, making your cheesecake light and fluffy.
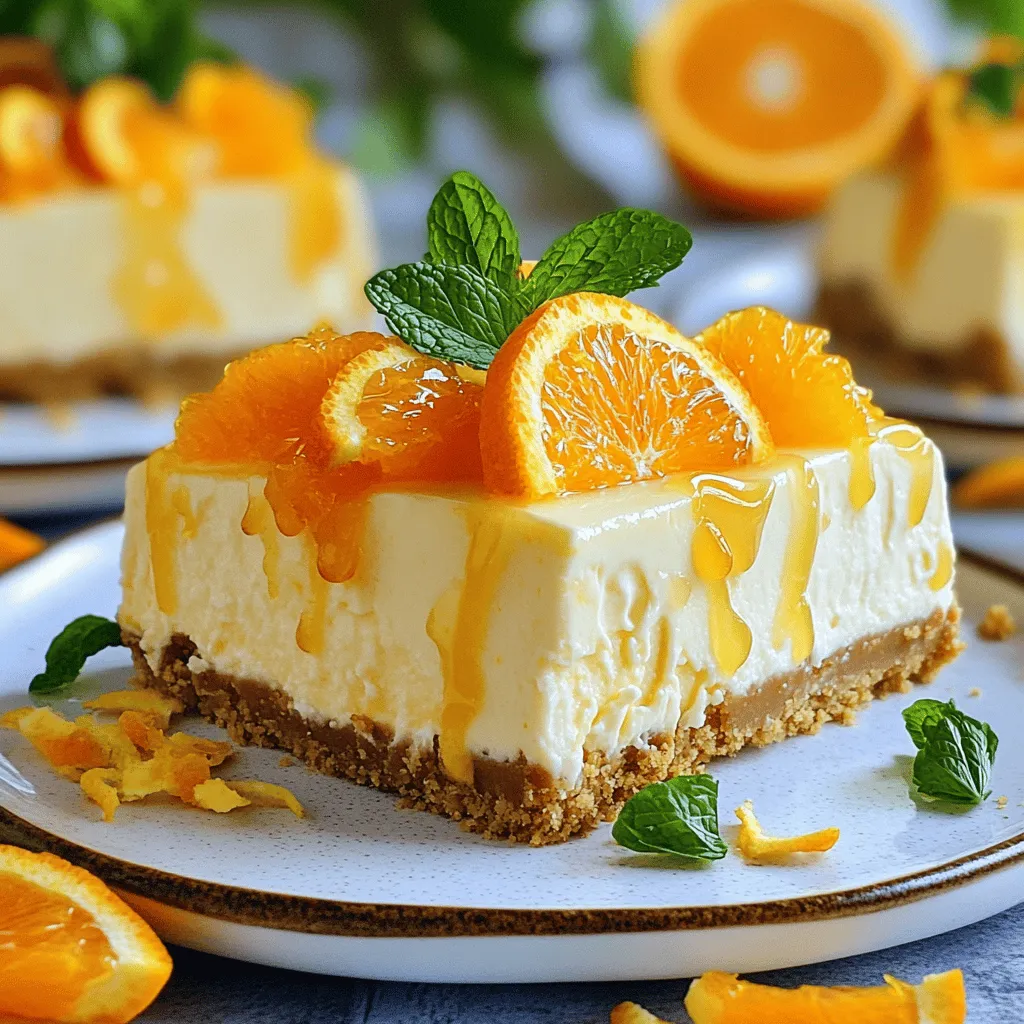
Presentation Tips
For a beautiful presentation, use a hot knife to slice the cheesecake. A hot knife will cut through the cream easily and give you clean slices. After cutting, you can garnish the slices just before serving. This keeps the garnish fresh and colorful. A sprinkle of orange zest or a few fresh orange segments on top adds a lovely touch.
Serving Suggestions
This cheesecake pairs well with fresh fruit, like berries or orange slices. The fruit adds a nice contrast to the creamy cheesecake. For drinks, consider serving it with a light tea or a refreshing lemonade. These beverages complement the sweet and tart flavors of the cheesecake.
Variations
Flavor Twists
You can change the flavor of this cheesecake easily. Try adding different fruit juices. Lemon and mango work great. They give a fresh and unique taste. You can also add a chocolate layer. Just melt some chocolate and pour it over the crust. Let it cool before adding the filling. This twist adds richness and depth.
Dietary Adjustments
If you need a gluten-free option, use gluten-free graham crackers. They work well in the crust and keep the taste. For a vegan version, swap cream cheese and whipped cream for vegan alternatives. Look for brands that taste rich and creamy. This way, everyone can enjoy the dessert without worry.
Mini Cheesecakes
You can make mini cheesecakes for fun, individual servings. Use muffin tins or small jars. Just press the crust into each cup and fill with the cheesecake mix. Adjust the chilling time to about 2 hours. This way, they set faster. Plus, mini cheesecakes are perfect for parties and gatherings. They are easy to serve and eat.
Storage Info
Storing Leftovers
To keep your No-Bake Orange Creamsicle Cheesecake fresh, store it in the fridge. Use an airtight container to prevent it from drying out or absorbing other smells. You can also cover the cheesecake with plastic wrap if you don’t have a container. Make sure to consume leftovers within three to four days for the best taste.
Freezing Options
If you want to freeze the cheesecake, you can do that too. First, let it set completely in the fridge. Then, wrap it tightly in plastic wrap and place it in a freezer-safe container. This helps keep the texture nice. To defrost, move it to the fridge for several hours or overnight. Avoid thawing it at room temperature, as this can make it watery. After freezing, the cheesecake may be a bit softer, but it will still taste great!
FAQs
Can I make this cheesecake ahead of time?
Yes, you can make this cheesecake ahead of time. I recommend preparing it a day in advance. This allows the flavors to blend nicely. Plus, chilling overnight makes the cheesecake even firmer. Store it in the refrigerator, tightly covered. This way, it stays fresh and delicious.
How long does the cheesecake need to set?
The cheesecake needs to chill for at least four hours. However, for the best results, I suggest letting it set overnight. This allows the filling to firm up fully. A longer chill time ensures easy slicing. It also helps the flavors develop more.
What can I substitute for heavy cream?
If you want a substitute for heavy cream, try using coconut cream. It gives a nice richness and flavor. Another option is using whipped topping, which is lighter. Greek yogurt can also work, but it changes the texture a bit. Choose what fits your taste and needs best.
Is it possible to make this recipe without dairy?
Yes, you can make a dairy-free version of this cheesecake. Use vegan cream cheese instead of regular cream cheese. Substitute coconut cream for heavy cream. For the crust, ensure you use dairy-free butter or oil. This way, you can enjoy the same great taste without dairy!
This cheesecake recipe combines simple ingredients and steps for a delicious treat. You learned how to prepare the crust, make the creamy filling, and present your dessert beautifully. You can even try new flavors or dietary options. Remember to store leftovers properly for best freshness. Embrace your creativity with this recipe and enjoy every bite of your homemade cheesecake. It’s a fun and rewarding experience that you can share with friends and family.