Vintage Pumpkin Crunch Cake Deliciously Simple Recipe

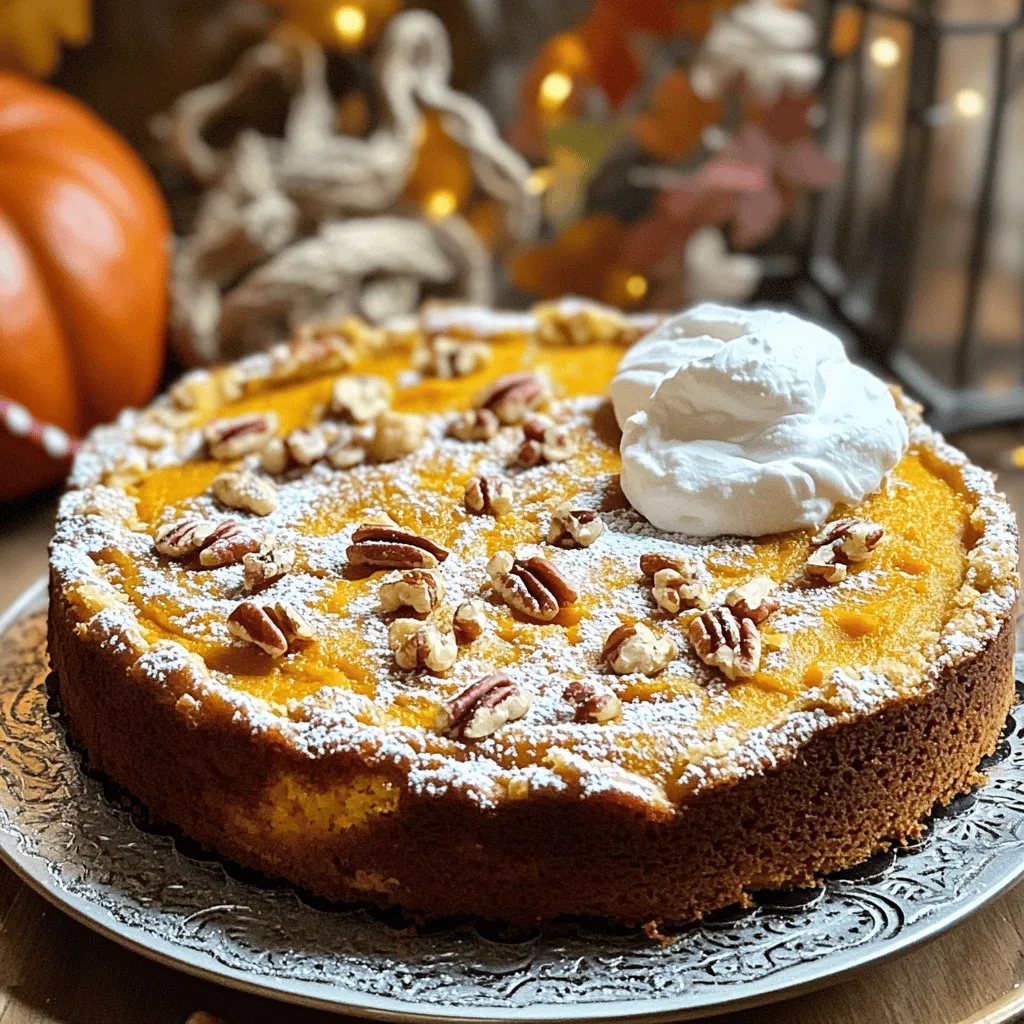
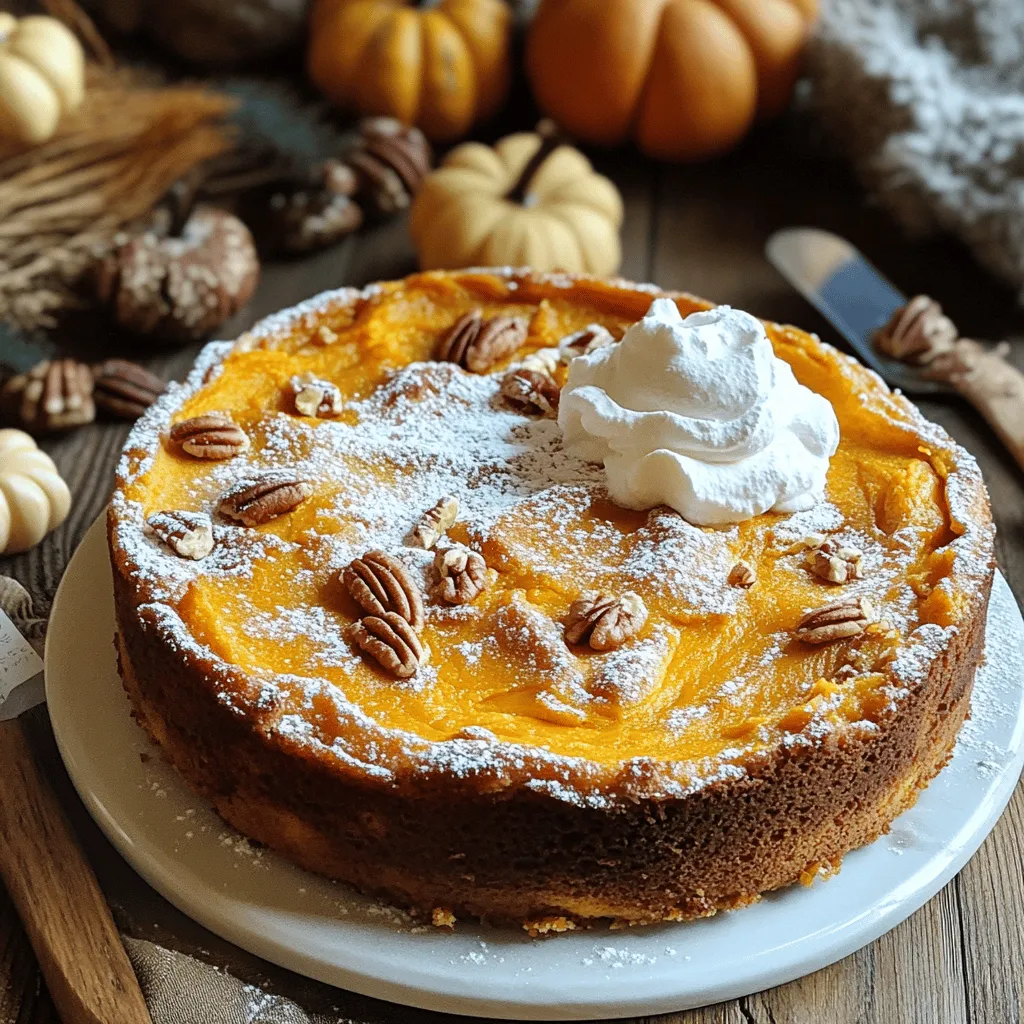
Are you ready for a simple and delicious treat this fall? My Vintage Pumpkin Crunch Cake is the perfect choice! With its rich flavors and easy prep, this recipe will become a family favorite in no time. Let’s dive into the heart of this delightful cake, packed with all the pumpkin goodness and crunchy topping you crave. Grab your ingredients, and let’s bake something amazing together!

Ingredients

List of Ingredients

  • 1 can (15 oz) pure pumpkin puree
  • 1 cup granulated sugar
  • 1 cup packed brown sugar
  • 1/2 cup vegetable oil
  • 4 large eggs
  • 1 teaspoon vanilla extract
  • 1 cup all-purpose flour
  • 1 teaspoon baking powder
  • 1 teaspoon baking soda
  • 2 teaspoons ground cinnamon
  • 1/2 teaspoon ground nutmeg
  • 1/4 teaspoon ground ginger
  • 1/4 teaspoon salt
  • 1 cup chopped pecans or walnuts (optional)
  • 1 cup whipped cream (for serving)
  • Powdered sugar (for dusting)

In this recipe, I keep the ingredients simple yet effective. You can customize the cake by adding nuts. Chopped pecans or walnuts add a lovely crunch.

Notes on Ingredient Quality

Using pure pumpkin puree is key. It brings out the best flavor in your cake. Avoid pumpkin pie filling. That has added spices and sugar, which can change the taste.

For the sugars, I suggest using granulated sugar and packed brown sugar. This mix gives a rich taste. Brown sugar adds moisture and a slight caramel flavor. Always choose high-quality sugar for the best results.

This Vintage Pumpkin Crunch Cake is not just easy to make. It’s also a classic that brings warmth and joy. For the full recipe, check out the details above.

Step-by-Step Instructions

Preparation Steps

1. Start by preheating your oven to 350°F (175°C). This step is key for even baking.

2. Grease and flour a 9×13 inch baking dish. This helps the cake release easily later.

3. In a large bowl, combine the pumpkin puree, granulated sugar, brown sugar, vegetable oil, eggs, and vanilla extract. Mix until it’s smooth and well blended.

4. In another bowl, whisk together the flour, baking powder, baking soda, cinnamon, nutmeg, ginger, and salt. This ensures even spice distribution in the cake.

5. Gradually add the dry mix to the wet ingredients. Stir until just combined. If you like nuts, fold them in now.

Baking the Cake

1. Pour the batter into your prepared baking dish. Use a spatula to spread it evenly.

2. Bake in your preheated oven for 45-50 minutes. To check if it’s done, insert a toothpick in the center. If it comes out clean, the cake is ready.

3. After baking, let the cake cool in the pan for about 15 minutes. This helps it set well.

4. Transfer the cake to a wire rack to cool completely. Proper cooling is vital for texture and taste.

For the full recipe, refer to the earlier section. Enjoy the process, and soon you’ll have a delightful Vintage Pumpkin Crunch Cake!

Tips & Tricks

Secrets to Perfect Pumpkin Crunch Cake

To make your pumpkin crunch cake moist and flavorful, always use fresh ingredients. Fresh eggs and pure pumpkin puree make a big difference. I like to mix my dry ingredients well before adding them to the wet mix. This helps the spices blend in evenly. You can also try adding a splash of apple cider or orange juice. It enhances the cake’s flavor and gives it a nice twist.

To boost the spice mixture, I often add a pinch of allspice or clove. These spices add depth and warmth to the pumpkin flavor. You can also adjust the cinnamon to your taste. If you love a strong spice note, add a bit more cinnamon.

Common Mistakes to Avoid

One common mistake is overmixing the batter. When you mix too much, the cake can become tough. Mix just until the dry ingredients are combined. It’s okay if a few lumps remain.

Another mistake is not cooling the cake enough. After baking, let it cool in the pan for at least 15 minutes. This helps it set and makes it easier to remove. If you cut it too soon, it may fall apart. Allow it to cool completely on a wire rack for the best texture.

For the full recipe, check the section above. Happy baking!

Variations

Alternative Ingredients

You can make this Vintage Pumpkin Crunch Cake fit your needs with some easy swaps. For a gluten-free option, use almond flour or a gluten-free baking blend. Both options work well for this cake. Just make sure to check the ratios on the package.

If you need a dairy-free substitute for the whipped cream, try coconut cream. Chill a can of coconut milk overnight, then scoop the solid cream off the top. Whip it until light and fluffy. This gives you a rich, creamy topping that pairs well with the pumpkin flavor.

Creative Twist Ideas

Want to add a fun twist? Mix in chocolate chips or chopped nuts, like pecans or walnuts, into the batter. This adds a nice crunch and more flavor. Just fold them in gently so they don’t sink to the bottom.

You can also play with the spices. For a unique taste, try adding cardamom or allspice. You can adjust the cinnamon to your liking, too. A little more or less can totally change the cake’s flavor. Experiment and find what you love!

For the full recipe, check the section above.

Storage Info

How to Store Leftover Cake

To keep your Vintage Pumpkin Crunch Cake fresh, store it in the fridge. Place slices in an airtight container or cover the entire cake with plastic wrap. This helps maintain moisture and flavor. It’s best to eat the cake within 4 to 5 days.

If you want to save it longer, freezing is a great option. Wrap the cake tightly in plastic wrap, then place it in a freezer bag. This way, it can last up to three months. When you’re ready to enjoy it, let it thaw in the fridge overnight.

Reheating Instructions

Reheating your cake can bring back its warmth and flavor. The best way is to use the oven. Preheat your oven to 350°F (175°C). Place the cake in a baking dish and cover it with foil. Heat it for about 10 to 15 minutes, until warm.

If you need a quicker method, you can use the microwave. Heat a slice for about 15 to 20 seconds. This gives you a warm piece of cake in no time.

After storage, serve with whipped cream for a tasty touch. Dust with powdered sugar for a nice finish. Whether fresh or reheated, enjoy every bite of your Vintage Pumpkin Crunch Cake!

FAQs

What is Vintage Pumpkin Crunch Cake?

Vintage Pumpkin Crunch Cake is a warm, spiced dessert. It has roots in classic American cooking. This cake blends pumpkin with sweet spices. It dates back to family gatherings and fall festivals. Many people enjoy it for Thanksgiving and Halloween.

It is similar to pumpkin pie but has a cake-like texture. You may also find it like a pumpkin coffee cake. The crunchy topping often comes from nuts. This cake gives you the warmth of fall in every bite.

Can I make this cake ahead of time?

Yes, you can make this cake ahead of time. I recommend baking it a day before you plan to serve it. This way, the flavors have time to blend. Let it cool completely before you store it.

For the best quality, keep it in the fridge. It can last for about three to four days. If you want to make it even earlier, freeze it. Wrap it tightly in plastic wrap and aluminum foil. It can last for up to three months in the freezer.

Is this recipe suitable for special diets?

This recipe can be adapted for special diets. To make it vegan, replace eggs with flaxseed meal or applesauce. You can also choose a plant-based oil. For gluten-free options, use almond flour or a gluten-free blend.

If you have nut allergies, skip the nuts or use seeds instead. Serve it with coconut whipped cream for a dairy-free option. This way, everyone can enjoy a slice of this delicious cake.

This blog post covered everything you need for a tasty pumpkin crunch cake. We explored the best ingredients and their quality. You learned step-by-step instructions for mixing and baking. We shared tips to avoid common mistakes and creative variations to try. Also, we discussed how to store and reheat your cake properly.

Enjoy crafting your cake and feel free to experiment. With these tips, you’ll make a delicious treat that everyone will love. Happy baking!

- 1 can (15 oz) pure pumpkin puree - 1 cup granulated sugar - 1 cup packed brown sugar - 1/2 cup vegetable oil - 4 large eggs - 1 teaspoon vanilla extract - 1 cup all-purpose flour - 1 teaspoon baking powder - 1 teaspoon baking soda - 2 teaspoons ground cinnamon - 1/2 teaspoon ground nutmeg - 1/4 teaspoon ground ginger - 1/4 teaspoon salt - 1 cup chopped pecans or walnuts (optional) - 1 cup whipped cream (for serving) - Powdered sugar (for dusting) In this recipe, I keep the ingredients simple yet effective. You can customize the cake by adding nuts. Chopped pecans or walnuts add a lovely crunch. Using pure pumpkin puree is key. It brings out the best flavor in your cake. Avoid pumpkin pie filling. That has added spices and sugar, which can change the taste. For the sugars, I suggest using granulated sugar and packed brown sugar. This mix gives a rich taste. Brown sugar adds moisture and a slight caramel flavor. Always choose high-quality sugar for the best results. This Vintage Pumpkin Crunch Cake is not just easy to make. It’s also a classic that brings warmth and joy. For the full recipe, check out the details above. 1. Start by preheating your oven to 350°F (175°C). This step is key for even baking. 2. Grease and flour a 9x13 inch baking dish. This helps the cake release easily later. 3. In a large bowl, combine the pumpkin puree, granulated sugar, brown sugar, vegetable oil, eggs, and vanilla extract. Mix until it’s smooth and well blended. 4. In another bowl, whisk together the flour, baking powder, baking soda, cinnamon, nutmeg, ginger, and salt. This ensures even spice distribution in the cake. 5. Gradually add the dry mix to the wet ingredients. Stir until just combined. If you like nuts, fold them in now. 1. Pour the batter into your prepared baking dish. Use a spatula to spread it evenly. 2. Bake in your preheated oven for 45-50 minutes. To check if it’s done, insert a toothpick in the center. If it comes out clean, the cake is ready. 3. After baking, let the cake cool in the pan for about 15 minutes. This helps it set well. 4. Transfer the cake to a wire rack to cool completely. Proper cooling is vital for texture and taste. For the full recipe, refer to the earlier section. Enjoy the process, and soon you’ll have a delightful Vintage Pumpkin Crunch Cake! To make your pumpkin crunch cake moist and flavorful, always use fresh ingredients. Fresh eggs and pure pumpkin puree make a big difference. I like to mix my dry ingredients well before adding them to the wet mix. This helps the spices blend in evenly. You can also try adding a splash of apple cider or orange juice. It enhances the cake’s flavor and gives it a nice twist. To boost the spice mixture, I often add a pinch of allspice or clove. These spices add depth and warmth to the pumpkin flavor. You can also adjust the cinnamon to your taste. If you love a strong spice note, add a bit more cinnamon. One common mistake is overmixing the batter. When you mix too much, the cake can become tough. Mix just until the dry ingredients are combined. It's okay if a few lumps remain. Another mistake is not cooling the cake enough. After baking, let it cool in the pan for at least 15 minutes. This helps it set and makes it easier to remove. If you cut it too soon, it may fall apart. Allow it to cool completely on a wire rack for the best texture. For the full recipe, check the section above. Happy baking! {{image_2}} You can make this Vintage Pumpkin Crunch Cake fit your needs with some easy swaps. For a gluten-free option, use almond flour or a gluten-free baking blend. Both options work well for this cake. Just make sure to check the ratios on the package. If you need a dairy-free substitute for the whipped cream, try coconut cream. Chill a can of coconut milk overnight, then scoop the solid cream off the top. Whip it until light and fluffy. This gives you a rich, creamy topping that pairs well with the pumpkin flavor. Want to add a fun twist? Mix in chocolate chips or chopped nuts, like pecans or walnuts, into the batter. This adds a nice crunch and more flavor. Just fold them in gently so they don’t sink to the bottom. You can also play with the spices. For a unique taste, try adding cardamom or allspice. You can adjust the cinnamon to your liking, too. A little more or less can totally change the cake's flavor. Experiment and find what you love! For the full recipe, check the section above. To keep your Vintage Pumpkin Crunch Cake fresh, store it in the fridge. Place slices in an airtight container or cover the entire cake with plastic wrap. This helps maintain moisture and flavor. It’s best to eat the cake within 4 to 5 days. If you want to save it longer, freezing is a great option. Wrap the cake tightly in plastic wrap, then place it in a freezer bag. This way, it can last up to three months. When you’re ready to enjoy it, let it thaw in the fridge overnight. Reheating your cake can bring back its warmth and flavor. The best way is to use the oven. Preheat your oven to 350°F (175°C). Place the cake in a baking dish and cover it with foil. Heat it for about 10 to 15 minutes, until warm. If you need a quicker method, you can use the microwave. Heat a slice for about 15 to 20 seconds. This gives you a warm piece of cake in no time. After storage, serve with whipped cream for a tasty touch. Dust with powdered sugar for a nice finish. Whether fresh or reheated, enjoy every bite of your Vintage Pumpkin Crunch Cake! Vintage Pumpkin Crunch Cake is a warm, spiced dessert. It has roots in classic American cooking. This cake blends pumpkin with sweet spices. It dates back to family gatherings and fall festivals. Many people enjoy it for Thanksgiving and Halloween. It is similar to pumpkin pie but has a cake-like texture. You may also find it like a pumpkin coffee cake. The crunchy topping often comes from nuts. This cake gives you the warmth of fall in every bite. Yes, you can make this cake ahead of time. I recommend baking it a day before you plan to serve it. This way, the flavors have time to blend. Let it cool completely before you store it. For the best quality, keep it in the fridge. It can last for about three to four days. If you want to make it even earlier, freeze it. Wrap it tightly in plastic wrap and aluminum foil. It can last for up to three months in the freezer. This recipe can be adapted for special diets. To make it vegan, replace eggs with flaxseed meal or applesauce. You can also choose a plant-based oil. For gluten-free options, use almond flour or a gluten-free blend. If you have nut allergies, skip the nuts or use seeds instead. Serve it with coconut whipped cream for a dairy-free option. This way, everyone can enjoy a slice of this delicious cake. This blog post covered everything you need for a tasty pumpkin crunch cake. We explored the best ingredients and their quality. You learned step-by-step instructions for mixing and baking. We shared tips to avoid common mistakes and creative variations to try. Also, we discussed how to store and reheat your cake properly. Enjoy crafting your cake and feel free to experiment. With these tips, you’ll make a delicious treat that everyone will love. Happy baking!

Vintage Pumpkin Crunch Cake

Indulge in the delightful flavors of fall with this Vintage Pumpkin Crunch Cake recipe! This easy-to-follow guide shows you how to combine pumpkin puree, warm spices, and nuts for a moist dessert that's perfect for any gathering. With just a few simple steps, you can bake a cake that will impress your family and friends. Click through to discover the full recipe and bring a taste of autumn to your table!

Ingredients
  

1 can (15 oz) pure pumpkin puree

1 cup granulated sugar

1 cup packed brown sugar

1/2 cup vegetable oil

4 large eggs

1 teaspoon vanilla extract

1 cup all-purpose flour

1 teaspoon baking powder

1 teaspoon baking soda

2 teaspoons ground cinnamon

1/2 teaspoon ground nutmeg

1/4 teaspoon ground ginger

1/4 teaspoon salt

1 cup chopped pecans or walnuts (optional)

1 cup whipped cream (for serving)

Powdered sugar (for dusting)

Instructions
 

Preheat your oven to 350°F (175°C). Grease and flour a 9x13 inch baking dish.

    In a large mixing bowl, combine the pumpkin puree, granulated sugar, brown sugar, oil, eggs, and vanilla extract. Mix until well combined and smooth.

      In a separate bowl, whisk together the flour, baking powder, baking soda, spices (cinnamon, nutmeg, ginger), and salt.

        Gradually add the dry ingredients to the pumpkin mixture, stirring until just combined. If you're using nuts, fold them into the batter at this stage.

          Pour the batter into the prepared baking dish. Use a spatula to spread it evenly.

            Bake in the preheated oven for 45-50 minutes, or until a toothpick inserted in the center comes out clean.

              Once baked, allow the cake to cool in the pan for about 15 minutes before transferring to a wire rack to cool completely.

                Before serving, dust the top with powdered sugar and serve with a generous dollop of whipped cream on the side.

                  Prep Time: 20 minutes | Total Time: 1 hour 10 minutes | Servings: 12

                    Leave a Comment

                    Recipe Rating