
Are you ready for a tasty snack that’s easy to make and will delight your taste buds? Peanut Butter Greek Yogurt Freezer Bites are your new go-to treat! Packed with protein and flavor, these bites are not just delicious—they’re also customizable for any diet. In this article, I’ll share simple steps to create these frozen wonders and tips to make them even better. Let’s get started on your new favorite snack!
Ingredients
Key Ingredients List
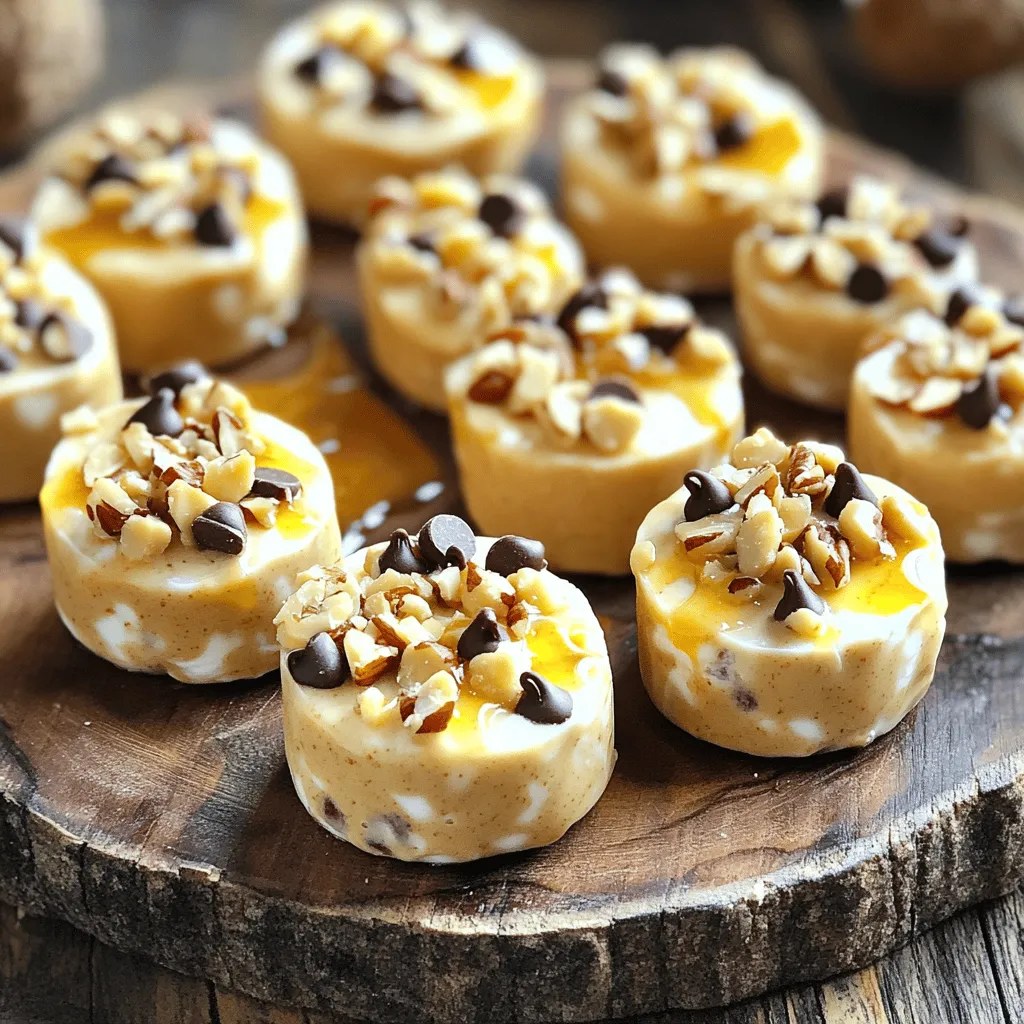
To make Peanut Butter Greek Yogurt Freezer Bites, you need the following:
– 1 cup Greek yogurt (plain or vanilla)
– 1/2 cup creamy peanut butter
– 1/4 cup honey or maple syrup
– 1/4 cup mini chocolate chips
– 1/4 cup crushed nuts (like almonds or walnuts)
– 1/2 teaspoon vanilla extract
– Pinch of sea salt
These ingredients create a creamy, sweet, and satisfying treat. The Greek yogurt adds protein and tang, while peanut butter provides richness.
Optional Add-ins
You can customize your bites with these fun add-ins:
– Sliced bananas or strawberries for fruity goodness
– A sprinkle of cinnamon for warmth
– Chia seeds for extra fiber and crunch
Feel free to mix and match. Your bites can be as unique as you want!
Substitutions for Dietary Needs
If you have dietary needs, here are some easy swaps:
– Use almond or sun butter for a nut-free option.
– Choose agave syrup or stevia instead of honey for vegan bites.
– For a dairy-free version, opt for coconut yogurt.
These substitutions still give you tasty bites without compromising your diet. Enjoy making them your own!
Step-by-Step Instructions
Preparation of the Mixture
To start, gather your ingredients. You need Greek yogurt, creamy peanut butter, honey or maple syrup, mini chocolate chips, crushed nuts, vanilla extract, and a pinch of sea salt. In a mixing bowl, combine the Greek yogurt and peanut butter first. Adding honey or maple syrup gives the mixture sweetness. Don’t forget the vanilla extract and sea salt for flavor. Mix everything until it is smooth and well-blended. This step is important for a creamy texture.
Next, fold in the mini chocolate chips and crushed nuts. Make sure they are evenly mixed. This adds a nice crunch and extra flavor to your bites.
Filling and Freezing Process
Now, prepare your muffin tin. You can use silicone or paper cupcake liners. If you prefer silicone molds, you can skip the liners. Spoon the yogurt mixture into each liner. Fill them about 3/4 full. Smooth the tops so they look neat. This will help them freeze evenly.
Place the muffin tin in the freezer. Let the bites freeze for at least 4 hours or until solid. This freezing time is key for getting a firm texture.
Tips for Removing from the Mold
Once the bites are frozen, it’s time to remove them from the muffin tin. If you used silicone molds, gently squeeze the sides to pop them out. For paper liners, you might need to peel them away carefully. If they stick, run warm water over the bottom of the tin for a few seconds. This helps loosen the bites. Store the bites in an airtight container in the freezer for up to 2 months. Enjoy them as a fun snack or dessert!
Tips & Tricks
Perfecting the Texture
To get the best texture, make sure to mix the yogurt and peanut butter well. I recommend using creamy peanut butter for a smooth blend. If you want a light texture, use plain Greek yogurt. It will create a creamy base that is rich and satisfying. Mixing in the honey or maple syrup adds sweetness without making it too runny.
Enhancing Flavor with Variations
You can change up the flavors easily. Try adding different extracts like almond or coconut for variety. You can also mix in fresh fruits, like mashed bananas or berries, to give your bites a fruity twist. If you love a crunch, swap the crushed nuts for granola. Just remember, balance the flavors so each bite is a treat!
Serving Suggestions
When serving these bites, make them look extra special. Arrange them on a pretty platter. Drizzle some honey on top for extra sweetness. You can sprinkle crushed nuts or mini chocolate chips for added flair. These bites are perfect for a snack or dessert. Enjoy them straight from the freezer for a cool treat!
Variations
Nut-Free Version
Want to make a nut-free version? You can swap out peanut butter for sun butter or soy nut butter. Both options keep the creamy texture but avoid nuts. This change makes it safe for kids with nut allergies. You still get that tasty flavor that makes these bites special.
Low-Sugar Alternative
If you want to cut back on sugar, try using ripe bananas instead of honey or maple syrup. Mash one ripe banana and mix it in with the yogurt and peanut butter. This method adds natural sweetness without added sugar. You can also use a sugar-free sweetener if you prefer.
Flavor Customizations
You can easily change the flavor of your bites. Add a few drops of almond or coconut extract for a twist. You can also mix in different fruits like blueberries, strawberries, or even diced apples. These flavors add a fun taste and make the bites more exciting. Try different combinations to find your favorite!
Storage Info
Freezing Storage Guidelines
To keep your Peanut Butter Greek Yogurt Freezer Bites fresh, store them in an airtight container. I recommend using a freezer-safe container or a resealable bag. Make sure to label your container with the date. This way, you always know when you made them. You can stack the bites to save space. Just avoid squishing them.
Thawing and Serving Suggestions
When you’re ready to enjoy a bite, take it out of the freezer. Let it sit at room temperature for about 5 to 10 minutes. This helps it soften a bit for easy eating. You can also microwave a single bite for about 10 seconds if you want it warm. Serve them on a nice platter. Drizzle with honey or sprinkle some crushed nuts for extra flair.
Shelf Life and Best Practices
These bites stay good in the freezer for up to 2 months. For the best taste and texture, eat them within the first month. If you notice any freezer burn or off smells, it’s best to toss them. Always check before serving. Following these tips will keep your bites delightful and tasty every time you treat yourself.
FAQs
Can I use non-dairy yogurt?
Yes, you can use non-dairy yogurt. Almond, coconut, or soy yogurt works well. Just choose a creamy option for the best texture. This will keep the bites tasty and smooth.
How long do these bites last in the freezer?
These bites can last up to two months in the freezer. Just store them in an airtight container to keep them fresh. They make a great snack for later!
What other mix-ins can I add?
You can add many fun mix-ins! Try using dried fruits like cranberries or apricots. You can also use seeds, like chia or flaxseed, for extra crunch and nutrition. Get creative with your favorites!
Are Peanut Butter Greek Yogurt Freezer Bites healthy?
Yes, they are quite healthy! They have protein from Greek yogurt and healthy fats from peanut butter. The chocolate chips and honey add a bit of sweetness, making them a balanced treat.
Can I make these ahead of time for meal prep?
Absolutely! These bites are perfect for meal prep. You can make a batch at the start of the week. Just freeze them and grab a few when you want a quick snack.
In this post, we explored how to make Peanut Butter Greek Yogurt Freezer Bites. We covered key ingredients, optional add-ins, and substitutes for dietary needs. You learned the step-by-step process for mixing, filling, and freezing these tasty bites. I shared tips for texture, flavor variations, and serving ideas. We discussed storage and answered common questions.
These bites are easy to make and can fit many diets. Enjoy creating your own versions!