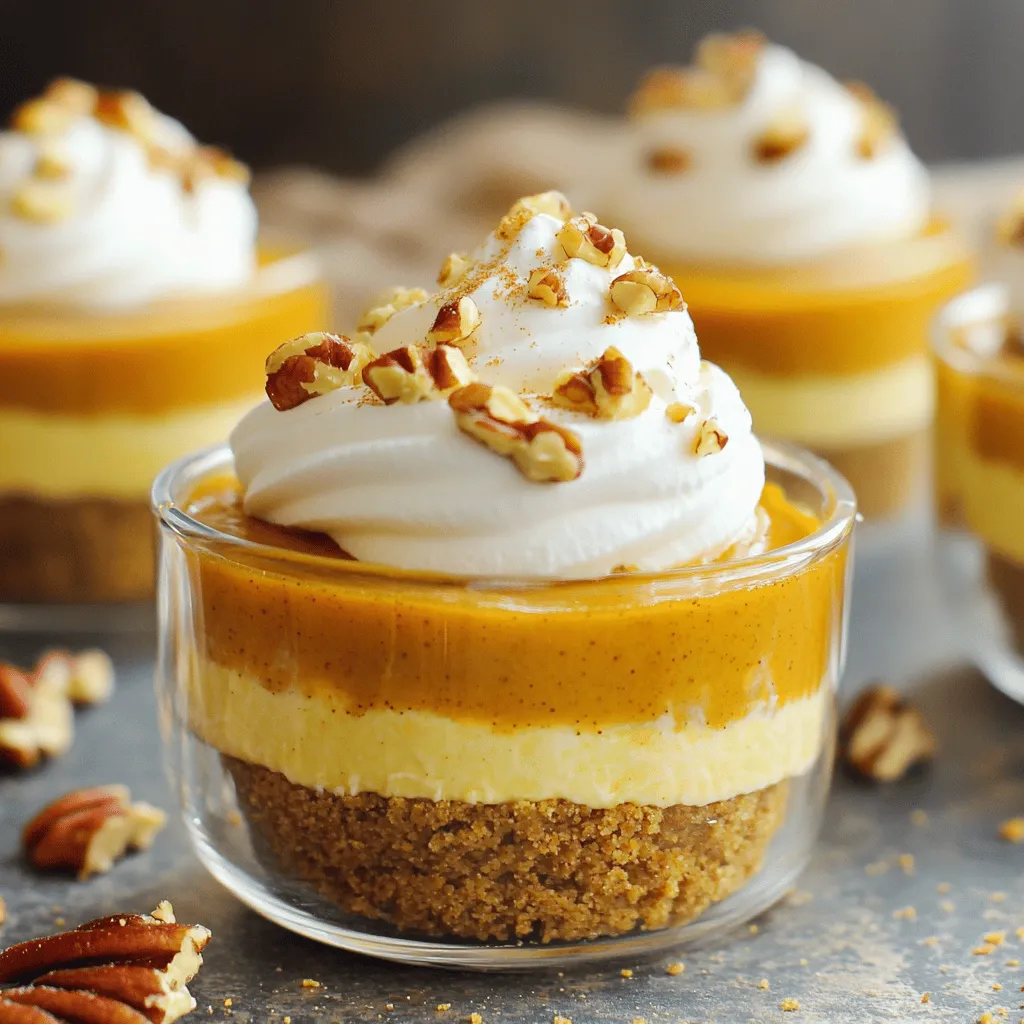
Get ready to indulge in a sweet fall delight with my No-Bake Pumpkin Cheesecake Cups! This treat combines creamy pumpkin goodness with a crunchy crust, perfect for any gathering. With simple ingredients and easy steps, you’ll whip up these delicious cups in no time. Plus, I have tips and tricks to make them just right. Let’s dive into this bold flavor adventure that will impress your friends and family!
Ingredients
Main Ingredients List
– Crust:
– 1 cup graham cracker crumbs
– 1/4 cup melted unsalted butter
– Cream Cheese Filling:
– 2 cups cream cheese, softened
– 1 cup canned pumpkin puree
– 3/4 cup powdered sugar
– 1 teaspoon vanilla extract
– 1 teaspoon pumpkin pie spice
– Toppings and Garnish:
– 1 cup whipped cream (for topping)
– 1/4 cup chopped pecans (for garnish)
Gather these ingredients to create a bold and delicious treat. The crust starts with graham cracker crumbs mixed with melted butter. This combo gives a nice crunch.
The cream cheese filling is rich and creamy. You will blend softened cream cheese with pumpkin puree, powdered sugar, vanilla, and pumpkin pie spice. This mix brings warm fall flavors.
Top your cups with whipped cream for extra creaminess. Finally, sprinkle chopped pecans for a delightful crunch. These simple ingredients come together to make a stunning dessert.
Step-by-Step Instructions
Preparing the Crust
To start, grab a medium bowl. In this bowl, combine the graham cracker crumbs and melted unsalted butter. Mix them until the mixture feels like wet sand. This step is key for a great crust. Next, take about 2 tablespoons of this mixture and spoon it into each serving cup or jar. Press down gently to create a flat layer at the bottom. Make sure it is even, so every bite has that crunchy texture.
Making the Cream Cheese Filling
Now, let’s move on to the cream cheese filling. In a large mixing bowl, beat the softened cream cheese with an electric mixer. You want it to be very smooth, with no lumps. Once it’s creamy, gently fold in the canned pumpkin puree, powdered sugar, vanilla extract, and pumpkin pie spice. Mixing these ingredients well will give your dessert a rich and flavorful taste. The filling should be creamy and thick but still easy to scoop.
Assembling the Cups
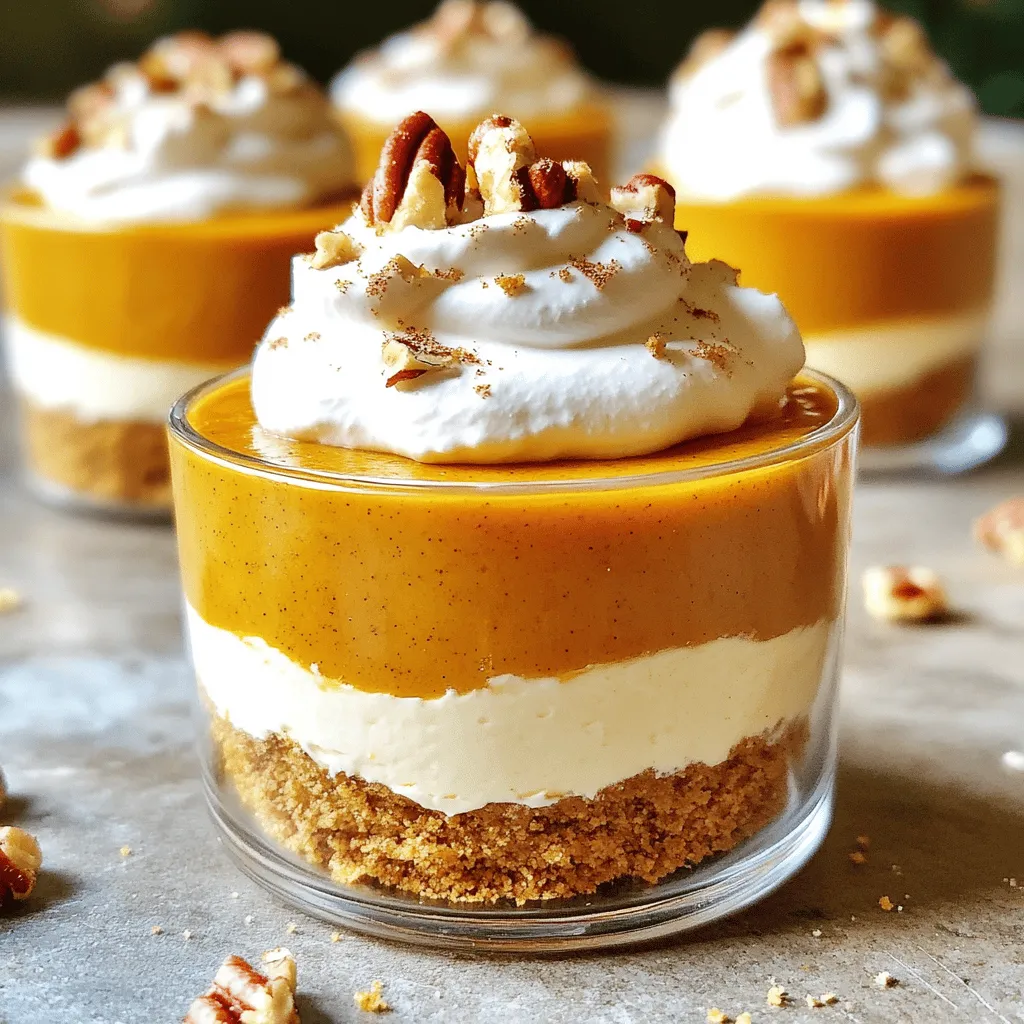
Next, it’s time to layer your dessert. Use a spoon or a piping bag to fill each cup with the pumpkin cheesecake mixture. Fill each cup until it’s about 3/4 full. This allows room for toppings later. Once filled, cover the cups with plastic wrap. Refrigerate them for at least 2 hours to let them set. Chilling is important; it helps the flavors meld together and creates a perfect texture.
When you’re ready to serve, don’t forget to top each cup with a generous dollop of whipped cream and sprinkle chopped pecans on top for that extra crunch. Enjoy your no-bake pumpkin cheesecake cups!
Tips & Tricks
Ingredient Substitutions
– Alternative crust options: If you want a twist, try using crushed chocolate cookies or almond flour. These give a rich flavor and unique texture. Both options can add a different taste profile to your dessert.
– Dairy-free or vegan alternatives: You can swap cream cheese for a dairy-free cream cheese. Use coconut cream instead of whipped cream for a vegan touch. These swaps keep the creamy feel while catering to different diets.
Perfecting the Texture
– Ways to achieve a creamy filling: Make sure your cream cheese is at room temperature. Beat it until smooth to avoid lumps. Gently fold in the pumpkin puree and other ingredients. This ensures a rich and creamy texture that melts in your mouth.
– Importance of chill time for setting: After assembling your cups, cover them and refrigerate for at least two hours. This helps the filling firm up and blend flavors. The longer they chill, the better the taste!
Serving Suggestions
– Pairing with drinks or other desserts: These cups go well with spiced cider or vanilla ice cream. They also taste great alongside coffee or tea for a cozy treat. The flavors of pumpkin and spice work well with these drinks.
– Presentation ideas: Serve in clear cups or jars to show off the layers. Top with whipped cream and sprinkle chopped pecans for a crunchy finish. You can also add a cinnamon stick for a festive touch!
Variations
Different Flavor Combinations
You can add fun twists to your no-bake pumpkin cheesecake cups. Try mixing in chocolate or caramel. Drizzling melted chocolate on top gives a rich flavor. For a sweet touch, add a layer of caramel sauce.
Spices also make a big difference. You can boost the taste by adding more pumpkin pie spice. Cinnamon or nutmeg can add warmth. Experiment with flavors to find your favorite mix.
Seasonal Twists
Seasonal ingredients can elevate your dessert. For fall, try adding apple or pear puree. These fruits pair well with pumpkin. In spring, consider using lemon zest for brightness.
Adapting the cups for holidays is a fun idea. For Halloween, use ghost-shaped candies on top. At Thanksgiving, sprinkle some cinnamon for a festive touch. Tailor the recipe to match the season and occasion.
Portion Size Variations
You can adjust the portion sizes for different events. Serve the cheesecake in larger bowls for a family dessert. This makes it easy for everyone to enjoy.
For parties, mini versions work great. Use small jars or shot glasses for fun, bite-sized treats. These are easy to grab and share. Adjusting the size can make your dessert fit any event perfectly.
Storage Info
Refrigeration Guidelines
To store leftover pumpkin cheesecake cups, keep them in the fridge. Use airtight containers or cover each cup with plastic wrap. This helps keep them fresh. They stay good for up to four days in the fridge. The flavors will blend and taste even better!
Freezing Instructions
You can freeze cheesecake cups for longer storage. To do this, first, wrap each cup tightly in plastic wrap. Then, place them in a freezer-safe bag or container. They last up to three months in the freezer. When you want to enjoy them again, move the cups to the fridge to thaw overnight. They can also thaw at room temperature for about two hours. Enjoy them chilled!
Serving Leftovers
If you have leftover cups, think of fun ways to use them. You can mix the filling into pancakes or swirl it into yogurt. This adds a tasty twist to your breakfast or snack. If the texture changes a bit after freezing, just top it with extra whipped cream. This helps mask any differences and keeps it delicious!
FAQs
How long does it take for no-bake pumpkin cheesecake cups to set?
These cups need at least 2 hours in the fridge to set. This time allows the filling to firm up. I suggest chilling them overnight for the best texture. The longer they chill, the better they taste!
Can I make these cups ahead of time?
Yes, you can make these cups a day or two in advance. This makes them great for parties or family gatherings. Just cover them well with plastic wrap after you prepare them. They will stay fresh in the fridge until you are ready to serve.
Is there a gluten-free option for the crust?
Absolutely! You can use gluten-free graham cracker crumbs. You can also use crushed almonds or oats for a different flavor. Just ensure they are labeled gluten-free to keep it safe for those with allergies.
In this blog post, I covered how to make no-bake pumpkin cheesecake cups. We explored the key ingredients needed for the crust, filling, and toppings. I shared simple steps for preparing and assembling the dessert. Tips on ingredient swaps, perfecting texture, and serving suggestions added value. I also noted variations for flavor and storage practices.
Enjoying these cheesecake cups can be perfect for many occasions. They are easy to make and fun to share!