No-Bake Peanut Butter Protein Bars Powerful Energy Snack

WANT TO SAVE THIS RECIPE?

Looking for a quick, healthy snack that fuels your day? These No-Bake Peanut Butter Protein Bars are the perfect solution. Packed with protein and energy, they are easy to make and require no baking. In just a few simple steps, you’ll create a tasty treat that satisfies your hunger and boosts your energy. Get ready to enjoy a delicious snack that fuels your active lifestyle!

Ingredients

List of Essential Ingredients
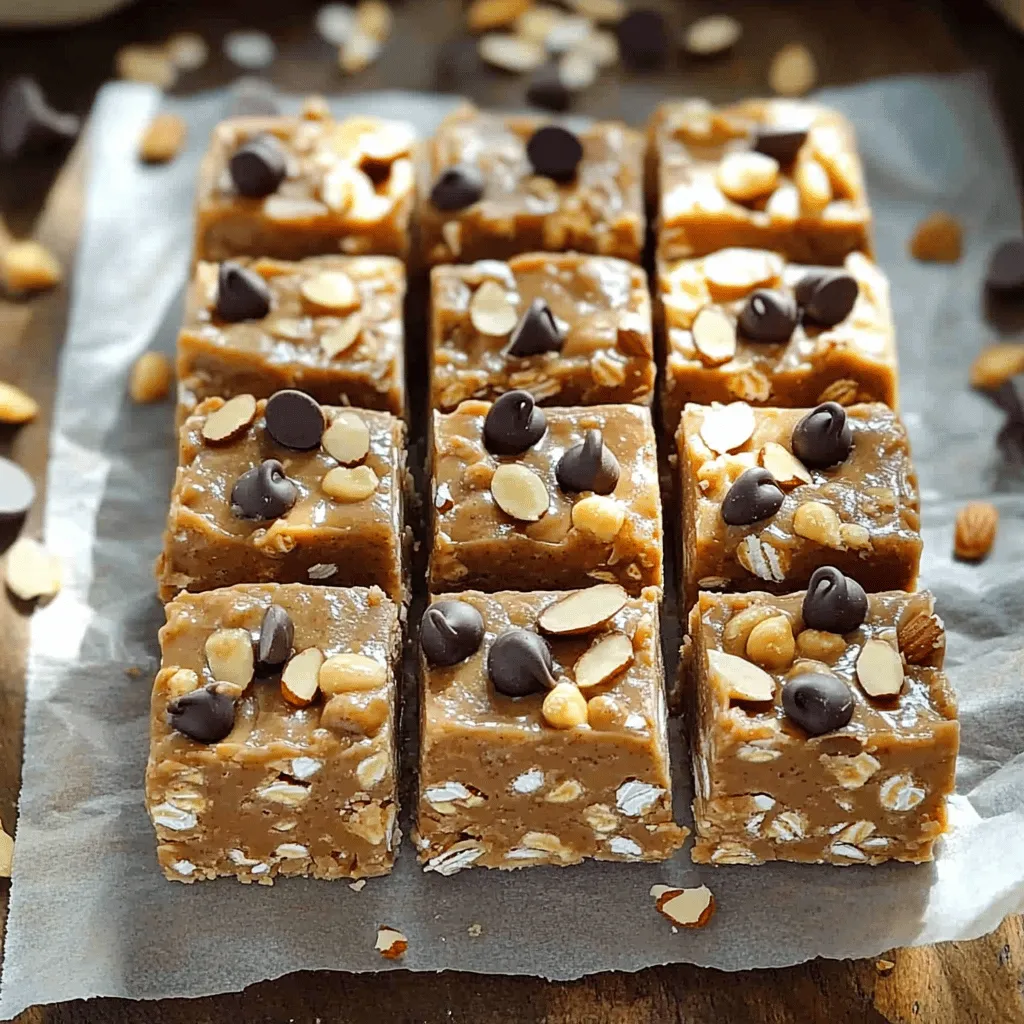
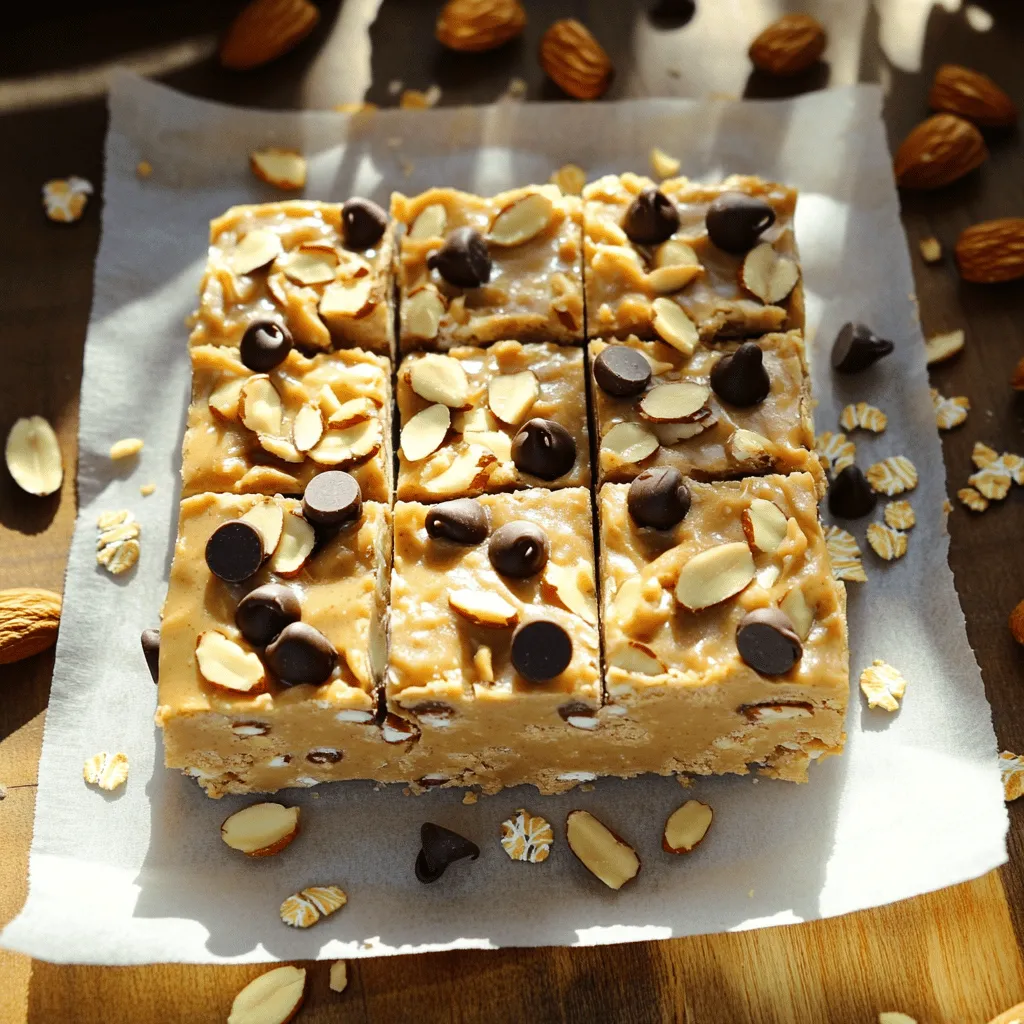
  • 1 cup rolled oats
  • 1/2 cup natural peanut butter (smooth or chunky)
  • 1/3 cup honey or maple syrup
  • 1/4 cup protein powder (vanilla or chocolate flavor)
  • 1/4 cup mini chocolate chips (optional)
  • 1/4 cup chopped nuts (almonds or walnuts)
  • 1/2 teaspoon vanilla extract
  • Pinch of salt

Gathering the right ingredients is key to making no-bake peanut butter protein bars. First, you need rolled oats. They give the bars a nice chewy texture. You can choose natural peanut butter, either smooth or chunky. This adds rich flavor and healthy fats.

Next, grab honey or maple syrup to sweeten the bars. This will hold everything together. Protein powder is a must too. It boosts the bars’ protein level. You can use vanilla or chocolate flavor for extra taste.

If you like some crunch, include mini chocolate chips. They make the bars even more fun! Chopped nuts like almonds or walnuts add texture and nutrition. Don’t forget the vanilla extract for flavor and a pinch of salt to balance it all out.

Optional Add-ins

  • Variations on nut butters
  • Additional toppings (coconut flakes, dried fruits)

You can change up the recipe too! Try different nut butters like almond or cashew for a twist. Adding toppings like coconut flakes or dried fruits can make these bars even better. Personalizing your bars keeps them exciting and new every time!

Step-by-Step Instructions

Preparation Steps

  • Mix dry ingredients in a bowl: In a large bowl, combine 1 cup of rolled oats, 1/4 cup of protein powder, and a pinch of salt. Stir well until everything is mixed evenly. This step is key for a good texture.
  • Prepare the peanut butter mixture: In a microwave-safe bowl, add 1/2 cup of natural peanut butter and 1/3 cup of honey or maple syrup. Heat it for 20-30 seconds until it melts slightly. Stir in 1/2 teaspoon of vanilla extract. This mixture should be smooth.

Combining Ingredients

  • Mix dry and wet ingredients thoroughly: Pour the warm peanut butter mixture into your bowl of dry ingredients. Mix everything until no dry spots remain. You want a thick, sticky texture.
  • Incorporate optional chocolate chips and nuts: If you like, add 1/4 cup of mini chocolate chips and 1/4 cup of chopped nuts. Fold them in gently. This adds a nice crunch and extra flavor.

Setting and Cooling

  • Press the mixture into the baking pan: Line an 8-inch square baking pan with parchment paper. Use the overhang for easy removal. Press the mixture firmly into the pan. Make sure to compact it well.
  • Refrigeration time and process: Place the pan in the fridge for at least 1-2 hours. This helps the bars set. Once chilled, lift them out using the parchment paper. Cut into squares or rectangles for easy snacking.

Tips & Tricks

Ensuring Proper Texture

To get the right texture, compact the mixture firmly. Once you mix the wet and dry parts, press it down hard in the pan. This helps the bars hold together. If your bars feel too dry, add a little more peanut butter or honey. For sweetness, you can mix in extra chocolate chips or nuts.

Pairing and Serving Suggestions

These bars make great snacks for any time. You can eat them as a quick breakfast or a midday treat. They are also perfect for meal prep. Enjoy them before or after a workout for energy. Pack them in your gym bag for a quick boost.

Avoiding Common Mistakes

Some common issues are bars that crumble or are too sticky. If they crumble, you might need to press them harder next time. If they are too sticky, try adding more oats or protein powder. Always let them chill long enough to set properly for the best results.

Variations

Flavor Alternatives

You can change the flavor of your bars easily. Try using almond or cashew butter instead of peanut butter. These will give your bars a new taste. You can also switch sweeteners. Use agave or stevia if you prefer less sugar. Both options keep your bars sweet without the extra calories.

Ingredient Swaps

If you want gluten-free bars, you can use gluten-free oats and a suitable protein powder. Many brands offer gluten-free options. For vegan bars, choose a plant-based protein powder and use maple syrup instead of honey. This keeps the bars tasty and suitable for everyone.

Seasonal Additions

Make your bars fun by adding seasonal ingredients. In the fall, mix in pumpkin puree and spices. In summer, add fresh berries or dried fruits. These ingredients not only add flavor but also bring in different nutrients.

Storage Info

Best Practices for Storage

To keep your no-bake peanut butter protein bars fresh, use airtight containers. This helps prevent moisture from making the bars soggy. Store them in the fridge for the best taste and texture. You can also freeze them if you want to keep them longer. Just wrap each bar well in plastic wrap before placing them in a freezer bag.

Shelf Life

In the fridge, these bars last about one week. You will know they are spoiled if they smell off or look dry and hard. If you freeze the bars, they can last up to three months. Just remember to thaw them in the fridge before you eat.

FAQs

Can I make these bars vegan?

Yes, you can make these bars vegan with a few swaps. Use maple syrup instead of honey. For the protein powder, choose a plant-based version. You can also use almond butter or cashew butter instead of peanut butter. These small changes keep the bars tasty and vegan-friendly.

How many protein bars can I make with this recipe?

This recipe makes 12 bars. Each bar is a great snack option. If you want smaller bites, cut them into smaller squares. Adjust the size to fit your needs and snack cravings.

Can I freeze these protein bars?

Yes, you can freeze these protein bars. Wrap each bar in plastic wrap or foil. Place them in an airtight container to keep them fresh. When you want one, thaw it in the fridge overnight or at room temperature for a couple of hours. Enjoy the bars without losing their taste or texture!

This blog post covers everything you need to make delicious protein bars. You learned about key ingredients, preparation steps, and useful tips. The variations let you customize your bars to fit your tastes. Remember to store them properly to keep them fresh longer. Make these bars your go-to snack for energy or a post-workout boost. With this guide, you’re set to whip up tasty treats that fit your lifestyle. Enjoy making and sharing your new healthy snacks!

- 1 cup rolled oats - 1/2 cup natural peanut butter (smooth or chunky) - 1/3 cup honey or maple syrup - 1/4 cup protein powder (vanilla or chocolate flavor) - 1/4 cup mini chocolate chips (optional) - 1/4 cup chopped nuts (almonds or walnuts) - 1/2 teaspoon vanilla extract - Pinch of salt Gathering the right ingredients is key to making no-bake peanut butter protein bars. First, you need rolled oats. They give the bars a nice chewy texture. You can choose natural peanut butter, either smooth or chunky. This adds rich flavor and healthy fats. Next, grab honey or maple syrup to sweeten the bars. This will hold everything together. Protein powder is a must too. It boosts the bars' protein level. You can use vanilla or chocolate flavor for extra taste. If you like some crunch, include mini chocolate chips. They make the bars even more fun! Chopped nuts like almonds or walnuts add texture and nutrition. Don't forget the vanilla extract for flavor and a pinch of salt to balance it all out. - Variations on nut butters - Additional toppings (coconut flakes, dried fruits) You can change up the recipe too! Try different nut butters like almond or cashew for a twist. Adding toppings like coconut flakes or dried fruits can make these bars even better. Personalizing your bars keeps them exciting and new every time! - Mix dry ingredients in a bowl: In a large bowl, combine 1 cup of rolled oats, 1/4 cup of protein powder, and a pinch of salt. Stir well until everything is mixed evenly. This step is key for a good texture. - Prepare the peanut butter mixture: In a microwave-safe bowl, add 1/2 cup of natural peanut butter and 1/3 cup of honey or maple syrup. Heat it for 20-30 seconds until it melts slightly. Stir in 1/2 teaspoon of vanilla extract. This mixture should be smooth. - Mix dry and wet ingredients thoroughly: Pour the warm peanut butter mixture into your bowl of dry ingredients. Mix everything until no dry spots remain. You want a thick, sticky texture. - Incorporate optional chocolate chips and nuts: If you like, add 1/4 cup of mini chocolate chips and 1/4 cup of chopped nuts. Fold them in gently. This adds a nice crunch and extra flavor. - Press the mixture into the baking pan: Line an 8-inch square baking pan with parchment paper. Use the overhang for easy removal. Press the mixture firmly into the pan. Make sure to compact it well. - Refrigeration time and process: Place the pan in the fridge for at least 1-2 hours. This helps the bars set. Once chilled, lift them out using the parchment paper. Cut into squares or rectangles for easy snacking. To get the right texture, compact the mixture firmly. Once you mix the wet and dry parts, press it down hard in the pan. This helps the bars hold together. If your bars feel too dry, add a little more peanut butter or honey. For sweetness, you can mix in extra chocolate chips or nuts. These bars make great snacks for any time. You can eat them as a quick breakfast or a midday treat. They are also perfect for meal prep. Enjoy them before or after a workout for energy. Pack them in your gym bag for a quick boost. Some common issues are bars that crumble or are too sticky. If they crumble, you might need to press them harder next time. If they are too sticky, try adding more oats or protein powder. Always let them chill long enough to set properly for the best results. {{image_2}} You can change the flavor of your bars easily. Try using almond or cashew butter instead of peanut butter. These will give your bars a new taste. You can also switch sweeteners. Use agave or stevia if you prefer less sugar. Both options keep your bars sweet without the extra calories. If you want gluten-free bars, you can use gluten-free oats and a suitable protein powder. Many brands offer gluten-free options. For vegan bars, choose a plant-based protein powder and use maple syrup instead of honey. This keeps the bars tasty and suitable for everyone. Make your bars fun by adding seasonal ingredients. In the fall, mix in pumpkin puree and spices. In summer, add fresh berries or dried fruits. These ingredients not only add flavor but also bring in different nutrients. To keep your no-bake peanut butter protein bars fresh, use airtight containers. This helps prevent moisture from making the bars soggy. Store them in the fridge for the best taste and texture. You can also freeze them if you want to keep them longer. Just wrap each bar well in plastic wrap before placing them in a freezer bag. In the fridge, these bars last about one week. You will know they are spoiled if they smell off or look dry and hard. If you freeze the bars, they can last up to three months. Just remember to thaw them in the fridge before you eat. Yes, you can make these bars vegan with a few swaps. Use maple syrup instead of honey. For the protein powder, choose a plant-based version. You can also use almond butter or cashew butter instead of peanut butter. These small changes keep the bars tasty and vegan-friendly. This recipe makes 12 bars. Each bar is a great snack option. If you want smaller bites, cut them into smaller squares. Adjust the size to fit your needs and snack cravings. Yes, you can freeze these protein bars. Wrap each bar in plastic wrap or foil. Place them in an airtight container to keep them fresh. When you want one, thaw it in the fridge overnight or at room temperature for a couple of hours. Enjoy the bars without losing their taste or texture! This blog post covers everything you need to make delicious protein bars. You learned about key ingredients, preparation steps, and useful tips. The variations let you customize your bars to fit your tastes. Remember to store them properly to keep them fresh longer. Make these bars your go-to snack for energy or a post-workout boost. With this guide, you're set to whip up tasty treats that fit your lifestyle. Enjoy making and sharing your new healthy snacks!

No-Bake Peanut Butter Protein Bars

Looking for a delicious and healthy snack? Try these Nutty Delight No-Bake Protein Bars! Packed with wholesome oats, peanut butter, and your choice of protein powder, they're perfect for a quick energy boost anytime. In just 15 minutes of prep, you can whip up a batch that satisfies your sweet tooth while keeping you fueled. Click through to explore the full recipe and treat yourself to this easy, nutritious delight!

Ingredients
  

1 cup rolled oats

1/2 cup natural peanut butter (smooth or chunky)

1/3 cup honey or maple syrup

1/4 cup protein powder (vanilla or chocolate flavor)

1/4 cup mini chocolate chips (optional)

1/4 cup chopped nuts (almonds or walnuts)

1/2 teaspoon vanilla extract

Pinch of salt

Instructions
 

In a large mixing bowl, combine the rolled oats, protein powder, and salt. Mix well until all the dry ingredients are evenly distributed.

    In a separate microwave-safe bowl, add the peanut butter and honey (or maple syrup). Heat for about 20-30 seconds until slightly melted and easy to mix. Stir in the vanilla extract.

      Pour the peanut butter mixture into the dry ingredients. Mix thoroughly until everything is well combined. If desired, fold in the mini chocolate chips and chopped nuts for added crunch.

        Line an 8-inch square baking pan with parchment paper, leaving some overhang on the edges for easy removal.

          Press the mixture evenly into the prepared pan, ensuring it's compact. Use the back of a spatula or your hands to press it down firmly.

            Refrigerate the bars for at least 1-2 hours to set.

              Once chilled, lift the bars out of the pan using the parchment overhang and cut them into squares or rectangles.

                Prep Time: 15 minutes | Total Time: 2 hours (includes chilling) | Servings: 12 bars

                  WANT TO SAVE THIS RECIPE?

                  Leave a Comment

                  Recipe Rating