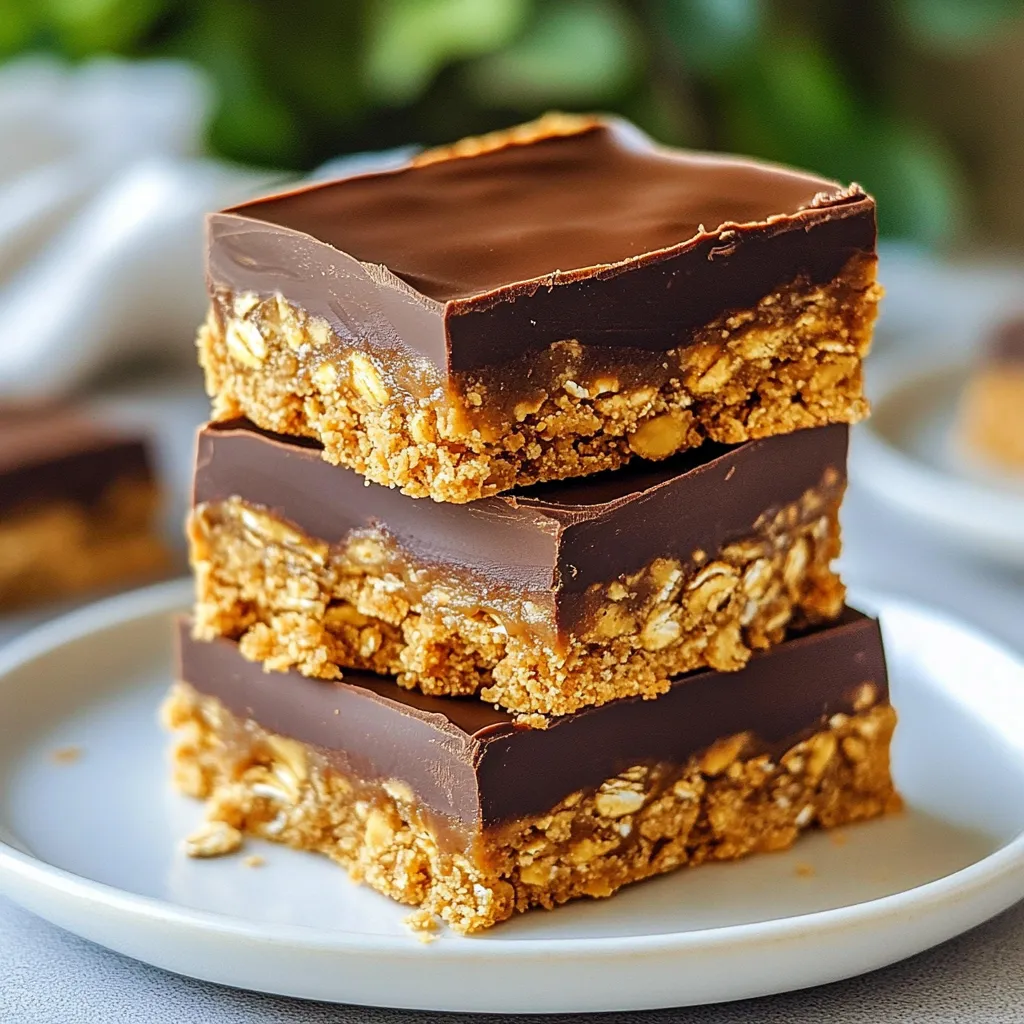
Are you ready for a treat that’s simple, tasty, and quick to make? No Bake Peanut Butter Bars are just what you need! With just a few ingredients, you can whip up a delicious dessert that everyone will love. Perfect for busy days or unexpected guests, these bars promise a rich peanut butter flavor with a chocolate topping that melts in your mouth. Let’s dive into how you can make your own!
Why I Love This Recipe
- Quick and Easy: This recipe comes together in just 15 minutes, making it perfect for a last-minute treat.
- No Baking Required: Forget the oven! These bars set in the fridge, saving you time and energy.
- Healthy Ingredients: With peanut butter, oats, and almond flour, these bars provide a nutritious boost.
- Customizable: You can easily swap out ingredients like sweeteners or add-ins to suit your taste.
Ingredients
Main Ingredients for No Bake Peanut Butter Bars
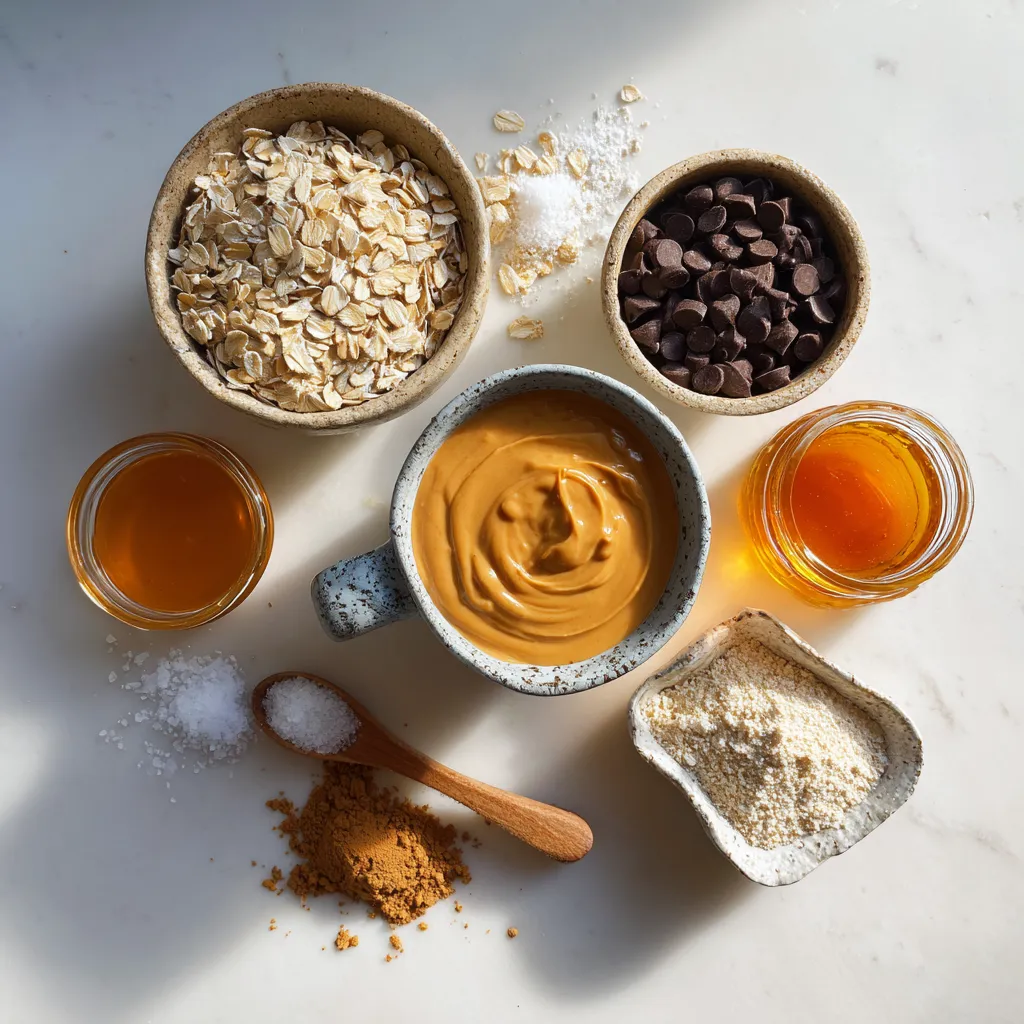
To make No Bake Peanut Butter Bars, you need a few key items. Here is what you will need:
– 1 cup creamy peanut butter
– 1 cup rolled oats
– 1/2 cup honey or maple syrup
– 1/2 cup dark chocolate chips
– 1/2 cup almond flour
– 1/4 teaspoon vanilla extract
– Pinch of salt
These ingredients come together to create a chewy and sweet treat. The peanut butter gives a rich flavor. The oats add a nice texture. Honey or maple syrup provide sweetness. Almond flour helps bind everything nicely.
Optional Ingredients for Customization
You can make these bars even more fun! Here are some optional ingredients you might like to try:
– Chopped nuts (like almonds or walnuts)
– Dried fruits (such as raisins or cranberries)
– A sprinkle of cinnamon for extra warmth
– Protein powder for a protein boost
Using these ingredients can change the taste and texture. Feel free to mix and match what you like best!
Nutritional Information Overview
These bars are not just tasty; they can be healthy, too! Here’s a quick look at what you get from one bar (assuming 12 bars total):
– Calories: Around 200
– Protein: 6 grams
– Carbohydrates: 24 grams
– Fiber: 3 grams
– Sugars: 8 grams
– Fats: 10 grams
These bars provide energy, making them great for a snack or dessert. They offer protein and healthy fats from peanut butter. Enjoying them in moderation can fit well into a balanced diet!
Step-by-Step Instructions
Preparation Steps for Mixing Ingredients
First, gather your ingredients. You will need creamy peanut butter, honey or maple syrup, vanilla extract, rolled oats, almond flour, and a pinch of salt. In a large mixing bowl, add 1 cup of creamy peanut butter, 1/2 cup of honey or maple syrup, and 1/4 teaspoon of vanilla extract. Mix these well until they are smooth and combined. Next, gradually add 1 cup of rolled oats and 1/2 cup of almond flour. Don’t forget the pinch of salt! Stir everything together until you have a thick mixture that looks uniform.
Instructions for Pressing Mixture into the Baking Dish
Now, prepare your 8×8 inch baking dish. Line it with parchment paper, leaving some overhang. This will help you lift the bars out later. Once the dish is ready, take your peanut butter mixture and transfer it into the dish. Use the back of a spoon or your hands to press it down firmly. Aim for an even layer across the bottom of the dish. This step is key to getting nice, firm bars.
Melting and Applying Chocolate Layer
For the chocolate layer, grab a microwave-safe bowl and pour in 1/2 cup of dark chocolate chips. Melt the chocolate in the microwave in 20-second intervals. Stir between each interval to keep it smooth. Once melted, pour the chocolate over the pressed peanut butter mixture. Use a spatula to spread it evenly across the top. This creates a delicious chocolate finish. After this, refrigerate your bars for at least 1-2 hours until they are firm. Once they are set, lift them out using the parchment overhang, and cut them into squares or bars. Enjoy your tasty creation!
Tips & Tricks
How to Achieve the Perfect Consistency
To get the right texture in your bars, you need to mix well. Start with your creamy peanut butter and honey. Blend them until smooth. Then, add the rolled oats and almond flour slowly. Stir until you see no dry spots. If your mixture feels too sticky, a little more almond flour can help. You want a thick, but moldable texture. This will help your bars hold together well.
Best Practices for Melting Chocolate
Melting chocolate can be tricky. Use a microwave-safe bowl. Start with 20-second bursts in the microwave. Stir between each burst. This keeps the chocolate from burning. If it feels thick, add a tiny bit of oil to thin it out. You want it smooth and shiny. This will make your bars look great!
Suggestions for Serving and Presentation
For a lovely presentation, cut your bars into neat squares. Stack them on a plate for height. Drizzling extra melted chocolate on top adds a nice touch. You can also sprinkle some sea salt for flavor. Serve them chilled for the best taste. These tips will impress your friends and family!
Pro Tips
- Chill for Better Texture: Allow the bars to chill for at least 2 hours for the best texture and firmness.
- Use Natural Peanut Butter: Opt for natural peanut butter with no added sugars or oils for a healthier option.
- Experiment with Mix-Ins: Add chopped nuts, dried fruits, or seeds for added texture and nutrition.
- Store Properly: Keep the bars in an airtight container in the refrigerator for up to a week for optimal freshness.
Variations
Alternative Nut Butters for Different Flavors
You can swap peanut butter for other nut butters. Almond butter adds a nutty twist. Cashew butter offers a creamy texture. Sunflower seed butter works well for nut-free diets. Each choice brings a new flavor to the bars. Feel free to experiment and find your favorite!
Add-ins for Extra Texture
Want more crunch? Add chopped nuts like almonds or walnuts. You can also mix in dried fruits. Raisins or cranberries give a sweet touch. Chocolate chips can add extra sweetness. These add-ins make the bars fun and unique.
Vegan and Gluten-Free Modifications
To make these bars vegan, use maple syrup instead of honey. Choose a nut butter that fits your diet. For gluten-free options, use certified gluten-free oats. Almond flour is naturally gluten-free and keeps the texture. These swaps help everyone enjoy this tasty treat!
Storage Info
Best Practices for Storing No Bake Peanut Butter Bars
To keep your no bake peanut butter bars fresh, store them in an airtight container. Use parchment paper to separate layers if you stack them. This keeps the chocolate from sticking to the bars. Place the container in the fridge for the best results. The cold helps keep the bars firm and tasty.
How Long Do They Last in the Fridge?
These no bake peanut butter bars last about one week in the fridge. After that, they may lose some flavor and freshness. Always check for any signs of spoilage, like an off smell or discoloration. If they look and smell good, they are likely still fine to eat.
Freezing Instructions for Extended Storage
If you want to keep your bars longer, freezing is a great option. Wrap each bar in plastic wrap, then place them in a freezer bag. Be sure to remove as much air as possible to avoid freezer burn. The bars will stay good for up to three months in the freezer. To enjoy, just thaw them in the fridge for a few hours before serving.
FAQs
Can I use natural peanut butter instead of creamy?
Yes, you can use natural peanut butter. Just know it may change the texture. Natural peanut butter is runnier and less sweet. This can make your bars softer. If you prefer a firmer bar, try using less honey or maple syrup.
How do I know when the bars are set?
You will know the bars are set after at least 1-2 hours in the fridge. They should feel firm to the touch. If they are still soft, give them more time. Once set, they are easy to cut into squares.
Can I substitute ingredients in this recipe?
Yes, you can substitute some ingredients. For example, you can use maple syrup instead of honey. You can also swap almond flour for another flour you like. If you want a nut-free option, try sunflower seed butter. Just remember, each change may affect taste and texture.
In this blog post, we explored making no-bake peanut butter bars. We discussed key ingredients and how to customize them for your taste. I shared simple instructions for mixing, pressing, and topping with chocolate. You learned handy tips for the best texture and presentation. We also covered variations, storage, and FAQs about the recipe.
These bars are easy and fun to make. Enjoy sharing them with friends and famil