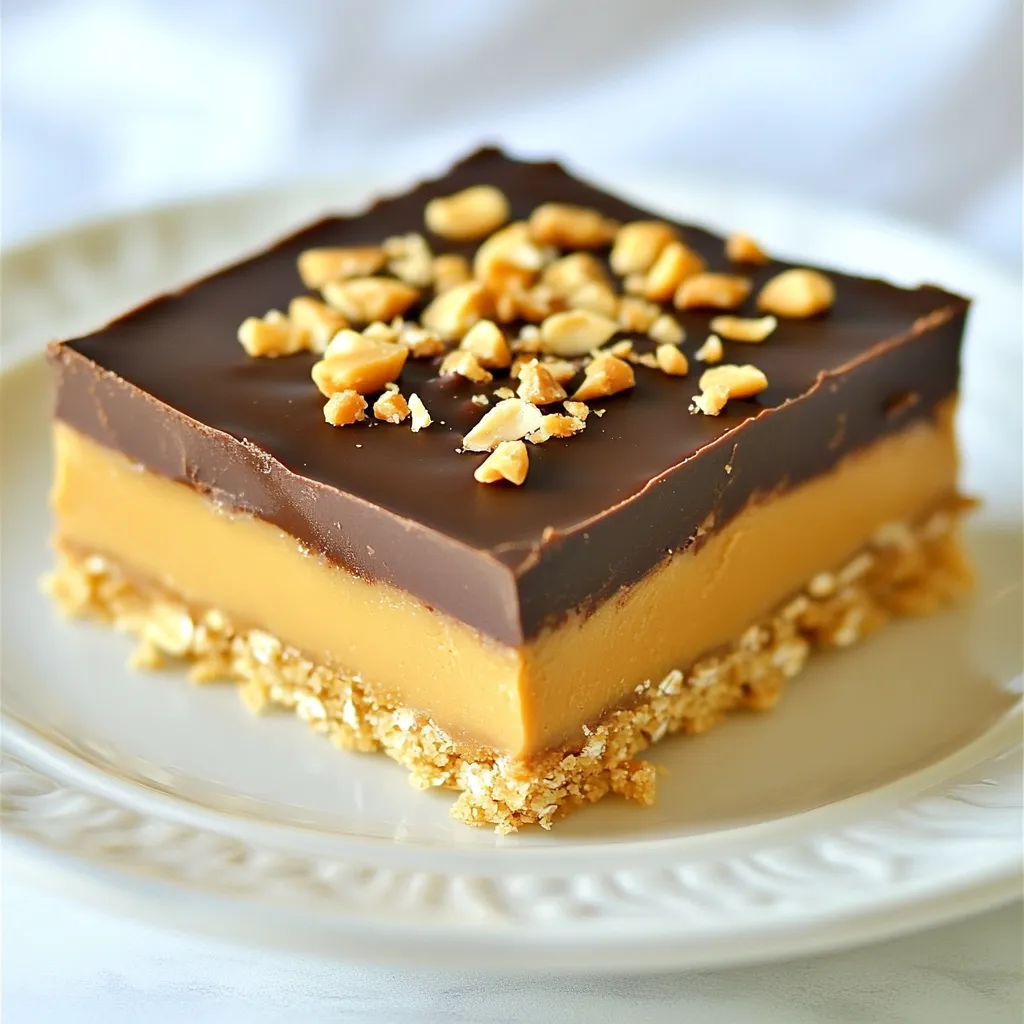
Are you craving a sweet treat but want to skip the oven? Try these No-Bake Peanut Butter Bars! They are quick to make and packed with flavor. With just a few simple ingredients, you can whip up a delicious snack that everyone will love. Whether you’re busy or just want something easy, this recipe is perfect. Let’s get started on making this tasty treat together!
Why I Love This Recipe
- Quick and Easy: This recipe requires no baking, making it a perfect treat when you’re short on time.
- Nutritious Ingredients: Made with wholesome ingredients like oats and peanut butter, these bars are a guilt-free indulgence.
- Customizable: You can easily add your favorite nuts or swap honey for maple syrup to suit your taste.
- Deliciously Satisfying: The combination of peanut butter and chocolate creates a rich and satisfying flavor that everyone loves.
Ingredients
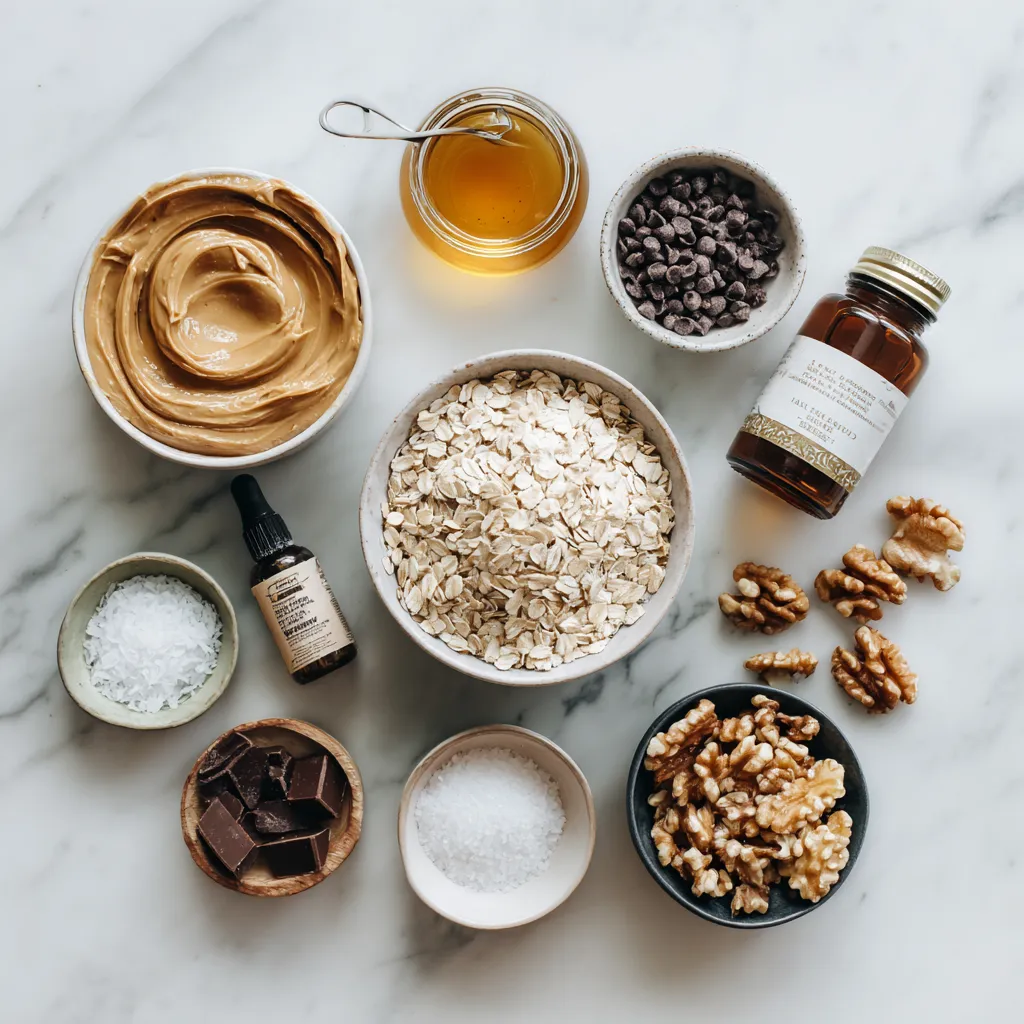
The key to great no-bake peanut butter bars lies in the right mix of ingredients. Here’s what you will need:
– 1 cup creamy peanut butter
– 1 cup rolled oats
– 1/2 cup honey or maple syrup
– 1/2 cup powdered sugar
– 1/2 cup dark chocolate chips
– 1/4 cup coconut oil
– 1/4 tsp salt
– 1/2 tsp vanilla extract
– Optional: 1/4 cup chopped nuts (e.g., almonds or walnuts)
Each ingredient plays a part in creating the perfect texture and taste. Peanut butter gives a rich, nutty flavor. Rolled oats add a nice chewiness that makes these bars satisfying. Honey or maple syrup serves as a natural sweetener, binding the bars together.
Powdered sugar adds sweetness and a smooth texture. Dark chocolate chips give a sweet, rich topping. Coconut oil helps the chocolate melt smoothly and adds a hint of tropical flavor. A touch of salt enhances all the flavors, and vanilla extract adds depth. If you want some crunch, chopped nuts are a great option.
Using quality ingredients is key for the best results. Make sure your peanut butter is creamy, and choose dark chocolate that you enjoy eating. Each bite should be a delicious treat!
Step-by-Step Instructions
Preparation of the Baking Dish
First, grab an 8×8-inch square baking dish. Line it with parchment paper. Leave some paper hanging over the edges. This makes it easy to lift out the bars later.
Mixing the Peanut Butter Base
In a big bowl, add 1 cup of creamy peanut butter. Pour in 1/2 cup of honey or maple syrup. Add 1/2 cup of powdered sugar, 1/4 teaspoon of salt, and 1/2 teaspoon of vanilla extract. Mix it all together until smooth. Make sure there are no lumps.
Incorporating Oats and Nuts
Now, stir in 1 cup of rolled oats. Mix until you can’t see any dry oats. If you want a crunch, fold in 1/4 cup of chopped nuts like almonds or walnuts.
Chocolate Melting Process
Next, put 1/2 cup of dark chocolate chips and 1/4 cup of coconut oil in a microwave-safe bowl. Heat this in the microwave for 20 seconds at a time. Stir after each time until it’s all melted and smooth.
Final Assembly in the Baking Dish
Take the peanut butter mixture and pour it into the lined baking dish. Press it down firmly using a spatula or your hands. Make sure it is even and packed tight. Then, pour the melted chocolate over the top. Spread it out evenly with a spatula.
Chilling and Serving Suggestions
Place the whole dish in the fridge. Let it chill for at least 2 hours. This helps the bars to set. Once they are firm, lift them out using the parchment paper. Cut into squares or rectangles and enjoy!
Tips & Tricks
Perfecting the Peanut Butter Mixture
To make the best peanut butter mixture, use creamy peanut butter. It blends well and gives a smooth texture. Mix the peanut butter, honey, powdered sugar, salt, and vanilla extract in a large bowl. Stir until smooth. If you want more crunch, add chopped nuts at this stage. This adds flavor and fun texture.
Chocolate Melting Tips
Melting chocolate can be tricky. Use a microwave-safe bowl for the chocolate chips and coconut oil. Heat them in short bursts of 20 seconds. Stir after each burst. This helps prevent burning. Once the chocolate is smooth, pour it over your peanut butter layer. This makes a nice, shiny top.
How to Cut Perfect Squares
Cutting the bars evenly can be easy. After chilling, lift the bars out of the pan using the parchment paper. Use a sharp knife to cut straight down. Wipe the knife with a cloth after each cut. This helps keep the edges nice and clean. Aim for squares or rectangles that are about 1 inch in size.
Storing the Bars Properly
To keep your bars fresh, store them in an airtight container. They will last up to one week in the fridge. You can also freeze them for longer storage. Just wrap each bar tightly in plastic wrap. This way, you can enjoy a sweet treat whenever you want!
Pro Tips
- Use Natural Peanut Butter: For a healthier option, choose natural peanut butter without added sugars or oils. This will enhance the flavor and texture of your bars.
- Chill Before Cutting: Allow the bars to chill completely in the refrigerator before cutting. This helps them hold their shape and makes slicing easier.
- Experiment with Mix-Ins: Feel free to customize your bars by adding dried fruits, seeds, or different types of nuts for added flavor and texture.
- Store Properly: Keep the bars in an airtight container in the fridge for up to a week, or freeze them for longer storage. This will maintain their freshness and taste.
Variations
Healthier Options Using Natural Sweeteners
You can swap honey or maple syrup with ripe bananas or dates. Both add sweetness. They also bring fiber and nutrients. Using these options reduces refined sugars. Your bars stay moist and tasty.
Nut-Free Alternatives
If you want nut-free bars, use sunbutter or soy nut butter. They give a similar taste and texture. This makes the bars safe for schools or nut-free diets. Always check for allergies on labels.
Flavor Add-Ins: Vanilla, Coconut, etc.
Add extra flavor with vanilla extract or shredded coconut. A teaspoon of cinnamon also works well. You can mix in chocolate chips or dried fruit for more taste. These add-ins create a fun twist.
Special Dietary Variations (Gluten-Free, Vegan)
To make these bars gluten-free, use certified gluten-free oats. For a vegan version, choose maple syrup and dairy-free chocolate chips. This way, everyone can enjoy the treat. Each variation keeps the bars delicious and satisfying.
Nutritional Information
Caloric Breakdown
Each no-bake peanut butter bar has about 150 calories. The bars are rich and filling. You can enjoy one without feeling guilty. If you eat two, you get around 300 calories.
Essential Nutrients Provided
These bars offer many nutrients. They have protein from peanut butter and fiber from oats. Here are the key nutrients:
– Protein: Helps build muscles.
– Fiber: Aids digestion and keeps you full.
– Healthy Fats: Found in peanut butter and coconut oil.
– Vitamins: Peanut butter contains vitamin E and B vitamins.
Suggested Serving Size Information
I suggest one bar per serving. This amount is perfect for a snack. If you share, cut them into smaller pieces. You can easily enjoy half a bar for a lighter treat.
FAQs
Can I use crunchy peanut butter instead of creamy?
Yes, you can use crunchy peanut butter. The bars will have a nice texture. The chunks add a fun crunch. Just keep in mind, it will change the smoothness of the bars.
How long do no-bake peanut butter bars last?
These bars last for about one week in the fridge. Store them in an airtight container. If you want them to last longer, you can freeze them. They will stay good for up to three months in the freezer.
Is there a substitute for coconut oil?
You can use butter or vegetable oil instead of coconut oil. They work well for melting and mixing. If you want a dairy-free option, use a light oil like canola oil.
Can I freeze no-bake peanut butter bars?
Yes, you can freeze these bars. Just wrap them tightly in plastic wrap or foil. This keeps them fresh and prevents freezer burn. When you want to eat them, let them thaw in the fridge.
In this post, we explored how to make no-bake peanut butter bars. We listed ingredients, shared step-by-step instructions, and included helpful tips. You learned about variations and essential nutrition facts. These bars are easy to customize, so have fun with it!
I hope you feel ready to make your own tasty treats. Enjoy the process and the reward