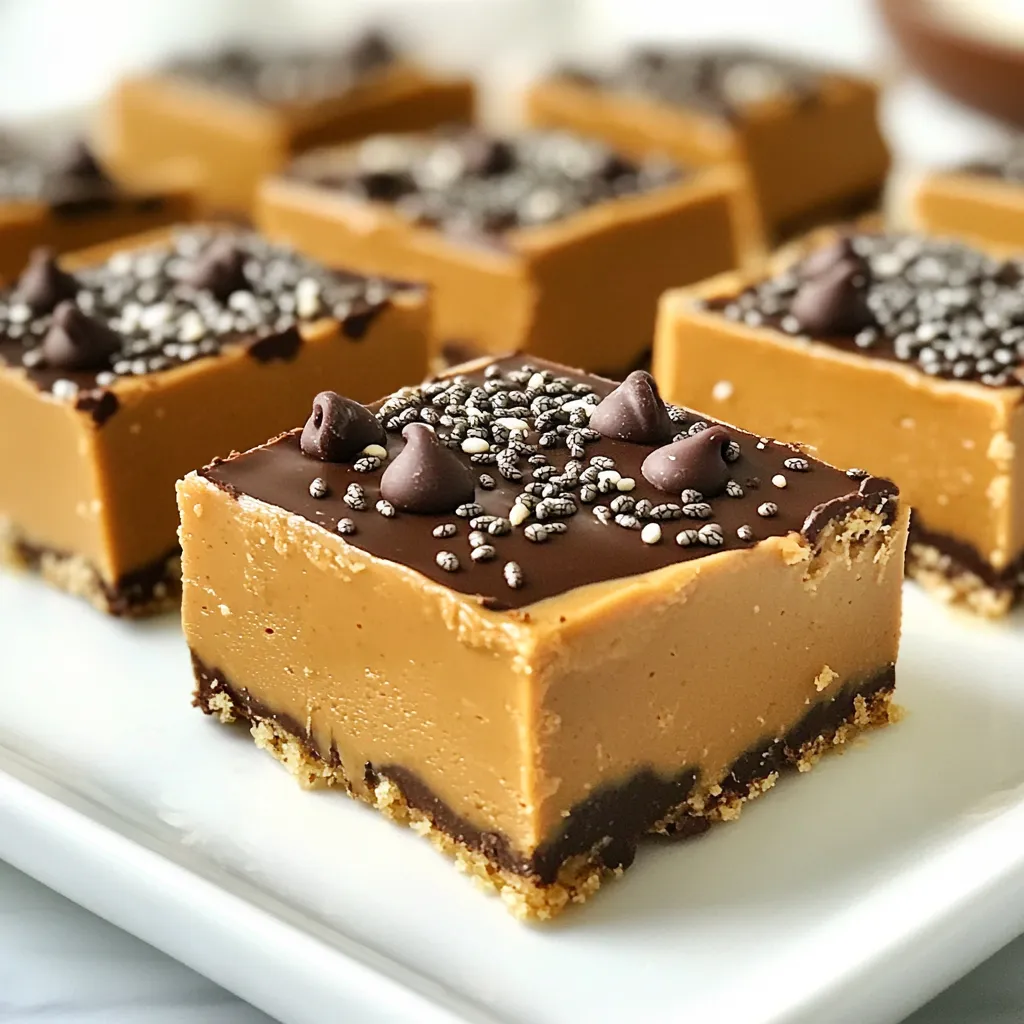
Looking for a sweet treat that’s easy and delicious? You’ve found it! These no bake peanut butter bars are not just quick to make but also packed with flavor. I’ll take you through the simple steps to whip up this tasty snack, whether you’re a baking pro or a novice. Plus, I’ll share tips for variations and storage. Let’s dive in and satisfy that sweet tooth!
Why I Love This Recipe
- Quick and Easy: This no-bake recipe takes just 20 minutes to prepare, making it a perfect option for a last-minute treat.
- Nutritious Ingredients: Packed with natural peanut butter, oats, and chia seeds, these bars are a wholesome snack option.
- Customizable: You can easily switch up the sweetener or add-ins like nuts or dried fruit to suit your taste.
- Deliciously Satisfying: The combination of creamy peanut butter and rich dark chocolate creates a delightful treat that satisfies cravings.
Ingredients
List of Required Ingredients
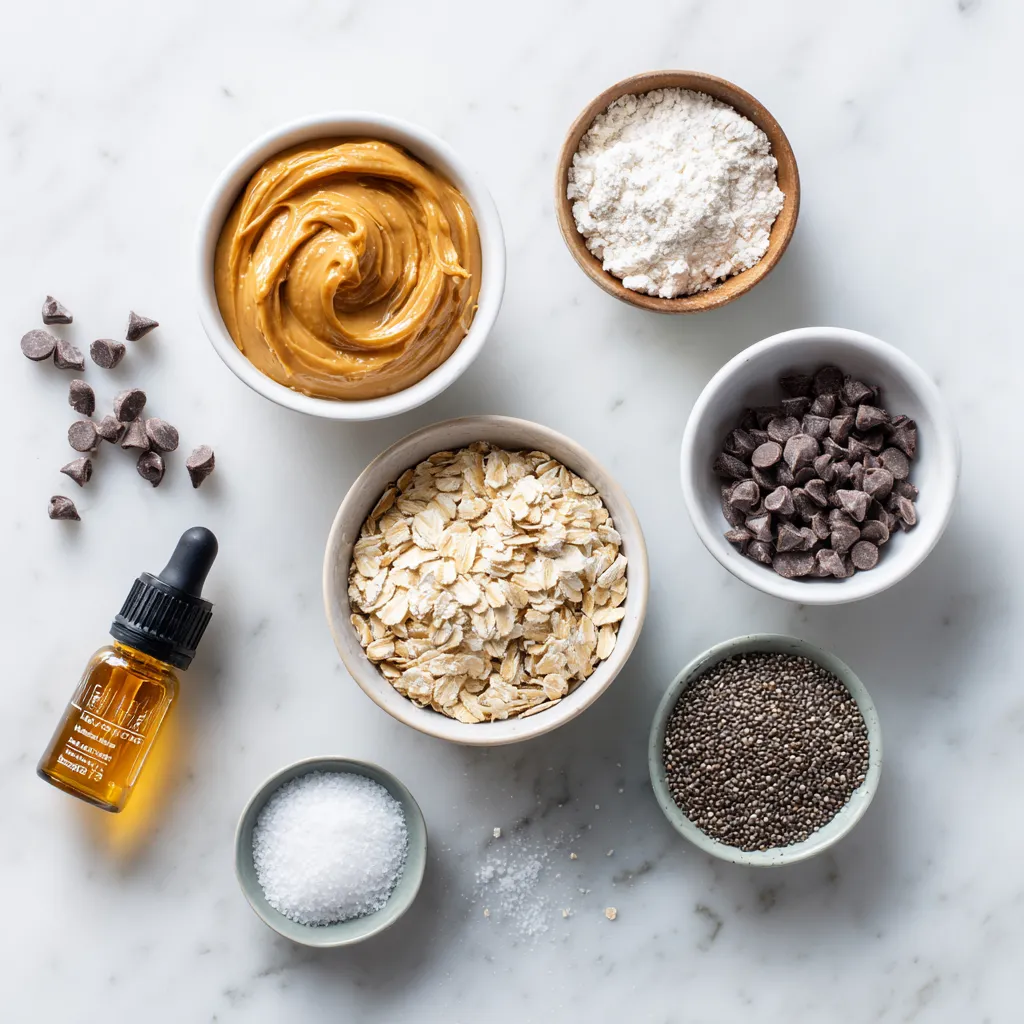
To make No Bake Peanut Butter Bars, you need these key ingredients:
– 1 cup natural peanut butter (creamy or crunchy)
– 1 cup rolled oats
– 1/2 cup honey or maple syrup
– 1/2 cup dark chocolate chips
– A pinch of salt
– 1 teaspoon vanilla extract
These ingredients create a base that is both tasty and satisfying.
Optional Ingredients for Added Flavor
You can make your bars even better with these optional ingredients:
– 1/4 cup powdered sugar (for extra sweetness)
– 1/4 cup chia seeds (for texture and nutrition)
Adding these gives a nice touch to the bars. They add sweetness and crunch.
Substitutions You Can Make
If you need to swap ingredients, here are some ideas:
– Use almond butter instead of peanut butter for a nut-free option.
– Maple syrup can replace honey for a vegan treat.
– You can use quick oats if you don’t have rolled oats at home.
These swaps keep the bars delicious while fitting your needs. Just remember, each change may slightly alter the taste or texture.
Step-by-Step Instructions
Detailed Instructions for Mixing
To start, grab a large bowl and add 1 cup of peanut butter. You can use creamy or crunchy, based on your taste. Next, pour in 1/2 cup of honey or maple syrup. This gives the bars a nice sweetness. Add 1 teaspoon of vanilla extract for a lovely flavor. Mix these ingredients well until they are smooth and creamy. In a separate bowl, combine 1 cup of rolled oats, 1/4 cup of powdered sugar (if you like things sweeter), 1/4 cup of chia seeds for extra crunch, and a pinch of salt. Stir these dry ingredients together well.
How to Properly Layer the Mixture
Now, take the dry mix and add it to the peanut butter mix. Stir this slowly. You want everything to blend into a sticky dough. Once mixed, line an 8×8 inch baking dish with parchment paper. Leave some paper hanging over the sides for easy lifting later. Pour the mixture into the dish. Use a spatula to press it down firmly across the bottom. Make sure it is even and compact.
Melting and Drizzling the Chocolate
For the chocolate topping, take 1/2 cup of dark chocolate chips. Place them in a microwave-safe bowl. Melt the chips in the microwave in 20-second intervals. Stir the chocolate after each interval until it is smooth. When the chocolate is melted, drizzle it over the pressed peanut butter mixture. Spread the chocolate evenly with a spatula. Now, place the dish in the fridge. Let it chill for at least 1-2 hours, or until the bars are firm and set. After they are set, lift the bars out using the parchment paper. Cut them into squares or bars for serving.
Tips & Tricks
Tips for Perfectly Setting Bars
To ensure your bars set well, chill them in the fridge. Aim for at least two hours. The key is to use a lined baking dish. Parchment paper helps in removing the bars easily. Press the mixture down firmly to create a compact layer. This will help them stay together when cut.
How to Handle Sticky Mixture
If the mixture feels too sticky, dampen your hands with a little water. This simple trick makes it easier to press the mixture into the baking dish. You can also use a spatula to spread it evenly. If you find it hard to mix, consider adding more oats a bit at a time.
Ideas for Presentation and Serving
For a beautiful presentation, cut the bars into neat squares. Arrange them on a wooden board for a rustic look. You can sprinkle extra chocolate chips or chia seeds on top for added flair. Serve with fresh fruit like strawberries or bananas for a pop of color. This not only looks nice but adds freshness to your treat!
Pro Tips
- Use Room Temperature Ingredients: Ensure your peanut butter and honey or maple syrup are at room temperature for easier mixing and a smoother texture.
- Customize Your Sweetness: Adjust the amount of powdered sugar to your taste, or skip it altogether if you prefer a more natural flavor.
- Chill for Best Results: Allow the bars to chill in the refrigerator for a longer period if you prefer a firmer texture; overnight chilling yields excellent results.
- Experiment with Toppings: Add your favorite nuts, seeds, or dried fruits on top of the chocolate drizzle before it sets for an extra crunch and flavor.
Variations
Flavor Variations (Nut Butters, Mix-ins)
I love to change up the flavors in my no bake peanut butter bars. You can swap peanut butter for other nut butters. Almond butter adds a nice twist. Cashew butter gives a rich, creamy taste. Mix-ins can also make a big difference. Try adding dried fruits like cranberries or raisins for some sweetness. You can also add nuts for crunch. Chopped walnuts or almonds work great! Chocolate chips are always a hit, too. Use white chocolate for a fun change.
Healthier Options (Sugar-Free Alternatives)
If you want to make these bars healthier, consider sugar-free options. You can use sugar-free maple syrup or agave nectar. These swaps keep the sweetness without the sugar. You can also skip the powdered sugar. The natural sweetness of the peanut butter and honey is often enough. If you want more fiber, add more chia seeds. They boost the nutrition without adding sugar.
Dietary Modifications (Vegan, Gluten-Free)
Making these bars vegan is easy! Just replace honey with maple syrup for a plant-based sweetener. Use gluten-free oats to keep it gluten-free. Always check the chocolate chips for dairy. Many brands offer vegan chocolate. You can also skip the powdered sugar entirely. This modification makes the bars lighter while still keeping them tasty. Enjoying these treats can fit into many diets!
Storage Info
Best Practices for Storing Bars
To keep your no bake peanut butter bars fresh, wrap them well. Use plastic wrap or aluminum foil. You can also place them in an airtight container. This prevents drying out and keeps them tasty. Store them in the fridge for the best results.
How Long They Last in the Fridge or Freezer
These bars can last for about one week in the fridge. If you want to keep them longer, freeze them. In the freezer, they can last up to three months. Just remember to cut them into squares before freezing. This way, you can grab one easily when you want a treat.
Tips for Reheating or Thawing
When you want to eat a frozen bar, take it out of the freezer. Let it thaw in the fridge for a few hours. If you’re in a hurry, leave it at room temperature for about 30 minutes. Avoid using the microwave, as it can melt the chocolate and make the bars too soft. Enjoy your delicious treat!
FAQs
Can I use crunchy peanut butter instead of creamy?
Yes, you can use crunchy peanut butter. The bars will have a nice texture. Crunchy peanut butter adds extra bites of peanut. It gives a different feel but still tastes great.
How can I make these bars vegan?
To make these bars vegan, swap the honey for maple syrup. Use dark chocolate that is dairy-free. Always check the label for vegan options. This way, you still get a tasty treat without animal products.
What can I substitute for honey?
You can use maple syrup or agave nectar as a substitute. Both add sweetness and work well in this recipe. If you want to keep it sugar-free, try using mashed bananas or date syrup instead. These options still make the bars sweet and delicious.
You learned about the key ingredients for tasty bars, step-by-step mixing, and fun variations. Knowing how to store your treats also helps keep them fresh.
Try out different flavors and modifications to make the recipe your own. With the tips shared, you can create bars that impress everyone. Enjoy your sweet creations and don’t be afraid to experiment. Happy cookin