No Bake Chocolate Peanut Butter Oat Bars Delight

WANT TO SAVE THIS RECIPE?

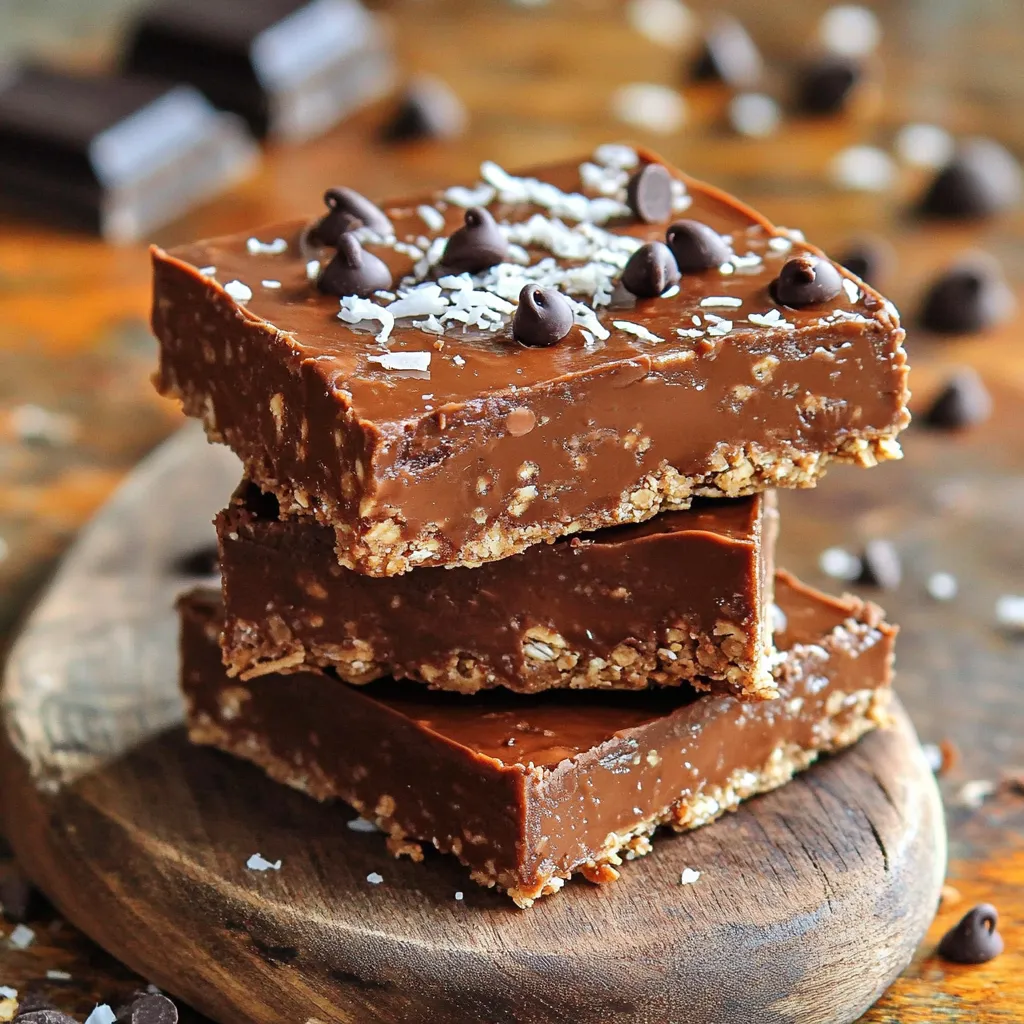
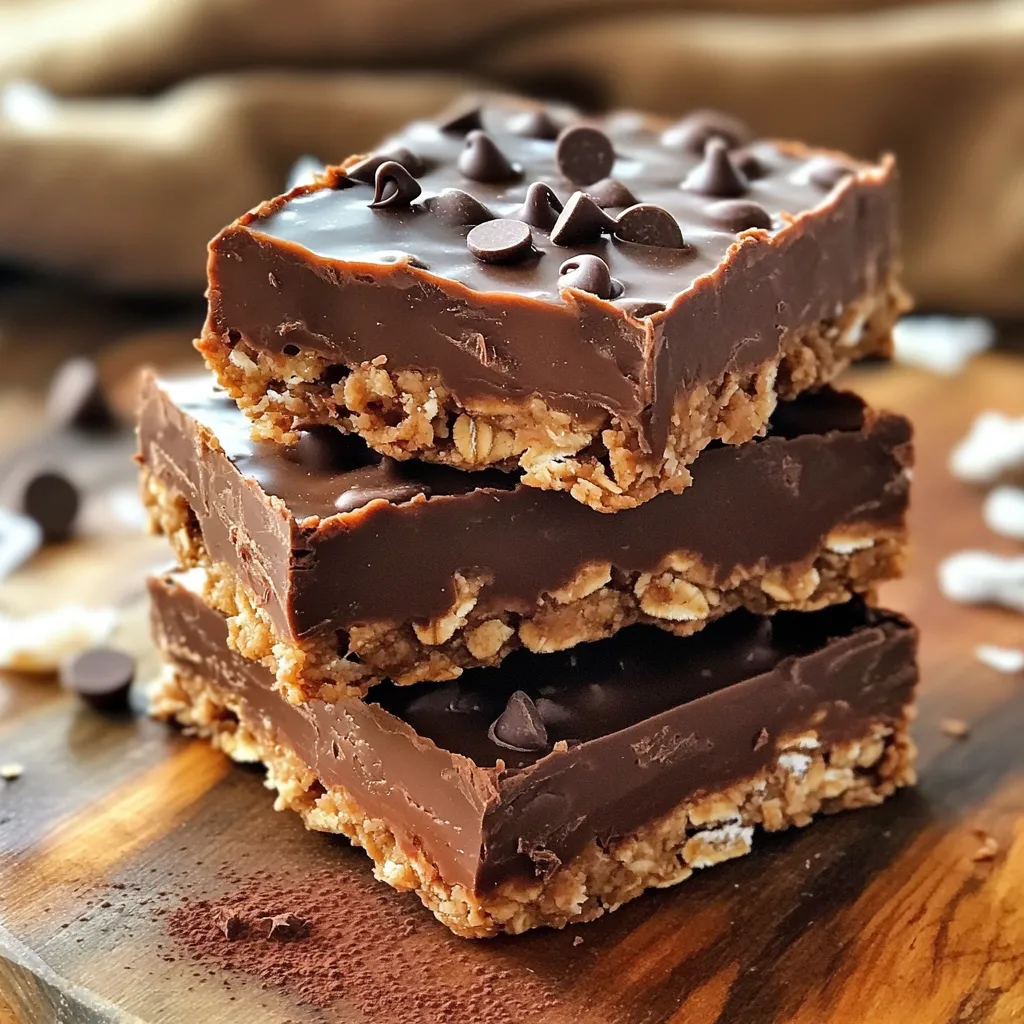
Are you ready to indulge in a sweet treat that’s quick and easy? My No Bake Chocolate Peanut Butter Oat Bars Delight will satisfy your cravings without turning on the oven! This recipe is perfect for snack lovers and busy bees alike. With just a few simple ingredients, you can whip up a delicious batch that’s loaded with flavor. Let’s dive into the creamy goodness of peanut butter and rich chocolate!

Ingredients

List of Ingredients

  • 1 cup rolled oats
  • 1/2 cup creamy peanut butter
  • 1/4 cup honey or maple syrup
  • 1/4 cup unsweetened cocoa powder
  • 1/2 cup chocolate chips (dark or semi-sweet)
  • 1/4 cup shredded coconut (optional)
  • 1/2 teaspoon vanilla extract
  • Pinch of salt

Ingredient Substitutions

You can swap creamy peanut butter for almond or cashew butter. This works well if you want a different taste or have nut allergies. For honey or maple syrup, try agave nectar or brown rice syrup. Each choice offers its own unique sweetness.

When it comes to chocolate, use white chocolate chips if you prefer a sweeter flavor. Dark chocolate gives a richer taste, while semi-sweet is a nice balance. You can also try cocoa nibs for a more intense chocolate flavor. These options help you customize your bars to fit your taste.

Step-by-Step Instructions

Preparation Steps

First, grab a large mixing bowl. In this bowl, mix together:

  • 1 cup rolled oats
  • 1/4 cup unsweetened cocoa powder
  • A pinch of salt

Stir these dry ingredients well. This step helps spread the flavors evenly.

Next, take a small saucepan. Over low heat, add:

  • 1/2 cup creamy peanut butter
  • 1/4 cup honey or maple syrup

Stir these together until smooth. Once mixed, add 1/2 teaspoon vanilla extract. Then remove the saucepan from the heat.

Combining Ingredients

Now, pour the warm peanut butter mixture over the dry ingredients. Mix them until they blend well together. If you want more texture, fold in:

  • 1/4 cup shredded coconut (optional)

After that, add in:

  • 1/2 cup chocolate chips

Set a few aside for later. Gently mix to combine everything.

Setting the Bars

Line an 8×8-inch baking dish with parchment paper. Leave some paper hanging over the edges. This will make it easy to lift out the bars later.

Next, transfer the mixture into the dish. Use your hands or a spatula to press it down firmly. Make the surface even.

Sprinkle the reserved chocolate chips on top. Press them slightly into the mixture for a nice touch.

Refrigerate the bars for at least 1-2 hours. This helps them firm up nicely. Once set, lift the bars out using the parchment paper. Cut them into squares or rectangles to serve.

Tips & Tricks

Perfecting the Recipe

To get the right consistency for your bars, mix the dry ingredients well. This helps the oats and cocoa blend. When you heat the peanut butter, keep the heat low. This way, it stays smooth and creamy. If it gets too hot, it may separate, making your bars crumbly.

When pressing the mixture into the dish, use your hands or a spatula. Make sure to press firmly. This helps the bars hold together. If they are too loose, they will fall apart when you cut them.

Serving Suggestions

For a nice presentation, stack the bars on a wooden board. Dust a little cocoa powder on top for flair. You can also serve them with fresh fruit, like bananas or berries. They pair well with milk or coffee for a tasty treat.

Common Mistakes to Avoid

A common mistake is overheating the peanut butter. This can change the texture and make it hard to mix. Always keep an eye on it while heating.

Another mistake is not waiting long enough for the bars to chill. Refrigerate them for at least 1-2 hours. This time allows the bars to firm up and makes cutting easier. If you rush this step, they may crumble or not hold their shape.

Variations

Flavor Variants

You can change up the flavors in these bars easily. Adding dried fruits can make them fruity and fun. Try cranberries or raisins for a sweet pop. Both pair well with the rich peanut butter and cocoa.

Incorporating nuts or seeds adds extra crunch. Chopped almonds or sunflower seeds work great. They also provide a nice contrast to the soft texture of the bars.

Dietary Adjustments

If you need gluten-free options, look for certified gluten-free oats. This ensures you enjoy the bars without worries. You can also swap honey or maple syrup for agave nectar to keep them vegan.

This way, anyone can enjoy these treats. Dietary needs should not limit your enjoyment of delicious snacks.

Chocolate Options

You can play with chocolate types in this recipe too. Using white chocolate or flavored chocolate chips gives a different taste. These options add a fun twist to the classic recipe.

If you want a more bitter taste, try cocoa nibs. They add a nice crunch and depth. You can mix them in or sprinkle them on top for added flair.

Storage Info

Proper Storage Techniques

To keep your No Bake Chocolate Peanut Butter Oat Bars fresh, use airtight containers. Glass containers work great for this purpose. Plastic containers are also a good choice, as long as they seal well.

You can store these bars in the fridge or freezer. If you plan to eat them within a week, the fridge is best. For longer storage, the freezer is ideal. Just make sure to wrap the bars tightly in plastic wrap before placing them in a container.

Shelf Life

In the fridge, these bars last about one week. If you freeze them, they can last up to three months. Check for signs that the bars have gone bad. If you see any mold or smell something off, it’s best to toss them.

The texture may change over time. If they feel too soft or crumbly, they might not be as tasty.

Reheating Instructions

If your bars soften in the fridge, don’t worry! You can enjoy them slightly chilled or at room temperature. If you prefer them firmer, pop them back in the fridge for a bit.

For a warm treat, you can microwave them for about 10 seconds. This will slightly melt the chocolate chips and give you a gooey texture. Enjoy these bars however you like!

FAQs

How long do No Bake Chocolate Peanut Butter Oat Bars last?

No Bake Chocolate Peanut Butter Oat Bars can last about one week in the fridge. Store them in an airtight container to keep them fresh. If you want to keep them longer, you can freeze them. They will stay good for about three months in the freezer. Just make sure to wrap them well.

Can I use natural peanut butter?

Yes, you can use natural peanut butter. However, it might change the texture a bit. Natural peanut butter has oil that can separate. This can make your bars a little more crumbly. If you choose natural peanut butter, stir it well before mixing. You may need to add a bit more sweetener to help with binding.

What can I add to enhance the flavor?

To boost the flavor, you can add a pinch of cinnamon or nutmeg. These spices add warmth and depth. You might also try adding a splash of almond extract for a nutty twist. Consider mixing in dried fruits like raisins or cranberries for sweetness. These additions make your bars even more fun and tasty!

You now know how to make delicious no-bake chocolate peanut butter oat bars. You learned about the key ingredients and possible substitutes. I shared step-by-step instructions for easy preparation and tips for perfection. Variations let you customize your bars to fit your taste. Remember proper storage for freshness and shelf life. Enjoy these treats and get creative with flavors. Your kitchen is now ready for some fun and delicious snacks!

- 1 cup rolled oats - 1/2 cup creamy peanut butter - 1/4 cup honey or maple syrup - 1/4 cup unsweetened cocoa powder - 1/2 cup chocolate chips (dark or semi-sweet) - 1/4 cup shredded coconut (optional) - 1/2 teaspoon vanilla extract - Pinch of salt You can swap creamy peanut butter for almond or cashew butter. This works well if you want a different taste or have nut allergies. For honey or maple syrup, try agave nectar or brown rice syrup. Each choice offers its own unique sweetness. When it comes to chocolate, use white chocolate chips if you prefer a sweeter flavor. Dark chocolate gives a richer taste, while semi-sweet is a nice balance. You can also try cocoa nibs for a more intense chocolate flavor. These options help you customize your bars to fit your taste. First, grab a large mixing bowl. In this bowl, mix together: - 1 cup rolled oats - 1/4 cup unsweetened cocoa powder - A pinch of salt Stir these dry ingredients well. This step helps spread the flavors evenly. Next, take a small saucepan. Over low heat, add: - 1/2 cup creamy peanut butter - 1/4 cup honey or maple syrup Stir these together until smooth. Once mixed, add 1/2 teaspoon vanilla extract. Then remove the saucepan from the heat. Now, pour the warm peanut butter mixture over the dry ingredients. Mix them until they blend well together. If you want more texture, fold in: - 1/4 cup shredded coconut (optional) After that, add in: - 1/2 cup chocolate chips Set a few aside for later. Gently mix to combine everything. Line an 8x8-inch baking dish with parchment paper. Leave some paper hanging over the edges. This will make it easy to lift out the bars later. Next, transfer the mixture into the dish. Use your hands or a spatula to press it down firmly. Make the surface even. Sprinkle the reserved chocolate chips on top. Press them slightly into the mixture for a nice touch. Refrigerate the bars for at least 1-2 hours. This helps them firm up nicely. Once set, lift the bars out using the parchment paper. Cut them into squares or rectangles to serve. To get the right consistency for your bars, mix the dry ingredients well. This helps the oats and cocoa blend. When you heat the peanut butter, keep the heat low. This way, it stays smooth and creamy. If it gets too hot, it may separate, making your bars crumbly. When pressing the mixture into the dish, use your hands or a spatula. Make sure to press firmly. This helps the bars hold together. If they are too loose, they will fall apart when you cut them. For a nice presentation, stack the bars on a wooden board. Dust a little cocoa powder on top for flair. You can also serve them with fresh fruit, like bananas or berries. They pair well with milk or coffee for a tasty treat. A common mistake is overheating the peanut butter. This can change the texture and make it hard to mix. Always keep an eye on it while heating. Another mistake is not waiting long enough for the bars to chill. Refrigerate them for at least 1-2 hours. This time allows the bars to firm up and makes cutting easier. If you rush this step, they may crumble or not hold their shape. {{image_2}} You can change up the flavors in these bars easily. Adding dried fruits can make them fruity and fun. Try cranberries or raisins for a sweet pop. Both pair well with the rich peanut butter and cocoa. Incorporating nuts or seeds adds extra crunch. Chopped almonds or sunflower seeds work great. They also provide a nice contrast to the soft texture of the bars. If you need gluten-free options, look for certified gluten-free oats. This ensures you enjoy the bars without worries. You can also swap honey or maple syrup for agave nectar to keep them vegan. This way, anyone can enjoy these treats. Dietary needs should not limit your enjoyment of delicious snacks. You can play with chocolate types in this recipe too. Using white chocolate or flavored chocolate chips gives a different taste. These options add a fun twist to the classic recipe. If you want a more bitter taste, try cocoa nibs. They add a nice crunch and depth. You can mix them in or sprinkle them on top for added flair. To keep your No Bake Chocolate Peanut Butter Oat Bars fresh, use airtight containers. Glass containers work great for this purpose. Plastic containers are also a good choice, as long as they seal well. You can store these bars in the fridge or freezer. If you plan to eat them within a week, the fridge is best. For longer storage, the freezer is ideal. Just make sure to wrap the bars tightly in plastic wrap before placing them in a container. In the fridge, these bars last about one week. If you freeze them, they can last up to three months. Check for signs that the bars have gone bad. If you see any mold or smell something off, it's best to toss them. The texture may change over time. If they feel too soft or crumbly, they might not be as tasty. If your bars soften in the fridge, don't worry! You can enjoy them slightly chilled or at room temperature. If you prefer them firmer, pop them back in the fridge for a bit. For a warm treat, you can microwave them for about 10 seconds. This will slightly melt the chocolate chips and give you a gooey texture. Enjoy these bars however you like! No Bake Chocolate Peanut Butter Oat Bars can last about one week in the fridge. Store them in an airtight container to keep them fresh. If you want to keep them longer, you can freeze them. They will stay good for about three months in the freezer. Just make sure to wrap them well. Yes, you can use natural peanut butter. However, it might change the texture a bit. Natural peanut butter has oil that can separate. This can make your bars a little more crumbly. If you choose natural peanut butter, stir it well before mixing. You may need to add a bit more sweetener to help with binding. To boost the flavor, you can add a pinch of cinnamon or nutmeg. These spices add warmth and depth. You might also try adding a splash of almond extract for a nutty twist. Consider mixing in dried fruits like raisins or cranberries for sweetness. These additions make your bars even more fun and tasty! You now know how to make delicious no-bake chocolate peanut butter oat bars. You learned about the key ingredients and possible substitutes. I shared step-by-step instructions for easy preparation and tips for perfection. Variations let you customize your bars to fit your taste. Remember proper storage for freshness and shelf life. Enjoy these treats and get creative with flavors. Your kitchen is now ready for some fun and delicious snacks!

No Bake Chocolate Peanut Butter Oat Bars

Indulge in these No Bake Chocolate Peanut Butter Oat Bars that are both delicious and easy to make! Made with wholesome ingredients like rolled oats, creamy peanut butter, and rich cocoa powder, these bars are a perfect snack or dessert. With just a bit of prep time, you can create a tasty treat that satisfies any sweet tooth. Click through to discover the full recipe and enjoy this delightful treat today!

Ingredients
  

1 cup rolled oats

1/2 cup creamy peanut butter

1/4 cup honey or maple syrup

1/4 cup unsweetened cocoa powder

1/2 cup chocolate chips (dark or semi-sweet)

1/4 cup shredded coconut (optional for added texture)

1/2 teaspoon vanilla extract

Pinch of salt

Instructions
 

In a large mixing bowl, combine the rolled oats, cocoa powder, and salt. Mix well to ensure even distribution.

    In a small saucepan over low heat, gently warm the peanut butter and honey (or maple syrup) together until smooth and fully combined. Stir in the vanilla extract and remove from heat.

      Pour the warm peanut butter mixture over the dry ingredients in the bowl. Stir until completely combined. If you’re using shredded coconut, fold it in at this step.

        Add the chocolate chips, reserving a few for topping, and mix gently until incorporated.

          Line an 8x8-inch (or similar size) baking dish with parchment paper, leaving some paper overhanging for easy removal. Transfer the mixture into the dish and press it down firmly with your hands or a spatula until the surface is even.

            Sprinkle the reserved chocolate chips on top, pressing them slightly into the mixture for an attractive finish.

              Refrigerate the bars for at least 1-2 hours to allow them to firm up.

                Once set, lift the parchment paper to remove the bars from the dish. Cut them into squares or rectangles, depending on your preference.

                  Prep Time: 15 minutes | Total Time: 2 hours 15 minutes | Servings: 12 bars

                    - Presentation Tips: Serve the bars stacked on a rustic wooden board, sprinkled with a light dusting of cocoa powder for a gourmet touch. Enjoy them as a quick snack or a satisfying dessert!

                      WANT TO SAVE THIS RECIPE?

                      Leave a Comment

                      Recipe Rating