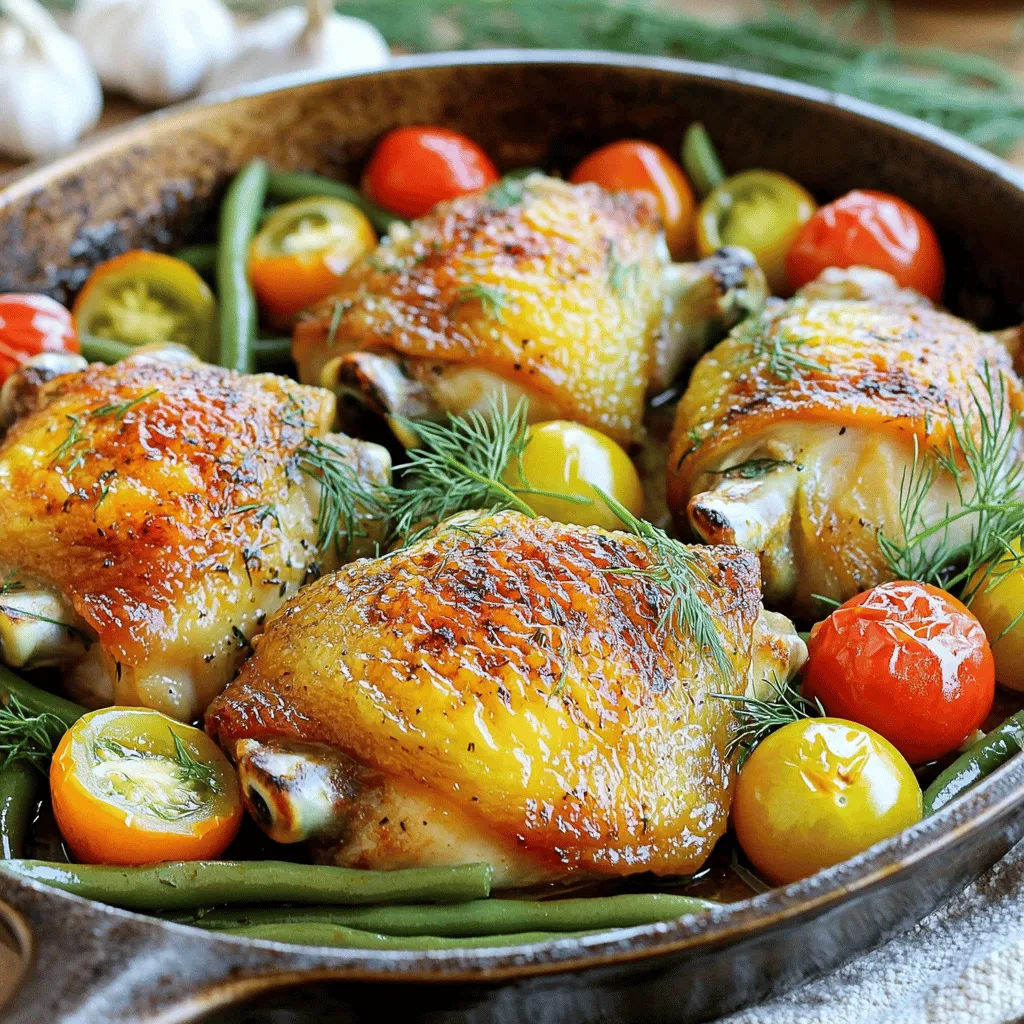
One Pan Pickle Jar Chicken Thighs Flavorful Delight
If you love easy, tasty meals, you’re in for a treat! One Pan Pickle Jar Chicken Thighs bring a burst
If you love easy, tasty meals, you’re in for a treat! One Pan Pickle Jar Chicken Thighs bring a burst
![- 2 ripe peaches, cut into wedges - 1 cup cherry tomatoes - 8 oz fresh mozzarella balls (bocconcini) - 1 cup fresh basil leaves These main ingredients create the heart of your Peach Caprese skewers. I love using ripe peaches because they are sweet and juicy. Cherry tomatoes add a pop of color and a burst of flavor. Fresh mozzarella balls are creamy and complement the other ingredients. Don't forget the fresh basil leaves; they bring a fragrant note that ties everything together. - 3 tablespoons balsamic glaze - 2 tablespoons olive oil - Salt and pepper to taste - 12-15 skewers (6-inch) For the final touch, balsamic glaze adds a sweet and tangy finish. Olive oil enhances the flavors and adds richness. A sprinkle of salt and pepper brings out the best in each ingredient. Use 6-inch skewers for easy handling. You can find these ingredients in your local grocery store. For the full recipe, check out the details provided earlier. To start, gather all your ingredients for Peach Caprese Skewers. You will need two ripe peaches, one cup of cherry tomatoes, and eight ounces of fresh mozzarella balls. First, slice the peaches into wedges. Wash the cherry tomatoes under cold water. Then, drain the mozzarella balls to remove excess liquid. Now, let's assemble the skewers. You will need 12 to 15 six-inch skewers for this recipe. Take a skewer and thread a fresh basil leaf onto it. Next, add a peach wedge, followed by a cherry tomato. Then, slide on a mozzarella ball. Repeat this pattern until the skewer is filled. Make sure to leave some space at the end for easy handling. Keep going until all the ingredients are used. You will create colorful and tasty skewers that look great on any table. Once your skewers are ready, it’s time for the finishing touches. Drizzle the skewers with two tablespoons of olive oil. This adds a rich flavor to the dish. Then, season them lightly with salt and pepper. This step enhances the natural flavors of the ingredients. For the final touch, drizzle three tablespoons of balsamic glaze over the skewers. This adds a sweet and tangy taste that pairs perfectly with the peaches and mozzarella. You can serve these beautiful skewers on a large platter or place them in a vase for a fun presentation. Enjoy your Peach Caprese Skewers as a delicious summer snack! For the complete recipe, check the [Full Recipe]. To make great Peach Caprese Skewers, focus on how you thread the ingredients. Start with a fresh basil leaf on the skewer. Then, add a peach wedge, followed by a cherry tomato, and finish with a mozzarella ball. This order gives a nice balance. Be sure to leave a little space at the end of each skewer. This space helps with easy handling and eating. Avoid overcrowding the skewers. Each ingredient needs room. If you pile on too much, the flavors mix too much. Each bite should have a clear taste of sweet peach, juicy tomato, and creamy mozzarella. You can boost your Peach Caprese Skewers with extra toppings or herbs. Try adding a sprinkle of crushed red pepper for heat. You might also enjoy fresh mint leaves for a twist. These small changes can make a big difference in taste. Balancing sweetness and acidity is key. The peaches are sweet, so you need something tart. That's where the balsamic glaze shines. It adds a tangy flavor that pairs well with the sweet peaches. A drizzle of olive oil also helps enhance the taste and texture. Enjoy experimenting with these ideas to make your skewers truly special! {{image_2}} To make Peach Caprese Skewers vegan-friendly, swap the mozzarella with vegan cheese. You can find many options in stores. Use a creamy, nut-based cheese for the best flavor. Make sure to check the label for any hidden animal products. For gluten-free needs, this recipe is already a great choice. All the main ingredients are naturally gluten-free. Just ensure that your balsamic glaze does not have any gluten ingredients. You can find many gluten-free brands at your local store. For parties, get creative with your serving ideas. Arrange the skewers in a tall jar or a vase. This fun display allows guests to grab their skewers easily. You can also use a large platter with fresh basil or greens underneath for color. For themed occasions, you can mix and match fruits. Try using strawberries or watermelon for a twist. You can also add a drizzle of flavored oils or different glazes for a unique taste. These small changes can make your dish stand out at any event. For the full recipe, check the details above and enjoy your culinary journey! To keep your Peach Caprese Skewers fresh, store them in the fridge. Place them on a plate or in a container. Cover them with plastic wrap or a lid. This helps keep them from drying out. They taste best when eaten within two days. If you leave them too long, the peaches may get soft. For long-term storage, you can freeze the ingredients. Cut the peaches and place them in a freezer bag. You can freeze mozzarella balls too. Just make sure to drain them first. Balsamic glaze also freezes well. However, I suggest not freezing the assembled skewers. They may become mushy when thawed. Use the Full Recipe to guide you on how to prepare them fresh each time. You can make Peach Caprese Skewers a few hours before serving. Prepare all your ingredients. Slice the peaches and wash the tomatoes. Assemble the skewers as you normally would. Keep them in the fridge until it's time to serve. This will keep the flavors fresh and crisp. Just remember to drizzle the balsamic glaze right before you serve. This way, your skewers will look and taste amazing. If you cannot find mozzarella, don't worry. You can use feta cheese as a tasty swap. Feta adds a nice tang that pairs well with peaches. Another option is burrata, which has a creamy texture. For a dairy-free choice, try using marinated tofu. It mimics the soft texture of cheese and soaks in flavors well. Each option brings its own twist to the dish. Absolutely! You can use a variety of fruits in your Peach Caprese Skewers. Strawberries, nectarines, or even plums work great. Just keep the fruit's sweetness in mind. You want to balance it with the savory mozzarella and basil. Mixing different fruits can create a colorful and fun snack. Each fruit will add its unique flavor and texture, making your skewers even more exciting. Try mixing and matching to find your favorite combo. For the full recipe, check out this [Full Recipe]. Peach Caprese skewers combine fresh peaches, tomatoes, mozzarella, and basil for a tasty treat. We covered the main ingredients, how to prepare, and tips for the best presentation. Remember, you can adapt this recipe for dietary needs or use other fruits too. In the end, these skewers are perfect for parties or a light snack. Enjoy making and sharing these delicious bites with family and friends!](https://savorystride.com/wp-content/uploads/2025/07/b9012ea0-d5e7-459d-b2ed-b5a660c32588.webp)
Looking for a fun and tasty snack this summer? Peach Caprese skewers are the perfect treat! They combine juicy peaches,
![- 8 oz rotini pasta - 1 cup dill pickles, diced - 1 cup cherry tomatoes, halved - 1/2 cup red onion, finely chopped - 1 cup cooked chicken (optional), shredded - 1/2 cup ranch dressing - 1/4 cup pickle juice - 1 tablespoon fresh dill, chopped - Salt and pepper to taste Choosing the right pasta type For this salad, I like rotini. It holds the dressing well. You can also try penne or fusilli. They add nice texture too. Selecting fresh vegetables Always choose firm dill pickles and ripe cherry tomatoes. Crunchy, fresh veggies make the salad pop. A good red onion should feel heavy and firm, with no soft spots. Best ranch dressing options You can use store-bought ranch for ease. Homemade ranch gives more flavor. Look for one made with real buttermilk for the best taste. If you want a twist, try a spicy ranch. Start by boiling some salted water in a large pot. You want it to be really hot. Add the rotini pasta and cook it for about 8 to 10 minutes. Check it often. You want it to be tender but still firm, which we call "al dente." After cooking, drain the pasta and rinse it under cold water. This stops the cooking and keeps it from getting mushy. Set the pasta aside to cool completely. Next, it's time to prepare the veggies. Chop the dill pickles into small pieces. You want them to be bite-sized. Then, finely chop the red onion. It should be small enough to blend well with the other ingredients. Finally, take the cherry tomatoes and cut them in half. This adds a nice burst of flavor in each bite. If you want to add chicken for protein, shred it now and set it aside. In a small bowl, whisk together the ranch dressing and pickle juice. This mix gives the salad a tangy taste. Make sure they blend well. Taste it, then add salt and pepper to bring out the flavors. You might want it a bit saltier or tangier, so adjust to your liking. Now, it's time to bring everything together. In a large bowl, mix the cooled pasta, chopped vegetables, and any shredded chicken. Pour the ranch dressing over the top. Add the fresh dill for that extra zing. Use a spatula or a spoon to gently toss everything together. Be careful not to break up the pasta. You want it to stay whole and look pretty. Cover the salad with plastic wrap or a lid. Place it in the fridge for at least 30 minutes. This chilling time helps the flavors mix well. Once you are ready to serve, take it out and toss it gently again. This keeps everything fresh and vibrant. If you need to, add a pinch more salt or pepper before serving. Enjoy your Dill Pickle Ranch Pasta Salad! For the full recipe, check out the details above. To boost the taste of your Dill Pickle Ranch Pasta Salad, adjust the seasoning. Add a pinch more salt or pepper if needed. You can also mix in a touch of garlic powder for extra flavor. I love using fresh dill. It brightens the dish and adds a nice crunch. Feel free to toss in a bit more if you love that pickle punch. This pasta salad is great on its own, but it pairs well with many dishes. Serve it alongside grilled chicken or burgers for a fun meal. You can also enjoy it with BBQ ribs or as a side at a potluck. The creamy ranch flavor complements these hearty dishes perfectly. Make your salad look as good as it tastes. Garnish with extra dill or a few pickle slices on top. You can also add cherry tomatoes for a pop of color. Serve it in a large, fun bowl or individual cups for a party. This makes it easy to enjoy and adds a nice touch to your table. {{image_2}} If you want to make this pasta salad vegan or vegetarian, you can skip the chicken. Use a plant-based ranch dressing. This keeps the dish creamy without any animal products. For a gluten-free option, swap the rotini pasta with gluten-free pasta. Many brands offer great alternatives that taste just as good. To boost the flavor, think about adding ingredients like diced bell peppers or shredded carrots. These not only add taste but also crunch. You could also swap ranch dressing for a creamy herb dressing or a spicy vinaigrette. This can give your salad a new twist and keep it exciting. In summer, add fresh corn or diced cucumbers to make it even fresher. These ingredients bring a bright taste that works well with the dill pickles. For winter, consider adding roasted vegetables like sweet potatoes or brussels sprouts. These hearty options can make the salad warm and comforting. For the complete recipe, check out the [Full Recipe]. To keep your Dill Pickle Ranch Pasta Salad fresh, use airtight containers. Glass containers work well because they do not stain. You can also use plastic containers with tight lids. This keeps air out and helps avoid spoilage. Store the salad in the fridge right after making it. To keep it fresh longer, add the dressing just before serving. This prevents the pasta from soaking up too much liquid. If you have leftovers, ensure they are stored well to maintain their crunch. You should not reheat pasta salad. It tastes best cold or at room temperature. If you must warm it, do so gently. Use a microwave on low power. This way, you can avoid making the pasta mushy. Another option is to let it sit at room temperature for a bit. This helps to bring out the flavors without changing the texture. Dill Pickle Ranch Pasta Salad lasts about 3 to 5 days in the fridge. Store it in airtight containers to ensure freshness. Always check for signs of spoilage before eating. Signs include a sour smell or a change in color. If the salad looks slimy or has an off-smell, throw it away. Remember, when in doubt, throw it out! Enjoy your crunchy and flavorful treat! For the full recipe, check out the ingredients and steps above. You can try several alternatives to ranch dressing. Some great options include: - Greek yogurt mixed with herbs - Buttermilk dressing - Blue cheese dressing - Creamy Caesar dressing Each dressing brings its own flavor, so feel free to experiment! Yes, you can make this salad in advance! Here are some best practices: - Prepare the pasta and veggies a day ahead. - Mix the dressing but keep it separate until serving. - Combine everything just before serving for the best taste. This salad can be healthy depending on your choices. Here’s a quick breakdown: - It has fresh veggies, which are great for vitamins. - Use whole grain pasta for more fiber. - Consider low-fat ranch dressing to cut calories. Adding cooked chicken boosts protein without too many calories. Absolutely! Adding proteins can make the salad heartier. Here are some ideas: - Grilled chicken for a classic touch - Cooked shrimp for a seafood twist - Canned beans like chickpeas for a veggie option - Tofu for a plant-based protein Feel free to mix and match! Rotini is a great choice for this salad, but other types work too. Here are some suggestions: - Penne for a fun shape - Fusilli for extra texture - Bowtie pasta for a playful look Choose any shape you love; just ensure it holds the dressing well. For the full recipe, check the section above. This blog post shared how to make a tasty Dill Pickle Ranch Pasta Salad. We covered the key ingredients like rotini pasta, dill pickles, and cherry tomatoes. I showed you step-by-step instructions for cooking and mixing the salad. Remember to pick fresh veggies and adjust seasonings to your taste. This salad is easy to customize for any diet or season. Whether you serve it fresh or store it for later, it's sure to be a hit. Enjoy creating your own version!](https://savorystride.com/wp-content/uploads/2025/07/a042b148-0d3f-4695-8010-6b8d6df37c74.webp)
Are you ready for a burst of flavor? My Dill Pickle Ranch Pasta Salad is the perfect mix of crunch
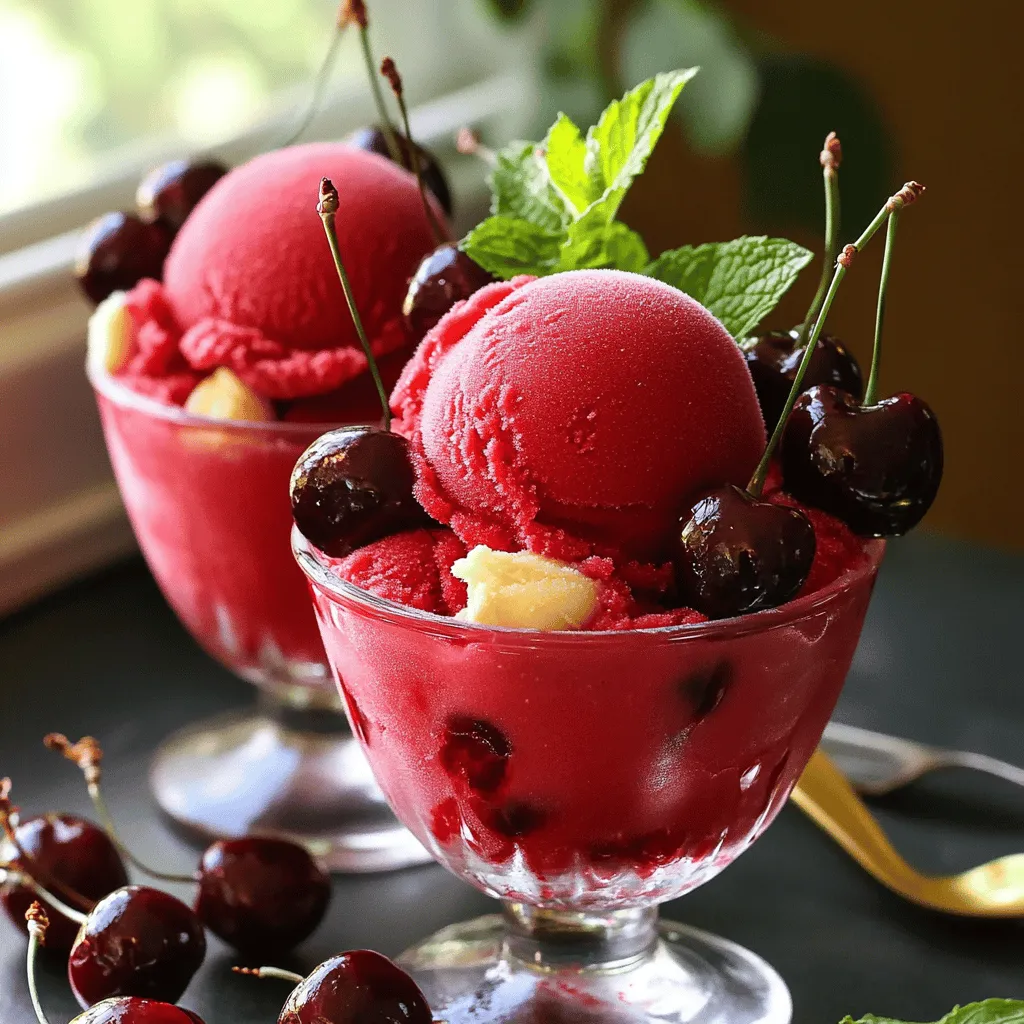
Craving a sweet, cool treat? Look no further than No Churn Cherry Cola Sorbet! This easy-to-make dessert is perfect for

Are you ready to roll? In this guide, I’ll show you how to make delightful Pickle Sushi Rolls. These fun
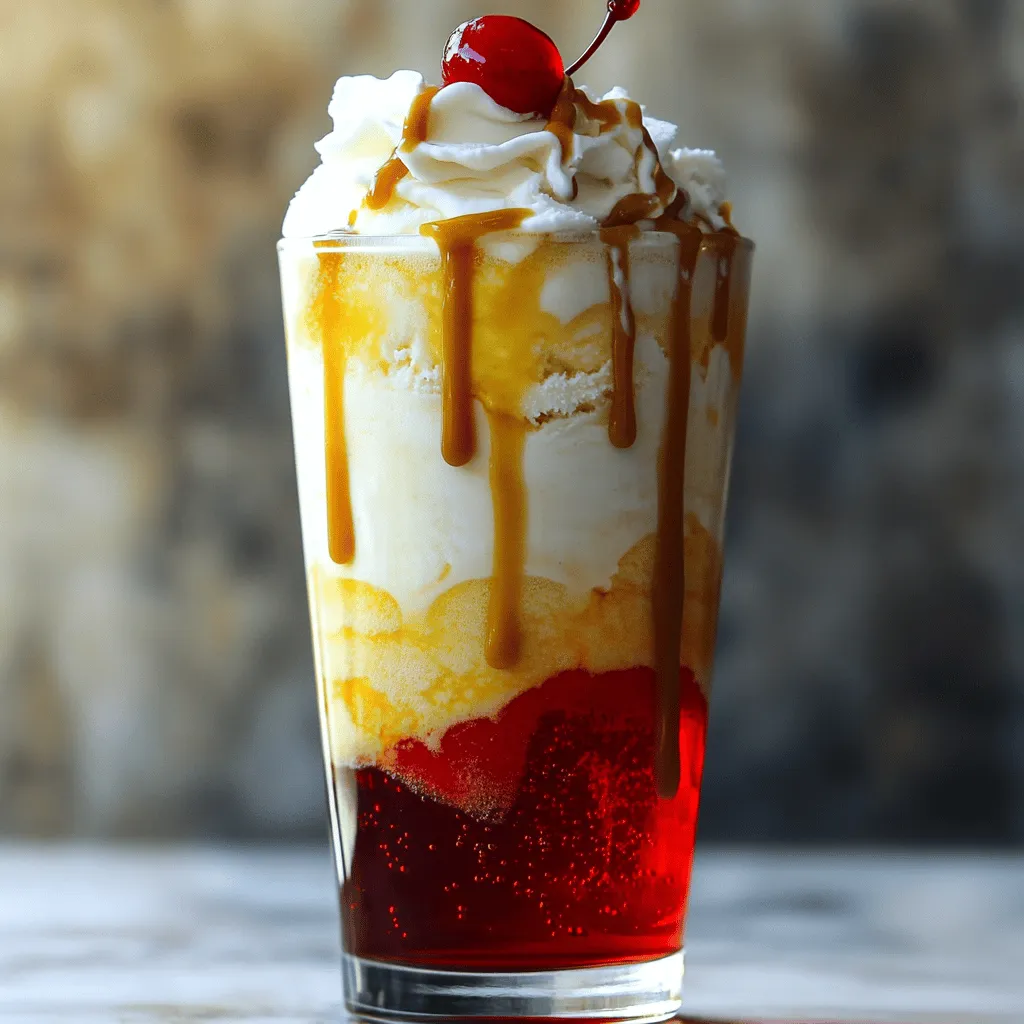
If you love sweet treats, you’ll adore the Cherry Bomb Butterbeer Float! This fun drink blends creamy vanilla ice cream,
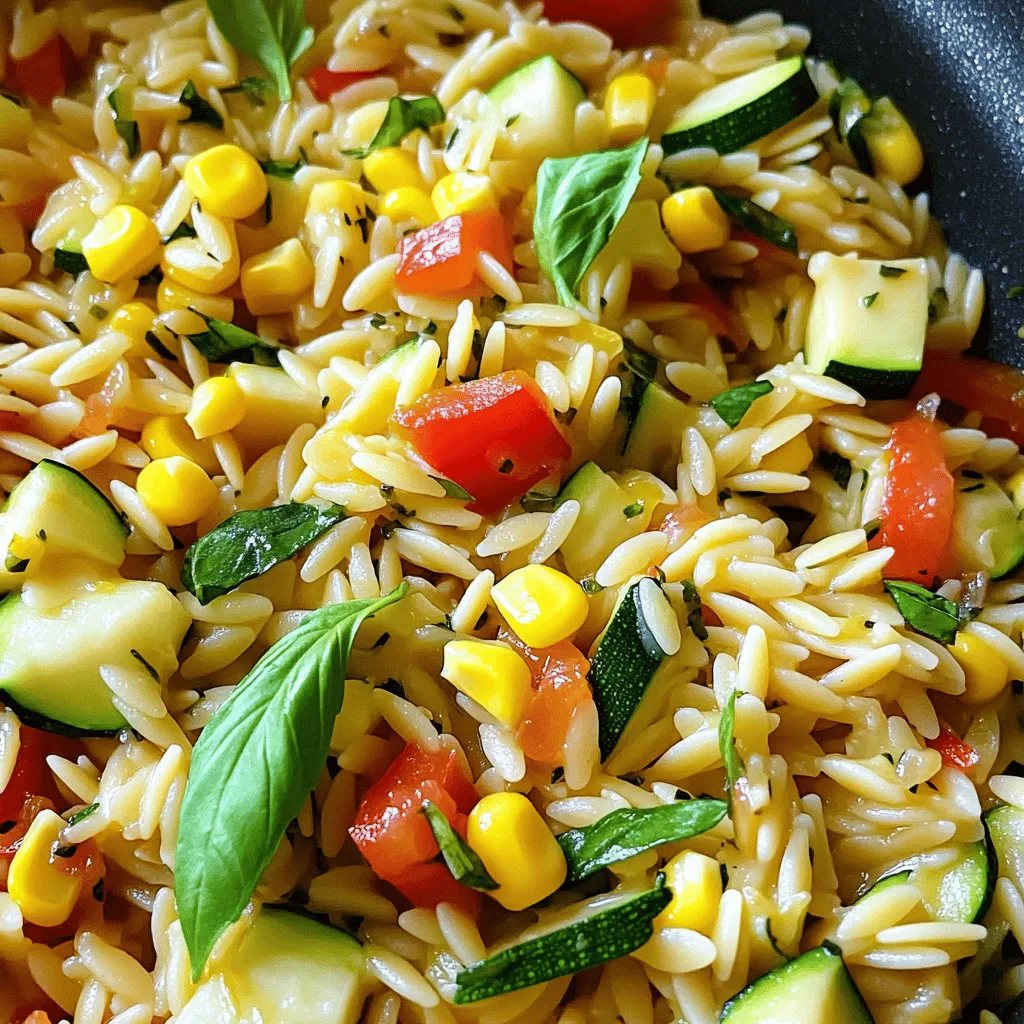
Enjoy summer’s best fresh flavors with my One Pan Summer Corn Zucchini Orzo! This dish combines sweet corn and tender
![- 1 large watermelon (seedless) - 1 cup crumbled feta cheese - 1/4 cup fresh mint leaves, chopped - Fresh basil leaves for garnish (optional) Watermelon is the star of this dish. It has a sweet, juicy flavor that cools you down. Choose a large, seedless watermelon for easy slicing. Feta cheese adds a creamy, salty touch. It pairs well with the sweet watermelon. Fresh mint enhances the dish with a bright, herbal note. You can add fresh basil for extra flavor and visual appeal. - 1/4 cup balsamic glaze - 1/4 cup olive oil - 1 teaspoon sea salt - 1/2 teaspoon black pepper Balsamic glaze drizzles over the pizza, adding a tangy sweetness. Olive oil brings richness and depth to the flavors. Sea salt enhances the taste of both the watermelon and feta. Black pepper adds a subtle kick. These ingredients work together to create a well-balanced dish. For the full recipe, check out the instructions to transform these fresh ingredients into a delightful summer treat. First, wash the watermelon well. This step helps remove dirt and germs. Next, slice the watermelon into 1-inch thick slabs. Each slab should be thick enough to hold toppings. After slicing, remove the green rind. This gives you pizza-like bases that look great. Once your slabs are ready, pat them dry. Use a paper towel to soak up extra moisture. Dry slabs grill better and won't steam. Preheat your grill to medium-high heat. When hot, place the watermelon slabs on the grill. Grill each side for about 3-4 minutes. You want to see nice grill marks. The watermelon should feel soft but not mushy. After grilling, let the watermelon slabs cool a bit. Then, sprinkle crumbled feta cheese on top. The warmth from the watermelon will slightly melt the cheese. Next, drizzle the balsamic glaze generously over the feta. This adds a sweet and tangy flavor. Sprinkle chopped mint leaves over the top for freshness. If you like, add fresh basil leaves for garnish. Finally, cut each slab into smaller pieces. Serve the pizza right away for the best taste. For full details and instructions, check the Full Recipe. To get perfect grill marks, start with a hot grill. Make sure to preheat it well. Place the watermelon slabs on the grill without crowding them. This helps them cook evenly. Grill for about 3-4 minutes on each side. You want those nice, dark marks. Keep an eye on the time. Overcooking can make the watermelon mushy. You want it soft, but still firm. Feel free to switch up the cheese. Goat cheese or ricotta can work great too. You can add toppings like sliced olives or cherry tomatoes. For a sweeter taste, try adding a drizzle of honey or agave syrup. This will balance the saltiness of the feta. You can also play with glazes. A citrus glaze adds brightness and zest to the dish. Make your watermelon pizza look fun and inviting. You can serve it on a wooden board or a colorful plate. Cut the watermelon into triangles or squares for easy eating. For extra flair, add fresh herbs like basil and mint on top. A sprinkle of pomegranate seeds can also add color and crunch. These garnishes will make your dish pop and impress your guests. {{image_2}} You can mix the watermelon feta slab pizza with other fruits. Try adding peaches or strawberries. These fruits bring a sweet twist. Their flavors blend well with the salty feta. Think about the colors too; it makes the pizza look great! You can also use fresh herbs like arugula or cilantro. They add a nice peppery taste. Each herb gives a unique flavor boost. For a vegan option, swap feta cheese for plant-based cheese. Many brands offer great taste and texture. This way, you can enjoy the pizza without dairy. If gluten is a concern, this pizza is perfect. Watermelon is naturally gluten-free. You can serve it to anyone without worry. Summer gatherings are the best time for this dish. The bright colors and fresh flavors fit right in. You can tailor ingredients for holiday themes too. For fall, think about adding roasted nuts or pumpkin seeds. They add warmth and crunch. In winter, consider a drizzle of pomegranate molasses for a festive touch. Each season offers a chance to be creative with your watermelon feta slab pizza. For the full recipe, check out the Watermelon Feta Slab Pizza section. To keep your leftovers fresh, wrap each slice in plastic wrap. Store them in the fridge. This helps prevent drying out. You can also place the slices in an airtight container. The key is to keep moisture in and air out. For watermelon, store it whole at room temperature until cut. Once you slice it, keep it in the fridge. Watermelon loses its juiciness if left out too long. If you want to reheat grilled watermelon, do it gently. Use a grill pan over low heat. This keeps the texture nice. You can also use a microwave, but be careful not to overheat. Some people prefer to eat their watermelon pizza cold. It tastes refreshing on hot days! Try both ways to see what you like best. You can keep the assembled pizza in the fridge for about three days. After that, the watermelon may start to spoil. Look for signs like mushiness or a sour smell. If you see these signs, it's best to toss it. Enjoy your Watermelon Feta Slab Pizza while it's fresh! For the full recipe, refer to [Full Recipe]. To make Watermelon Feta Slab Pizza, start by washing your watermelon. Cut it into thick slabs, about one inch each. Remove the rind to create your pizza base. Pat each slab dry to soak up extra water. Next, drizzle olive oil on top and sprinkle with sea salt and black pepper. Preheat your grill to medium-high heat. Grill each slab for 3-4 minutes on both sides. You want nice grill marks and a slight softening. After grilling, let them cool a bit. Then, add your crumbled feta cheese. Drizzle balsamic glaze on top and sprinkle with fresh mint. Optional: garnish with basil leaves. Cut into pieces and serve right away. For more details, check the Full Recipe. Yes, you can grill watermelon without a grill! Use a grill pan on your stovetop. Heat the pan over medium-high heat and follow the same grilling steps. You can also use an oven. Set it to broil and place the watermelon on a baking sheet. Broil for a few minutes on each side until you see marks. Watermelon is hydrating and low in calories. It provides vitamins A and C, and it’s full of antioxidants. Feta cheese offers protein and calcium, which are great for your bones. Together, they make a tasty snack that supports hydration and provides healthy nutrients. Serve Watermelon Feta Slab Pizza chilled or at room temperature. It tastes best fresh, so enjoy it right after making. Pair it with a light salad or grilled meats for a full meal. To choose a ripe watermelon, look for a uniform shape. It should feel heavy for its size. Check for a yellow spot where it sat on the ground; this means it ripened well. Knock on it; a hollow sound means it’s juicy and ready to eat. Watermelon Feta Slab Pizza is not vegan due to the feta cheese. To make it vegan, substitute feta with a plant-based cheese. You can also use nutritional yeast for a cheesy flavor. This way, you keep the taste while making it vegan-friendly. Watermelon Feta Slab Pizza is a fun, tasty dish. We covered all the key steps, from choosing the best ingredients to grilling techniques. Remember to customize it with different herbs or fruits for your taste. Store leftovers wisely to keep them fresh. This dish shines at summer gatherings and is easy to make. You’ll impress guests and enjoy healthy flavors. Dive into this recipe, and let your creativity flow in the kitchen!](https://savorystride.com/wp-content/uploads/2025/07/97058692-86d0-435f-ae56-b828c7c452a5.webp)
Summer is the perfect time to enjoy fresh flavors, and nothing beats a Watermelon Feta Slab Pizza! This unique dish
![- Funfetti cake mix - Large eggs - Water - Vegetable oil - Icing (store-bought or homemade) - White chocolate or candy melts - Food coloring (red, blue, yellow, green) - Sprinkles (for decoration) - Lollipop sticks When making Tie Dye Funfetti Cake Pops, start with the basics. You need a box of Funfetti cake mix. This mix gives those pops a fun, colorful flair. For the best results, use three large eggs. These eggs help bind the cake together. You also need one cup of water and half a cup of vegetable oil. These ingredients keep the cake moist. For the icing, you can use either store-bought or homemade. It adds sweetness and helps hold the cake together. White chocolate or candy melts are crucial for coating the cake pops. You will need one cup of these as well. To create the tie-dye effect, grab food coloring in red, blue, yellow, and green. Use bright colors for the best look! Don't forget the sprinkles. They add a fun touch to the finished pops. Finally, pick up some lollipop sticks to hold each cake pop. If you can't find Funfetti cake mix, use a vanilla cake mix and add rainbow sprinkles. For the icing, a simple buttercream can work great. You can also make a cream cheese icing for a fun twist. If you want to switch the chocolate, dark chocolate or milk chocolate will work too. Just remember to melt it carefully. Each option gives a different taste. Using fresh eggs is key for a fluffy texture. They make the cake rise better and taste fresh. When choosing food coloring, look for gel or paste options. These provide bright colors without making the cake runny. For the best tie-dye effect, mix the colors well but keep some swirls. This creates a fun pattern when you shape the pops. Using high-quality ingredients makes a big difference in flavor and looks. For the full recipe, check out the detailed instructions. Enjoy making these colorful treats! To start, preheat your oven to 350°F (175°C). This step is key for baking. Next, grab a large bowl. Add the Funfetti cake mix, three large eggs, one cup of water, and half a cup of vegetable oil. Mix them well until smooth. Pour this batter into a greased 9x13 inch baking pan. Bake for about 25 to 30 minutes. You know it’s done when a toothpick comes out clean. Let it cool completely before moving on. Once the cake cools, it’s time to crumble. Use your hands to break the cake into fine crumbs in a large bowl. Make sure there are no big chunks left. This will help the cake pops hold together. Next, add about half a cup of icing to the crumbs. Mix with your hands or a spatula. You want the mixture moist. If it feels dry, add more icing bit by bit until it sticks together well. Now comes the fun part! Divide the cake mixture into four bowls. Use food coloring to dye each bowl a different color: red, blue, yellow, and green. Mix each bowl until the colors are bright and even. Take a tablespoon of each color and shape them into balls. Alternate colors as you shape to create a tie-dye look. Place these on a baking sheet lined with parchment paper. Once done, chill the cake balls in the fridge for at least 30 minutes. This helps them firm up for the next steps. To achieve vibrant colors in your cake pops, use gel food coloring. Gel colors yield a brighter hue than liquid options. Start with a small amount, then mix until you get the shade you want. For marbling, swirl the colors together gently when shaping the cake balls. This creates a fun tie-dye effect without mixing them too much. Sprinkles can bring your cake pops to life! Use rainbow sprinkles for a classic look or themed sprinkles for special occasions. To apply them, sprinkle while the chocolate is still wet. This ensures they stick well. For a fancy touch, consider arranging them in a colorful display. A cake stand or a glass jar works perfectly for a fun presentation. If your cake pops don't hold their shape, it may be due to too much icing. Make sure to add just enough to bind the crumbs together. If your chocolate melts too thick, add a little vegetable oil to thin it out. This helps coat the pops smoothly. Always remember to let them chill before dipping them in chocolate for the best results. For the complete recipe, refer to the [Full Recipe]. {{image_2}} You can switch up the flavor of your Tie Dye Funfetti Cake Pops. Instead of using Funfetti cake mix, try chocolate or vanilla cake mix. These alternatives give you a whole new taste. You can also add flavorings like almond or vanilla extract to the mix. Just a drop or two will enhance the flavor and make it unique. Decorating your cake pops can go beyond just sprinkles. Try using edible glitter for a shiny, fun look. You can also use themed decorations to match a party or holiday. Think little edible stars for a space theme or hearts for a Valentine’s Day treat. These details make your cake pops more special and eye-catching. If you need gluten-free options, look for a gluten-free cake mix. Many brands offer great choices that work well in cake pops. For vegan cake pops, use a flaxseed meal as an egg substitute. You can also make vegan icing using coconut cream and powdered sugar. These swaps keep the taste and fun without the animal products. For the full recipe, check out the Tie Dye Funfetti Cake Pops section. To keep your Tie Dye Funfetti Cake Pops fresh, follow these tips: - Refrigerate: Place them in an airtight container. This keeps them moist. - Freeze: For longer storage, wrap each pop in plastic wrap. Then, put them in a freezer bag. - Avoid Sogginess: Make sure they cool completely before storing. This helps prevent moisture buildup. Cake pops can last a while if stored right. Here’s what you need to know: - Refrigerated: They stay fresh for about 1 week. - Frozen: You can keep them for up to 3 months. - Signs of Spoilage: Look for off smells or a change in color. If they feel sticky, it's time to toss them. If you want to enjoy your cake pops warm, here’s how: - Revive in the Microwave: Heat them for 10-15 seconds. Watch closely to avoid melting the chocolate. - Oven Method: Preheat your oven to 250°F (120°C). Place them on a baking sheet for about 5 minutes. This warms them without losing their shape. To make Tie Dye Funfetti Cake Pops, start by baking the cake. Preheat your oven to 350°F. Mix the Funfetti cake mix, eggs, water, and oil in a bowl. Pour the mix into a greased pan and bake for 25-30 minutes. Let it cool down. Next, crumble the cooled cake into fine pieces. Mix in half of the icing until it feels moist. Divide the cake mix into four bowls. Add food coloring to each bowl to create bright colors. Then, scoop small amounts of each color and roll them into balls. Chill these balls for at least 30 minutes. Melt the white chocolate. Dip lollipop sticks into the chocolate and insert them into each cake ball. Finally, dip each ball into the melted chocolate and coat with sprinkles. Let them set upright until firm. For the full recipe, see the details above. Yes, you can use different cake flavors for cake pops. Any cake mix works well. Vanilla, chocolate, or lemon flavors are great alternatives. Just keep in mind that the taste and color of your pops will change. Using a flavored cake mix adds variety. You can also mix in extracts, like vanilla or almond, for a unique twist. The key is to ensure the cake is moist enough to bind with the icing. To melt chocolate, you can use a microwave or a double boiler. For the microwave, place chocolate in a bowl. Heat it in short bursts, stirring in between until smooth. This method is fast and easy. For a double boiler, fill a pot with water and heat it. Place a heat-safe bowl over the pot, making sure it doesn’t touch the water. Add chocolate to the bowl and stir until melted. Both methods work well. Just be careful not to overheat the chocolate, as it can burn. In this blog post, we explored how to make Tie-Dye Funfetti Cake Pops. We covered the ingredients needed, from cake mix to colorful toppings. You learned tips for getting the best texture and vibrant colors. I shared step-by-step instructions for baking and decorating these tasty treats. Remember to experiment with flavors and decorating ideas. Cake pops are fun, flavorful, and versatile, making them perfect for any occasion. Enjoy your cake pops and let your creativity shine!](https://savorystride.com/wp-content/uploads/2025/07/83373fa8-848b-4df7-80a1-d15ce22469bd.webp)
Get ready for a colorful baking adventure with Tie Dye Funfetti Cake Pops! These vibrant treats are not just fun
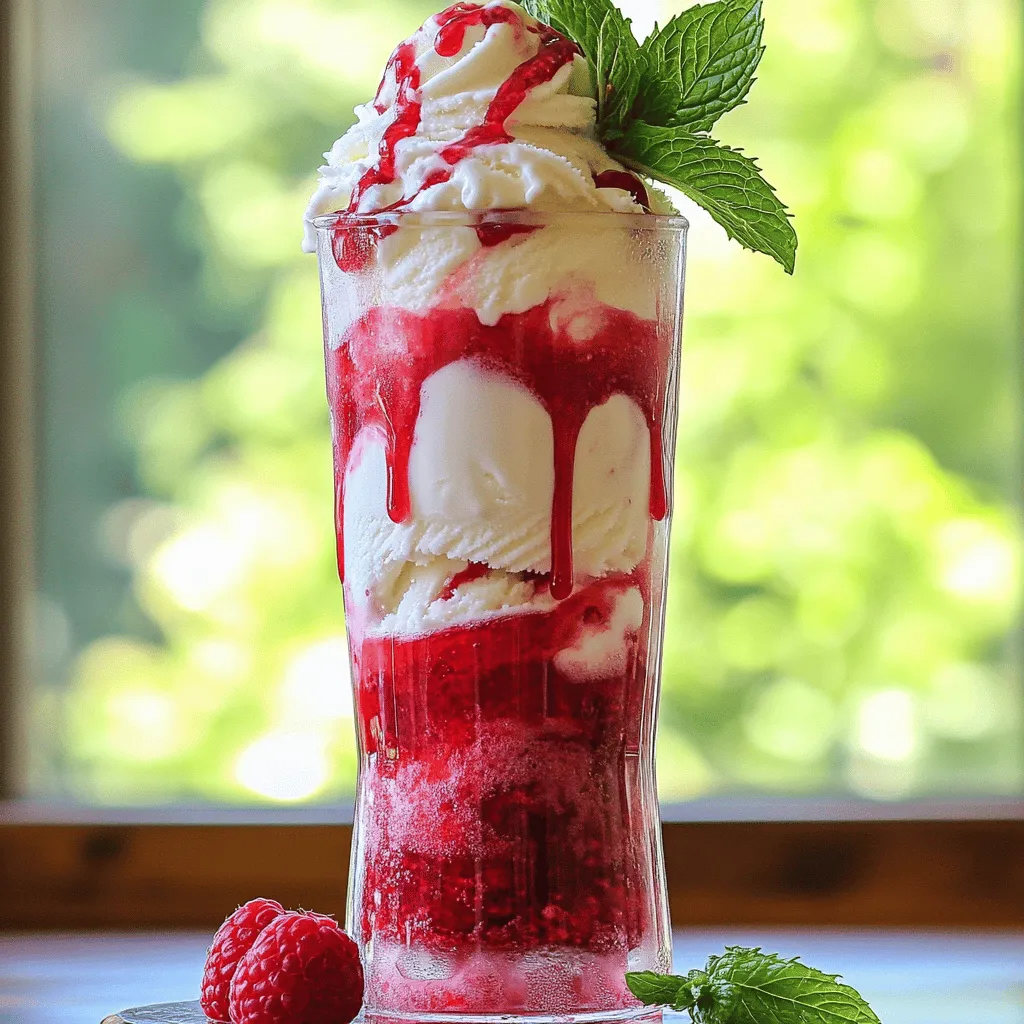
Get ready to enjoy a refreshing treat: the Sparkling Raspberry Cream Soda Float! This delightful recipe combines fresh raspberries, fizzy
