Craving a treat that’s both easy and delicious? You’re in the right place! These No Bake Oreo Cheesecake Cups are perfect for any occasion. With just a few simple ingredients, you’ll whip up a sweet delight that impresses. Plus, you can customize it with your favorite toppings! Let’s dive into the creamy goodness and get started on this fun dessert adventure together.
Ingredients
Full Ingredients List
To make No Bake Oreo Cheesecake Cups, you need:
- 16 Oreo cookies, crushed
- 4 tablespoons unsalted butter, melted
- 1 (8 oz) package cream cheese, softened
- 1 cup powdered sugar
- 1 teaspoon vanilla extract
- 1 cup heavy whipping cream
- 1 cup mini Oreo cookies for topping
These ingredients come together to create a rich and creamy dessert.
Substitutions and Alternatives
You can swap some ingredients if needed. For a lighter option, use low-fat cream cheese. If you prefer less sugar, reduce the powdered sugar to taste. You can use dairy-free cream cheese if you want a vegan treat. For a gluten-free version, look for gluten-free Oreo cookies.
Recommended Tools and Equipment
Having the right tools makes the process easy. You will need:
- Medium mixing bowls
- Electric mixer or hand mixer
- Measuring cups and spoons
- Small cups or glasses for serving
- A spoon for packing the crust
These tools help you mix, measure, and serve your delicious cheesecake cups with ease.
Step-by-Step Instructions
Preparation of the Oreo Crust
To start, crush 16 Oreo cookies in a medium bowl. You can use a rolling pin or your hands to crush them. Next, add 4 tablespoons of melted unsalted butter. Mix well until the cookies look shiny. This step is key for a tasty crust. Take about 2 tablespoons of this mixture and press it into the bottom of each cup. Use the back of a spoon for a tight pack.
Making the Cheesecake Filling
In a clean bowl, beat 1 (8 oz) package of softened cream cheese. Use a hand mixer until it is smooth. Then, gradually mix in 1 cup of powdered sugar and 1 teaspoon of vanilla extract. Keep beating until there are no lumps. In another bowl, whip 1 cup of heavy cream until stiff peaks form. Fold the whipped cream into the cream cheese mix gently. This makes your filling light and fluffy.
Assembling the Cheesecake Cups
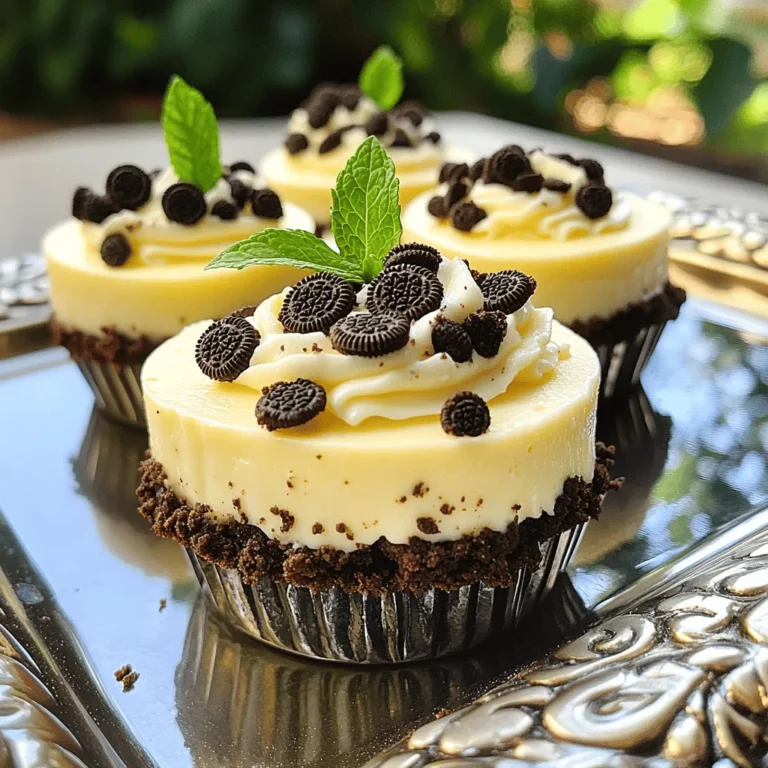
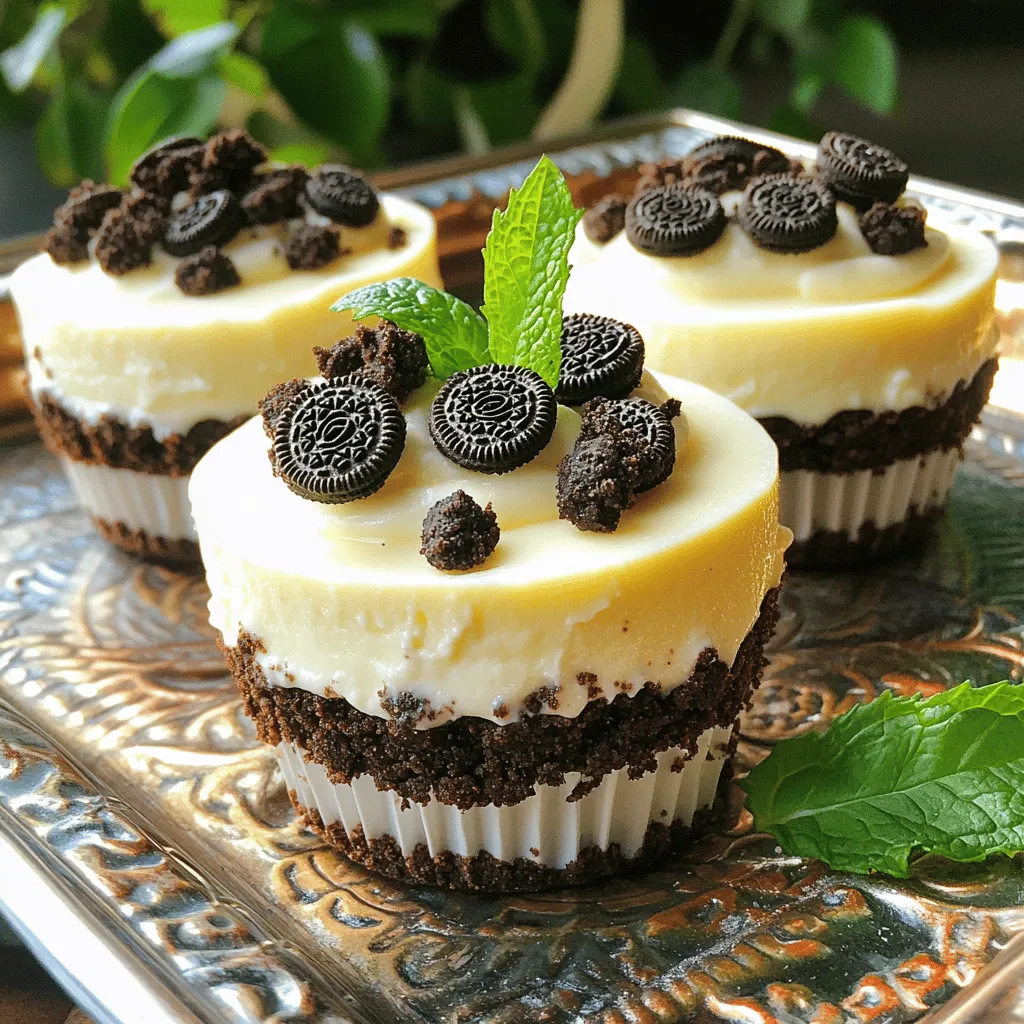
Now it’s time to layer! Spoon the cheesecake filling into each cup. Fill them to the top over the Oreo crust. For a fun touch, crumble some mini Oreo cookies on top for decoration. Finally, refrigerate the cups for at least 2 hours. This helps the flavors blend and sets the cheesecake. Enjoy your easy and delicious treat!
Tips & Tricks
How to Achieve the Best Texture
To get a smooth and fluffy texture, beat the cream cheese well. Use a hand mixer to whip the cream cheese until it is creamy. This helps avoid lumps. When you whip the heavy cream, make sure it reaches stiff peaks. This adds air and lightness to your cheesecake. Folding the whipped cream into the cream cheese mixture is key. Be gentle so you keep the air in the mix. This will give you a soft and creamy filling.
Serving Suggestions and Presentation Ideas
For a stunning presentation, serve your cheesecake cups on a pretty tray. You can add a small mint leaf on top of each cup for a fresh touch. This adds color and makes it look fancy. You can also layer the chocolate syrup or caramel sauce on top for extra flavor. Consider using clear cups so guests can see the layers inside. This makes each cup look even more tempting.
Troubleshooting Common Issues
If your cheesecake filling is too runny, it might be due to under-whipping the cream. Make sure you whip the cream until stiff peaks form. If you find lumps in the cream cheese, it may not have been softened enough. Always let it sit at room temperature before mixing. If your crust crumbles too easily, try adding a bit more melted butter. This helps the cookies stick together better. If all else fails, don’t worry! It will still taste great.
Variations
Flavor Variations
You can make these no-bake Oreo cheesecake cups more fun by adding fruit. Berries like strawberries or raspberries pair well with the rich cream. Just mash them up a bit and mix them into the cream cheese filling. You can also layer some fruit at the bottom of the cups before adding the filling for a colorful surprise. Try using banana slices for a creamy twist, or even add a splash of orange zest for a citrus kick.
Dietary Modifications
For those who need vegan options, you can easily swap some ingredients. Use a vegan cream cheese in place of regular cream cheese. Instead of heavy cream, you can use coconut cream for that rich texture. For the crust, replace the butter with vegan butter or coconut oil. The Oreos are usually vegan, but check the packaging to be sure. This way, everyone can enjoy the treat!
Toppings and Garnishes
Toppings make these cups even more special. You can sprinkle crushed Oreos on top for extra crunch. Mini chocolate chips or crushed nuts add a nice touch, too. For a fresh look, add a mint leaf or a slice of fresh fruit on top. If you want a little chocolate flair, drizzle some chocolate sauce over the cups right before serving. These little details make your dessert not just tasty but also eye-catching!
Storage Info
Best Ways to Store the Cheesecake Cups
To keep your No Bake Oreo Cheesecake Cups fresh, store them in the fridge. Use a tight lid to cover each cup. This helps keep them cool and safe from odors. If you plan to eat them later, avoid adding toppings until serving.
Shelf Life and Freezing Options
These cheesecake cups last about 3 to 4 days in the fridge. If you want to freeze them, place the cups in a safe container. They can stay in the freezer for up to a month. When you’re ready, let them thaw in the fridge overnight before eating.
Reheating or Refreshing Instructions
There’s no need to heat these cheesecake cups. They taste best cold. If they seem a bit soft after freezing, just chill them longer in the fridge. You can add whipped cream or fresh toppings to refresh their look and taste.
FAQs
Can I make this recipe ahead of time?
Yes, you can make these Oreo cheesecake cups ahead of time. They taste even better after chilling. You can prepare the cups up to 24 hours in advance. Just store them in the fridge until you are ready to serve. This makes them perfect for parties or gatherings.
How can I make these cheesecake cups more chocolaty?
To boost the chocolate flavor, you can add cocoa powder. Mix in about 2 tablespoons of unsweetened cocoa powder with the cream cheese. You can also use chocolate pudding mix for a richer taste. Another option is to drizzle melted chocolate on top before serving.
What can I use instead of heavy cream?
If you want a lighter option, use whipped topping instead of heavy cream. You can also use coconut cream as a dairy-free choice. Just chill a can of coconut milk overnight. Then, scoop out the solid part and whip it until fluffy. This will give you a creamy texture without heavy cream.
In this blog post, we covered how to make delicious cheesecake cups. I shared the ingredients you’ll need, plus helpful substitutions and tools. You learned step-by-step instructions, from the Oreo crust to the cheesecake filling. I offered tips for the best texture and ideas for serving. We explored fun flavor variations and ways to store your treats.
These cheesecake cups are simple and tasty. You can adjust them for your needs and enjoy them anytime. Get creative and make this recipe your own.

