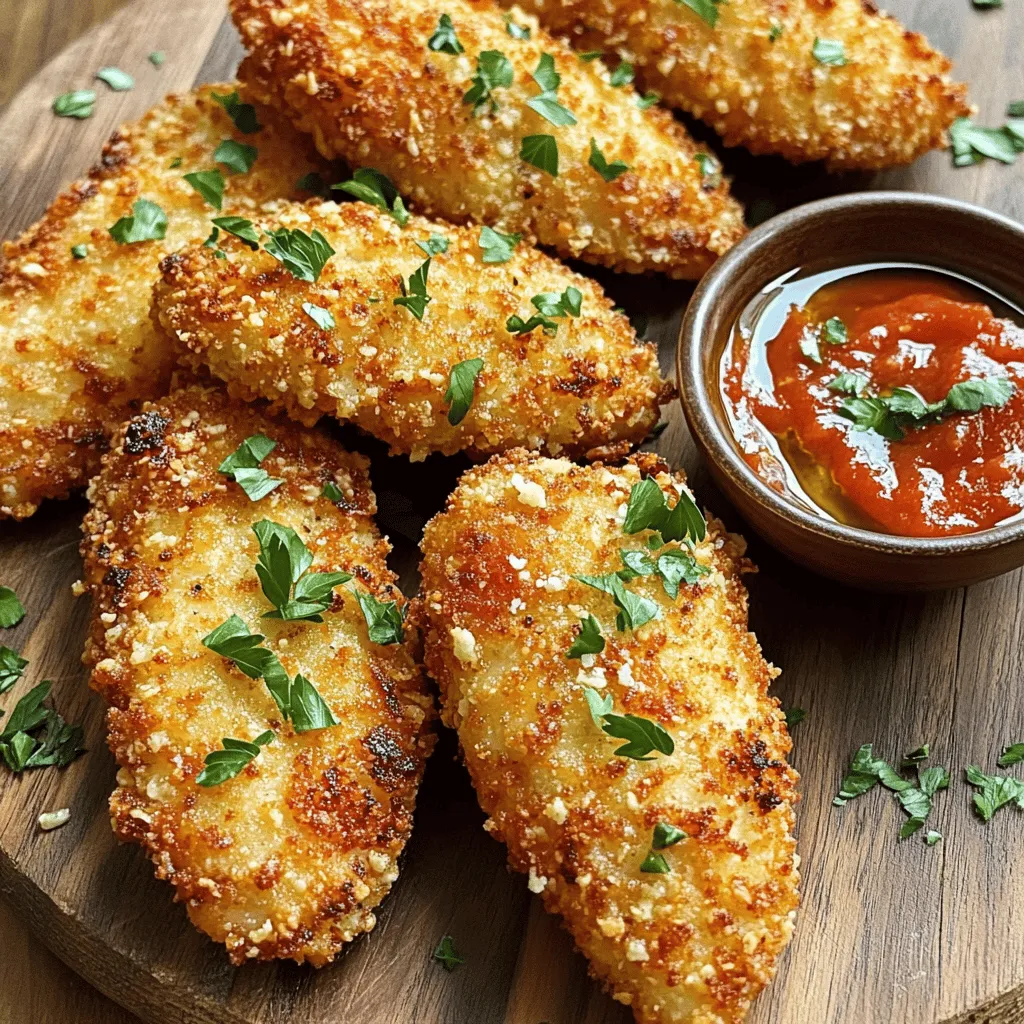
If you crave a meal that’s both easy to make and packed with flavor, you’ve found it! These Garlic Parmesan Chicken Tenders are crispy on the outside and juicy inside. With simple ingredients and a few easy steps, you can whip up this tasty dish in no time. Dive into this guide to learn how to treat your taste buds right, impress your loved ones, and make mealtime a delight!
Ingredients
Here’s a simple list of what you need for Garlic Parmesan Chicken Tenders:
– 1 lb chicken tenderloins
– 1 cup all-purpose flour
– 2 large eggs
– 1 cup breadcrumbs (preferably panko)
– 1 cup grated Parmesan cheese
– 4 cloves garlic, minced
– 1 teaspoon paprika
– 1 teaspoon dried oregano
– 1 teaspoon salt
– ½ teaspoon black pepper
– ½ teaspoon crushed red pepper flakes (optional)
– ½ cup olive oil
– Fresh parsley, chopped (for garnish)
These ingredients work together to create juicy chicken tenders with a crispy crust. The panko breadcrumbs add a lovely crunch. The mix of garlic and Parmesan brings rich flavor. You also get a nice kick from the crushed red pepper if you choose to add it.
For the best taste, use fresh garlic. It makes a big difference in flavor. If you want to make this meal healthier, consider using whole wheat breadcrumbs or a gluten-free option. You can even swap out the tenderloins for chicken breasts if that’s what you have on hand.
This recipe is flexible and allows you to adjust it to your liking.
Step-by-Step Instructions
Preparation Steps
– Preheat your oven to 425°F (220°C).
– Line a baking sheet with parchment paper for easy cleanup.
– In a shallow dish, mix flour, paprika, salt, black pepper, and oregano.
– In another bowl, whisk the eggs until smooth.
– Get a third dish and mix breadcrumbs, minced garlic, and Parmesan cheese.
Coating the Chicken
– Start the dipping process. First, coat each chicken tender in the flour mix.
– Shake off any extra flour before moving to the next step.
– Next, dip the floured tender into the beaten eggs. Let excess egg drip off.
– Finally, coat the tender in the breadcrumb mix. Press gently to help it stick.
Baking Process
– Place the coated chicken tenders on the parchment-lined baking sheet.
– Drizzle olive oil over the tenders for that crispy finish.
– Bake them for 15-20 minutes. They should be golden brown and fully cooked.
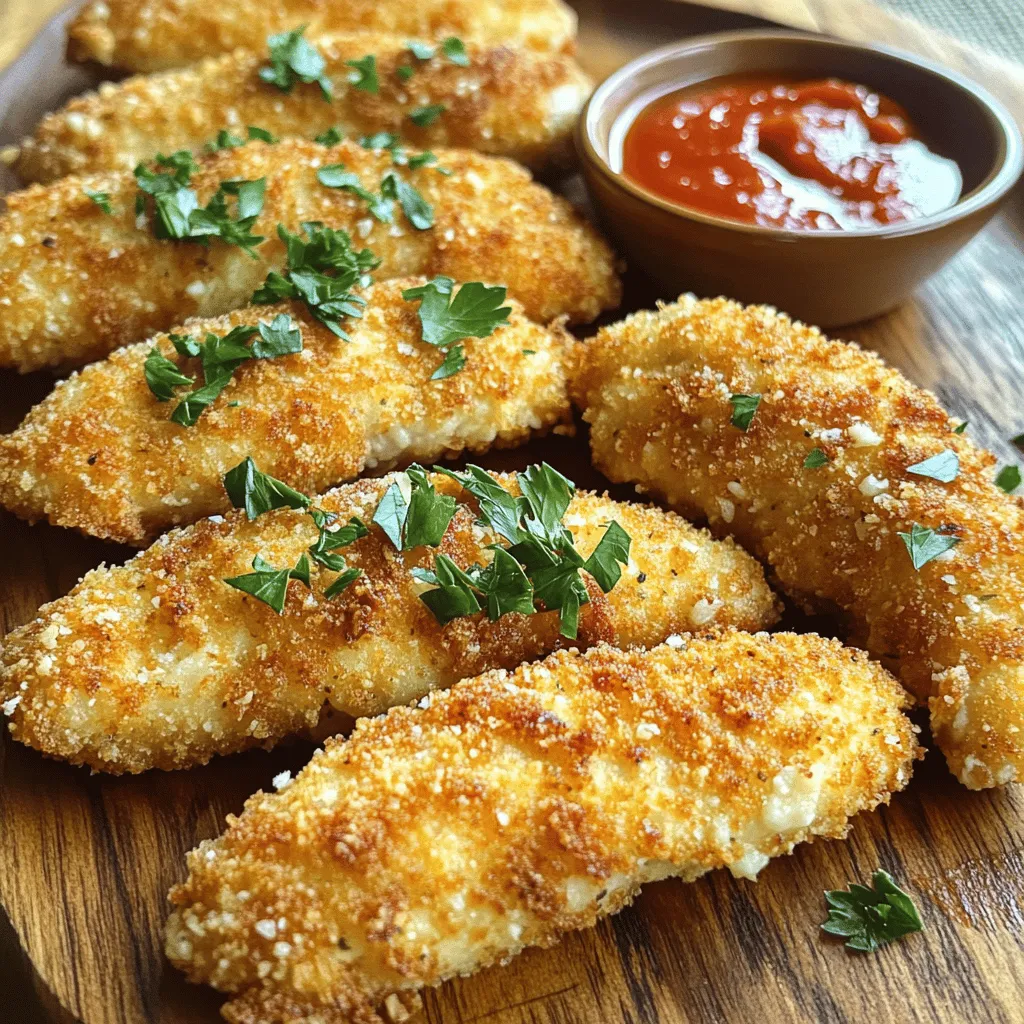
– Let them cool for a few minutes before serving. Garnish with fresh parsley.
Tips & Tricks
Cooking Tips
To keep your chicken tenders juicy, avoid overcooking. Bake them at 425°F for 15-20 minutes. Use a meat thermometer. Aim for 165°F at the center. This ensures they are safe and tender.
For the crispiest coating, use panko breadcrumbs. They add extra crunch. Also, coat the chicken well. Press the crumbs firmly onto the chicken for best results. Drizzle olive oil before baking. This helps to achieve a golden, crispy finish.
Serving Suggestions
Dips can elevate your meal. Marinara sauce pairs well with Garlic Parmesan Chicken Tenders. Garlic aioli is another great choice. Both add flavor and richness.
For sides, consider a fresh salad or roasted vegetables. A side of crispy fries or coleslaw also works well. These options balance the meal and add variety.
Healthier Options
If you want lighter options, try baking instead of frying. You can also use less oil. This keeps the dish tasty but reduces calories.
Nutritional information per serving (based on 4 servings) includes approximately:
– Calories: 350
– Protein: 30g
– Carbohydrates: 20g
– Fat: 15g
This information helps you plan your meals better.
Variations
Flavor Variations
You can change the flavor of your Garlic Parmesan Chicken Tenders by adding spices or different cheeses. For a twist, try smoked paprika or Italian seasoning. You can also use different cheeses like cheddar or mozzarella. Each adds a unique taste and texture.
If you want a spicy kick, add hot sauce to the egg wash. This gives the tenders a nice heat. You can also mix crushed red pepper flakes into the breadcrumb mix for extra spice. This way, every bite is full of flavor.
Cooking Methods
To make crispy tenders, try using an air fryer. Set it to 400°F (200°C) and cook the tenders for about 10-12 minutes. Flip them halfway through for even crispiness. This method uses less oil but gives you that crunchy texture.
If you prefer baking, keep the oven at 425°F (220°C).For a better result, you can flip them halfway through cooking. This ensures both sides get nice and crispy.
Storage Info
Storing Leftovers
To store leftovers, let the chicken tenders cool first. Place them in an airtight container. They stay fresh for about three days in the fridge. For best taste, reheat them in the oven. Set the oven to 375°F (190°C). Bake for 10-15 minutes, until they feel hot and crispy again.
Freezing Instructions
You can freeze cooked tenders for meal prep. After they cool, wrap each tender in plastic wrap. Place them in a freezer bag, removing as much air as possible. They last up to three months in the freezer. When you’re ready to eat, thaw them in the fridge overnight. Reheat them using the same oven method for the best taste. Enjoy your crispy chicken tenders anytime!
FAQs
Common Questions
Can I use chicken breasts instead of tenderloins?
Yes, you can use chicken breasts. Just cut them into strips. They will still taste great!
How long does it take to cook chicken tenders?
It takes about 15-20 minutes to cook chicken tenders at 425°F. You want them golden and cooked through.
Ingredient Substitutions
What can I use if I don’t have breadcrumbs?
You can use crushed crackers or cornflakes. They will add a nice crunch.
Can I make this recipe gluten-free?
Yes, use gluten-free flour and gluten-free breadcrumbs. This will keep the dish tasty and safe for gluten-free diets.
Meal Prep Questions
How far in advance can I prepare the tenders?
You can prepare the tenders a day ahead. Just coat them, then store in the fridge until you bake.
What’s the best way to keep them warm when serving?
Use a warm oven set to low heat. You can also cover them with foil to keep the heat in.
In this blog post, we explored a simple recipe for Garlic Parmesan Chicken Tenders. You learned about the key ingredients, the step-by-step process, and helpful tips for success. We also covered variations to excite your palate and storage methods to keep leftovers fresh.
In conclusion, this recipe provides a tasty and straightforward way to enjoy chicken tenders at home. With a few simple steps, you can create a meal that delights everyone at your table. Enjoy your cooking!