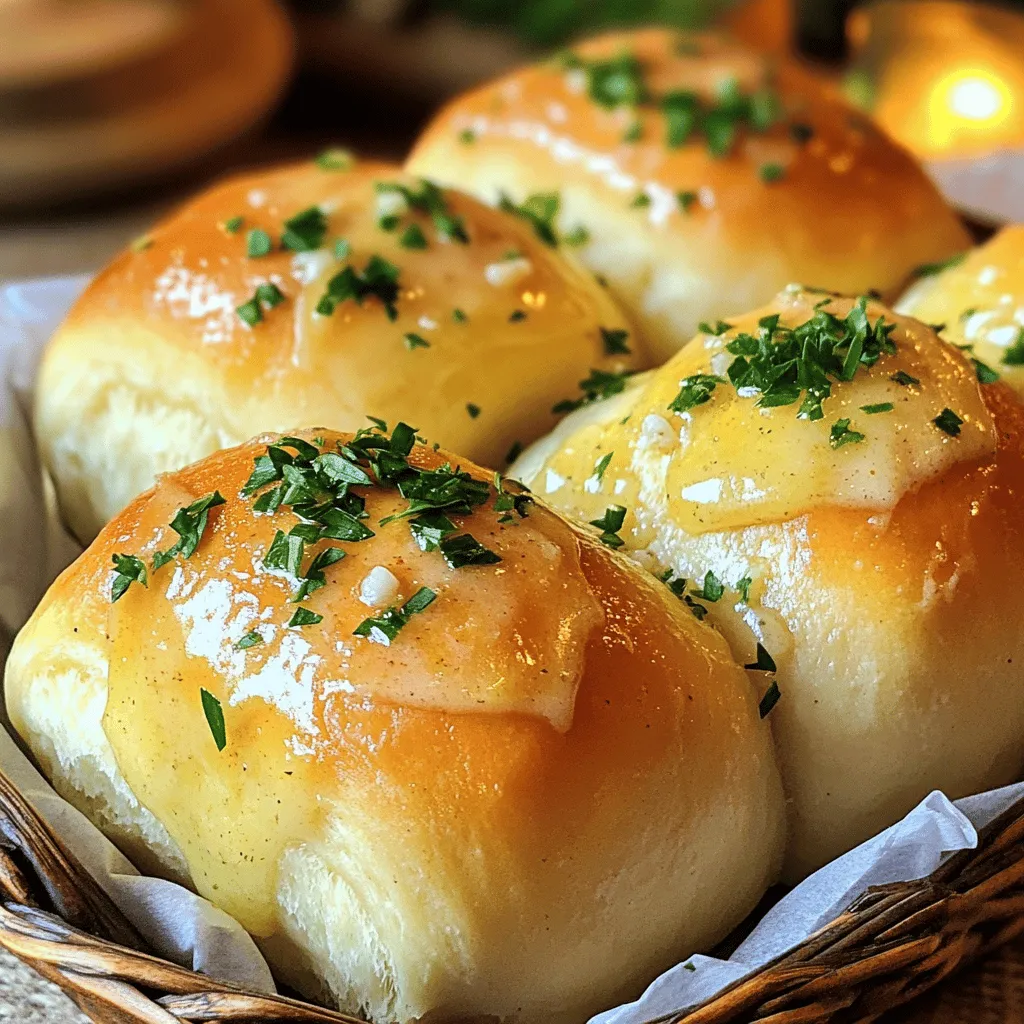
If you crave warm, fluffy bread rolls with a punch of garlic flavor, you’re in the right place! This recipe for Garlic Butter Bread Rolls is not only simple but also delivers a taste that will impress everyone. With just a few ingredients, you can create perfect rolls for any meal. Let’s dive into how to make these mouthwatering treats that will have everyone asking for seconds!
Ingredients
To make garlic butter bread rolls, you need simple ingredients. Here’s what you’ll need:
– 3 cups all-purpose flour
– 1 packet (2¼ teaspoons) instant yeast
– 1 teaspoon sugar
– 1 teaspoon salt
– 1 cup warm water (about 110°F)
– ¼ cup unsalted butter, melted
– 4 cloves garlic, minced
– 2 tablespoons fresh parsley, chopped
– 1 tablespoon additional melted butter for brushing
– Optional: pinch of chili flakes for added spice
Each ingredient plays an important role. The flour gives structure. The yeast helps the rolls rise. Sugar feeds the yeast for a good rise. Salt enhances flavor and strengthens the dough.
Warm water activates the yeast. Butter adds richness and flavor. Garlic brings in that delicious aroma. Parsley adds freshness, while chili flakes can spice things up. The options are endless!Enjoy the process and the tasty results!
Step-by-Step Instructions
Prep the Yeast Mixture
– Combine warm water, sugar, and yeast
– Let rest until frothy
Start by mixing warm water, sugar, and yeast in a large bowl. The water should feel warm to the touch, not hot. This step wakes up the yeast. Let the mixture sit for about 5 to 10 minutes. You want it to become frothy. This froth shows that the yeast is active and ready.
Make the Dough
– Add melted butter and salt
– Gradually stir in flour
Once your yeast is frothy, add melted butter and salt. Stir these in well. Next, gradually add the flour. I like to use a wooden spoon for this. Mix until a sticky dough forms. Don’t worry if it looks rough at first; it will come together.
Knead and First Rise
– Knead dough until smooth
– Place in greased bowl and let rise
Now, turn the dough onto a floured surface. Knead it for about 8 to 10 minutes. You want the dough to be smooth and elastic. Once ready, place the dough in a greased bowl. Cover it with a kitchen towel and let it rise in a warm spot. Give it about an hour to double in size.
Prepare Garlic Butter
– Sauté garlic in butter
– Mix in parsley and optional chili flakes
While the dough rises, let’s make the garlic butter. Melt some butter in a small pan over low heat. Add minced garlic and sauté for about one minute. The smell is amazing! After that, stir in chopped parsley and optional chili flakes if you like some heat.
Shape Rolls
– Punch down dough and divide
– Shape into balls and brush with garlic butter
Once your dough has risen, punch it down gently. This releases the air. Divide the dough into 12 equal pieces. Shape each piece into a ball. Place them in a greased baking dish. Brush the tops with that tasty garlic butter mix.
Second Rise and Bake
– Let rolls rise again
– Bake until golden brown
Cover the dish with a towel again. Let the rolls rise for another 30 to 40 minutes. Preheat your oven to 375°F (190°C). Once the rolls have puffed up, bake for 20 to 25 minutes. You want them to turn golden brown.
Tips & Tricks
How to Ensure Perfect Rolls
To make your rolls soft and fluffy, kneading is key. Knead the dough for about 8-10 minutes. This helps develop gluten, which gives the rolls their nice texture. You want the dough to feel smooth and elastic. If it feels sticky, sprinkle a bit more flour.
For the best rise, find a warm spot in your kitchen. An oven set to warm (but turned off) works well. Cover the dough with a towel to keep it cozy. Let it rise until it doubles in size, about one hour.
Enhancing Flavor
You can boost flavor by adding herbs and spices. Try mixing in rosemary or thyme for a savory twist. For a kick, a pinch of chili flakes adds nice heat.
Cheese lovers can sprinkle shredded mozzarella or parmesan on top. This gives a golden crust and a cheesy interior.
Serving Suggestions
These rolls pair great with soups and salads. They add warmth and comfort to meals. Serve them with a bowl of tomato soup or a fresh green salad for a perfect match.
For a beautiful display, place the rolls in a rustic bread basket. You can garnish with fresh parsley on top. This adds color and makes your dish pop!

Variations
Herb-Infused Versions
You can elevate your garlic butter rolls with fresh herbs. Try mixing in rosemary, thyme, or oregano. These herbs add a fresh taste and make your rolls unique. You can also combine different herbs for a more complex flavor. A blend of parsley and basil works well too. Just chop them finely and add them to the dough or garlic butter.
Sweet Twists
If you want a sweet version, you can mix in some cinnamon or sugar. Adding a teaspoon of cinnamon to the dough gives a warm, cozy flavor. You might also sprinkle sugar on top before baking for a sweet crust. Try topping the rolls with a glaze made from powdered sugar and milk after baking. This adds a fun twist to your rolls.
Gluten-Free Options
For a gluten-free version, swap all-purpose flour with a gluten-free flour blend. Look for blends that contain xanthan gum, as this helps with texture. You may need to adjust the amount of warm water depending on the blend you choose. Start with three-quarters of a cup and add more as needed. Be sure to check your baking time since gluten-free rolls may bake faster.
Storage Info
Best Storage Practices
After you make your garlic butter bread rolls, you want to keep them fresh. Store leftovers in an airtight container. This keeps moisture in and prevents them from going stale. If you have a large batch, use a larger container or divide them into smaller ones.
– Use a container with a tight seal.
– Keep them at room temperature for up to 2 days.
– If you want to keep them longer, store them in the fridge. They can last up to a week in the fridge.
Freezing Instructions
Freezing garlic butter bread rolls is a smart way to save them for later. Allow the rolls to cool completely before freezing. This helps prevent ice crystals from forming. Wrap each roll tightly in plastic wrap and then in aluminum foil. This keeps out air and moisture.
– To freeze rolls:
– Cool completely.
– Wrap each roll in plastic wrap.
– Place wrapped rolls in a freezer-safe bag.
When you want to enjoy your rolls, thaw them at room temperature for a few hours. You can also warm them in the oven. Preheat the oven to 350°F (175°C) and bake them for about 10 minutes. This will make them soft and warm again.
FAQs
Can I use regular yeast instead of instant yeast?
Yes, you can use regular yeast. The main difference is in how you use it. Regular yeast needs more time to rise. You must first dissolve it in warm water with sugar. Instant yeast mixes right into the dry ingredients. It saves time.
How do I know when the dough has risen enough?
Look for a few key signs. The dough should double in size. It should feel soft and puffy. You can gently poke it with your finger. If the indentation stays, it’s ready. If it springs back, let it rise a bit longer.
What can I serve with garlic butter bread rolls?
These rolls pair well with many dishes. Try serving them with soups, like tomato or chicken noodle. They also go great with salads. You can enjoy them with pasta or alongside grilled meats. They make a perfect side for any meal.
How long do these rolls last?
These rolls stay fresh for about 2 days at room temperature. Store them in an airtight container. For longer storage, freeze them. They last up to 3 months in the freezer. To enjoy, just thaw and warm them in the oven.
You’ve learned how to make delicious garlic butter rolls from scratch. We covered the ingredients and each step, from prepping the yeast to baking the rolls. I shared tips to ensure perfect texture and flavor. Lastly, we explored variations and storage methods to keep your rolls fresh. Now, you can impress your family and friends with this tasty treat. Enjoy baking and sharing your garlic butter rolls!