Skip to content
DisclaimerTerms Of UseGDPR PolicyCookie Policy

savorystride

  • Home
  • Drinks
  • Appetizers
  • Dinner
  • Dessert
  • About
  • Contact
  • Privacy Policy
DisclaimerTerms Of UseGDPR PolicyCookie Policy

Hazel

- 1 cup all-purpose flour - 1 cup granulated sugar - 1/2 cup unsweetened cocoa powder - 1/2 teaspoon baking powder - 1/4 teaspoon salt - 1/2 cup unsalted butter, melted - 2 large eggs - 1 teaspoon vanilla extract - 1 cup chocolate chips (semi-sweet or dark) - 1 cup mini marshmallows - 1/2 cup graham cracker crumbs - Extra graham crackers for serving To make a great S'mores Brownie Skillet Dip, you need to gather the right ingredients. This dip has a rich, chocolatey base. The mini marshmallows add a sweet, gooey touch. The graham cracker crumbs give it that classic S'mores crunch. - Nuts (walnuts or pecans) - Flavored chocolate chips If you want to mix it up, add nuts or different chocolate chips. Nuts give a nice crunch. Flavored chocolate chips can add a twist to your dip. - 10-inch cast-iron skillet - Mixing bowls - Whisk To cook your dip, you’ll need a 10-inch cast-iron skillet. It helps the dip bake evenly. You will also need mixing bowls and a whisk. These tools make it easy to combine your ingredients. For the full recipe, check out the detailed directions to enjoy this treat. - Preheat your oven to 350°F (175°C). - In a large mixing bowl, sift together: - 1 cup all-purpose flour - 1 cup granulated sugar - 1/2 cup unsweetened cocoa powder - 1/2 teaspoon baking powder - 1/4 teaspoon salt - Add to the dry ingredients: - 1/2 cup unsalted butter, melted - 2 large eggs - 1 teaspoon vanilla extract - Mix until just combined. Be careful not to overmix. - Fold in: - 1 cup chocolate chips - Grease a 10-inch cast-iron skillet or an oven-safe dish. - Pour the brownie batter into the skillet, spreading it evenly. - Sprinkle on top: - 1 cup mini marshmallows - 1/2 cup graham cracker crumbs - Bake in the preheated oven for 20-25 minutes. - Look for the edges to set and the center to be slightly soft. - The marshmallows should be golden brown and puffed. Once done, remove it from the oven. Let it cool slightly before serving. You can find the full recipe in detail for extra tips! To make the best S'mores Brownie Skillet Dip, focus on two key points: mixing and baking. - Avoiding overmixing the batter: Mix just until the ingredients blend. Overmixing can make your dip tough. Aim for a smooth batter, but don’t worry about small lumps. They will bake out. - Ensuring even baking: Spread your batter evenly in the skillet. This helps it cook evenly. Check for doneness by looking for set edges and a slightly soft center. The marshmallows should puff up and turn golden. Presentation makes this dip even more fun! - Presentation tips: Drizzle melted chocolate on top for a fancy touch. Add some fresh strawberries or banana slices on the side. This adds color and flavor. - Alternative dippers besides graham crackers: Try using pretzels, sliced apples, or cookies. Each dipper gives a new taste and texture to enjoy with the brownie dip. You can make this dip even better with simple add-ins. - Adding a drizzle of melted chocolate: This extra drizzle not only looks great but boosts the chocolate flavor. It makes each bite richer. - Using flavored marshmallows: Instead of plain marshmallows, try chocolate or vanilla-flavored ones. They add a fun twist and enhance the overall flavor. For a detailed guide on making this delightful treat, check the Full Recipe. Enjoy your dip! {{image_2}} You can switch up the flavors of your S'mores Brownie Skillet Dip for fun. - Peanut butter version: Add half a cup of creamy peanut butter to the batter. This gives a nutty twist to the sweet chocolate base. It pairs well with the marshmallows. - Mint chocolate variation: Swap in mint-flavored chocolate chips instead of regular. This creates a refreshing minty taste. It’s perfect for those who love mint and chocolate together. You can easily change the recipe to fit different diets. - Gluten-free alternative: Use gluten-free flour instead of regular flour. This allows everyone to enjoy the dip without worry. Just make sure to check the labels on the other ingredients to ensure they are gluten-free. - Vegan substitutions: Replace eggs with flax eggs. Mix one tablespoon of ground flaxseed with three tablespoons of water for each egg. You can also use vegan butter instead of regular butter. This makes the dip friendly for vegan diets. You might need to change the recipe based on your crowd. - Scaling the recipe for small gatherings: If you have fewer guests, cut the recipe in half. This still gives everyone a tasty treat without too much leftover. - Making single-serving portions: Use small oven-safe ramekins instead of a skillet. This way, each person gets their own individual dip. It’s fun and makes serving easy. For the full recipe, check out the previous section. Enjoy your creative twists on this fun dessert! To store leftovers, let the dip cool. Transfer it to an airtight container. Keep it in the fridge for up to three days. When you want to enjoy it again, just reheat it. You can freeze the dip for future treats. Use a freezer-safe container. It can last up to two months in the freezer. To reheat, thaw it in the fridge overnight. Warm it in the oven at 350°F (175°C) until heated through. Look for signs of spoilage to ensure safety. If the dip has an off smell or color, discard it. Store it well to keep it fresh. Always use clean utensils when serving. This helps prevent contamination. Enjoy your S'mores Brownie Skillet Dip fresh for the best taste! Yes, you can prepare this dip ahead of time. Mix the dry and wet ingredients separately. Store them in the fridge for a few hours or overnight. When you are ready to bake, combine them and follow the rest of the steps. This saves time and keeps the dip fresh. If you don't have graham crackers, try these options: - Pretzel sticks for a salty crunch - Fruit slices like apples or strawberries - Biscotti for a sweet dipper - Vanilla wafers for a smooth taste These choices add fun flavors and textures to your dip. Yes, you can turn this dip into brownies! Just pour the batter into a greased baking pan. Bake it at 350°F (175°C) for 25-30 minutes. Check the center with a toothpick; it should come out clean. Enjoy solid brownies that are just as tasty! For the full recipe, refer to the section above. This post shared how to make a fun S'mores Brownie Skillet Dip. You learned about the ingredients, tools, and simple steps needed to prepare and bake it. Tips and tricks helped you enhance the flavor and presentation. You can try different flavors or adjust it to fit dietary needs. This treat is tasty and perfect for gatherings. With the right care, leftovers can last too. Enjoy making this easy and delicious recipe for your next get-together!

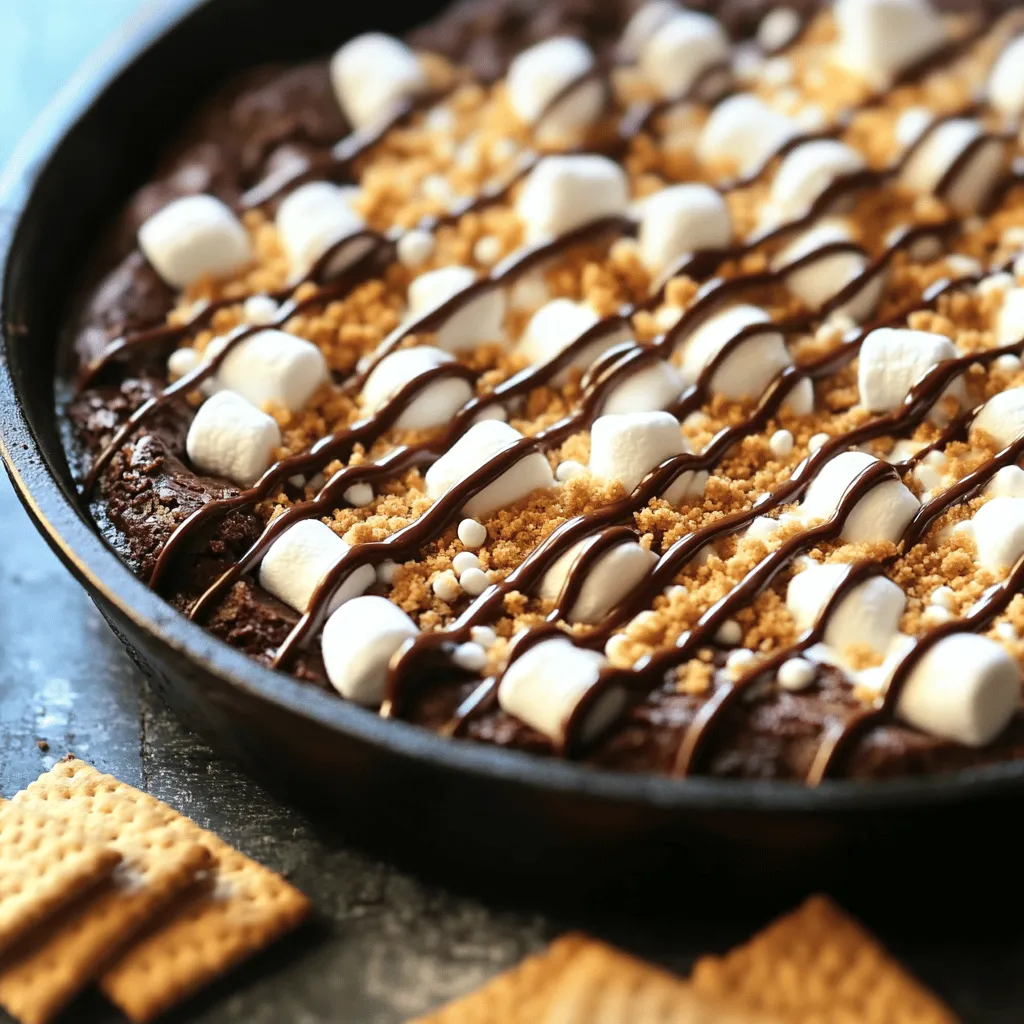
S’mores Brownie Skillet Dip Irresistible and Easy Treat

Craving a dessert that combines gooey chocolate, melted marshmallows, and crunchy graham crackers? Look no further! My S’mores Brownie Skillet

To make Slow Cooker Butternut Squash Mac and Cheese, gather these items: - 1 medium butternut squash, peeled and cubed - 2 cups elbow macaroni - 4 cups vegetable broth - 1 cup milk (dairy or non-dairy) - 2 cups shredded sharp cheddar cheese - 1 cup shredded mozzarella cheese - 1 teaspoon garlic powder - 1 teaspoon onion powder - 1 teaspoon Dijon mustard - Salt and pepper to taste - ½ teaspoon smoked paprika (optional) - Fresh parsley for garnish You can boost flavor and nutrition with these add-ins: - Cooked spinach for added greens - Crispy bacon for a savory crunch - Jalapeños for a spicy kick - Nutritional yeast for a cheesy flavor without dairy Choosing the best ingredients helps your dish shine. Here are my tips: - Butternut Squash: Look for a firm squash with smooth skin. Avoid soft spots. - Cheese: Go for high-quality cheeses for the best melt. Sharp cheddar adds great flavor. - Pasta: Use elbow macaroni for classic texture, but small shells work too. - Broth: Choose low-sodium vegetable broth for a balanced taste. - Milk: Use whole milk for creaminess, or opt for almond milk for a lighter option. These choices make your mac and cheese not just tasty but also comforting. For the complete cooking process, check out the Full Recipe. First, peel the butternut squash. I find using a sharp peeler works best. After peeling, cut the squash in half. Remove the seeds with a spoon. Then, chop the squash into small cubes. Aim for about one-inch pieces to ensure even cooking. This size helps the squash blend well later. Next, place the cubed butternut squash in your slow cooker. Add the elbow macaroni and pour in the vegetable broth. Then, add the milk, garlic powder, onion powder, and Dijon mustard. Don’t forget to season with salt and pepper. Stir everything until it mixes well. Cover the slow cooker and cook on high for 2.5 to 3 hours. If you prefer low heat, cook for 4 to 5 hours. Check that the squash is tender and the pasta is cooked through. Once your dish is cooked, grab an immersion blender. Blend the mixture right in the slow cooker until smooth. If you like some texture, you can mash a few squash cubes with a fork. After blending, stir in the shredded cheddar and mozzarella. Mix until the cheese melts and creates a creamy sauce. Adjust your seasoning with more salt and pepper, if needed. For a smoky twist, sprinkle smoked paprika over the top. Serve warm, and add fresh parsley for a nice touch. You can find the Full Recipe for more details and serving suggestions. To get that perfect creamy texture in your butternut squash mac and cheese, use the right cheeses. I recommend a mix of sharp cheddar and mozzarella. The cheddar gives a rich flavor, while mozzarella adds that gooey stretch. When mixing in the cheeses, make sure the slow cooker is still warm. This helps the cheese melt more easily. Another key step is blending the butternut squash well. After cooking, I use an immersion blender right in the slow cooker. This makes everything smooth and creamy. If you like a bit of texture, mash some squash with a fork instead of blending fully. One common mistake is not cooking the pasta enough. If you leave it in too long, it may turn mushy. Keep an eye on the cooking time. I suggest checking the pasta at the lower end of the time range. If you find it’s too firm, let it cook a bit longer. Another issue is not seasoning well. Taste your dish before serving. You can easily add more salt, pepper, or spices at the end. A pinch of smoked paprika can elevate the flavor, so don't skip this step. For the best presentation, serve your mac and cheese in bowls. Garnish with fresh parsley for a pop of color. You can also sprinkle a little extra cheese on top before serving. This makes the dish look inviting. Pair it with a simple side salad for a balanced meal. If you want to make it a fun dish for kids, add a few colorful veggies on top. This makes it more appealing and adds nutrition. Enjoy your creamy butternut squash mac and cheese delight! For the full recipe, check out the earlier section. {{image_2}} You can switch up the cheese for fun. Try using gouda for a smoky touch. Pepper jack adds a nice kick. You can also mix in some cream cheese for extra creaminess. Don’t be afraid to experiment with your favorite cheeses! Want to make this dish heartier? Consider adding protein. Shredded rotisserie chicken works great. You can also stir in cooked bacon for a savory twist. For a vegetarian option, try adding chickpeas or black beans. These options will keep your meal filling and delicious. You can change flavors with the seasons. In fall, add a pinch of nutmeg or cinnamon for warmth. In spring, mix in fresh spinach or peas for color. Summer? Try adding diced tomatoes for a fresh taste. These changes keep the dish exciting and fresh! For more details, check the Full Recipe. After enjoying your Slow Cooker Butternut Squash Mac and Cheese, you might have some leftovers. To store them properly, let the dish cool down first. Use an airtight container to keep the flavors fresh. Place it in the fridge. It will stay good for about 3 to 5 days. If you think you won't eat it soon, consider freezing it. When you're ready to enjoy the leftovers, reheating is key. You can use the microwave or the stove. For the microwave, place a portion in a bowl and cover it. Heat it in short bursts, stirring often. If you use the stove, add a splash of milk while warming it. This helps keep it creamy and delicious. If you want to keep your mac and cheese for longer, freezing is a great choice. Let it cool fully before packing. Use a freezer-safe container or a freezer bag. Make sure to remove as much air as possible. It can last for 2 to 3 months in the freezer. When you’re ready to eat it, thaw it in the fridge overnight. Then, reheat as mentioned above for the best taste. This way, you can enjoy your Slow Cooker Butternut Squash Mac and Cheese whenever you want! Butternut squash gives this dish a sweet and nutty taste. It adds a creamy texture that complements the cheese. The flavor is mild, which lets the sharp cheddar shine. Overall, it makes the mac and cheese rich without being too heavy. Yes, you can use other pasta shapes. Fusilli, penne, or shells work well too. Just make sure they cook in the same time as elbow macaroni. This way, everything stays perfectly tender. Keep in mind, different shapes may change the texture but not the flavor. Absolutely! You can swap dairy milk for almond, soy, or oat milk. Use dairy-free cheese to keep it creamy and tasty. This way, you can enjoy the same rich flavor without dairy. Just adjust the seasonings to match your taste. For the full recipe, check the link. In this blog post, we covered how to make a delicious butternut squash dish. We explored the right ingredients and tips for choosing them. I shared easy steps for prepping squash, slow cooking, and blending your meal. We also discussed how to achieve a creamy texture and avoid common mistakes. Remember, feel free to change up your ingredients and try seasonal flavors. Store leftovers properly and reheat for the best taste. Enjoy experimenting and making this dish your own!

Slow Cooker Butternut Squash Mac and Cheese Delight

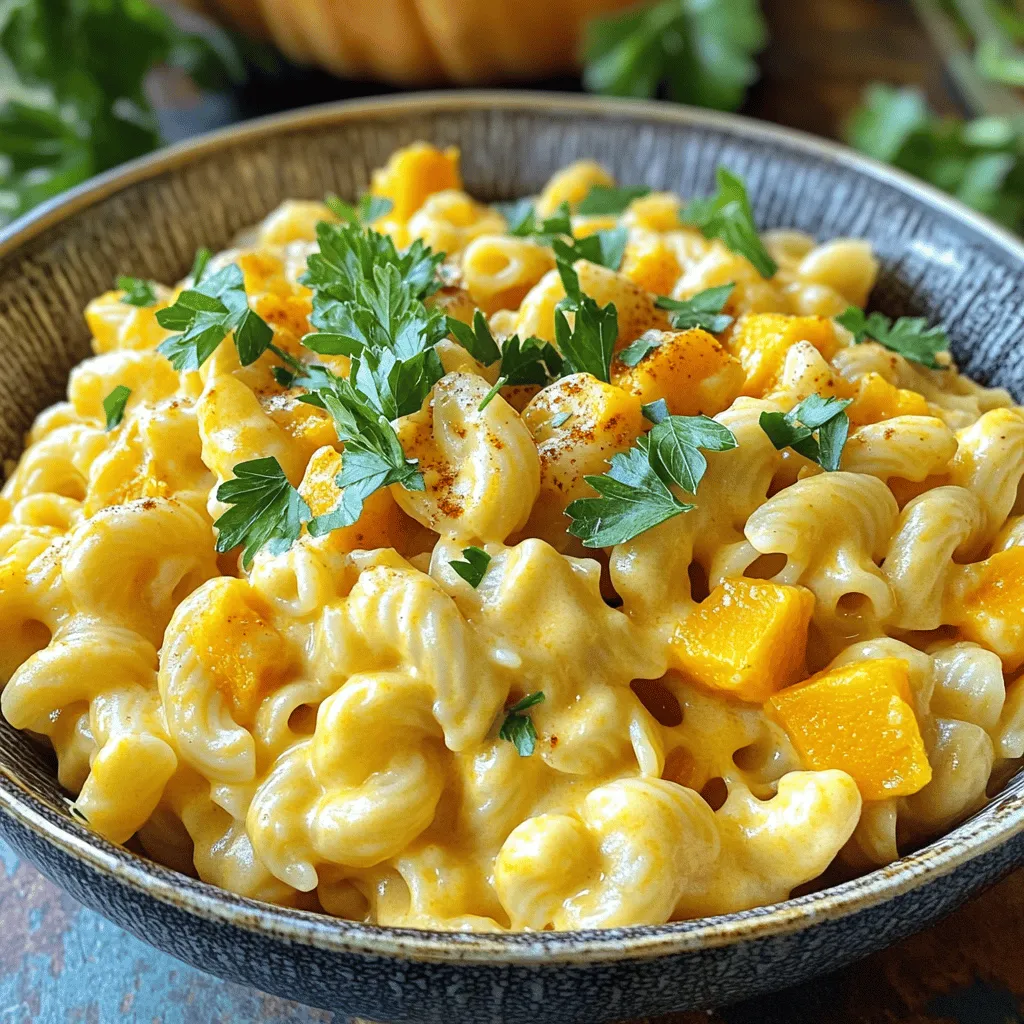
Craving a cozy, creamy dish that’s also healthy? Try my Slow Cooker Butternut Squash Mac and Cheese Delight! This recipe

To make Cinnamon Roll Apple Fritter Bread, gather these items: - 2 cups all-purpose flour - 1 tablespoon baking powder - 1/2 teaspoon salt - 1/2 cup granulated sugar - 1 teaspoon ground cinnamon - 1/2 cup unsalted butter, melted - 1 cup milk - 2 large eggs - 2 medium apples, peeled and diced (preferably Granny Smith or Honeycrisp) - 1 teaspoon vanilla extract - 1/2 cup brown sugar - 1/2 cup powdered sugar (for glaze) - 2 tablespoons milk (for glaze) Using the right amounts matters a lot. For flour, stick to 2 cups. If you want, you can use whole wheat flour for a nutty taste. Baking powder must be 1 tablespoon; this helps the bread rise. If you need a gluten-free option, use a gluten-free flour blend. For sugar, 1/2 cup granulated will sweeten well. You can swap it with coconut sugar for a different flavor. Use 1 teaspoon of ground cinnamon for that warm taste. If you love spice, consider adding nutmeg or allspice. Use 1/2 cup of unsalted butter, melted. If you're dairy-free, coconut oil works great. The milk should be 1 cup. Almond or oat milk can replace it easily. Use 2 large eggs for binding. If you're vegan, use flax eggs instead. The apples should be Granny Smith or Honeycrisp for the best flavor. For the glaze, mix 1/2 cup powdered sugar with 2 tablespoons milk. You can swap the milk with almond milk if you like. - All-purpose flour: This forms the base of the bread. It gives structure and chewiness. - Baking powder: This ingredient makes the bread rise, creating a fluffy texture. - Granulated sugar: It sweetens the bread and adds to the browning. - Ground cinnamon: This spice brings warmth and flavor, making it cozy. - Apples: They add moisture and sweetness, making every bite delightful. - Unsalted butter: This enriches the flavor and makes the bread tender. - Powdered sugar: This is used for the glaze, adding sweetness and a nice finish. Gather these ingredients, and you’re ready to create a dish that warms the heart and pleases the palate. For the full recipe, check the details above! Start by gathering all your ingredients. You need flour, baking powder, salt, sugar, cinnamon, butter, milk, eggs, apples, and vanilla. Preheat your oven to 350°F (175°C). Grease your loaf pan or use parchment paper for easy removal. Mix the dry ingredients in one bowl. This includes flour, baking powder, salt, sugar, and cinnamon. In another bowl, blend the wet ingredients. This is melted butter, milk, eggs, and vanilla. Pour the wet mix into the dry ingredients, stirring gently. You want to avoid overmixing. A few lumps are fine. Fold in the diced apples to add sweetness and texture. Layering is key for a beautiful look. Start by pouring half the batter into your loaf pan. Then sprinkle half of the brown sugar and cinnamon mixture on top. Add the second half of the batter and finish with the remaining brown sugar mix. To create a marbled effect, use a knife to swirl through the layers. Bake your bread for 50-60 minutes. A toothpick should come out clean when it’s done. This step is crucial for moist bread. The secret to a soft and fluffy texture lies in mixing. Combine wet and dry ingredients until just blended. Do not overwork the batter. The apples also help keep the bread moist. Let the bread cool for a bit before adding the glaze. Whisk together powdered sugar and milk for a smooth finish. Drizzle it over your bread for a sweet touch. Enjoy the warm, cozy flavors of your cinnamon roll apple fritter bread! For the full recipe, refer to the details above. When making Cinnamon Roll Apple Fritter Bread, avoid overmixing the batter. This can lead to dense bread. You want a light and fluffy texture. Also, don’t skip the apples; they add moisture and flavor. Use fresh apples for the best taste. Finally, make sure your oven is properly preheated. This ensures even baking. To boost the taste of your bread, try adding a pinch of nutmeg along with cinnamon. This gives it warmth and depth. You can also mix in chopped nuts like pecans or walnuts for a crunchy texture. For a sweeter touch, drizzle more glaze on top. Mixing a little vanilla into the glaze can make it extra special. Serve your Cinnamon Roll Apple Fritter Bread warm for a cozy feel. Slice it and place it on a pretty plate. Garnish with a sprinkle of cinnamon and a few apple slices for color. Pair it with coffee or tea for a delightful breakfast or snack. You can also serve it with whipped cream for a sweet treat. For more ideas, check out the Full Recipe. {{image_2}} You can add many flavors to this bread. Nuts like walnuts or pecans work well. They add a nice crunch and taste. You can also use other fruits. Try pears or berries. They bring a fresh twist to the classic recipe. Mix and match fruits for fun flavors. You can even swirl in some caramel for extra sweetness! If you need gluten-free bread, swap the all-purpose flour with a gluten-free blend. Make sure the blend has xantham gum for the right texture. For dairy-free options, use almond milk or oat milk instead of regular milk. Use a dairy-free butter substitute, and you will still enjoy this delicious bread. Presentation can make a big difference. Slice the bread and serve it on a colorful plate. Drizzle some glaze on top for a sweet touch. You can also dust it with powdered sugar for a lovely look. Try pairing it with a scoop of vanilla ice cream. This makes a cozy dessert for any gathering. For breakfast, serve it warm with butter and a sprinkle of cinnamon. You can find the Full Recipe to create this delightful treat and explore more variations! After baking, let your bread cool completely. Wrap the loaf in plastic wrap or aluminum foil. This keeps it fresh and moist. Store it at room temperature for up to three days. If you want it to last longer, place it in the fridge. Just remember, cold storage can dry it out a bit. To freeze, slice the bread first. This way, you can grab a piece anytime. Wrap each slice in plastic wrap, then place them in a freezer bag. Press out the air to prevent freezer burn. Your bread can stay fresh in the freezer for up to three months. When you're ready to enjoy it, just thaw it in the fridge overnight. To reheat, preheat your oven to 350°F (175°C). Place the desired slices on a baking sheet. Cover with foil to keep them moist. Heat for about 10-15 minutes. You can also pop a slice in the microwave for about 20-30 seconds. Just be careful not to overheat it, or it might get tough. For a touch of warmth, drizzle a bit of glaze over the top before serving. Enjoy your cozy treat! You can serve this bread warm or at room temperature. Slice it thick for a hearty bite. I love adding a drizzle of glaze on top for sweetness. A sprinkle of cinnamon adds a nice touch too. You can pair this bread with a hot cup of coffee or tea. It’s a cozy treat for breakfast or dessert. Try adding a dollop of whipped cream for extra fun! Check the bread after 50 minutes. Insert a toothpick into the center. If it comes out clean, your bread is ready! If not, give it an extra 5-10 minutes. The edges should be golden brown, and the top should look set. Don’t forget to let it cool a bit. This helps the flavors settle and makes slicing easier. Yes, you can make this bread ahead of time. Bake it and let it cool completely. Then, wrap it tightly in plastic wrap. Store it in the fridge for up to three days. You can also freeze it for up to three months. Just thaw it overnight in the fridge before serving. Reheat slices in the microwave for a warm treat. Enjoy the same delicious flavor even days later! In this blog post, I covered everything about making Cinnamon Roll Apple Fritter Bread. We explored key ingredients, step-by-step instructions, and helpful tips for perfecting your bake. I revealed common mistakes to avoid and different flavors you can try. We also discussed how to store and reheat your bread for the best taste. Remember, practice makes perfect. Enjoy baking and share this tasty treat with friends and family!

Cinnamon Roll Apple Fritter Bread Cozy and Delightful Recipe

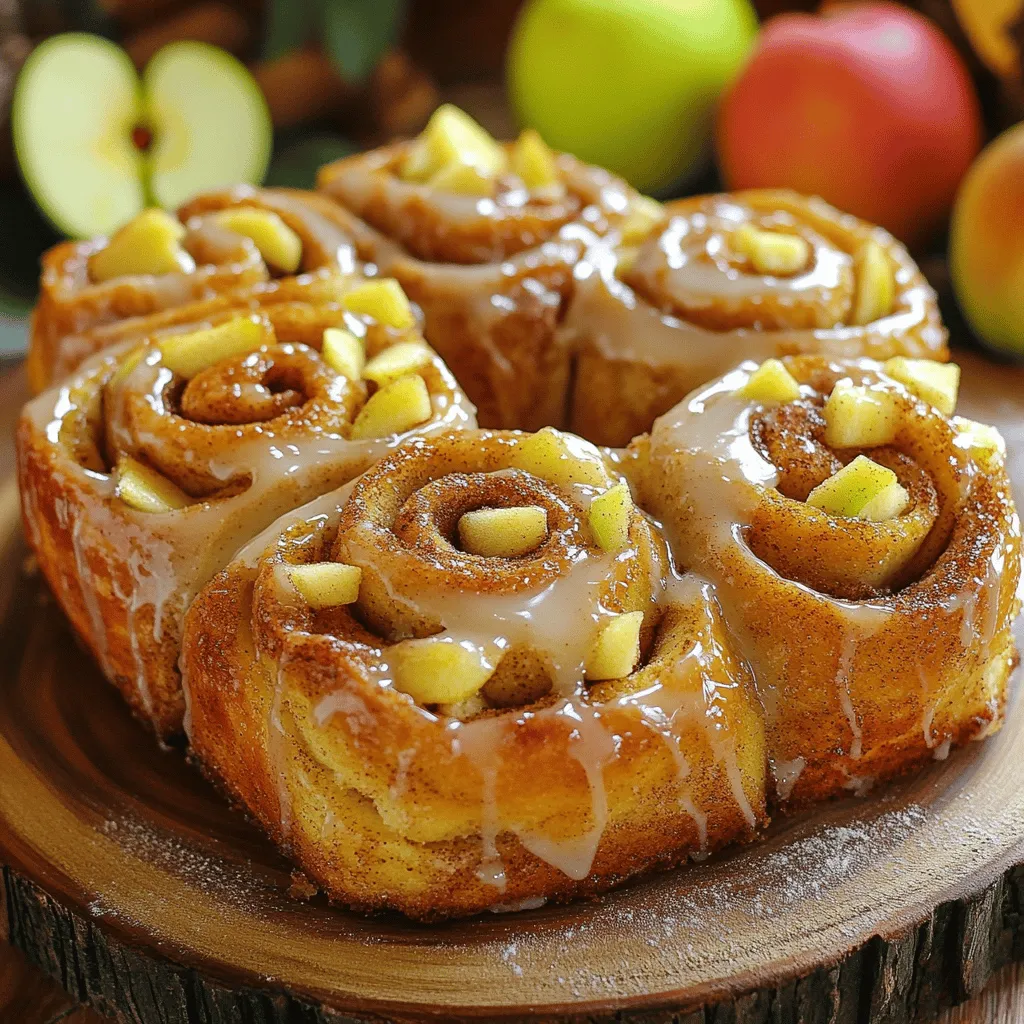
Warm, sweet, and oh-so-cozy! Today, I’ll guide you through making Cinnamon Roll Apple Fritter Bread. This dish brings the best

To make this dish, you need the following ingredients: - 4 boneless, skinless chicken thighs - 2 tablespoons olive oil - 1 teaspoon garlic powder - 1 teaspoon smoked paprika - 1 teaspoon dried thyme - Salt and pepper, to taste - 1 large sweet potato, diced - 2 cups Brussels sprouts, halved - 2 carrots, sliced - 1 red onion, cut into wedges - 1/4 cup pure maple syrup - Fresh parsley, chopped (for garnish) These ingredients give you a mix of flavors and textures. The chicken stays juicy, while the veggies get tender and sweet. You can change things up by adding some optional ingredients: - Fresh herbs like rosemary or sage - Other root vegetables such as parsnips or turnips - Add a pinch of red pepper flakes for heat - Use honey instead of maple syrup for a different sweetness These options let you personalize your dish and try new flavors. To prepare this meal, you will need: - A large oven-safe skillet or baking sheet - Mixing bowls for combining ingredients - A sharp knife for chopping veggies - Measuring spoons for accurate spice amounts - A meat thermometer to check chicken doneness Having the right tools makes cooking easier and more fun. Use these items to create a perfect one-pan meal. For the complete recipe, check out the full recipe. Start by preheating your oven to 400°F (200°C). In a large bowl, mix 2 tablespoons of olive oil, 1 teaspoon of garlic powder, 1 teaspoon of smoked paprika, and 1 teaspoon of dried thyme. Add salt and pepper to taste. Next, toss in 4 boneless, skinless chicken thighs. Make sure each piece is well coated with the spice mix. This step adds great flavor to the chicken. In another bowl, combine 1 large diced sweet potato, 2 cups of halved Brussels sprouts, 2 sliced carrots, and 1 cut red onion. Drizzle half of the 1/4 cup of pure maple syrup over the veggies, then toss them to coat. This sweet touch balances the savory chicken. Grab a large baking sheet or an oven-safe skillet. Place the seasoned chicken thighs in the center. Surround them with the mixed veggies. Make sure to spread them out evenly. This way, everything cooks well together. Drizzle the remaining maple syrup over the chicken and veggies. Ensure an even coat for maximum flavor. Now, bake the dish in your preheated oven for 25-30 minutes. The goal is for the chicken to reach an internal temperature of 165°F (75°C). The veggies should be tender. For a nice caramelization, switch the oven to broil for an extra 3-5 minutes. Watch closely to avoid burning. Once done, let the dish rest for a few minutes. Garnish with fresh parsley before serving. Enjoy your delicious One Pan Harvest Chicken and Maple Veggies! For the complete recipe, check out the Full Recipe section. To boost the flavor of your One Pan Harvest Chicken and Maple Veggies, use fresh herbs. Fresh thyme or rosemary can add a bright note. You can also marinate the chicken for a few hours. This helps the spices soak in more. Consider adding a splash of balsamic vinegar. It can add tang and depth to the dish. For a spicy kick, mix in some red pepper flakes. These tips will elevate your meal. Cook your chicken at 400°F (200°C) for best results. The chicken takes about 25-30 minutes to cook through. Always check the internal temperature. It should reach 165°F (75°C) for safety. If you use larger chicken pieces, you may need extra time. For veggies, they should be tender and caramelized. Broiling for 3-5 minutes at the end adds a nice finish. Keep an eye on them to avoid burning. If your chicken is dry, it could be overcooked. Use a meat thermometer next time. If the veggies are too firm, they may need more time. Check their tenderness halfway through baking. If the dish seems bland, add more salt or spices. A sprinkle of extra maple syrup can help too. If you find the glaze too sticky, add a splash of water to loosen it up. {{image_2}} You can swap chicken for other proteins easily. Try turkey thighs for a leaner option. Salmon fillets work well if you want fish. Just remember that cooking times will change. Always check the internal temperature to ensure safety. Turkey may take a bit longer, while salmon cooks faster. Using seasonal veggies can add fun to your dish. In spring, use asparagus and peas. Summer brings zucchini and bell peppers. For fall, think about adding squash or beets. In winter, root veggies like parsnips or turnips shine. Each swap gives your meal a new taste profile. You can change the flavors with simple swaps. Instead of smoked paprika, try regular paprika for a milder taste. Adding fresh herbs like rosemary or sage boosts flavor. For a sweet twist, use honey instead of maple syrup. Experimenting with spices can make your dish unique. For more details on creating this dish, check the Full Recipe for One Pan Harvest Chicken and Maple Veggies. To keep your One Pan Harvest Chicken and Maple Veggies fresh, let them cool. Place leftovers in an airtight container. Store them in the fridge for up to three days. Label the container with the date. This helps you keep track of freshness. When you're ready to eat, reheat leftovers in the oven. Preheat your oven to 350°F (175°C). Place the chicken and veggies on a baking sheet. Heat for about 10-15 minutes. This keeps the food juicy and warm. You can also use a microwave for quick reheating. Just cover the dish to keep moisture in. Heat in short bursts to avoid overheating. To freeze, let the dish cool completely. Transfer it to a freezer-safe container. It can stay frozen for up to three months. When you want to eat it, thaw it overnight in the fridge. Reheat as mentioned before. Enjoy the flavors just like the first time! For the full recipe, check the earlier sections. Yes, you can use bone-in chicken. Bone-in chicken adds flavor and moisture. Adjust the cooking time. Bone-in pieces often take longer to cook. Aim for about 35-40 minutes in the oven. Always check the internal temperature. It should reach 165°F (75°C) to be safe. One Pan Harvest Chicken and Maple Veggies pairs well with many sides. Here are some ideas: - A fresh green salad - Quinoa or rice for a hearty touch - Crusty bread to soak up the maple glaze - Creamy mashed potatoes for comfort These sides complement the sweet and savory flavors of the dish. Cooking in the oven takes about 25-30 minutes. Preheat your oven to 400°F (200°C). Bake until the chicken is cooked through and veggies are tender. For extra caramelization, broil for 3-5 minutes after baking. Always ensure chicken reaches an internal temperature of 165°F (75°C). This blog post covered the key steps for making One Pan Harvest Chicken and Maple Veggies. We discussed essential and optional ingredients, handy tools, and clear instructions for cooking. I shared tips to enhance flavor and solve common issues. You can also swap proteins and veggies for variety. Lastly, we talked about storing and reheating leftovers. Enjoy creating your own tasty meal! This dish is versatile and quick to make, so get cooking.

One Pan Harvest Chicken and Maple Veggies Simple Meal

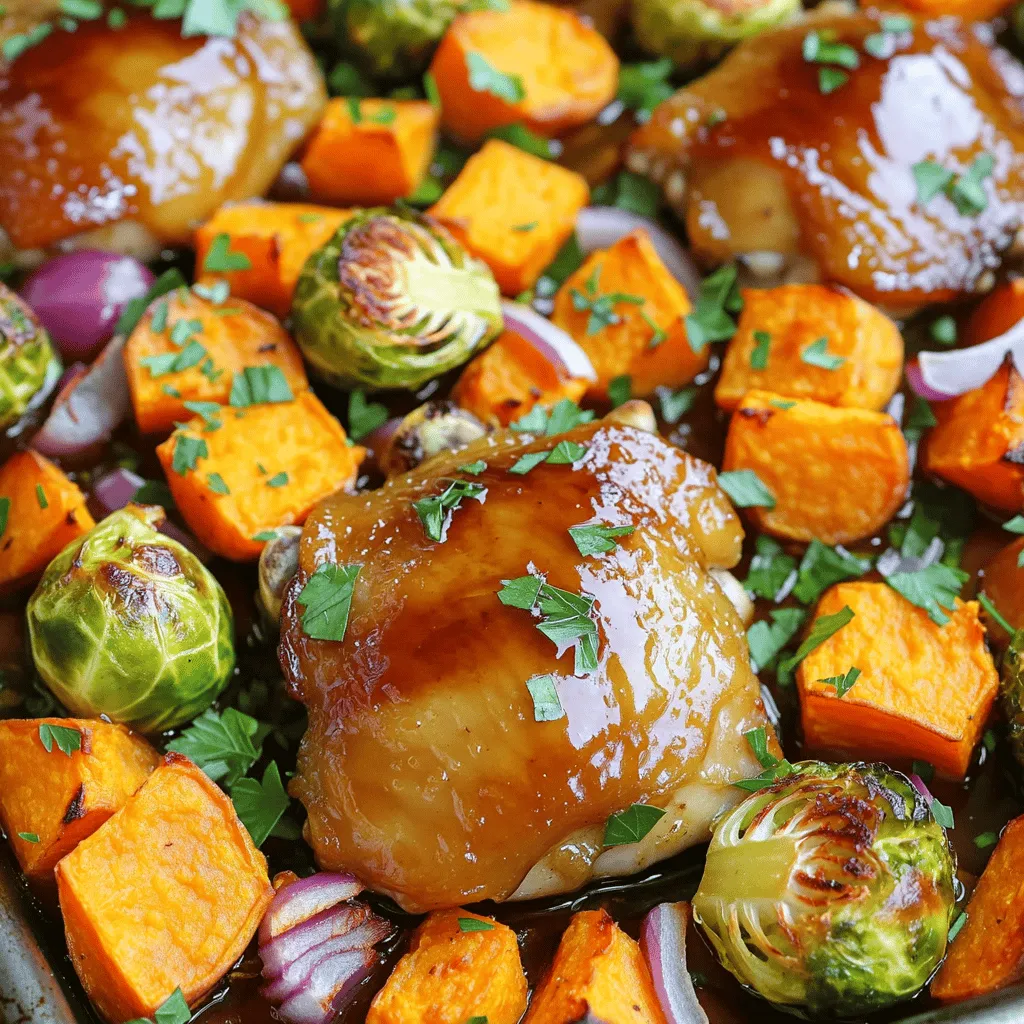
Looking for a simple and tasty meal? Try my One Pan Harvest Chicken and Maple Veggies! This recipe packs all

- 1 pound ground beef - 4 flour tortillas - 1 cup shredded cheddar cheese - 1 cup shredded mozzarella cheese - 1 teaspoon garlic powder - 1 teaspoon onion powder - Salt and pepper, to taste - 1/3 cup ketchup - 1/3 cup mustard - 1/4 cup chopped pickles - Fresh lettuce leaves - Sliced tomatoes - Sliced onions When I create Cheeseburger Quesadilla Smash Sliders, I focus on fresh, high-quality ingredients. The ground beef is the star of the show. I always choose 80/20 beef for a juicy flavor. Flour tortillas provide a soft, warm base that holds everything together. Cheddar and mozzarella cheese melt beautifully, giving that gooey texture we love. The mix of these cheeses enhances the flavor and makes the sliders even more tempting. Seasonings are key to making your patties pop. I use garlic powder and onion powder for depth. A hint of salt and pepper brings everything together. Condiments are where the magic happens. Ketchup and mustard add a tangy kick. Pickles give a crunchy texture that contrasts with the cheese and beef. For optional toppings, I enjoy fresh lettuce for crunch and sliced tomatoes and onions for extra flavor. These toppings not only elevate the dish but also add color to your sliders. For the Full Recipe, check out the detailed instructions that guide you through this fun cooking experience. To start, gather your ground beef and spices. In a bowl, mix the ground beef with garlic powder, onion powder, salt, and pepper. Make sure to mix it well. Then, form the mixture into eight small patties. This gives you the right size for sliders. Next, heat a large skillet over medium-high heat. Place the patties in the skillet. Cook them for about 2-3 minutes on each side. You want to see a nice sear. Once cooked through, set them aside while you prepare the quesadilla. Now, it's time to layer your quesadilla. Take one flour tortilla and place it in the same skillet. Sprinkle half of the cheddar and mozzarella cheese evenly on top. Then, add two cooked beef patties. Top them with chopped pickles and a drizzle of ketchup and mustard. Next, sprinkle the remaining cheese over everything. Cover this with a second tortilla. Cook it for about 2-3 minutes. You’re looking for a golden brown color on the bottom tortilla. When the cheese melts, carefully flip the quesadilla. Cook the other side until it’s golden and crispy. Once cooked, remove the quesadilla from the skillet. Let it rest for a minute before slicing it into wedges. This makes it easier to handle. You can repeat this process with the remaining ingredients. When serving, garnish with fresh lettuce leaves. For extra color and taste, add sliced tomatoes and onions if you like. You can also check the Full Recipe for more tips on making these sliders perfect. To cook ground beef evenly, start with a hot skillet. Shape the beef into thin patties. Thin patties cook faster and brown better. Avoid pressing down on the patties while cooking. This keeps the juices inside, making them tender. For the cheese, use a mix of cheddar and mozzarella. This blend melts well and gives great flavor. Add cheese on both sides of the quesadilla. This ensures a gooey, cheesy experience. Flip the quesadilla carefully to keep the cheese inside. To add extra flavor, try some simple spices. A pinch of smoked paprika can elevate the taste. You can also add cayenne for some heat. Mix these spices into the beef before forming patties. This packs flavor into every bite. Customizing condiments is easy. Use your favorite sauces like BBQ or sriracha. Try adding diced jalapeños or chopped onions for a kick. You can also swap ketchup for aioli for a gourmet touch. A cast iron skillet works best for this recipe. It retains heat and gives a nice sear to the patties. If you don’t have one, a non-stick skillet is a good choice. For utensils, a spatula is key. Use it to flip the quesadilla easily. Having a sharp knife helps when slicing the sliders. A cutting board is also important to keep your workspace clean. For the full recipe, check the detailed instructions provided earlier! {{image_2}} You can switch up the meat in your sliders. Try ground turkey or chicken for a lighter meal. If you prefer plants, use black beans or lentils for a tasty option. Cheese is another fun area to mix. You can use pepper jack for heat or gouda for a smoky flavor. Blend different cheeses together for a unique taste. Want to spice things up? Add jalapeños or other peppers to your sliders. They bring a nice kick! Think about mixing in flavors from other cuisines too. Try adding taco seasoning for a Mexican twist or even barbecue sauce for a Southern vibe. Your quesadilla sliders can be anything you want! These sliders can shine as a full meal or a fun appetizer. Serve them with a side of fries or a fresh salad. If you have guests, make mini sliders! They are perfect for parties and gatherings. Everyone loves a bite-sized treat. Just cut them smaller, and you’re good to go! For the full recipe, check out the detailed instructions provided earlier. To keep your Cheeseburger Quesadilla Smash Sliders fresh, place them in an airtight container. This helps to lock in flavor and moisture. Store them in the fridge for up to three days. For best results, avoid stacking the sliders. This keeps them from getting soggy. You can also wrap each slider in plastic wrap for extra protection. When it's time to enjoy your leftovers, the best way to reheat is to use a skillet. Heat it over medium heat. Place the sliders in the skillet for about three to four minutes on each side. This method keeps them crispy. Avoid using the microwave, as it can make them soggy. If you must use the microwave, heat them for 30 seconds at a time. Check them often to keep the texture nice. If you want to save some sliders for later, freezing is a great option. To freeze, wrap each slider tightly in plastic wrap, then place them in a freezer bag. They can last up to two months in the freezer. When you're ready to eat, thaw them in the fridge overnight. For reheating, use the skillet method mentioned earlier. This brings back their crispy goodness. Enjoy your delicious Cheeseburger Quesadilla Smash Sliders later with the Full Recipe! Cheeseburger Quesadilla Smash Sliders are a fun mix of quesadillas and burgers. They use tortillas instead of buns. This dish has melted cheese, juicy beef, and tasty toppings. It’s a great choice for snacks or meals. The crispy outside and gooey inside make it hard to resist. Everyone loves the blend of flavors in every bite. Yes, you can prep these sliders ahead of time. Make the beef patties and cook them. Then, assemble the quesadillas, but don’t cook them yet. Store the quesadillas in the fridge. When you’re ready to eat, just cook them in a skillet. They stay fresh and tasty this way. If you need to store leftovers, put them in an airtight container. These sliders go well with many sides. Here are some popular choices: - Crispy French fries - Fresh salad with light dressing - Classic coleslaw - Sweet potato fries - Crunchy veggie sticks with dip Each side adds a nice touch to the meal. Absolutely! You can make these sliders as spicy as you want. For a mild flavor, skip the hot sauce. If you like heat, add jalapeños or hot sauce to the beef mix. You can also sprinkle chili powder for extra kick. Taste as you go to find your perfect spice level. Cheeseburger quesadilla smash sliders are fun and easy to make. We covered the key ingredients, how to cook the patties, and assemble the sliders. You can customize them with different meats and toppings to suit your taste. Remember the best cooking tips to get that perfect melt. Store leftovers properly, and they’ll stay fresh. Enjoy these sliders at your next gathering or as a quick meal. Now go ahead and create something delicious!

Cheeseburger Quesadilla Smash Sliders Irresistible Treat

Craving a fun and tasty twist on classic comfort food? Look no further! Cheeseburger Quesadilla Smash Sliders blend everything you

To make Pumpkin Spice Latte Tiramisu Cups, you need the following ingredients: - 1 cup brewed strong coffee (cooled) - 1/2 cup pumpkin puree - 1/2 cup mascarpone cheese - 1 cup heavy whipping cream - 1/3 cup powdered sugar - 1 teaspoon vanilla extract - 1 teaspoon pumpkin spice mix - 12 ladyfinger cookies - Cocoa powder, for dusting - Whipped cream and cinnamon sticks, for garnish - Coffee: Use any strong brewed coffee you enjoy. You can use decaf if you prefer. - Pumpkin Puree: Canned pumpkin puree works well. You can also make your own by roasting fresh pumpkin. - Mascarpone Cheese: If you can't find mascarpone, cream cheese can be a good substitute. Just mix it with a bit of cream for a smoother texture. - Heavy Whipping Cream: This is key for a light filling. You can use coconut cream for a dairy-free option. - Powdered Sugar: You can replace it with granulated sugar, but it will change the texture a bit. - Vanilla Extract: Try using almond extract for a different flavor kick. - Pumpkin Spice Mix: If you don’t have this, mix cinnamon, nutmeg, and allspice for a similar taste. - Always choose fresh ingredients for the best flavor. Fresh pumpkin puree makes a huge difference. - When buying mascarpone, look for brands that are creamy and smooth. This affects your final texture. - For the best coffee flavor, use high-quality coffee beans. Freshly brewed coffee enhances the taste. - The ladyfinger cookies should be crisp. If they're stale, they will not absorb the coffee well. - Use real whipped cream for the topping. It adds a rich flavor that canned whipped cream can’t match. These ingredients create a delicious treat that captures the cozy essence of fall. For the full recipe, check out the details provided earlier. To start, brew one cup of strong coffee. Let it cool down completely. Pour the cooled coffee into a shallow dish. Add one tablespoon of pumpkin spice mix and stir well. This mixture gives your tiramisu cups a warm, fall flavor. In a mixing bowl, combine half a cup of pumpkin puree and half a cup of mascarpone cheese. Add one-third cup of powdered sugar and one teaspoon of vanilla extract. Beat these ingredients together until they are smooth and creamy. This mixture is the heart of your dessert, rich and tasty. In another bowl, pour one cup of heavy cream. Whip it until soft peaks form. Then, add the remaining powdered sugar gradually. Keep whipping until stiff peaks are reached. This step adds lightness to your pumpkin mixture. Take your soaked ladyfingers and dip them quickly into the coffee mixture. They should be wet but not soggy. Place a layer of these ladyfingers at the bottom of each serving cup. Next, spoon a layer of the pumpkin mascarpone mixture over the ladyfingers. Repeat these layers until the cups are full. Cover each cup with plastic wrap and refrigerate for at least four hours. This chill time helps the flavors blend nicely. When ready to serve, dust the tops with cocoa powder. Add a dollop of whipped cream and a cinnamon stick for a nice touch. Enjoy these delightful cups of fall! For detailed measurements and a complete guide, check out the Full Recipe. Layering is key to a great Pumpkin Spice Latte Tiramisu Cup. Start with the ladyfingers. You want them soaked but not soggy. Dip them quickly in your coffee mixture. This keeps them firm and tasty. Place the first layer in your serving cup. Add a generous layer of the pumpkin cream next. Repeat this process until your cups are full. Aim for three layers for the best effect. Each bite should have a mix of coffee and pumpkin flavor. To boost flavor, use strong coffee. Brew it fresh and let it cool. The stronger the coffee, the better it pairs with pumpkin. You can also add a pinch of nutmeg to the pumpkin cream. This adds warmth and depth. If you like a sweeter dessert, adjust the sugar levels in the cream. Just remember to taste as you mix. This ensures your tiramisu has just the right flavor. One common mistake is over-soaking the ladyfingers. If they become too soggy, they lose their structure. Always dip quickly, as mentioned earlier. Another mistake is not chilling long enough. Letting the cups chill for at least 4 hours helps the flavors meld. This waiting time is worth it for the best taste. Lastly, don’t skip the cocoa dusting. It adds a rich finish and enhances the visual appeal of your cups. Follow these tips, and you’ll create a delightful dessert that captures the spirit of fall. For the full recipe, check the earlier section. {{image_2}} You can switch things up with different flavors. How about using chai spice instead of pumpkin spice? It adds a warm, cozy touch. You can also try using chocolate coffee for a mocha twist. This makes each bite rich and delicious. For a fruity spin, mix in some apple pie spice. It brings a fresh fall flavor to your dessert. If you need to make swaps, don’t worry! Use almond milk instead of regular milk for a dairy-free option. You can replace mascarpone with a dairy-free cream cheese. This keeps the texture smooth while catering to dietary needs. For a lighter version, try using Greek yogurt in place of heavy cream. It will still taste great! When serving these cups, presentation is key. Use clear cups to show off those lovely layers. Top each cup with a drizzle of caramel sauce for extra sweetness. You can also sprinkle chopped nuts on top for added crunch. If you want to impress, serve with a slice of pumpkin bread on the side. This adds a nice touch to your autumn gathering. For the full recipe, check out the Pumpkin Spice Latte Tiramisu Cups. Enjoy! To keep your Pumpkin Spice Latte Tiramisu Cups fresh, store them in the fridge. Use an airtight container to prevent moisture loss. These cups taste best within three days. Always cover them with plastic wrap if you don't have a container. This keeps them moist and delicious. You can freeze these tiramisu cups, but it may change the texture. To freeze, wrap each cup tightly in plastic wrap. Then, place them in a freezer-safe bag. They can last up to a month in the freezer. When you’re ready to enjoy, let them thaw in the fridge overnight. These tiramisu cups are best served cold and do not need reheating. If you want to reinvent them, you can transform leftovers into a parfait. Layer the leftover pumpkin cream and ladyfingers in a bowl. Add fresh whipped cream on top for a new dessert twist. For more ideas, check the Full Recipe for inspiration. Yes, you can make these cups a day ahead. This gives the flavors time to blend. Just store them in the fridge. Cover each cup with plastic wrap to keep them fresh. These tiramisu cups last for about three days in the fridge. After that, the texture may change. If you have leftovers, enjoy them within that time frame for the best taste. Absolutely! You can swap in any strong coffee you like. Espresso works great, too. For milk, feel free to use almond, oat, or soy milk. Just make sure the coffee is strong enough to hold the flavors. If you can't find mascarpone cheese, cream cheese works well. You can blend it with a bit of heavy cream for a smoother texture. Ricotta cheese is another good option, but it may have a grainier feel. We covered a lot about making Pumpkin Spice Latte Tiramisu Cups. We explored key ingredients, detailed steps, and useful tips. You learned how to enhance flavors and avoid mistakes. Variations let you adapt this treat to your taste. Storage advice ensures your dessert stays fresh. Use this guide to create a memorable dessert. Enjoy the process and share your creations with others. Happy cooking!

Pumpkin Spice Latte Tiramisu Cups Perfect for Fall

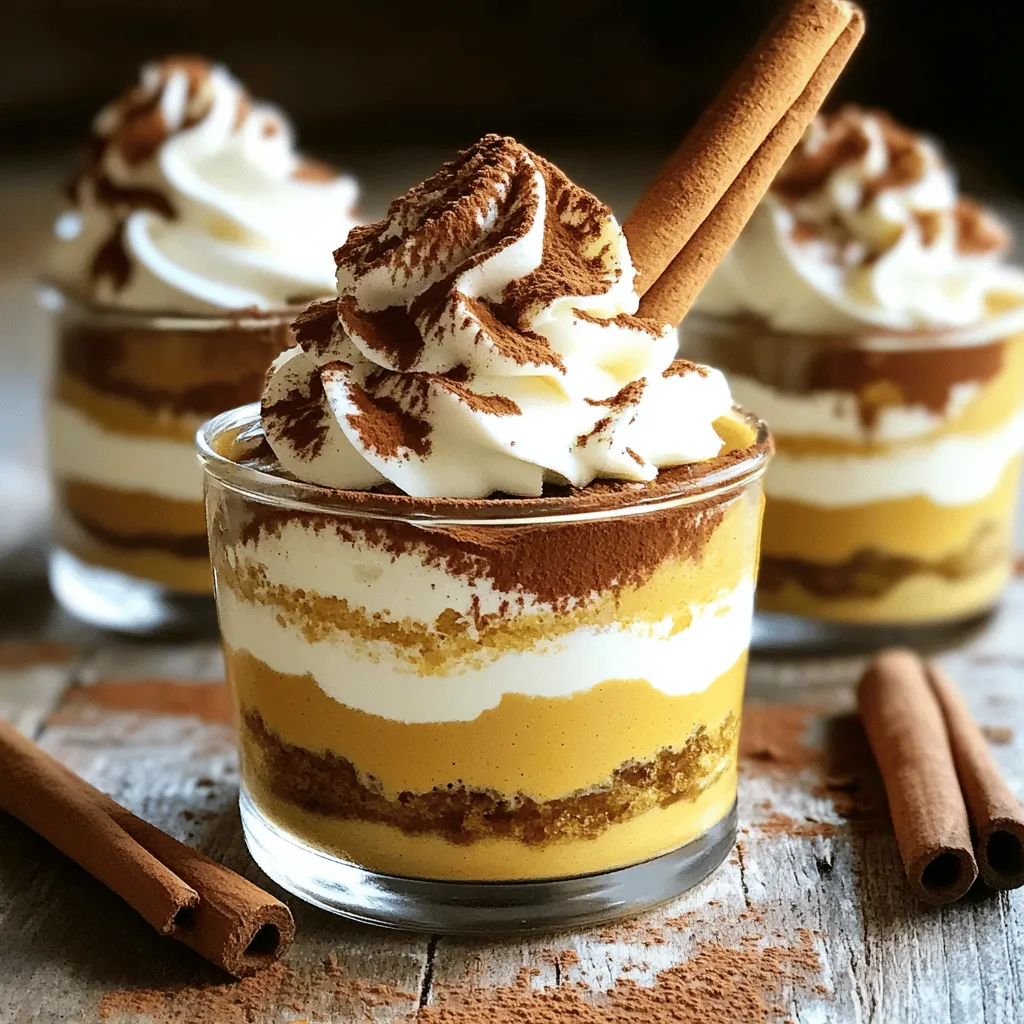
Fall is here, and it’s time to indulge in a delicious twist on a classic dessert! I’m excited to share

- 1 cup unsalted butter, softened - 1/2 cup brown sugar, packed - 2 medium apples, peeled, cored, and finely chopped (Granny Smith works well) The base of this dish starts with unsalted butter. It gives a rich, creamy texture. Brown sugar adds sweetness and depth. For apples, I recommend Granny Smith. Their tartness balances the sweetness well. - 1/2 cup caramel sauce, warmed - 1 cup crushed graham crackers - Chopped pecans or walnuts (optional, for garnish) Next, we add caramel sauce. It creates a luscious drizzle on top. Crushed graham crackers add crunch, mimicking a pie crust. If you like, sprinkle chopped nuts for extra flavor and texture. This combination makes every bite a treat. For the full recipe, check the details above. To start, you need to make the butter mixture. In a bowl, combine 1 cup of softened unsalted butter and 1/2 cup of brown sugar. Use a hand mixer to beat them together until the mix is fluffy and creamy. This step is key to creating a rich base. Next, add 1/2 teaspoon of cinnamon, 1/4 teaspoon of nutmeg, and 1 teaspoon of vanilla extract. Mix again until all the spices blend well. The warm scents will make your kitchen feel cozy. Now it’s time to add apples. Choose two medium-sized apples, like Granny Smith. Peel, core, and finely chop them. The smaller the pieces, the better they mix in. Gently fold the chopped apples into the butter mixture. Be careful not to mash them. You want those apple chunks to stay intact for great texture. Grab a large cutting board or platter for assembly. Spread the caramel apple butter mixture evenly across the board. This will create a smooth, inviting layer. Then, drizzle 1/2 cup of warmed caramel sauce over the top. Let it flow freely, making beautiful streaks. For a pie-like touch, sprinkle 1 cup of crushed graham crackers on top. This adds a nice crunch. If you like, finish with chopped pecans or walnuts for extra flavor. Finally, arrange sliced fruits, cookies, and crackers around the board. This makes it easy for everyone to dip in and enjoy! Choosing the right apples is key to this dish. I love using Granny Smith apples. They have a crisp bite and a tart taste. This balance pairs well with the sweet caramel. You can also try Honeycrisp apples for sweetness. Always pick fresh apples with no bruises. Adjusting spice levels can change the whole flavor. I recommend starting with half a teaspoon of cinnamon. If you want more warmth, add a bit more. Nutmeg adds depth, so try a quarter teaspoon. Always taste as you go to find your perfect mix. Selecting the right board can elevate your butter board. A large, rustic wooden board works great. It gives a warm and inviting feel. You can also use a marble or slate board for a modern touch. Make sure it is big enough for all your goodies. Garnishing is all about visual appeal. I like to add extra apple slices on top. Drizzling more caramel sauce adds a nice shine. A sprinkle of chopped nuts can also look beautiful. These little touches make your board stand out. Pairing with sliced fruits makes the board fun. Try pears or bananas for a tasty contrast. They add freshness and can be dipped right in. You can also serve with assorted cookies or crackers. Choose sweet or savory options for a nice balance. I like to include graham crackers for that pie crust taste. They bring a crunch that everyone loves. Offer a mix of textures to keep things interesting. Enjoying the butter board with friends makes it even better! {{image_2}} You can mix things up with different nuts. Try almonds, hazelnuts, or cashews. Each nut adds a unique crunch and flavor. You can also use flavored caramel sauces. Options like sea salt caramel or chocolate caramel create exciting new tastes. If you need gluten-free options, use gluten-free graham crackers. They still give that nice crunch. For vegan alternatives, switch out the butter for a plant-based one. This keeps the taste rich without dairy. Add seasonal fruits for a fresh twist. In fall, pears or figs work well. In summer, strawberries or blueberries are great choices. You can also incorporate holiday spices. Think about adding ginger, cloves, or allspice for a festive touch. After enjoying your caramel apple pie butter board, store the leftovers in the refrigerator. Place the butter mixture in an airtight container. This helps keep it fresh for a few days. If you have leftover sliced apples, store them separately. Use lemon juice to coat them. This prevents browning and keeps them looking nice. Keep the caramel sauce in a small jar. Seal it well and place it in the fridge. This way, you can enjoy it later. When you store the components separately, they stay fresh longer. To warm the butter mixture, scoop out what you need into a bowl. Heat it in the microwave for about 10-15 seconds. Stir it well to make it smooth and spreadable again. For the leftover caramel sauce, you can heat it gently. Place the jar in a bowl of hot water or use the microwave for a few seconds. Stir it to make sure it warms evenly. This makes it easy to drizzle over your butter board again. Enjoy every bite! Yes, you can prep this butter board in advance. Here are some tips: - Make the butter mixture a day ahead. Store it in the fridge. - Wait to add the apples until just before serving. This keeps them fresh. - Prepare your toppings like crushed graham crackers and nuts ahead. - Drizzle the caramel sauce right before you serve. You can pair this butter board with many fun dips and snacks: - Sliced fruits like pears, bananas, or strawberries add color. - Assorted cookies such as ginger snaps or chocolate chip are a hit. - Use different types of crackers for a crunchy contrast. - Try pretzels for a salty-sweet balance. To keep your apples fresh and bright, try these methods: - Toss the chopped apples in lemon juice right after cutting. - Use a mixture of water and lemon juice to soak them briefly. - Keep the apples in an airtight container until you need them. - Cover the butter board with plastic wrap if you make it early. This caramel apple pie butter board is simple and fun to make. You learned about the key ingredients, like butter, brown sugar, and apples. I shared tips to enhance flavor and how to present your creation. You can even customize the recipe with different nuts or seasonal fruits. Remember, this dish is great for gatherings or a cozy night in. Enjoy your delicious butter board, and feel free to get creative. The flavors will make every bite special. Happy cooking!

Caramel Apple Pie Butter Board Indulgent Delight

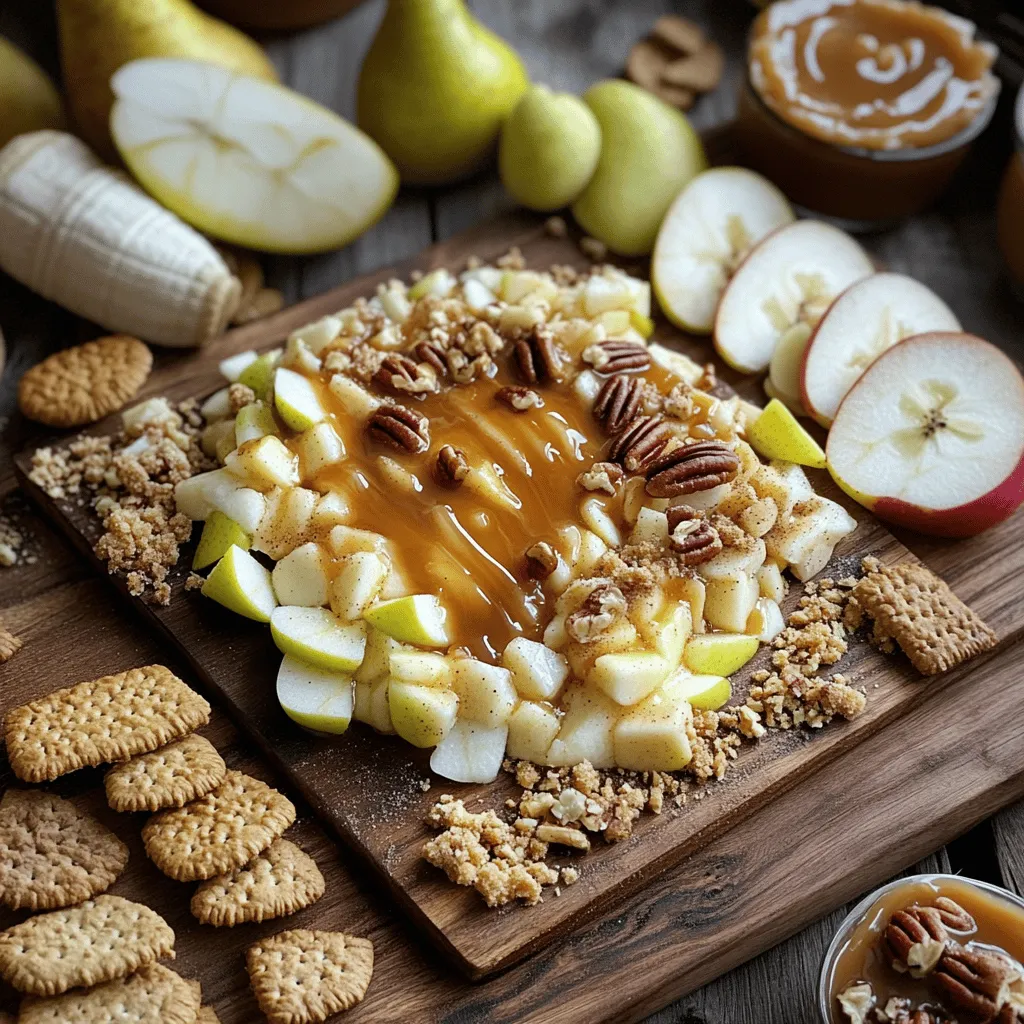
Are you ready for a fun twist on dessert? This Caramel Apple Pie Butter Board combines sweet butter, rich caramel,

To make a delicious s'mores sheet cake, you need some key ingredients. These will help create a rich, sweet treat that everyone will enjoy. Here’s what you need: - 1 box chocolate cake mix - 3 large eggs - 1 cup water - 1/3 cup vegetable oil - 1 cup mini marshmallows - 1 cup graham cracker crumbs - 1 cup chocolate chips - 1 cup sweetened condensed milk - 1 teaspoon vanilla extract - Pinch of salt - Additional mini marshmallows for topping - Chocolate sauce for drizzling These ingredients combine to create a cake that’s both easy to make and fun to eat. Each layer adds to the classic s'mores flavor. The chocolate cake mix gives you a rich base, while the mini marshmallows and graham cracker crumbs add the signature crunch and sweetness. The sweetened condensed milk helps keep the cake moist. When you gather these ingredients, it’s like setting the stage for a fun baking adventure. You can find most of these items at your local grocery store. If you want to switch things up, consider using different cake mixes or toppings. You can find the full recipe in the previous section to guide you through the baking process. First, you need to grease your baking pan. Use butter or cooking spray to coat a 9x13 inch pan. This will help the cake come out easily. Next, preheat your oven to 350°F (175°C). This step is very important. While your oven heats up, grab a large mixing bowl. In that bowl, mix the chocolate cake mix, water, eggs, and vegetable oil. Stir it well until you have a smooth batter. You want no lumps in your mix. After that, gently fold in the mini marshmallows, graham cracker crumbs, chocolate chips, sweetened condensed milk, vanilla extract, and a pinch of salt. Make sure everything blends evenly. Now, pour the batter into your greased pan. Spread it out evenly with a spatula. This helps the cake bake evenly. Place the pan in the oven and bake it for 30 to 35 minutes. To check if it is done, insert a toothpick in the center. If it comes out clean, the cake is ready. Once the cake is done, take it out of the oven. Sprinkle additional mini marshmallows on top. Return the cake to the oven for 5 more minutes. This will toast the marshmallows until they are golden and puffed. After that, let the cake cool completely in the pan. When it's cool, drizzle some chocolate sauce over the top. This dessert is now ready to enjoy. For the Full Recipe, check the section above. To get a great texture in your s'mores sheet cake, gently fold in the ingredients. This keeps the cake light and fluffy. If you mix too hard, it can become dense. Each ingredient should blend well without losing air. Also, ovens can vary. Check your cake a few minutes early. If your oven runs hot, you may need less time. For the best look, cut the cake into neat squares. Place them on a pretty platter. Sprinkle extra graham cracker crumbs on top. Drizzle chocolate sauce for a sweet touch. For a fun twist, toast some mini marshmallows and add them on top. This gives a nice, gooey finish. Pair your s'mores sheet cake with cold milk or hot cocoa. Both drinks complement the sweet, rich flavors. You can also serve it with coffee for a warm treat. Enjoy the cake fresh for the best taste! For the full recipe, check out the details provided earlier. {{image_2}} You can switch up flavors in your s'mores sheet cake. Adding peanut butter or Nutella brings a rich taste. Just mix in about half a cup of your favorite spread into the batter. This gives each bite a creamy, nutty twist. You can also use different cake mixes. Instead of chocolate, try vanilla or red velvet. Each mix gives the cake a new flavor profile while keeping the s'mores theme. Just follow the same steps in the recipe for a fun change! If you need gluten-free options, use a gluten-free cake mix. This keeps the cake just as moist and delicious. Make sure to check the other ingredients for gluten as well. For vegan substitutions, swap the eggs with flax eggs. Mix one tablespoon of ground flaxseed with three tablespoons of water for each egg. Use almond milk or oat milk instead of regular milk. These changes keep the cake tasty while meeting dietary needs. Explore these fun variations to make your s'mores sheet cake unique and enjoyable for everyone! For the full recipe, check the earlier section. To keep your s'mores sheet cake fresh, let it cool completely. Cover the cake with plastic wrap or foil. This helps keep moisture in and prevents it from drying out. You can also store the cake in an airtight container. In the fridge, it stays good for about 3 to 5 days. For longer storage, consider freezing it. When you're ready to enjoy a slice, there are a few ways to reheat it. The best method is to use the oven. Preheat the oven to 350°F (175°C). Place the slice on a baking sheet and heat for about 10 minutes. This keeps the cake moist and revives the flavors. You can also use the microwave for a quick fix. Heat a slice for about 20-30 seconds. Add a few mini marshmallows on top before reheating for extra gooeyness. You start with a box mix for ease. It saves time and effort. A homemade cake has a richer taste. You can use flour, sugar, cocoa, baking powder, and eggs. If you want to switch things up, use whole wheat flour or almond flour. You can also swap out vegetable oil for melted butter. This change adds a nice flavor. Yes, you can freeze the cake! First, let it cool completely. Wrap it tightly in plastic wrap. Then, place it in a freezer-safe bag. To thaw, move it to the fridge overnight. Freezing may change the texture a bit. The cake may become denser but will still taste great. If you need a substitute, try using chopped regular marshmallows. They give a similar taste but change the look. You can also use whipped cream for a fluffier texture. For toppings, consider crushed cookies or dark chocolate shavings. These options add a fun twist to your cake. You now have a simple guide to make a delicious s'mores sheet cake. We reviewed the ingredients, easy steps, and helpful tips. You can also explore fun variations and storage methods. This dessert is perfect for gatherings or a tasty treat at home. Enjoy experimenting with flavors and serving ideas to impress your family and friends. Baking is fun, and this cake will satisfy your sweet cravings every time!

S’mores Sheet Cake Decadent and Easy Dessert Recipe

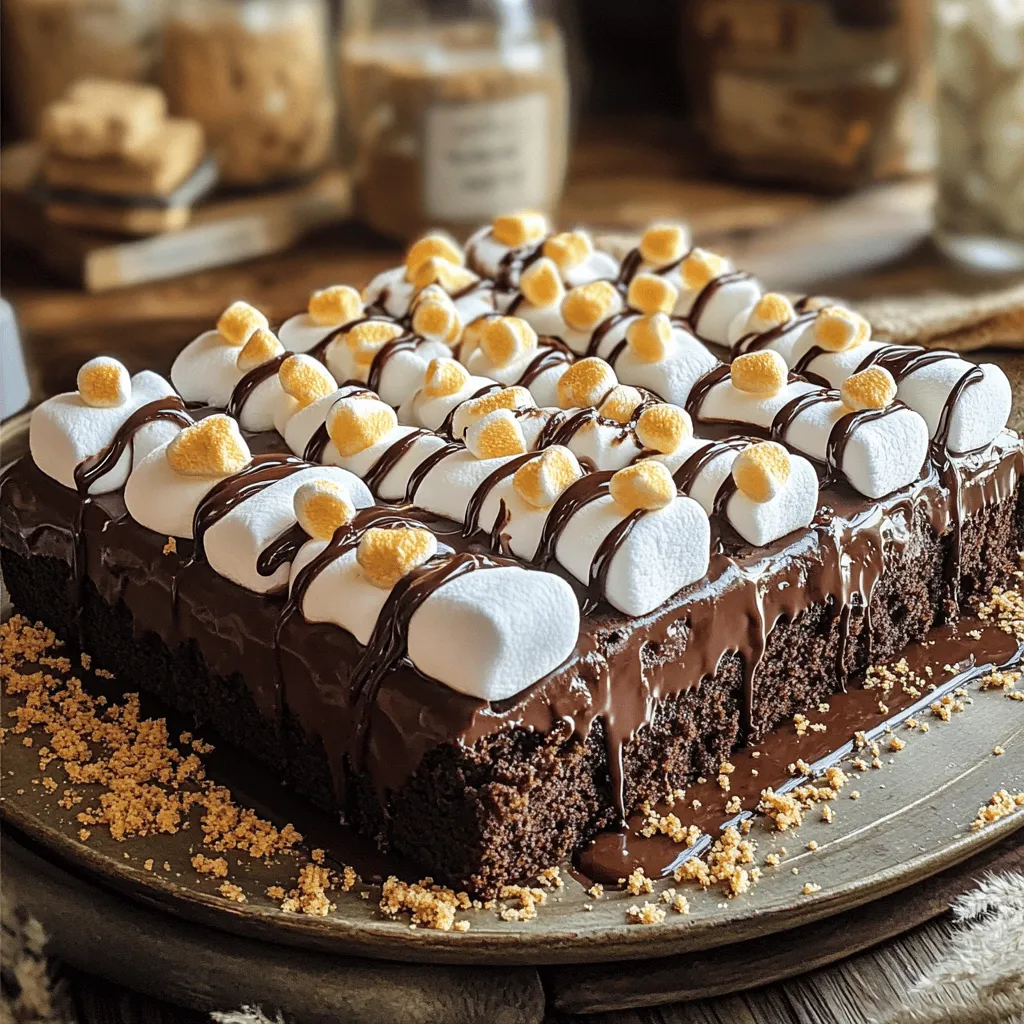
Craving a sweet treat that captures the essence of campfire s’mores? You’re in luck! This S’mores Sheet Cake combines rich

To make zucchini pizza boats, you need a few key items: - 4 medium zucchinis - 1 cup marinara sauce - 1 cup shredded mozzarella cheese - 1/2 cup sliced bell peppers (any color) - 1/2 cup sliced black olives - 1/2 teaspoon Italian seasoning - 1/4 teaspoon red pepper flakes (optional) - Fresh basil leaves for garnish - Salt and pepper to taste These ingredients create a tasty base. The zucchinis act as the boat, holding all the good stuff. You can add more fun flavors to your zucchini pizza boats. Try these: - Cooked ground turkey or beef - Sliced mushrooms - Fresh spinach - Cherry tomatoes - Different cheeses like feta or cheddar Mix and match to find your favorite combo. Adjust seasonings too. You can use garlic powder or onion powder for extra taste. If you have dietary needs, there are easy swaps: - Use gluten-free marinara for a gluten-free option. - Try vegan cheese if you want a plant-based meal. - Swap zucchinis for eggplant or bell peppers for a new twist. Zucchini pizza boats are flexible. You can cater to many diets. They are a fun way to enjoy a meal while staying healthy. If you want the full recipe, just check below. Start by washing the zucchinis well. This helps remove dirt and any chemicals. Next, cut each zucchini in half lengthwise. Use a spoon to scoop out the insides. Make sure to leave about 1/4 inch of flesh. This keeps the boats strong. Place them cut side up on a baking sheet. Lightly season the insides with salt and pepper. This brings out the zucchini's natural flavor. In a bowl, mix together the marinara sauce, Italian seasoning, and red pepper flakes. This sauce adds great taste to your boats. Spoon the sauce generously into each zucchini boat. It should fill them nicely. Next, sprinkle the shredded mozzarella cheese on top. Add sliced bell peppers and black olives for extra flavor. You can customize the toppings to your liking. Now, it's time to bake the zucchini boats. Preheat your oven to 375°F (190°C). Place the baking sheet in the oven and bake for 20 to 25 minutes. Keep an eye on them. You want the zucchinis to be tender and the cheese to be bubbly and golden. When done, remove them from the oven. Let them cool slightly before serving. Garnish with fresh basil leaves for a pop of color and taste. The Full Recipe has all these details covered for you. To cook zucchini just right, pick medium-sized ones. They hold their shape well. Cut them in half lengthwise and scoop out the insides. Leave a bit of flesh for strength. Bake at 375°F for 20 to 25 minutes. This will make them tender but not mushy. Check for doneness by poking with a fork. It should go in easily but feel firm. For great taste, season the zucchini inside with salt and pepper. This adds depth. Mix your marinara sauce with Italian seasoning. Add red pepper flakes for heat if you like it spicy. Layer toppings carefully. Start with sauce, then cheese, and finish with peppers and olives. This helps keep the cheese from burning and gives a nice texture. Make your zucchini pizza boats pop with color! Use fresh basil leaves as a garnish. They add a bright touch. Arrange the boats on a nice plate. Serve them warm for the best flavor. You can drizzle a bit of olive oil on top for shine. This makes the dish look gourmet. For the Full Recipe, check the link! {{image_2}} You can easily make zucchini pizza boats vegetarian. Just use veggies like mushrooms, spinach, or cherry tomatoes. If you want a vegan version, swap out the cheese for plant-based cheese. Nutritional yeast can also add a cheesy flavor. You can mix different herbs for extra taste, too. Basil and oregano work great! Zucchini is naturally gluten-free, making it a smart choice. If you want a heartier base, try adding gluten-free breadcrumbs to the filling. You can also serve the boats with a gluten-free marinara sauce. Always check labels to avoid hidden gluten in sauces or toppings. Kids love fun toppings! Try using mini pepperoni, colorful bell peppers, or even pineapple. You can let kids assemble their own boats. This way, they can choose what they like. Offering a "create your own" meal makes it fun and exciting for them! To store leftover zucchini pizza boats, let them cool first. Place them in an airtight container. You can keep them in the fridge for up to three days. Make sure to cover them well to keep the flavor fresh. When you want to enjoy your leftovers, preheat your oven to 350°F (175°C). Place the zucchini pizza boats on a baking sheet. Heat them for about 10 to 15 minutes. This keeps the cheese melty and the zucchini warm. You can also use a microwave. Heat them for 1 to 2 minutes, but they won’t get crispy. If you want to save zucchini pizza boats for later, freezing is a great option. Let them cool completely. Wrap each boat tightly in plastic wrap. Then, place them in a freezer-safe bag. They can stay in the freezer for up to three months. When you’re ready to eat, thaw them overnight in the fridge before reheating. Enjoy a tasty meal anytime! For the full recipe, check out the detailed instructions. Yes, you can use other vegetables. Eggplant, bell peppers, and squash work well. Cut them in half and scoop out some flesh. This will create a nice boat for your toppings. Each veggie adds its unique flavor. Experiment and find your favorite! To make them ahead, prepare the zucchini and sauce. Cut the zucchinis and scoop them out. Store them in the fridge. You can also mix the sauce and toppings. When you are ready to cook, just fill the boats and bake. This saves time on busy days! Zucchini is low in calories and high in fiber. It helps keep you full longer. The added veggies and cheese provide vitamins and protein. This dish is a healthy way to enjoy pizza flavors without the carbs. You get taste and nutrition all in one! You can find the Full Recipe for Zucchini Pizza Boats in this article. It gives step-by-step instructions and ingredient details. It makes cooking this dish easy and fun! Zucchini pizza boats are fun, healthy, and easy to make. We covered key ingredients, from the basics to tasty toppings. I shared tips for perfect cooking and ideas for kids. Plus, you learned how to store and reheat leftovers. Try these boats for a great meal that can fit any diet. You have the tools to make this dish your own. Enjoy experimenting with flavors and sharing your creations!

Zucchini Pizza Boats Tasty and Easy Meal Idea

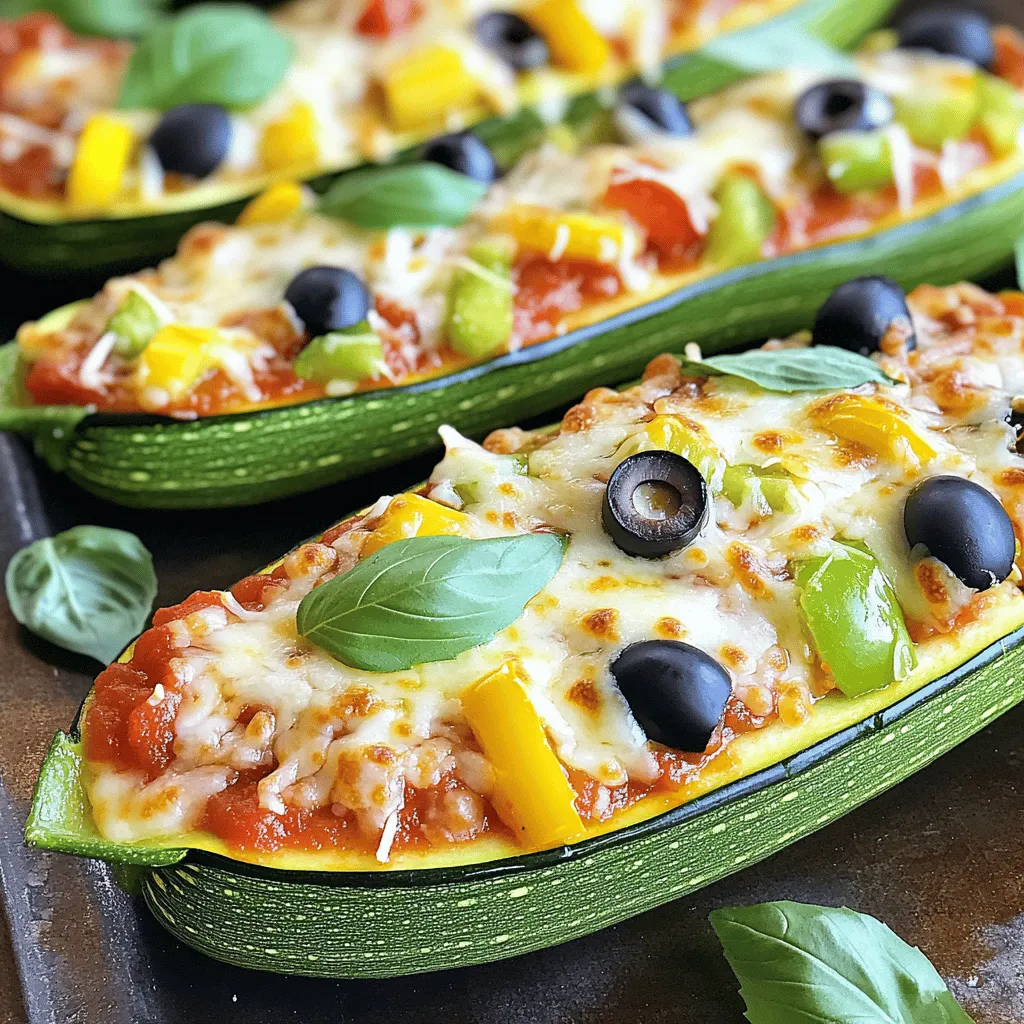
Looking for a fun and healthy meal idea? Try Zucchini Pizza Boats! They are tasty, easy to make, and a

- 2 cups fresh or frozen cherries, pitted - 1/2 cup freshly squeezed lime juice - 1/2 cup granulated sugar - 1 1/2 cups sparkling water - 2 cups ice cubes - Lime slices and fresh cherries for garnish To make the best Cherry Lime Soda Slushies, precise measurements matter. Use a liquid measuring cup for lime juice. This ensures you get the right amount. For cherries, a standard cup works well. If you use frozen cherries, let them thaw a bit for easier blending. When measuring sugar, level it off with a straight edge. This helps avoid too much sweetness. For cherries, I like to use Washington or Bing cherries. They are sweet and flavorful. For lime juice, fresh limes always taste best. If you need a quick option, store-bought lime juice can work too. When it comes to sparkling water, I recommend brands like La Croix or Perrier. They add great fizz. You can also try flavored sparkling waters for a fun twist. To make these Cherry Lime Soda Slushies, start with fresh or frozen cherries. You need about 2 cups. Remove the pits if using fresh cherries. Next, take 1/2 cup of freshly squeezed lime juice. This gives the slush a nice tartness. Combine the cherries, lime juice, and 1/2 cup of granulated sugar in a blender. Blend until smooth. Now, add 2 cups of ice cubes to the blender. Blend again until you achieve a slushy consistency. It should be thick but still pourable. Pour the cherry mixture into a large mixing bowl. Slowly fold in 1 1/2 cups of sparkling water. Do this gently to keep some fizz. Taste your mix. If it needs more sweetness, add sugar or extra cherries. Blend briefly if you add more. Spoon the slushie into tall glasses. Finally, garnish with lime slices and fresh cherries. To get the perfect slushy, focus on ice. Use fresh ice cubes for the best texture. Blend the ice well, but don’t overdo it. If you blend too long, it can turn watery. You want a mix that feels icy but not too hard. Also, when adding sparkling water, do it slowly. Mixing too fast can lose the bubbles. Fold it in gently to keep that fizzy feel. If your slushy is too thick, you can add a bit more sparkling water. 1. Blend the Base: Combine cherries, lime juice, and sugar until smooth. 2. Add Ice: Pour in the ice cubes, blending until slushy. 3. Fold in Fizz: Gently mix in sparkling water to maintain bubbles. 4. Taste and Adjust: Check the sweetness, adding sugar or cherries as needed. 5. Serve: Spoon into glasses and add garnishes like lime slices and cherries. These steps will lead you to a delightful Cherry Lime Soda Slushie. Enjoy this refreshing treat anytime! Making slushies sounds easy, but some common mistakes can ruin them. One big mistake is blending too long. If you blend too much, your slushie will turn into a drink. You want that icy texture, not a smoothie. Another mistake is not using enough ice. Ice gives your slushie the right thickness. Lastly, don’t skip the sparkling water. It adds a nice fizz that makes your slushie fun. You can easily change the sweetness of your slushie. If you prefer it sweeter, add more sugar or extra cherries. Just blend again for a short time. If you find it too sweet, add a splash of lime juice. This will balance the flavor. Always taste your slushie before serving. This way, you can adjust it to your liking. Blending is key to a great slushie. First, blend the cherries, lime juice, and sugar until smooth. Then, add the ice cubes. Blend again until you see a slushy texture. When you mix in the sparkling water, do it gently. This keeps all the bubbles intact. If you overmix, you’ll lose that fizzy feel. Follow these steps from the Full Recipe for the best results. {{image_2}} You can change the taste of your Cherry Lime Soda Slushies by using different fruits. Try using strawberries, blueberries, or even mangoes. Each fruit adds its own twist. For example, strawberries give a sweet and fresh flavor. Blueberries add a nice tartness. Mangoes bring a tropical touch. You can mix and match to find your favorite combo! To make your slushies even more exciting, think about fun add-ins. You can mix in some mint leaves for a cool flavor. A splash of coconut milk can add creaminess. If you want a fizzier drink, use soda instead of sparkling water. You can also add a scoop of lime sorbet for a sweeter finish. Let your creativity flow! Seasonal fruits make great slushies too! In summer, add fresh peaches or watermelon for a refreshing treat. Fall is perfect for using apples or pears. You can even add a hint of cinnamon for warmth. In winter, try using cranberries for a festive touch. Each season brings its own fruits, so have fun experimenting! To make the best Cherry Lime Soda Slushies, check out the Full Recipe for detailed steps and tips! After you make your Cherry Lime Soda Slushies, you might have some left over. To keep them fresh, store them in a sealed container. This helps prevent ice crystals from forming. You can also use a mason jar for a tight seal. Be sure to leave some space at the top. Slushies expand when they freeze. If you want to freeze slushies, pour them into ice cube trays. This way, you can use them later. When you want a quick drink, blend a few slushie cubes with a splash of sparkling water. This makes a fun, icy treat. You can also freeze the entire batch in a container. Just remember to stir it every hour until it’s frozen solid. Cherry Lime Soda Slushies taste best when fresh. They can last up to 3 days in the fridge. After that, the flavors may fade. If you see any ice crystals or an off smell, it’s time to toss them. Always trust your senses. Fresh slushies should smell sweet and fruity. Enjoy your tasty treat without worries! A Cherry Lime Soda Slushie is a fun and frozen drink. It blends sweet cherries with tart lime juice. You mix these with sparkling water and ice. The result is a refreshing, slushy treat perfect for hot days. This drink is fizzy and full of fruity flavor. You can easily make it at home. Just follow the Full Recipe, and you’ll enjoy this vibrant drink. Yes, you can use many other fruits! Strawberries, raspberries, or even mangoes work well. Each fruit adds a unique taste and color. You can mix fruits too, like cherries and strawberries. Just keep the lime juice and sugar to balance the flavors. Experiment and find your favorite combo! You can prep Cherry Lime Soda Slushies ahead of time. Make the slushie mixture and store it in the freezer. When you are ready to serve, scoop it into glasses. You can blend it again if it’s too hard. This way, you enjoy a cold treat whenever you want! You learned how to make Cherry Lime Soda Slushies from start to finish. We covered ingredients, preparation tips, and step-by-step instructions. I shared common mistakes to avoid and ways to make your slushies unique. You also discovered how to store leftovers and answered frequently asked questions. Now, you have everything you need to create the perfect slushy. Enjoy experimenting with flavors and techniques. Your slushy journey starts here!

Cherry Lime Soda Slushies Refreshing and Easy Treat

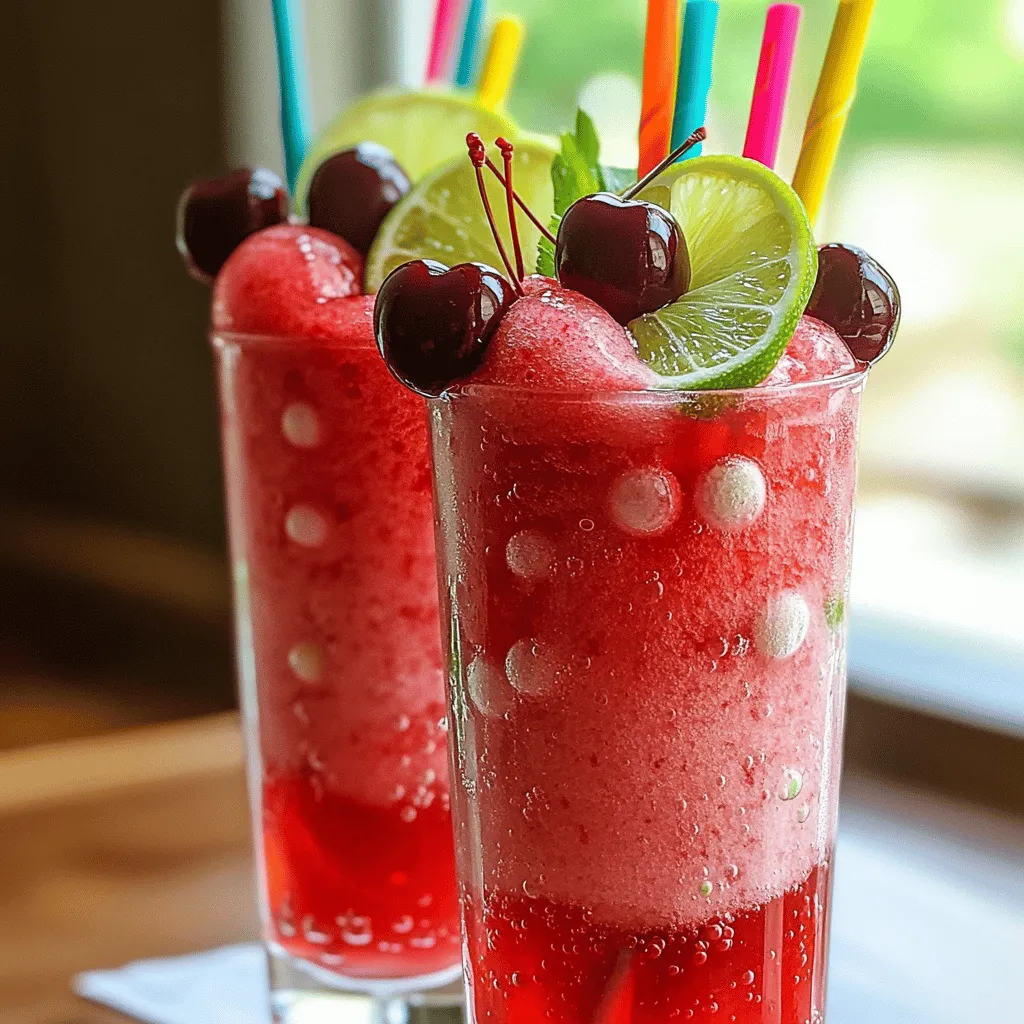
Looking for a cool treat that’s easy to make? Cherry Lime Soda Slushies are a fun and refreshing way to

Older posts
Newer posts
← Previous Page1 … Page4 Page5 Page6 … Page49 Next →

dsad

© 2025 savorystride • Built with GeneratePress

Our Policies

  • Copyright Policy
  • Cookie Policy
  • GDPR Policy
  • Privacy Policy
  • Disclaimer
  • Terms Of Use

More Information

  • Home
  • About
  • Contact
  • Appetizers
  • Dessert
  • Dinner
  • Drinks
©2025, savorystride About Back To Top