Skip to content
DisclaimerTerms Of UseGDPR PolicyCookie Policy

savorystride

  • Home
  • Drinks
  • Appetizers
  • Dinner
  • Dessert
  • About
  • Contact
  • Privacy Policy
DisclaimerTerms Of UseGDPR PolicyCookie Policy

Hazel

To make delicious espresso brownie cupcakes, you will need the following ingredients: - 1 cup unsalted butter (2 sticks) - 2 cups granulated sugar - 4 large eggs - 1 teaspoon vanilla extract - 1 cup all-purpose flour - 1 cup unsweetened cocoa powder - 1 teaspoon baking powder - 1/2 teaspoon salt - 2 tablespoons instant espresso powder - 1/2 cup chocolate chips (optional for extra gooeyness) - Powdered sugar for dusting (optional) These ingredients create a rich, chocolatey base with a kick of espresso. You can take your cupcakes to the next level with these optional ingredients: - 1/2 cup chopped nuts (like walnuts or pecans) - 1 teaspoon almond extract for a nutty twist - Sea salt flakes for a sweet and salty finish These add-ins can enhance the flavor and texture of your cupcakes. Here are some handy conversions for your ingredients: - 1 cup = 240 milliliters - 1 tablespoon = 15 milliliters - 1 teaspoon = 5 milliliters - 1 cup of all-purpose flour = 120 grams - 1 cup of granulated sugar = 200 grams - 1 cup of cocoa powder = 100 grams Understanding these conversions helps when you need to adjust your recipe. For the full recipe, check the recipe card above. Start by preheating your oven to 350°F (175°C). This step warms up the oven so your cupcakes cook evenly. Next, take a muffin pan and line it with cupcake liners. This keeps your cupcakes from sticking and helps with easy serving. In a medium saucepan, melt 1 cup of unsalted butter over low heat. Once it melts, take it off the heat and let it cool a bit. Add 2 cups of granulated sugar to the butter. Stir well until the sugar mixes in nicely. Now, crack 4 large eggs into the mix, adding them one at a time. Stir well after each egg. Finally, add 1 teaspoon of vanilla extract and mix until smooth. In another bowl, whisk together 1 cup of all-purpose flour, 1 cup of unsweetened cocoa powder, 1 teaspoon of baking powder, 1/2 teaspoon of salt, and 2 tablespoons of instant espresso powder. This mix gives your cupcakes a rich flavor. Gently fold the dry mix into the wet mix. Be careful not to overmix, or your cupcakes can turn out tough. If you like, fold in 1/2 cup of chocolate chips for extra gooeyness. Evenly divide the batter among the lined muffin cups, filling each about 2/3 full. Place the pan in the preheated oven and bake for 18-20 minutes. To check if they are done, insert a toothpick into the center. It should come out with a few moist crumbs. After baking, let the cupcakes cool in the pan for 5 minutes. Then, transfer them to a wire rack to cool completely. If you want, dust them with powdered sugar for a sweet touch. For the full recipe, check the details above. To get the best espresso taste, use good quality espresso powder. Instant espresso powder works well in this recipe. It gives a nice, bold flavor without being too bitter. Mix the espresso powder with the dry ingredients to help it blend in well. You can also brew a small shot of espresso and add it to the wet mix for more depth. This makes your cupcakes rich and full of flavor. One common mistake is overmixing the batter. When you mix too much, your cupcakes can become tough. Mix until just combined for a soft texture. Another mistake is not measuring ingredients accurately. Use a kitchen scale for best results. Make sure your oven is at the right temperature, too. An oven thermometer can help ensure accuracy. Lastly, don’t skip cooling time. Let the cupcakes cool for the best taste and texture. To keep your cupcakes fresh, store them in an airtight container. This helps prevent them from drying out. If you want to keep them longer, you can freeze them. Wrap each cupcake in plastic wrap and place them in a freezer bag. When you’re ready to eat, let them thaw at room temperature. For a sweet touch, dust with powdered sugar before serving. Enjoy your delicious treats! For the full recipe, check the earlier section. {{image_2}} You can add nuts to your espresso brownie cupcakes to boost flavor and crunch. I love using walnuts or pecans. They blend well with the rich chocolate and coffee taste. Simply chop the nuts and fold them into the batter. Use about 1/2 to 1 cup, depending on your taste. The nuts will add texture and make each bite even more exciting. If you need a gluten-free option, swap the all-purpose flour for a gluten-free mix. Many brands offer great blends that work well in baking. Just be sure to check that they contain xanthan gum or add it yourself. This will help your cupcakes rise and stay soft. The flavor stays rich, and no one will guess they are gluten-free! You can also make these cupcakes vegan. Replace the eggs with flaxseed meal or applesauce. For each egg, use 1 tablespoon of flaxseed mixed with 2.5 tablespoons of water. Let it sit until it thickens. For the butter, use coconut oil or vegan butter. The cupcakes will still be rich and tasty, perfect for anyone who avoids animal products. You can find the full recipe earlier in this article to get started on these variations. Enjoy experimenting! I love these espresso brownie cupcakes fresh, but leftovers are a treat too. Store the cupcakes in an airtight container. This keeps them moist and soft. They stay good at room temperature for about three days. If you want them to last longer, put them in the fridge. They can last up to a week in the fridge. Just remember to bring them to room temperature before you enjoy them. Freezing these cupcakes is easy and smart. First, let the cupcakes cool completely. Then, wrap each one in plastic wrap. Place them in a freezer bag or a container. They can stay fresh for up to three months in the freezer. When you’re ready to eat, just take out what you need. After freezing, the cupcakes may lose some moisture. To refresh them, let them thaw in the fridge overnight. You can warm them up in the microwave for 10 to 15 seconds. This makes them soft and tasty again. Dust with powdered sugar if you want a sweet touch. Enjoy your espresso brownie cupcakes as if they were just baked! You can use brewed espresso or strong coffee. Brew a cup of espresso, then reduce it to about 1 tablespoon. This will give you a strong flavor. If you don't have espresso, use instant coffee granules. Just make sure they dissolve well in your mix. Yes, you can! If you want a rich taste, use cocoa powder. You can replace chocolate chips with an equal amount of cocoa powder. This will keep the chocolate flavor strong. Just remember to balance the sugar since cocoa can be less sweet. Espresso brownie cupcakes last about 3 days at room temperature. Store them in an airtight container to keep them fresh. If you want to save them longer, freeze them. They can last up to 3 months in the freezer. Just thaw them before serving. For the full recipe, check out the details above. You now have the tools to make great espresso brownie cupcakes. We explored ingredients, step-by-step instructions, and handy tips. You can create tasty variations and store your treats like a pro. Remember, practice makes perfect when baking. These cupcakes are fun to make and share with friends. Enjoy your baking journey and the delicious results!

Espresso Brownie Cupcakes Rich and Decadent Delight

Get ready to indulge in a rich and decadent delight: Espresso Brownie Cupcakes! These treats combine the deep, bold flavor

To make a tasty and filling potato stew, gather these main ingredients: - 4 large russet potatoes, peeled and diced - 2 carrots, chopped - 2 celery stalks, chopped - 1 medium onion, diced - 3 cloves garlic, minced - 1 cup green peas (fresh or frozen) - 4 cups vegetable broth - 1 teaspoon dried thyme - 1 teaspoon smoked paprika - 1 bay leaf - Salt and pepper to taste - 2 tablespoons olive oil These ingredients blend well together. The potatoes give the stew that hearty base. The carrots and celery add crunch and flavor. Garlic and onion bring a lovely aroma to the dish. You can add some optional ingredients for more flavor. Here are a few ideas: - 1 teaspoon of rosemary for a fresh taste - 1 cup of corn for sweetness - 1 tablespoon of soy sauce for umami - 1 teaspoon of chili powder for a kick These extras can help you customize your stew. Feel free to experiment with what you have on hand. Once you finish cooking your hearty potato stew, garnishing makes it even better. Try these garnishes: - Fresh parsley, chopped - A sprinkle of grated cheese - A dash of hot sauce for spice Garnishing adds color and can enhance the taste. It makes your dish look inviting and delicious. For the full recipe, check out the detailed cooking instructions. To start, gather all your ingredients. You will need: - 4 large russet potatoes, peeled and diced - 2 carrots, chopped - 2 celery stalks, chopped - 1 medium onion, diced - 3 cloves garlic, minced - 1 cup green peas (fresh or frozen) - 4 cups vegetable broth - 1 teaspoon dried thyme - 1 teaspoon smoked paprika - 1 bay leaf - Salt and pepper to taste - 2 tablespoons olive oil - Fresh parsley for garnishing Wash and peel the potatoes. Dice them into cubes. Chop the carrots and celery into small pieces. Dice the onion and mince the garlic. Set everything aside. Now, let’s cook. In a large pot, heat the olive oil over medium heat. Add the diced onion and minced garlic. Sauté them together until the onion turns soft, about 4-5 minutes. Next, add the chopped carrots and celery to the pot. Stir them in and cook for another 5 minutes. This helps release their sweet flavors. Time to add the main ingredients! Toss in the diced potatoes, vegetable broth, dried thyme, smoked paprika, and bay leaf. Bring this mix to a boil, then reduce the heat to low. Cover the pot with a lid and let it simmer for 20 minutes. Check if the potatoes are tender by piercing them with a fork. After 20 minutes, stir in the green peas. Cook for another 5 minutes. This gives the peas a nice warmth. Season your stew with salt and pepper. Taste it and adjust the flavors as needed. Finally, remove the bay leaf and discard it. Your hearty potato stew is ready to enjoy! Serve it hot in bowls. Garnish each bowl with fresh parsley for a pop of color. You can pair this stew with crusty bread or a simple salad. It’s a warm meal that brings comfort to any table. For the full recipe, check out the section above! To make the best hearty potato stew, start with fresh ingredients. Use ripe, firm potatoes for the best taste. Cut your veggies into equal sizes. This helps them cook evenly. Sauté the onions and garlic well. This brings out their sweet flavors. Let the stew simmer gently. This allows the flavors to blend well. You can easily swap ingredients to fit your needs. If you need a gluten-free option, use gluten-free broth. For a vegan stew, skip the butter and use olive oil. You can also add chickpeas instead of peas for more protein. If you like a thicker stew, add a bit of cornstarch mixed with water. Add herbs like rosemary or basil for a fresh taste. You can try using vegetable broth instead of water. This adds depth to your stew. Another tip is to toss in a splash of white wine. It gives a nice zing! For creaminess, stir in a dollop of sour cream or coconut milk before serving. These tips will make your hearty potato stew shine. For the complete recipe, check out the Full Recipe section. {{image_2}} You can easily make this stew vegetarian or vegan. Simply use vegetable broth, like in the Full Recipe. Skip any meat and add more veggies. Try adding zucchini or bell peppers for extra flavor. Use beans or lentils to give it heartiness. They add protein and make the stew filling. If you want to add protein, beans or lentils work great. Black beans or kidney beans are tasty choices. Lentils cook fast and blend well with the stew. You can also add meat if you prefer. Chicken or beef adds a rich taste. Brown the meat first, then follow the stew steps. Want to change the flavor? Try different spices! Add cumin for warmth or turmeric for a golden color. You can use fresh herbs like rosemary or basil too. A splash of hot sauce can spice things up. Adjust the seasoning to fit your taste. Each change makes the stew unique and fun. To store leftover hearty potato stew, let it cool first. Once cool, transfer it to an airtight container. Make sure to seal it well. Place the container in the fridge. Leftovers can stay fresh for up to three days. If you plan to eat it later, freezing is a good option. To freeze the stew, use a freezer-safe container. Leave some space at the top. This space lets the stew expand as it freezes. You can freeze it for about three months. When you’re ready to eat, thaw it in the fridge overnight. This keeps the flavors intact. When reheating, use a pot on the stove. Heat it on low to medium heat. Stir often to avoid sticking. You might need to add a splash of broth or water. This helps to regain the stew's original texture. If you use a microwave, heat in short bursts. Stir in between to ensure even heating. Enjoy your comforting stew! Hearty Potato Stew stays fresh in the fridge for about three to five days. Keep it in an airtight container. This helps to lock in flavor and moisture. If you notice any odd smell or color, it's best to toss it. Trust your senses; they guide you well. Yes, you can make Hearty Potato Stew in advance. It tastes even better the next day! The flavors meld together nicely as it sits. Just let it cool before storing it in the fridge. When you are ready to eat, simply reheat it on the stove or in the microwave. Hearty Potato Stew pairs well with many sides. Here are some great options: - Crusty bread or rolls for dipping - A fresh green salad to add crunch - Rice or quinoa for extra fiber - Pickles or relishes for a tangy bite These sides will make your meal more filling and fun. Enjoy the stew with your favorite choices! For the full recipe, check out the Hearty Potato Stew details above. Hearty potato stew is a warm and filling dish. We discussed key ingredients, preparation, and cooking steps. I shared tips to improve your stew with swaps and variations. You can make it vegetarian or add protein for a boost. Remember to store leftovers properly for later meals. This dish is flexible and easy to make, perfect for any home. Enjoy trying your own creations!

Hearty Potato Stew Comforting and Easy Family Meal

Are you looking for a warm and cozy meal that the whole family will love? Hearty Potato Stew is the

To make creamy Parmesan beef rigatoni, you will need these key ingredients: - 12 oz rigatoni pasta - 1 lb ground beef - 1 medium onion, diced - 3 cloves garlic, minced - 1 cup vegetable broth - 1 cup heavy cream - 1 cup grated Parmesan cheese - 1 teaspoon Italian seasoning - Salt and pepper to taste - 2 tablespoons olive oil - Fresh parsley, chopped (for garnish) These ingredients create a perfect blend of flavors and textures. The rigatoni holds the sauce well. The ground beef gives it heartiness. The cream and cheese make it rich and smooth. If you want to switch things up, consider these alternatives: - Use turkey or chicken instead of ground beef for a lighter dish. - Swap heavy cream with half-and-half for a lighter sauce. - Try using vegetable broth for a vegetarian version. - You can replace Parmesan with Pecorino Romano for a sharper flavor. These swaps can help you cater to your taste or dietary needs. They keep the dish exciting and fresh. To make this meal, you’ll need some basic kitchen tools: - Large pot for boiling pasta - Large skillet for cooking beef and making the sauce - Spatula for stirring and breaking up the beef - Measuring cups for accurate ingredient portions - Knife and cutting board for chopping onion and garlic Having the right tools makes cooking easier and more enjoyable. You can find all these items in most kitchens. If you follow the full recipe, you’ll create a delicious dish that everyone will love. To make creamy Parmesan beef rigatoni, start with the pasta. Bring a large pot of salted water to a boil. Add 12 oz of rigatoni pasta and cook it until it's al dente. This usually takes around 10-12 minutes, so check the package for exact times. Once done, drain the pasta and set it aside. Next, heat 2 tablespoons of olive oil in a large skillet over medium heat. Add 1 medium diced onion and 3 minced garlic cloves. Sauté them until the onion turns translucent. This step adds great flavor to the dish. Now, add 1 lb of ground beef to the skillet. Break it apart with a spatula and cook for about 5-7 minutes until it is browned and cooked through. Season the beef with salt and pepper to taste. After the beef is browned, pour in 1 cup of vegetable broth. Stir it well and let it simmer for about 3 minutes. This will help reduce the broth. Then, lower the heat and add 1 cup of heavy cream. Stir continuously while adding 1 cup of grated Parmesan cheese gradually. Mix until the cheese melts and the sauce becomes creamy. Finally, stir in 1 teaspoon of Italian seasoning for extra flavor. Now, combine the cooked rigatoni with the sauce in the skillet. Toss everything together until the pasta is well coated. If the sauce seems too thick, add a splash of pasta water until you reach your desired creaminess. Serve your dish hot, garnished with freshly chopped parsley for a pop of color. - Always use a large pot with plenty of water for boiling pasta. - Add salt to the boiling water; it should taste like the sea. - Stir the pasta occasionally to prevent sticking. - Check the pasta a minute before the package time to avoid overcooking. 1. Boil pasta: 10-12 minutes. 2. Sauté onion and garlic: 3-4 minutes. 3. Brown beef: 5-7 minutes. 4. Simmer broth: 3 minutes. 5. Make the sauce: 5 minutes. 6. Combine and serve: 2 minutes. This timing ensures you have a delicious, creamy dish ready in about 30 minutes. For the full recipe, check the details above! To make your Creamy Parmesan Beef Rigatoni truly shine, focus on the flavors. Use fresh garlic and onion; they add depth. Try adding a splash of white wine when cooking the beef. This adds a nice acidity that balances the creaminess. For more flavor, add a pinch of red pepper flakes for a mild heat. Fresh herbs like basil or thyme can brighten the dish. Just chop them and sprinkle on top just before serving. One common mistake is overcooking the pasta. Cook it al dente, as it will soften further in the sauce. Another mistake is not seasoning enough. Always season your beef while cooking. Taste the sauce before mixing in the pasta. If it needs salt or pepper, add it now. Lastly, don’t rush the sauce. Let it simmer to allow the flavors to meld. To reheat your Creamy Parmesan Beef Rigatoni, use a skillet instead of the microwave. Add a splash of cream or broth to keep it creamy. Heat over medium-low, stirring gently until warm. This way, your dish stays rich and delicious. If you use the microwave, do it in short bursts and stir in between. This helps maintain the creamy texture. For best results, serve fresh, but leftovers can still taste great if reheated properly. {{image_2}} You can easily make a vegetarian version of creamy Parmesan rigatoni. Start by swapping the ground beef for mushrooms or lentils. Mushrooms add a rich flavor and meaty texture. Lentils are great for protein and fiber. You can use 1 lb of either option. Follow the same cooking steps as in the full recipe. Just be sure to sauté them well to enhance their flavors. If you want to change the protein, there are many options. Ground turkey or chicken works well. You can also use plant-based crumbles for a vegan dish. Consider adding cooked sausage for a spicy kick. Each choice gives a different taste but keeps the dish creamy and delicious. Adding vegetables boosts nutrition and flavor. Try spinach or kale for a pop of color and health benefits. Bell peppers or zucchini can add sweetness and crunch. Fresh herbs like basil or thyme will brighten the dish. Toss them in during the last few minutes of cooking. This way, they stay vibrant and fresh. Experiment with what you love to make your rigatoni unique! To keep your creamy Parmesan beef rigatoni fresh, store it in an airtight container. Make sure it cools down to room temperature before sealing. This helps prevent moisture build-up. Always label the container with the date. This way, you can track how long it has been stored. You can freeze creamy Parmesan beef rigatoni for later. First, let it cool completely. Next, portion the rigatoni into freezer-safe bags or containers. Remove as much air as possible before sealing. This helps prevent freezer burn. When you're ready to enjoy it again, thaw it overnight in the fridge before reheating. In the fridge, creamy Parmesan beef rigatoni lasts about three to four days. When reheating, use a skillet over low heat for even warming. Add a splash of water or broth to help restore creaminess. You can also microwave it in short bursts, stirring in between. Make sure it’s heated all the way through before serving. For best results, consume it within the first few days. You can find the full recipe to enjoy this dish fresh and hot. To make creamy Parmesan beef rigatoni, follow these steps: 1. Cook 12 oz of rigatoni pasta in salted water until al dente. 2. In a skillet, heat 2 tablespoons of olive oil. 3. Add 1 medium diced onion and 3 minced garlic cloves, cooking until soft. 4. Add 1 lb of ground beef, breaking it up with a spatula. Cook until browned. 5. Pour in 1 cup of vegetable broth and let it simmer for 3 minutes. 6. Lower the heat and add 1 cup of heavy cream, stirring well. 7. Gradually mix in 1 cup of grated Parmesan cheese until melted. 8. Add Italian seasoning, salt, and pepper to taste. 9. Toss the cooked rigatoni in the creamy sauce. 10. Serve hot, garnished with fresh parsley. This method gives you a rich and creamy dish that's simple to make. For the full recipe, check the recipe section above. Yes, you can use other pasta shapes. Penne or fusilli work well too. Each shape holds the sauce differently. Rigatoni has ridges that catch the creamy sauce. This makes every bite delicious. If you want a gluten-free option, use gluten-free pasta. Just follow the cooking time on the package. If you want to replace heavy cream, use milk and butter instead. Mix 3/4 cup of milk with 1/4 cup of melted butter. This will give a similar richness. You can also use half-and-half for a lighter option. For a dairy-free choice, try coconut cream or cashew cream. Each substitute will change the flavor a bit, so choose what you like best! This article covered how to make creamy Parmesan beef rigatoni, ingredient options, and key tools. You learned step-by-step cooking tips to ensure perfect pasta. We explored common mistakes and reheating methods for great taste. Variations, like vegetarian options and adding vegetables, let you customize your dish. Finally, you found best practices for storing and freezing leftovers. Use these tips to create a comforting meal your family will love. Enjoy the cooking process and impress your loved ones with your skills.

Creamy Parmesan Beef Rigatoni Simple and Delicious Meal

Looking for a quick and tasty dinner idea? Creamy Parmesan Beef Rigatoni is your answer! This dish combines rich flavors
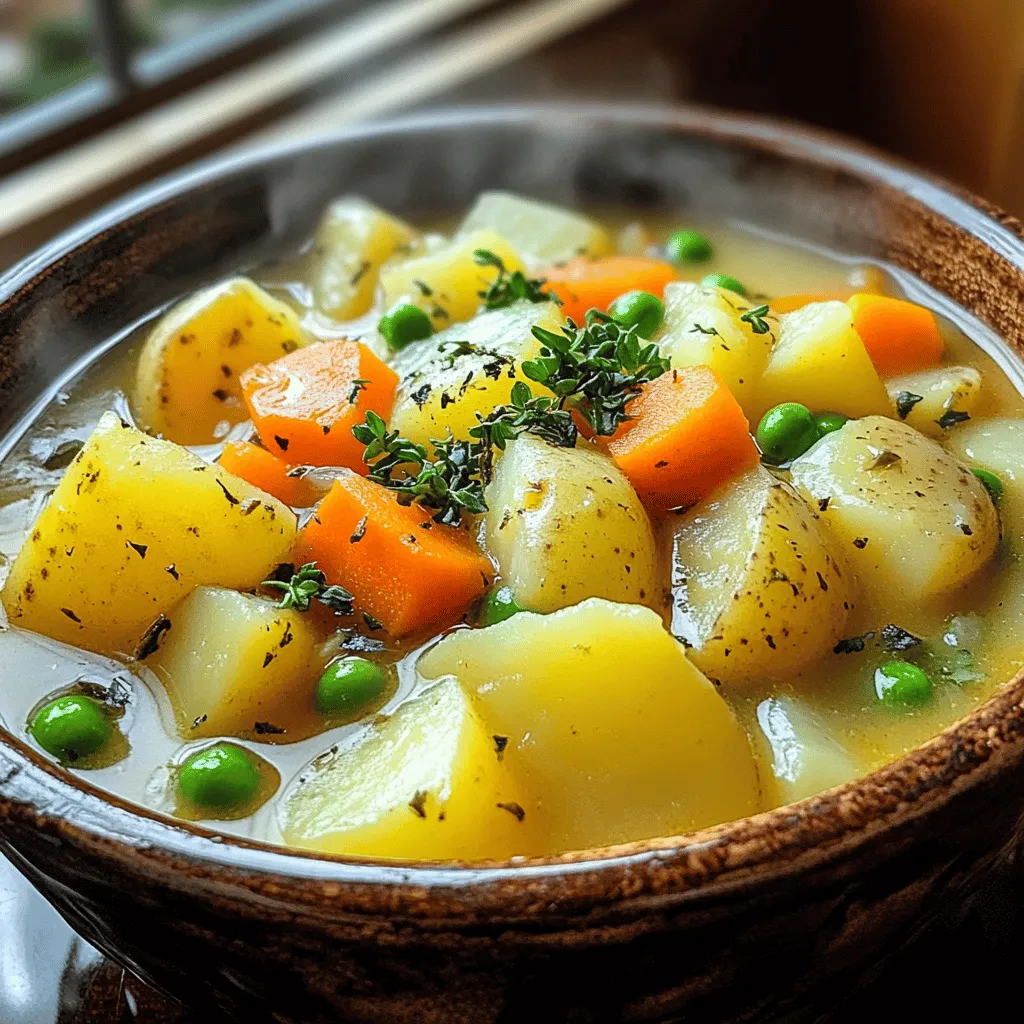
To make Garlic Cheddar Potato Soup, you need some simple but tasty ingredients. Here’s what you will need: - 4 large russet potatoes, peeled and diced - 1 medium onion, chopped - 4 cloves garlic, minced - 4 cups vegetable broth - 1 cup heavy cream - 2 cups sharp cheddar cheese, grated - 2 tablespoons olive oil - 1 teaspoon dried thyme - Salt and pepper to taste - Fresh chives, chopped (for garnish) These ingredients create a warm and creamy soup that is perfect for any day. The russet potatoes give the soup body, while garlic adds a rich flavor. The sharp cheddar cheese makes it creamy and cheesy, creating a delightful balance. When cooking, always choose fresh ingredients for the best taste. You can find the full recipe to guide you through the cooking steps. Enjoy making this comforting dish! 1. Sautéing the onion: Start by heating olive oil in a large pot. Use medium heat. Add the chopped onion. Cook it for about 5 minutes. You want it to be soft and clear, not brown. 2. Adding garlic and thyme: Next, stir in the minced garlic and dried thyme. Cook for 2 minutes. Keep stirring to avoid burning. The smell will be amazing! 3. Cooking the potatoes: Now, add the diced russet potatoes to the pot. Mix well to coat the potatoes with the onion and garlic. Pour in the vegetable broth. Make sure the potatoes are fully covered. Bring it to a boil, then lower the heat. Simmer for 15-20 minutes. The potatoes should be soft enough to pierce with a fork. 1. Using an immersion blender: Take your immersion blender and blend the soup until it is smooth. This is quick and easy. If you don’t have one, carefully move to the next step. 2. Transferring to a traditional blender: If using a traditional blender, pour the soup in batches. Blend carefully to avoid spills. After blending, return the creamy soup to the pot. 1. Incorporating cream and cheese: Stir in the heavy cream and grated cheddar cheese. Keep mixing over low heat. Wait until the cheese melts and the soup heats up. 2. Adjusting seasoning: Finally, taste your soup. Add salt and pepper to your liking. This step makes it just right. Enjoy your Garlic Cheddar Potato Soup Comforting Creamy Delight! For more details, check out the Full Recipe. Choosing the right cheese For a rich taste, always go for sharp cheddar. It gives the best flavor. You can mix it with other cheeses too. Try gouda or cream cheese for a twist. They add creaminess and depth. Adding spices and herbs Spices bring life to the soup. I like to use dried thyme, but feel free to add more. A pinch of cayenne pepper gives a nice kick. Fresh herbs like parsley or basil work wonders too. They brighten up the dish. Achieving creaminess To make your soup creamy, blend it well. A smooth texture makes a big difference. Use an immersion blender for ease. If you don’t have one, pour it into a regular blender carefully. Remember to let it cool a bit first. Alternative potato varieties Russet potatoes are great, but you can try others. Yukon Golds add a buttery taste. Red potatoes hold their shape and add a nice bite. Experiment with different types to find your favorite. Best toppings for garnish Garnish can elevate your soup. I love using chopped chives for a fresh touch. Crispy bacon bits add crunch and flavor. A sprinkle of cheese on top makes it even better. Pairing ideas What goes well with this soup? Fresh bread is a must. A simple salad adds a light touch. Consider a spinach or mixed greens salad for balance. These pairings enhance the whole meal experience. For the full Garlic Cheddar Potato Soup recipe, check out the [Full Recipe]. {{image_2}} You can make this garlic cheddar potato soup fit your diet easily. For a gluten-free option, just check your broth label. Most vegetable broths are gluten-free. You can also use gluten-free flour if you decide to thicken your soup. If you prefer a vegan alternative, swap heavy cream with coconut milk or cashew cream. Replace cheese with nutritional yeast for a cheesy flavor. These adjustments keep your soup creamy and tasty. To change the flavor, add extra vegetables. Diced carrots or chopped celery work great. They add color and nutrition. You can also toss in some spinach or kale for a healthy boost. For a spicy kick, try infusing with spices. Cayenne pepper adds heat, while smoked paprika gives a nice depth. Just a pinch can transform your soup into a flavor bomb. This soup shines in many styles. The classic American version is rich and creamy. You can enjoy it with crusty bread. For an international twist, add curry powder for warmth. It gives a nice depth and a hint of spice. You can also switch up the cheese. Try using a sharp Swiss or crumbly feta for a unique taste. Each variation makes the soup special and fun to explore. For the full recipe, check back to the ingredients and instructions we discussed earlier. To store leftovers of garlic cheddar potato soup, let it cool first. Once cool, pour it into a clean container. Use a container with a tight seal to keep it fresh. Glass jars or plastic containers work well. Make sure to store it in the fridge. It stays good for about 3 to 4 days. You can freeze the soup if you want to keep it longer. First, let it cool completely, just like for refrigeration. Then, pour the soup into freezer-safe bags or containers. Leave some space at the top for expansion. This soup can last up to 3 months in the freezer. When you're ready to eat, thaw the soup overnight in the fridge. To reheat, pour it into a pot over low heat. Stir it well as it warms up. You may need to add a splash of broth or cream if it seems too thick. Enjoy your creamy delight anytime! For the full recipe, check the section above. Can I use instant potatoes for this recipe? Yes, you can use instant potatoes. However, fresh potatoes give better flavor and texture. Instant potatoes may change the soup's creaminess and taste. For the best results, stick to russet potatoes. What can I substitute for heavy cream? If you want a lighter option, use whole milk or half-and-half. For a dairy-free choice, coconut cream works well. This will add a slight coconut flavor but keeps it creamy. How do I make this soup vegan-friendly? To make this soup vegan, use vegetable broth and coconut cream instead of heavy cream. Replace cheddar cheese with a vegan cheese alternative. This keeps the flavor while catering to vegan diets. How long does this soup take to cook? The total cooking time is about 40 minutes. It takes around 10 minutes to prep and 30 minutes to cook. You’ll have a warm, tasty soup ready in no time. Is it necessary to blend the soup? Blending the soup is not required, but it gives a smooth texture. If you prefer a chunkier soup, leave some potato pieces unblended. Just mash them a bit while cooking. Can I prepare this soup in advance? Yes, you can make this soup ahead of time. Store it in the fridge for up to three days. Just reheat it on the stove before serving. For a quick meal, make it in advance! For the full recipe, check the Garlic Cheddar Potato Soup section above. In this blog post, we explored how to make a delicious potato soup. You learned about the key ingredients, like russet potatoes and sharp cheddar cheese. We covered step-by-step instructions, tips for adding flavor, and variations for dietary needs. Lastly, we discussed storage, so you can enjoy your leftovers. With these tips, you can create a comforting soup that meets your needs. Get cooking and enjoy the warmth of homemade soup!

Garlic Cheddar Potato Soup Comforting Creamy Delight

If you’re craving a warm, creamy bowl of comfort, you need to try this Garlic Cheddar Potato Soup. With just

To make these tasty rolls, you need a few key items: - 2 ¼ cups all-purpose flour - ¼ cup granulated sugar - 1 packet (2 ¼ teaspoons) instant yeast - ½ teaspoon salt - ½ cup milk, warmed (about 110°F) - 1 large egg - 3 tablespoons unsalted butter, melted - 1 tablespoon orange zest - ½ cup dried cranberries, roughly chopped - 1 tablespoon ground cinnamon - ¼ cup brown sugar - 3 tablespoons unsalted butter, softened (for filling) - 1 cup powdered sugar (for icing) - 1 tablespoon fresh orange juice (for icing) Each of these ingredients plays a role. The flour gives structure, the sugar adds sweetness, and the yeast helps the rolls rise. The cranberries and orange zest bring a burst of flavor. Want to switch it up? Here are some fun options: - Chopped nuts like pecans or walnuts for crunch - Cream cheese for a rich filling - Different dried fruits like cherries or raisins - Spices like nutmeg or ginger for extra warmth These additions can make your rolls unique and tasty. You will need some tools to help you bake: - Mixing bowls for combining ingredients - A whisk for blending dry items - A rolling pin for rolling out dough - A baking dish for the rolls - Parchment paper for easy cleanup - A thermometer to check milk temperature Having the right tools makes the process smoother and more enjoyable. For the full recipe, check out the recipe section above. Start by mixing 1 cup of flour, sugar, yeast, and salt in a large bowl. This forms the dry base of the dough. In a separate bowl, blend warm milk, egg, melted butter, and orange zest. Make sure the milk is about 110°F; this helps the yeast grow. Gradually add the wet mix to the dry mix. Stir it until combined, then add more flour slowly until a soft dough forms. Knead the dough for about 5 minutes on a floured surface. You want it to be smooth and elastic. Place the dough in a greased bowl, cover it with a damp cloth, and let it rise in a warm spot for about 1 hour, or until it doubles in size. Once the dough has risen, punch it down to remove air. Roll it out on a floured surface into a rectangle, about 12x18 inches. Next, spread softened butter over the dough. Sprinkle brown sugar and cinnamon evenly on top. The sweet aroma will fill your kitchen. Then, scatter chopped cranberries over the mixture. Starting at one long end, roll the dough tightly into a log. Cut the log into 12 equal pieces. Place these rolls in a greased baking dish. Cover them again and let them rise for another 30 minutes until they look puffy. Preheat your oven to 350°F (175°C). Bake the rolls for 20 to 25 minutes or until they turn golden brown. While they cool slightly, prepare the icing. Mix powdered sugar with fresh orange juice until it’s smooth. Drizzle the icing over the warm rolls just before serving. This adds a sweet touch that complements the cranberry and orange flavors perfectly. Enjoy your Cranberry Orange Cinnamon Rolls as a delightful homemade treat! For the complete instructions, check the Full Recipe. For the best dough rise, find a warm spot in your home. A sunny window works well. You can also use an oven with the light on. The heat helps the dough grow. Cover the bowl with a damp cloth to keep it moist. Let the dough rise until it doubles. This can take about one hour. To make soft rolls, use warm milk. Milk around 110°F (43°C) is perfect. This helps activate the yeast. Knead the dough until it is smooth and elastic. Don’t rush this step. Allowing the dough to rise well is key. When rolling out the dough, don’t press too hard. Gentle handling keeps the rolls fluffy. One mistake is using cold milk. This can slow down yeast growth. Another error is not letting the dough rise enough. If you skip this, your rolls may be dense. Also, cut the rolls evenly for even baking. If they are not the same size, some will bake faster than others. Finally, don’t forget to check your oven temperature with a thermometer. An oven that is too hot can burn the rolls. For a complete guide, refer to the Full Recipe. {{image_2}} You can make simple swaps for a healthier twist. Use whole wheat flour instead of all-purpose flour. This adds fiber and nutrients. Replace granulated sugar with coconut sugar for a lower glycemic index. You can even use unsweetened applesauce for a portion of the butter. This keeps the rolls moist while cutting fat. Get creative with flavors! Try adding chopped nuts like walnuts or pecans to the filling. They add crunch and richness. You can also mix in some vanilla extract for a deeper taste. If you want a tart kick, add fresh orange slices or zest. This brightens the flavor and adds freshness. These rolls fit many occasions. For breakfast, serve them warm with fresh fruit. For brunch, pair them with coffee or tea. They also shine at holiday gatherings. You can even turn them into a dessert by adding a scoop of vanilla ice cream on the side. Enjoy these rolls at any time with friends and family! To keep your leftover rolls fresh, place them in an airtight container. This will help prevent them from drying out. You can also wrap them in plastic wrap. Store them at room temperature for up to three days. If you want to keep them longer, consider freezing them. To reheat your rolls, preheat the oven to 350°F (175°C). Place the rolls on a baking sheet. Cover them with foil to keep them moist. Heat for about 10 to 15 minutes. You can also microwave them for 15 to 20 seconds. This works well if you only have one or two rolls. If you want to freeze your rolls, let them cool completely. Then, wrap each roll in plastic wrap and place them in a freezer bag. Squeeze out as much air as possible. This helps prevent freezer burn. They will stay fresh for up to three months. To enjoy, thaw in the fridge overnight and reheat as needed. You can find the Full Recipe for these delightful rolls above. You can tell the rolls are done when they turn golden brown. A nice, warm smell fills the kitchen too. If you tap the bottom, it should sound hollow. The rolls should also spring back when you gently press them. Yes, you can make the dough ahead of time! Simply prepare it and let it rise. After the first rise, cover it tightly and store it in the fridge. It will stay fresh for up to 24 hours. When you are ready, take it out and let it come to room temperature before rolling it out. Serve these rolls warm for the best flavor. Place them on a pretty platter. Drizzle with icing for a sweet touch. You can add extra orange zest and a few whole cranberries for a nice look. These rolls make a great treat for breakfast or brunch! For the complete process, check the Full Recipe. You now know how to make delicious Cranberry Orange Cinnamon Rolls. We covered key ingredients, tools, and tips to ensure success. You learned about variations and how to store leftovers for later enjoyment. Use these steps to delight friends and family with warm, sweet rolls. Baking can be simple and rewarding. Enjoy your kitchen adventure and the tasty rewards that follow. Happy baking!

Cranberry Orange Cinnamon Rolls Flavorful Homemade Treat

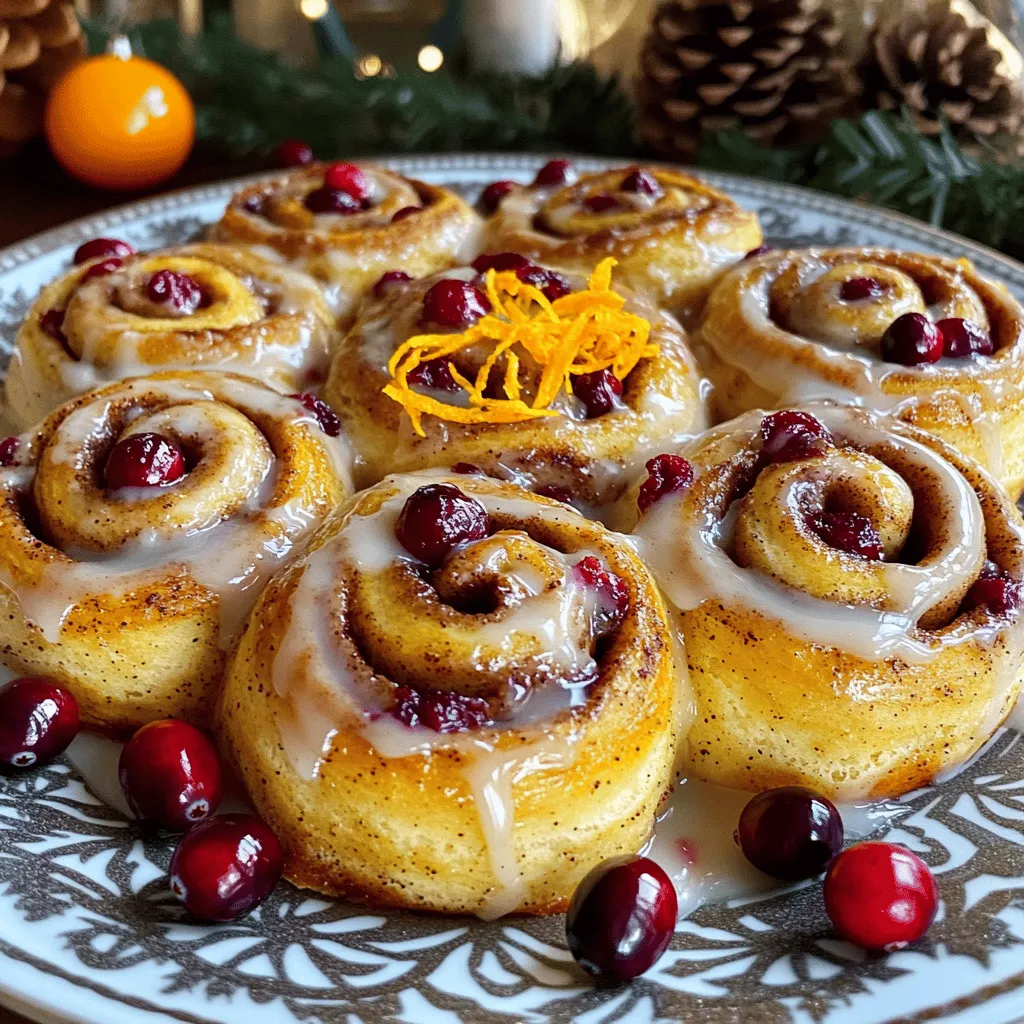
Are you ready to treat yourself to a sweet, zesty delight? My Cranberry Orange Cinnamon Rolls are the perfect blend

To create your Beef Cannelloni with Mozzarella Sauce, gather the following ingredients: - 12 cannelloni tubes - 1 pound ground beef - 1 onion, finely chopped - 2 cloves garlic, minced - 1 cup ricotta cheese - 1 cup shredded mozzarella cheese (plus extra for topping) - 1 egg - 1 teaspoon dried oregano - 1 teaspoon dried basil - Salt and pepper to taste - 2 cups marinara sauce - 1/4 cup grated Parmesan cheese - Olive oil for cooking These ingredients come together to create a warm and hearty dish. The cannelloni tubes hold a flavorful beef filling that combines with creamy ricotta and mozzarella. The herbs add a nice touch, while the marinara sauce ties everything together. Make sure to have everything ready before you start cooking. It makes the process smoother and more fun. You can find the full recipe to guide you through the process. 1. Preheat the oven and prepare ingredients Start by setting your oven to 375°F (190°C). Gather all your ingredients. This makes cooking easier. 2. Sauté onions and garlic In a large skillet, heat a tablespoon of olive oil over medium heat. Add the finely chopped onion and minced garlic. Sauté them until the onion is soft and fragrant, about 3-4 minutes. 3. Cook ground beef and season it Next, stir in 1 pound of ground beef. Cook until it's browned, breaking it apart with a spoon. This should take 5-7 minutes. Season the beef with 1 teaspoon of dried oregano, 1 teaspoon of dried basil, salt, and pepper. Mix well. 1. Combine filling ingredients Remove the skillet from heat. Let the beef mixture cool slightly. In a mixing bowl, add the beef, 1 cup of ricotta cheese, 1 cup of shredded mozzarella cheese, and 1 egg. Mix everything well. 2. Stuff the cannelloni tubes Take your 12 cannelloni tubes and gently fill each one with the beef and cheese mixture. You can use a spoon or a piping bag to make it easier. 3. Layer in the baking dish In a large baking dish, spread a thin layer of marinara sauce at the bottom. Lay the filled cannelloni tubes in the dish, side by side. Pour the remaining marinara sauce over the top. 1. Spread marinara sauce and assemble the layers After layering the tubes, sprinkle extra mozzarella cheese and 1/4 cup of grated Parmesan cheese on top. This adds flavor and a nice crust. 2. Bake covered and then uncovered Cover the dish with aluminum foil. Bake for 25 minutes. Then, remove the foil and bake for another 15-20 minutes. The cheese should be bubbly and golden brown. 3. Rest before serving Once baked, let the dish rest for a few minutes. This helps the flavors settle. Now you're ready to serve your Beef Cannelloni with Mozzarella Sauce. Enjoy this tasty comfort food! For the full recipe, refer to the earlier section. How to avoid overcooking the beef To keep the beef tender, watch the heat. Cook on medium heat for about 5-7 minutes. Break it apart with a spoon to ensure even cooking. Once it’s browned, take it off the heat. This helps keep it juicy and full of flavor. Tips for a creamy filling For a creamy filling, mix ricotta and mozzarella well. Make sure your cheeses are at room temperature. This helps them blend smoothly. Adding an egg also gives the filling a nice texture and richness. Best ways to serve Beef Cannelloni Serve your Beef Cannelloni warm from the oven. Place it on a plate and drizzle extra marinara sauce on top. This adds a nice touch and keeps it moist. You can also sprinkle fresh basil or parsley for a pop of color. Pairing with side dishes and wine Pair this dish with a simple salad, like arugula or mixed greens. A light vinaigrette works best. For wine, a medium-bodied red, like Chianti, complements the flavors nicely. It balances the richness of the beef and cheese. Garnishing ideas for an elegant touch To make your dish look fancy, add fresh basil leaves on top. A sprinkle of grated Parmesan cheese gives it flair. You can also drizzle a bit of olive oil or balsamic glaze for added flavor. Serving in individual plates vs. family style Serving in individual plates makes it special. It allows guests to enjoy their own portion. Family style is great for sharing and creates a cozy atmosphere. Either way, your Beef Cannelloni will shine! For the full recipe, check out the details above. {{image_2}} You can change the ground beef for turkey or chicken. These meats are leaner but still tasty. If you want a meat-free option, try using lentils or mushrooms. They give a nice texture and flavor. For cheese, mozzarella is great, but you can also use provolone or fontina. These cheeses melt well and add a different taste. Mixing cheeses is fun too! Try a blend for extra flavor. Adding veggies to the meat mixture boosts nutrition and taste. Chopped spinach, bell peppers, or mushrooms work well. They add color and make the dish more filling. You can spice things up by adding fresh herbs or spices. A pinch of red pepper flakes gives it a kick. Fresh parsley or basil can brighten the flavor. Experimenting with seasonings keeps the dish exciting. While marinara sauce is classic, you can try a white sauce. A creamy béchamel pairs well with the beef. It gives a rich and smooth texture. You can also explore different marinara styles. Try a spicy arrabbiata or a roasted garlic sauce. Each choice brings a new flavor profile to the dish. For the full recipe, check out the Beef Cannelloni with Cheesy Delight recipe above. To store your Beef Cannelloni, let it cool first. Place leftovers in an airtight container. This keeps the flavors fresh. You can store it in the fridge for up to three days. When you're ready to eat, preheat your oven to 350°F. Cover the dish with foil to keep the moisture in. Heat it for about 20 minutes or until warm. You can freeze both uncooked and cooked cannelloni. For uncooked cannelloni, fill the tubes, then lay them flat in a container. Cover the container tightly. It will stay fresh for up to three months. For cooked cannelloni, let it cool completely first. Then, wrap it tightly in plastic wrap and foil. Thaw it overnight in the fridge when ready to cook. Preheat your oven to 375°F and bake as usual until hot and bubbly. To cook cannelloni, you fill the tubes with your chosen filling. Place them in a baking dish with sauce. Bake in a preheated oven at 375°F for about 40-45 minutes. Cover the dish for the first part of baking, then uncover to brown the top. Yes, you can make Beef Cannelloni ahead of time. Assemble the dish, then cover it with foil and store it in the fridge. It stays fresh for up to 2 days. Bake it when you are ready to eat. If you need a ricotta cheese substitute, try cottage cheese or cream cheese. You can also use Greek yogurt for a healthier twist. Blend these options until smooth to mimic ricotta's texture. Beef Cannelloni lasts about 3-4 days in the fridge. Store it in an airtight container to keep it fresh. Reheat in the oven at 350°F until heated through. For the best taste, enjoy it sooner rather than later. For the complete recipe of Beef Cannelloni with Mozzarella Sauce, refer to the [Full Recipe]. You learned how to make flavorful Beef Cannelloni from scratch. We covered ingredients, step-by-step instructions, and convenient tips. You can tweak the recipe to suit your tastes with various fillings or sauces. Remember, perfecting this dish takes practice. Don't hesitate to experiment with flavors and substitutions. Soon, you'll impress your family and friends with your delicious Beef Cannelloni. Enjoy the process, and happy cooking!

Beef Cannelloni with Mozzarella Sauce Tasty Comfort Food

Looking for a dish that warms your heart and satisfies your cravings? Beef Cannelloni with Mozzarella Sauce is your answer!

Newer posts
← Previous Page1 … Page45 Page46

dsad

© 2025 savorystride • Built with GeneratePress

Our Policies

  • Copyright Policy
  • Cookie Policy
  • GDPR Policy
  • Privacy Policy
  • Disclaimer
  • Terms Of Use

More Information

  • Home
  • About
  • Contact
  • Appetizers
  • Dessert
  • Dinner
  • Drinks
©2025, savorystride About Back To Top