Creamy Carbonara Ramen Bowls Easy Comfort Food
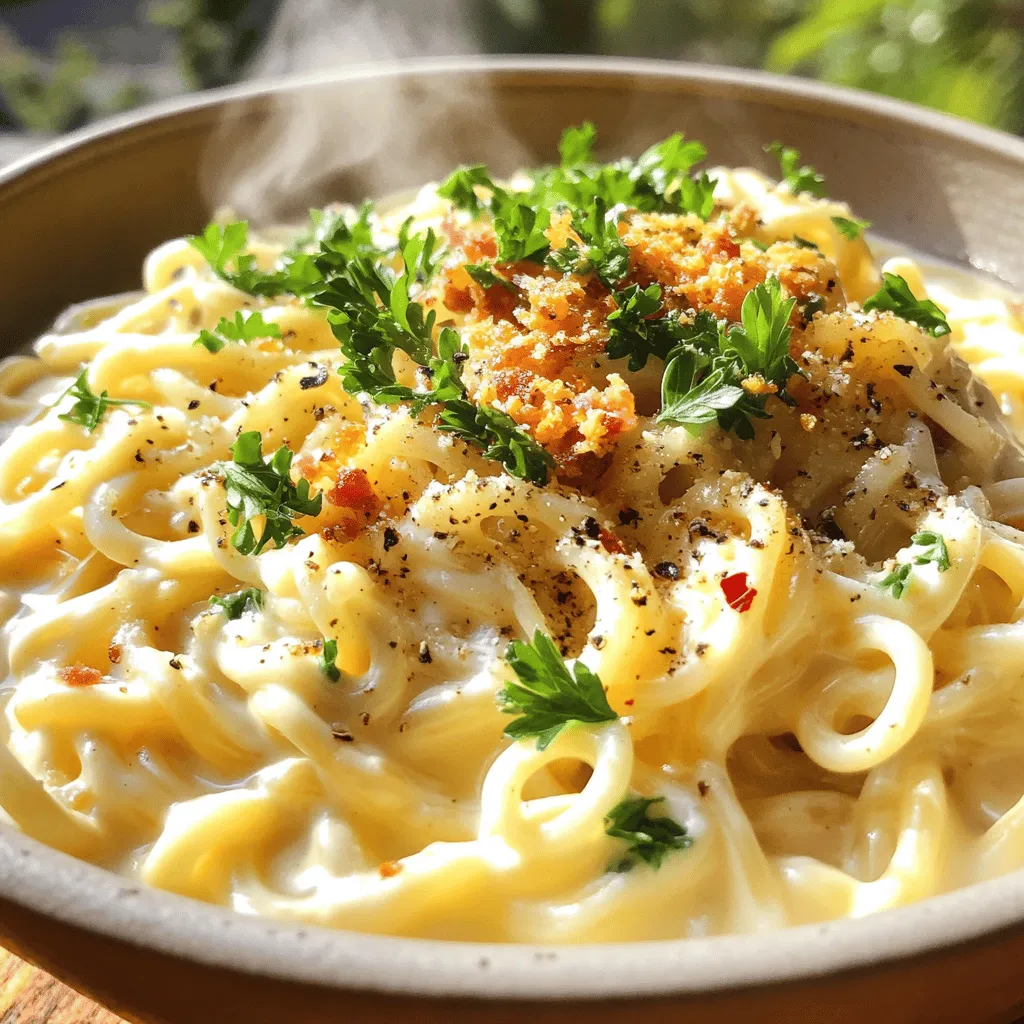
Craving a cozy meal that warms your heart? These Creamy Carbonara Ramen Bowls are the perfect comfort food! This dish
Craving a cozy meal that warms your heart? These Creamy Carbonara Ramen Bowls are the perfect comfort food! This dish
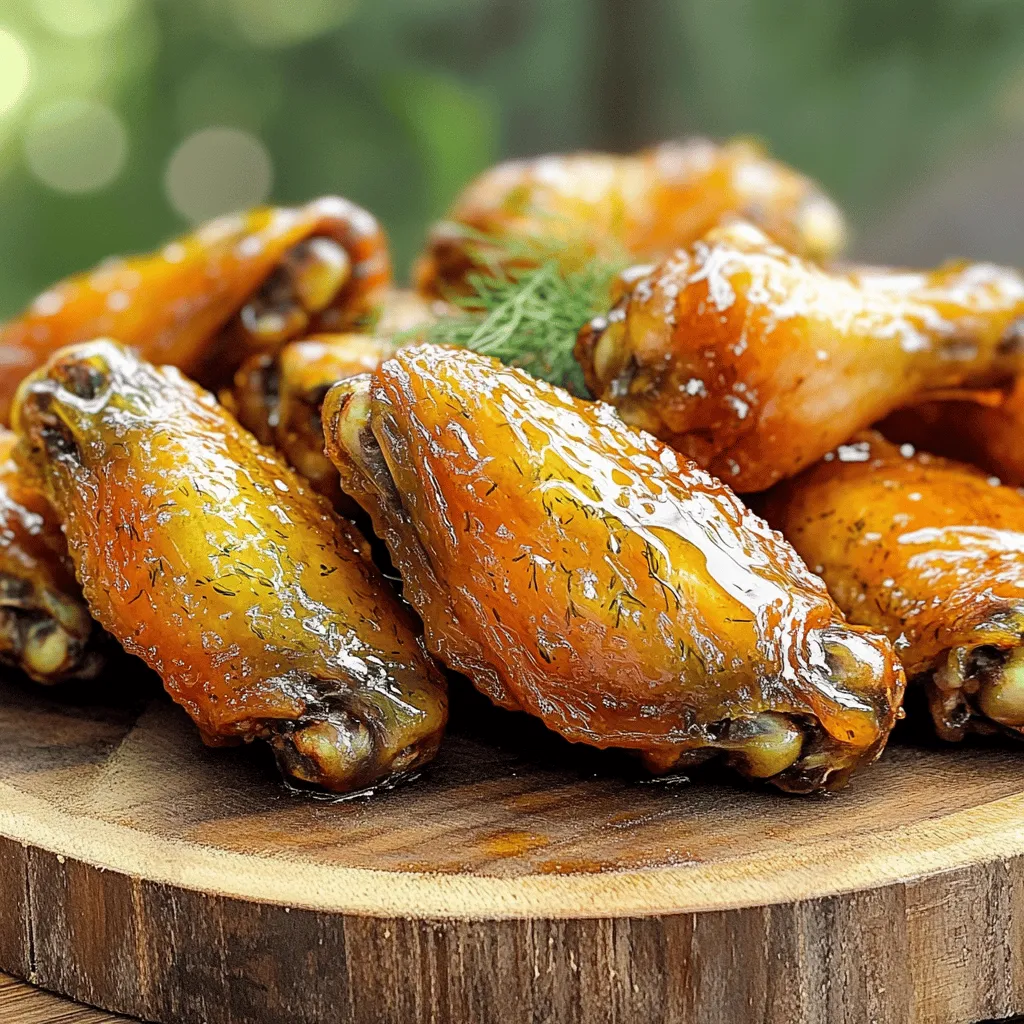
Get ready for a flavor party with my Pickle Juice Hot Honey Wings! These wings pack a punch of tangy,
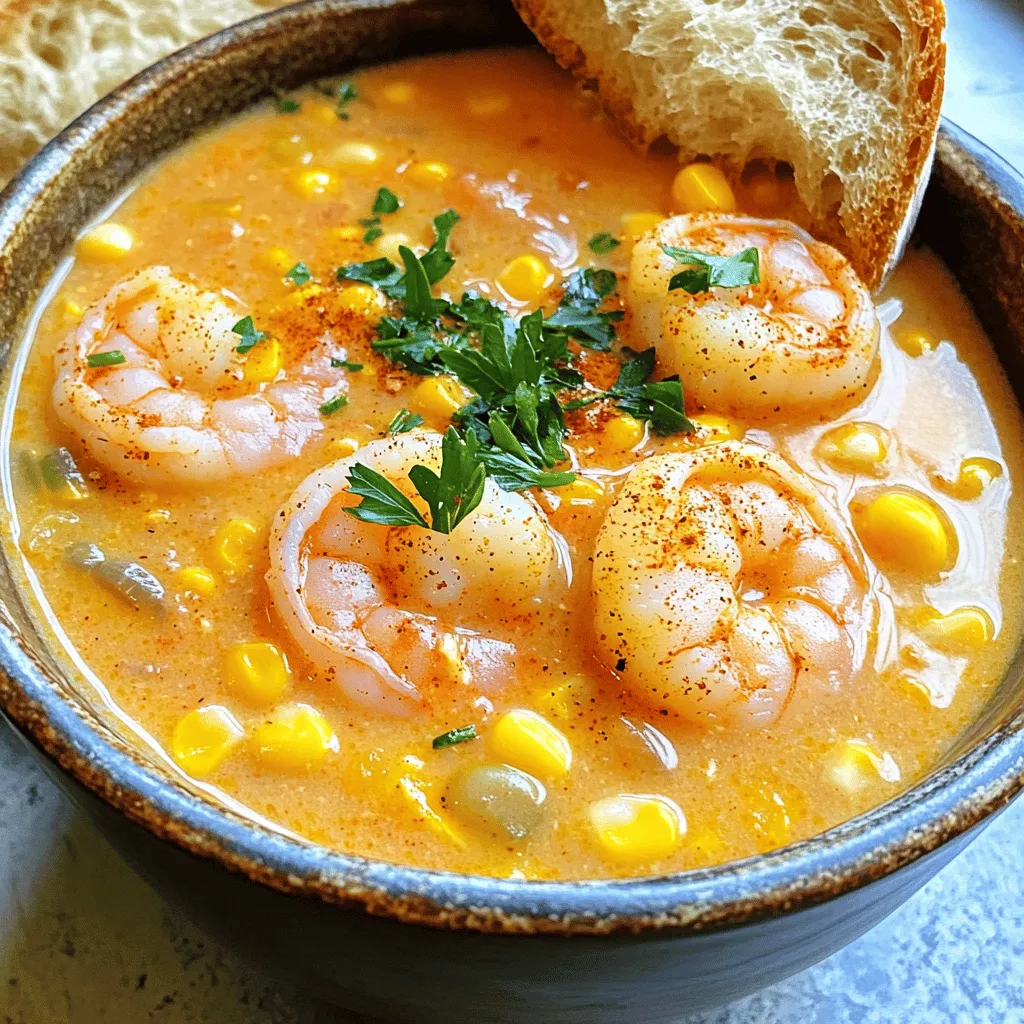
If you crave a warm, flavorful dish that cooks in no time, you’re in the right place. My Minute Cajun
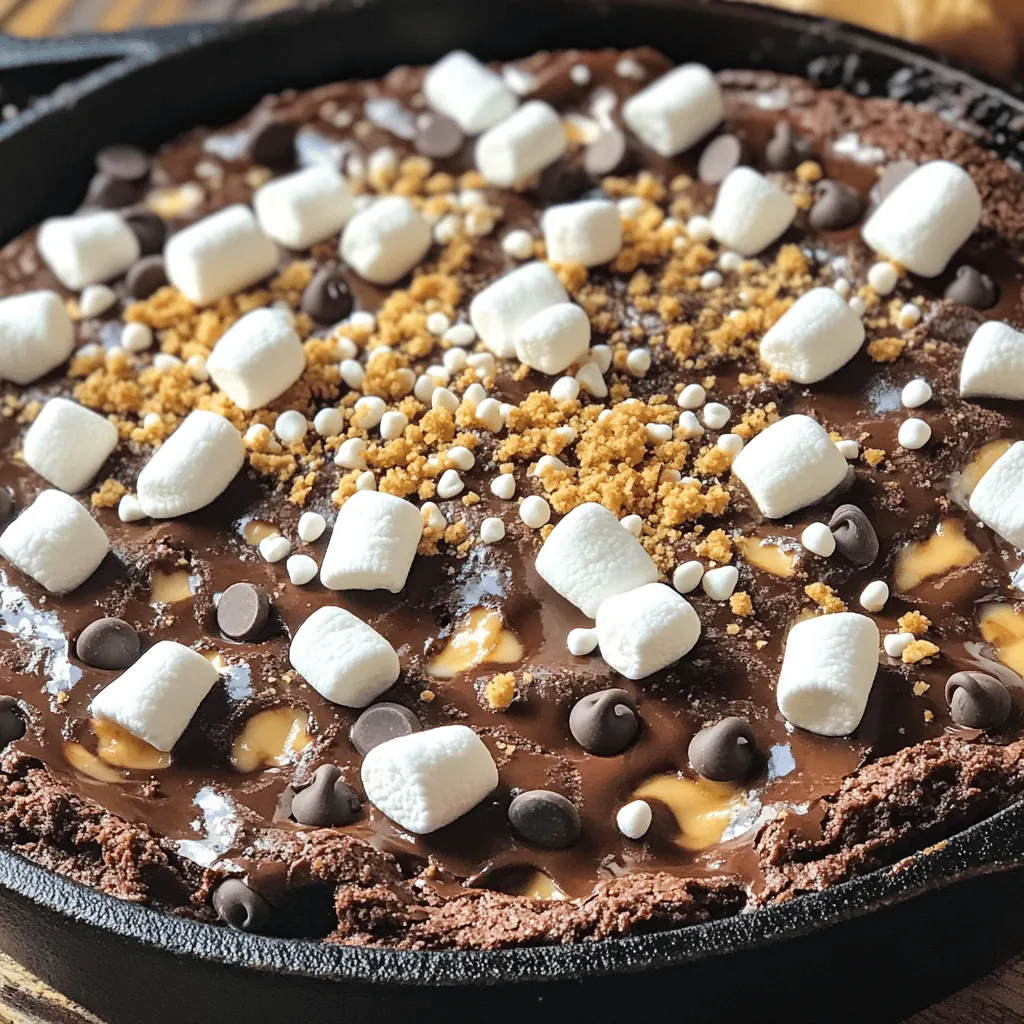
Are you ready to dive into a dessert that’s pure bliss? The S’mores Brownie Skillet Dip is an irresistible treat
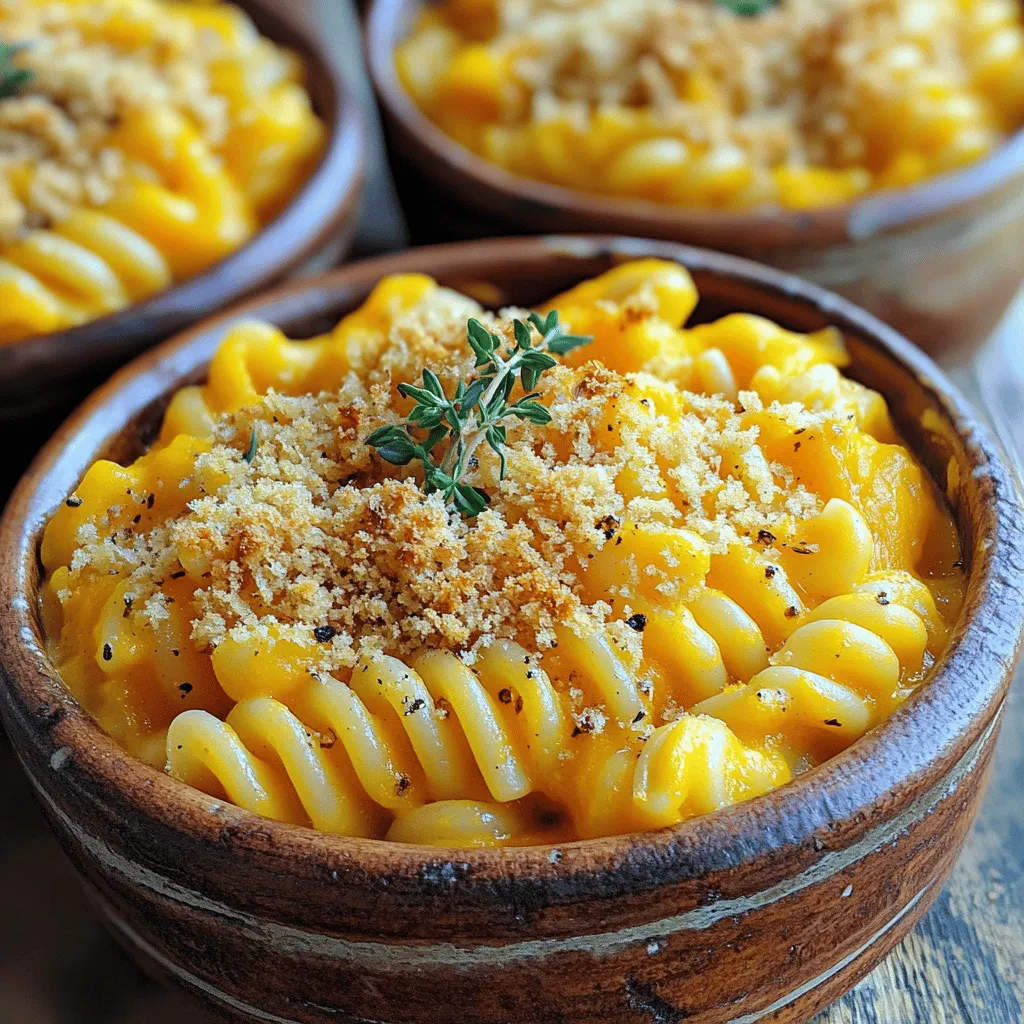
If you’re seeking a warm, comforting dish that’s easy to make, you’ll love my Slow Cooker Butternut Squash Mac and
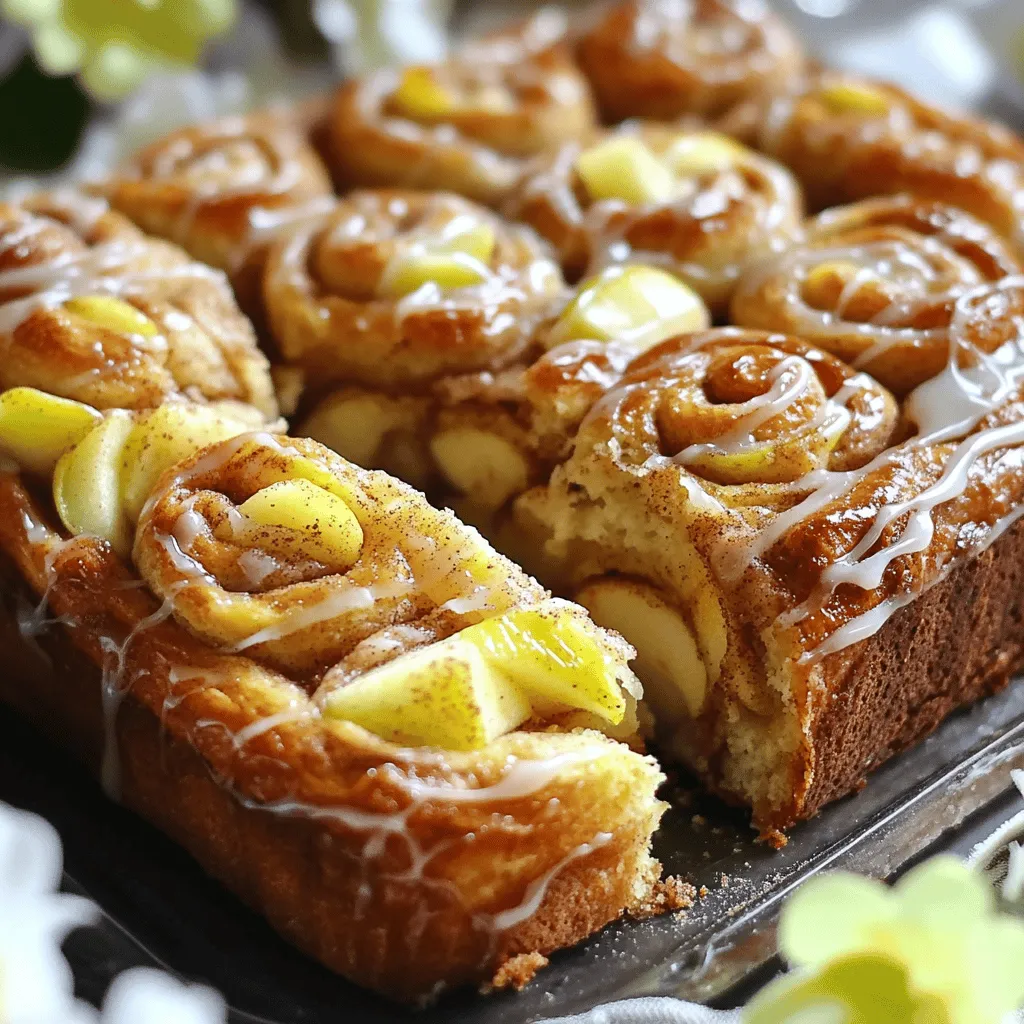
Are you ready to treat your taste buds? This Cinnamon Roll Apple Fritter Bread combines soft, sweet dough with juicy
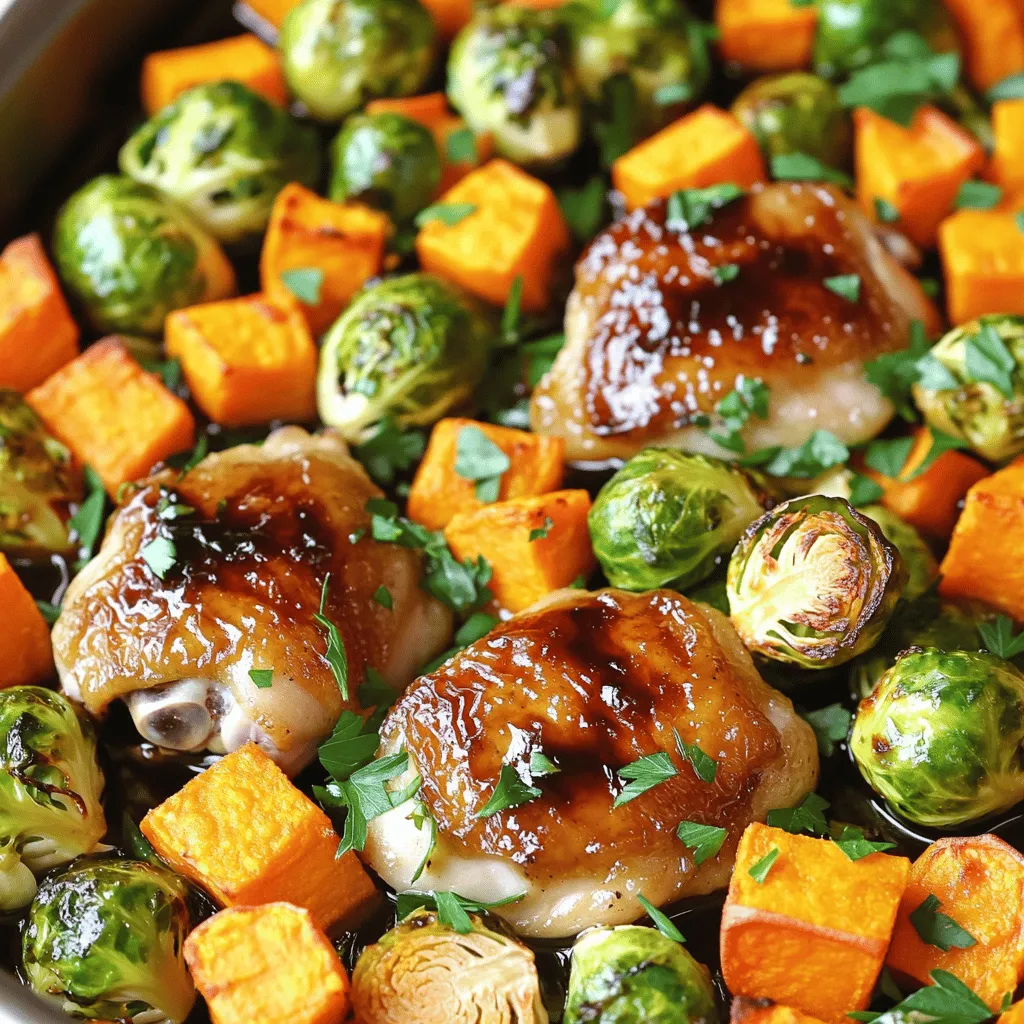
If you’re looking for a simple, tasty dish, you’ve found it! The One Pan Harvest Chicken and Maple Veggies Delight

Are you ready to elevate your snack game? Cheeseburger Quesadilla Smash Sliders combine the best of both worlds! This tasty
![To create your Pumpkin Spice Latte Tiramisu Cups, gather the following ingredients: - 1 cup strong brewed coffee (cooled) - 1 tablespoon pumpkin pie spice - 1 cup mascarpone cheese - 1 cup heavy cream - 1/2 cup powdered sugar - 1 teaspoon vanilla extract - 1 cup pumpkin puree - 12 ladyfinger cookies - Cocoa powder for dusting - Dark chocolate shavings (optional for garnish) These ingredients form the heart of this delightful dessert. Each one plays a key role in building flavor and texture. The strong brewed coffee gives a rich base, while pumpkin pie spice adds warmth. Mascarpone cheese and heavy cream create a creamy layer that feels indulgent. Pumpkin puree enhances the autumn vibe and adds moisture. When choosing your coffee, opt for a strong brew. This ensures the ladyfingers soak up enough flavor. The ladyfingers should be light and airy, making them perfect for soaking. You can even choose gluten-free versions if needed. Cocoa powder adds a finishing touch, giving that classic tiramisu look. I recommend using high-quality mascarpone cheese for the best taste. It should be creamy and smooth to blend well with the other ingredients. If you like a richer flavor, dark chocolate shavings make an excellent garnish. They add a lovely contrast to the sweet layers. For the full recipe, check out the [Full Recipe]. Enjoy gathering these ingredients, as each one contributes to a memorable dessert experience! First, brew a strong cup of coffee. Let it cool down. In a medium bowl, mix the cooled coffee with pumpkin pie spice. Stir well to combine. Set this mixture aside for later use. In a separate bowl, beat together the mascarpone cheese, heavy cream, powdered sugar, and vanilla extract. Use a mixer until the mixture forms soft peaks. This step is key for a light texture. Now, gently fold in the pumpkin puree. You want a smooth and creamy blend. Take your ladyfinger cookies. Quickly dip each one into the spiced coffee. Ensure they soak but don’t get too soggy. In your serving cups, layer two soaked ladyfingers at the bottom. Next, add a layer of the pumpkin mascarpone mixture on top. Repeat this process until the cups are full. Finish with a final layer of mascarpone. Cover the cups with plastic wrap. Refrigerate them for at least four hours, or overnight if you can wait. This allows all those great flavors to meld. Before you serve, dust the top with cocoa powder and add dark chocolate shavings if desired. For the full recipe, see above. - Beating mascarpone to soft peaks: Start by beating the mascarpone cheese with heavy cream, powdered sugar, and vanilla. This will create a light and fluffy texture. Stop when you see soft peaks forming. If you beat it too long, it may become grainy. - Gentle folding technique: Once you add the pumpkin puree, use a spatula to fold it in gently. This keeps the mixture airy. Be careful not to stir too hard; you want to keep that creamy feel. - Ideal soaking time for the right texture: Quickly dip each ladyfinger into the cooled coffee mixture. A second or two is just right. This helps them absorb flavor without getting mushy. - Avoiding sogginess: After soaking, let the ladyfingers sit for a moment. This allows excess coffee to drip off, giving you a nice balance of flavor and texture. - Best practices for presentation: Use clear cups to show off the beautiful layers. A dusting of cocoa powder on top adds a nice touch. Dark chocolate shavings make it look even fancier. - Pairing ideas with beverages: These cups go great with a warm cup of coffee or a spiced chai. The flavors blend well and enhance the dessert experience. For the full recipe, check out the details above. {{image_2}} You can have fun with flavors in Pumpkin Spice Latte Tiramisu Cups. Try using different spices. For a twist, mix in nutmeg or ginger. These spices add warmth and depth to the dish. You can also incorporate chocolate or caramel layers. A chocolate layer brings richness and pairs well with coffee. Caramel adds sweetness and a creamy texture. Both options make your dessert more exciting. If you need gluten-free options, look for gluten-free ladyfingers. They work just as well as regular ones. You can also use dairy substitutes for mascarpone. Cream cheese or coconut cream can create a similar texture. Just make sure to adjust the sweetness. This keeps your dessert tasty while meeting dietary needs. Consider different serving styles to impress your guests. Mini dessert cups look cute and are easy to serve. They allow everyone to enjoy a small portion. You can also use jars for individual servings. Jarring creates a rustic look and makes sharing easy. Plus, they are perfect for parties or picnics. For the full recipe, check out the details above. To keep your pumpkin spice latte tiramisu cups fresh, store them in a tight container. Use plastic wrap or a lid to cover them well. This helps keep unwanted odors out. You can store them in the fridge for up to three days. After this time, the flavor and texture may start to fade, making them less enjoyable. Can you freeze tiramisu cups? Yes, you can! However, freezing may change the texture. Start by removing the cups from any plastic wrap. Place them in a freezer-safe container. They can last up to one month in the freezer. To thaw without losing texture, move the cups to the fridge for several hours before serving. This keeps them creamy and delicious. To refresh flavors after storage, consider adding a sprinkle of fresh cocoa on top. This adds a nice touch. You might also want to add dark chocolate shavings for extra flair. These simple garnishes can elevate your tiramisu cups, making them feel fresh and exciting again. Enjoy each bite of this unique dessert! Yes, you can make these tiramisu cups ahead of time. I suggest preparing them at least one day before you plan to serve. This gives the flavors time to mix well. The longer they sit, the better they taste! These cups will last about 3 to 4 days in the fridge. Be sure to cover them well. This keeps them fresh and tasty. After that, the texture may change, and they won't be as good. If you can't find mascarpone, you have options. Cream cheese works as a nice substitute. It will change the flavor a bit, making it tangier. You can also use ricotta cheese for a lighter taste. Just make sure to blend it well for smoothness. You now know how to make delicious Pumpkin Spice Latte Tiramisu Cups. We covered the required ingredients, step-by-step instructions, and useful tips for a perfect texture. Plus, I shared variations and storage info to keep your dessert fresh. These cups are a fun twist on a classic treat. Enjoy them with friends or family during fall gatherings. You’ll impress everyone with your skills! Remember, cooking is all about trying new things.](https://savorystride.com/wp-content/uploads/2025/07/d373e332-0c61-48fa-94cb-40c55ca1de8d.webp)
If you love the cozy flavors of fall, you’re in for a treat! Today, I’ll show you how to make
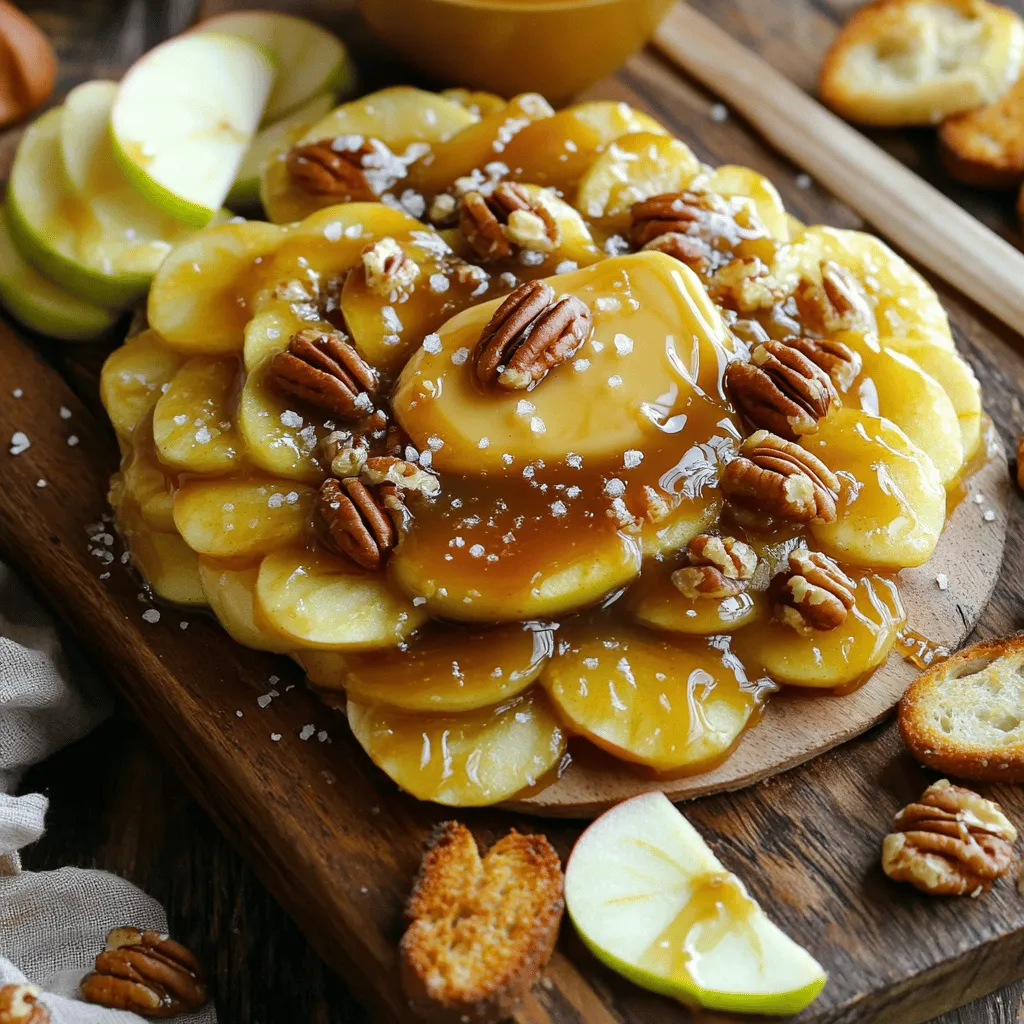
If you love sweet treats and fun gatherings, you’ll adore my Caramel Apple Pie Butter Board! This delightful and simple
