Skip to content
DisclaimerTerms Of UseGDPR PolicyCookie Policy

savorystride

  • Home
  • Drinks
  • Appetizers
  • Dinner
  • Dessert
  • About
  • Contact
  • Privacy Policy
DisclaimerTerms Of UseGDPR PolicyCookie Policy

Hazel

To make this tasty Greek chickpea cucumber feta salad, you will need: - 1 can (15 oz) chickpeas, drained and rinsed - 1 medium cucumber, diced - 1 cup cherry tomatoes, halved - 1/2 red onion, finely chopped - 1 cup crumbled feta cheese - 1/4 cup Kalamata olives, pitted and halved - 1/4 cup fresh parsley, chopped - 3 tablespoons olive oil - 2 tablespoons red wine vinegar (or apple cider vinegar) - 1 teaspoon dried oregano - Salt and pepper to taste Using fresh ingredients makes this salad shine. Fresh cucumbers add crunch. Juicy cherry tomatoes give flavor. Fresh parsley adds brightness. The feta cheese brings creaminess. Each bite bursts with taste. Fresh ingredients also keep your meal healthy. They provide vitamins and nutrients. Freshness matters for both flavor and health. You can easily change ingredients to fit your needs. If you are vegan, leave out the feta. Try adding avocado for creaminess. If you cannot eat chickpeas, use black beans. They also taste great! For a gluten-free option, this salad is already safe. Just check your vinegar choice. Making these swaps keeps the salad fun and tasty! To make this salad, start by gathering all your ingredients. You need one can of chickpeas, a cucumber, cherry tomatoes, red onion, feta cheese, Kalamata olives, and fresh parsley. 1. In a large bowl, add the drained and rinsed chickpeas. 2. Dice the cucumber and add it to the bowl. 3. Halve the cherry tomatoes and toss them in. 4. Finely chop the red onion and mix it in as well. 5. Next, gently add the crumbled feta cheese. 6. Slice the Kalamata olives and add them to the mix. 7. Finally, chop some fresh parsley and fold it in gently. Now, we’ll make the dressing. Use a small bowl to do this. 1. Whisk together three tablespoons of olive oil. 2. Add two tablespoons of red wine vinegar or apple cider vinegar. 3. Mix in one teaspoon of dried oregano, salt, and pepper to taste. Pour this dressing over the salad. Toss everything gently to coat the ingredients well. Allow the salad to sit for 10-15 minutes. This lets the flavors mix nicely. To save time, prep your ingredients first. Chop all veggies before mixing. Use a can of chickpeas to skip the soaking. Rinse them well to get rid of extra salt. Slice the olives and feta cheese while you wait. This way, you'll have everything ready fast. If you're short on time, you can use pre-cut veggies or store-bought dressings. This can make your task much quicker. Look for bright colors in your salad. The cucumber should be crunchy and fresh. The tomatoes should be juicy and sweet. When mixing, the feta should gently break apart without turning mushy. The olives will add a nice briny flavor. The salad will smell fresh and vibrant when done. If it looks colorful and smells great, you know it’s ready to serve. Enjoy your Greek Chickpea Cucumber Feta Salad! For the full recipe, check the complete guide. When mixing your Greek Chickpea Cucumber Feta Salad, keep it gentle. This helps maintain the shape of the cucumber and feta. Use a large bowl for easy tossing. Start by adding the chickpeas and vegetables first. Then, fold in the feta and olives. This way, each bite has a mix of flavors. For serving, a shallow bowl works best. It lets everyone see the colorful layers. Garnish with extra parsley and a lemon wedge. This adds a nice touch and a bit of zest. To enhance the flavors, use fresh herbs. Fresh parsley adds brightness. You can also try adding fresh mint or dill. A squeeze of lemon juice lifts the taste. If you like it spicy, add a pinch of red pepper flakes. For a richer taste, let the salad sit for a bit. This gives the flavors time to blend. A drizzle of balsamic glaze can also add sweetness and depth. Experiment to find your favorite mix. Making this salad ahead of time is easy. You can prepare it up to a day in advance. Just keep the dressing separate until serving. This keeps it fresh and crunchy. If you mix it too early, the cucumbers may become soggy. Store the salad in an airtight container in the fridge. For the best taste, eat it within two days. You can also prep ingredients like chopping veggies ahead. This saves time on busy days. Check out the Full Recipe for more detailed steps! {{image_2}} You can easily change flavors in the Greek chickpea cucumber feta salad. For a zesty kick, try adding diced bell peppers. They add crunch and color. If you want a bit of sweetness, use fresh corn instead of olives. You can also swap feta cheese for goat cheese for a creamy texture. These simple changes can make the dish unique and fun. Adding protein boosts the nutrition of this salad. Grilled chicken is a great option. Cut it into small pieces and mix it in. It adds a savory taste. If you prefer plant-based options, try marinated tofu. Cut it into cubes and toss it with the salad. Both options make the salad more filling and satisfying. You can adapt this salad to each season. In summer, add fresh basil or mint for a refreshing taste. In fall, include diced sweet potatoes for warmth. Winter is great for adding roasted vegetables like carrots or Brussels sprouts. These seasonal changes keep the salad interesting and enjoyable all year long. For the full recipe, check the details above. To keep your Greek Chickpea Cucumber Feta Salad fresh, store it in the fridge. Use an airtight container. This helps to keep the salad crisp and tasty. Avoid adding dressing to the whole salad if you plan to save some. It can make the salad soggy. Instead, pack the dressing separately. When you are ready to eat, just drizzle the dressing on top. Most leftovers last about three to four days in the fridge. Chickpeas and feta cheese can stay fresh for this time. Cucumbers and tomatoes may lose their crunch after a couple of days. If you notice any bad smell or change in color, toss it out. Always check your ingredients before using them again. Freezing the Greek Chickpea Cucumber Feta Salad is not recommended. The cucumbers and tomatoes can become mushy when thawed. However, you can freeze the chickpeas. Drain and rinse them first, then store in a freezer-safe bag. They will last for up to six months. When ready to use, thaw them in the fridge overnight. For the freshest taste, enjoy the salad fresh. For the full recipe, refer to the earlier section. This salad is packed with nutrition. Chickpeas are high in protein and fiber. This helps keep you full longer. Cucumber adds hydration with low calories. Feta cheese provides calcium and healthy fats. Tomatoes bring vitamins A and C, which support your immune system. Olives add healthy fats and antioxidants. Together, these ingredients create a tasty dish that is good for your body. Yes, you can make this salad ahead of time. It tastes even better after the flavors mix. Prepare it up to a day in advance. Keep it in the fridge in a sealed container. If you use fresh cucumber and tomatoes, add them just before serving. This keeps them crisp and fresh. You can get creative with this salad! Here are some tasty ideas: - Bell peppers for extra crunch and color - Avocado for creaminess and healthy fats - Spinach or arugula for more greens - Quinoa for extra protein and texture - Nuts or seeds for crunch and healthy fats Feel free to mix and match as you like. Each addition can bring a new taste to your dish. For the full recipe, check out the earlier section. In this article, we explored how to make a Greek Chickpea Cucumber Feta Salad. We highlighted the importance of fresh ingredients and discussed substitutions for different diets. You learned detailed steps to prepare the salad efficiently and tips for boosting flavors. In closing, this salad is versatile and easy to make. You can adjust it to fit your taste or season. Enjoy cooking and sharing this tasty dish with others!

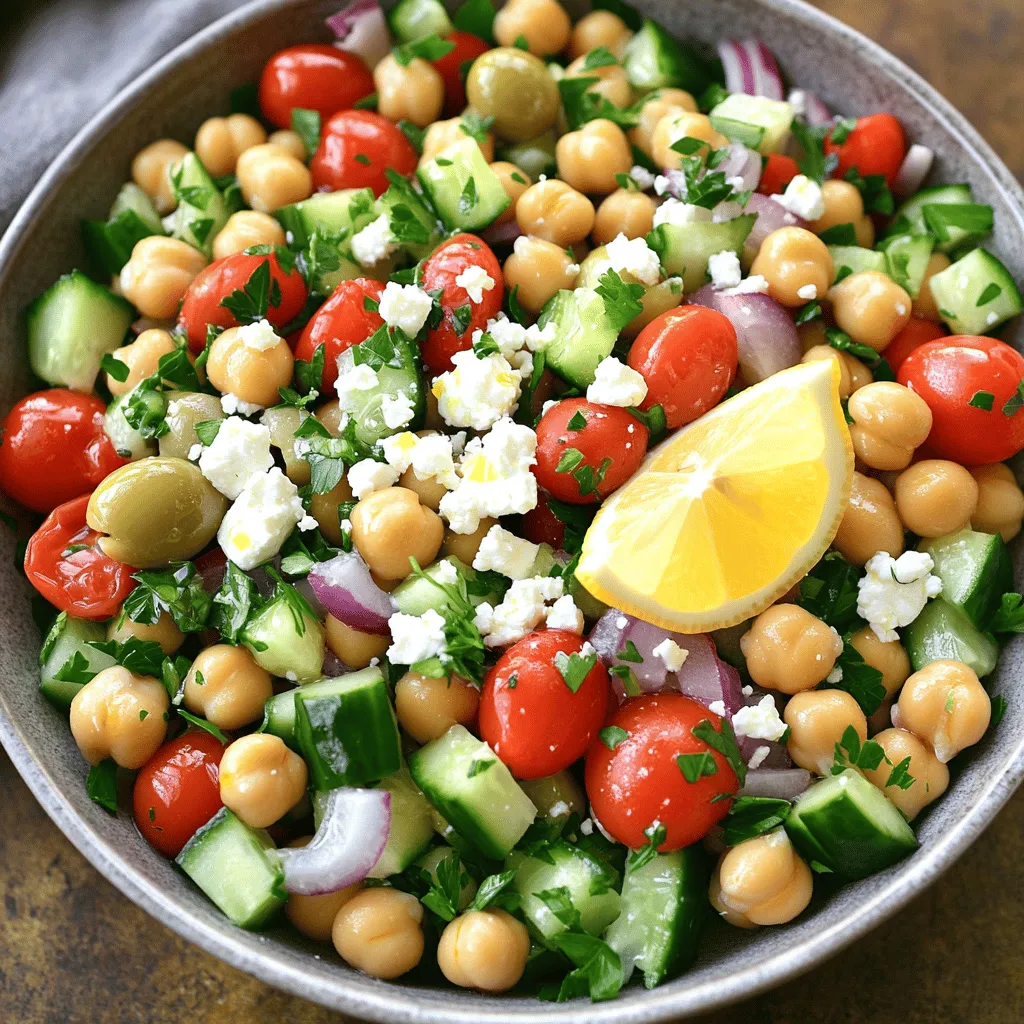
Greek Chickpea Cucumber Feta Salad Fresh and Tasty Dish

Are you ready to whip up a fresh and tasty dish? This Greek Chickpea Cucumber Feta Salad is perfect for

Raspberry Almond Snowball Cookies come together with just a few simple ingredients. Here’s what you need: - 1 cup unsalted butter, softened - 1/2 cup powdered sugar, plus extra for dusting - 1 teaspoon vanilla extract - 1/2 teaspoon almond extract - 2 cups all-purpose flour - 1/2 cup finely chopped almonds - 1/4 teaspoon salt - 1/2 cup raspberry preserves These ingredients create a soft, buttery cookie with a burst of sweet raspberry. Using fresh ingredients makes a big difference. Fresh butter adds creaminess and flavor. High-quality raspberry preserves give the cookie a juicy surprise. If your ingredients are old or stale, the cookies won't taste as good. Always check the dates on your baking items. You can swap some ingredients if needed. For a dairy-free option, use vegan butter. If you dislike almonds, try chopped walnuts or pecans. You can also use other fruit preserves like strawberry or peach for different flavors. These changes keep the cookies fun and fresh. For the full recipe, check out the [Full Recipe]. Start by gathering your ingredients. You need butter, powdered sugar, flour, and almond extract. Make sure your butter is soft. This helps mix it well. In a big bowl, cream the butter and sugar together. Use a mixer or a spoon. Mix until it gets light and fluffy. Then, add the vanilla and almond extract. These flavors make the cookies special. Next, sift in the flour and salt. Mix gently; you don't want to overwork the dough. Finally, fold in the chopped almonds. They add a nice crunch. Your dough should be soft but not sticky. If it feels too wet, sprinkle a bit more flour. Now it's time to shape your cookies. Take about 1 tablespoon of dough. Flatten it in your hand, making a small circle. Place 1/2 teaspoon of raspberry preserves in the center. Fold the dough around the jam. Pinch it closed to form a ball. Make sure the jam is sealed inside. This way, it won’t leak while baking. Line your baking sheet with parchment paper. Place the cookie balls on the sheet, leaving space between them. This helps them bake evenly. You can fit about 12 cookies on one sheet. Preheat your oven to 350°F (175°C). This step is key for even baking. Bake your cookies for 12-15 minutes. Keep an eye on them. You want the bottoms to turn golden, not brown. Overbaking makes them dry. Once baked, let them cool for 5 minutes on the sheet. Then move them to a wire rack. Let them cool completely. After cooling, dust the cookies with powdered sugar. This creates a lovely snowy look. You can find the Full Recipe for more details on timing and techniques. One mistake is using cold butter. Always start with softened butter. This helps the dough mix well. Another error is overbaking. Watch the cookies closely. They should be lightly golden on the bottoms, not brown. Lastly, don’t skip the dusting. The powdered sugar adds sweetness and charm. To boost flavor, use good-quality almond extract. It makes a big difference. Also, look for fresh raspberry preserves. You want a bright, fruity taste. Try to balance the sweetness of the cookies with the tartness of the raspberry. This mix creates a delightful bite that keeps you coming back for more. Dusting cookies can be fun and easy. Use a fine-mesh sieve for an even sprinkle of powdered sugar. Hold it high above the cookies for a nice, gentle fall of sugar. You can also dust them after they cool completely. This keeps the sugar from melting into the warm cookies. For a festive touch, consider adding some chopped almonds on top as well. For the full recipe of Raspberry Almond Snowball Cookies, check out the complete instructions provided above. {{image_2}} Raspberry almond snowball cookies are great, but you can switch up the filling! Here are some ideas: - Strawberry preserves: This adds a sweet twist. - Apricot jam: A tangy flavor shines through. - Nutella: Rich and creamy, it is a crowd-pleaser. - Peanut butter: This gives a fun, nutty taste. You can use any fruit spread you love. Just make sure it’s thick enough to hold its shape. While almonds are classic, other nuts can work well too. Here are some tasty options: - Pecans: They add a buttery flavor. - Walnuts: These offer a hearty crunch. - Hazelnuts: They give a unique, rich taste. - Cashews: Their creaminess blends nicely with the dough. Feel free to mix and match. Use what you have on hand or what you enjoy most. If you have dietary needs, you can still enjoy these cookies. Here are ways to adapt: - Gluten-free: Use a gluten-free flour blend for the dough. - Dairy-free: Substitute the butter with coconut oil or a dairy-free spread. - Sugar-free: Try a sugar substitute to make the cookies lower in sugar. These modifications allow everyone to enjoy the deliciousness. Check the [Full Recipe] for the base ingredients and instructions. To keep Raspberry Almond Snowball Cookies fresh, store them in an airtight container. This helps maintain their soft texture. Line the container with parchment paper to absorb any moisture. If you have multiple layers, separate them with more parchment to prevent sticking. Keep the container in a cool, dry place. Avoid warm spots to stop the cookies from getting soggy. You can freeze these cookies for later. To do this, let the cookies cool completely first. Then, place them in a single layer on a baking sheet. Freeze them for about one hour until firm. Once frozen, transfer them to a freezer bag or airtight container. They will last up to three months in the freezer. When you want to enjoy them, let them thaw at room temperature. Raspberry Almond Snowball Cookies stay fresh for about one week at room temperature. Check for signs of staleness, like a dry texture or loss of flavor. If the cookies develop any odd smell or change in color, it’s best to toss them. For the best taste, enjoy them within the first few days. You can always refer to the Full Recipe for tips on how to make a fresh batch! To stop cookies from spreading, chill the dough first. After mixing, cover the bowl and place it in the fridge for about 30 minutes. This helps firm up the butter. You can also use parchment paper on your baking sheet. This keeps the cookies from sticking and helps them hold their shape. Yes, you can make these cookies ahead of time! After forming the dough balls, freeze them on a baking sheet. Once frozen, transfer them to a zip-top bag. You can bake them later straight from the freezer. Just add a couple of extra minutes to the baking time. Serve these cookies on a pretty plate. I love to add fresh raspberries and almond slices for color. Dusting them with powdered sugar makes them look snowy and festive. These cookies pair well with tea or coffee, making them great for gatherings. For the full recipe, check out the section above. We explored key ingredients and their importance for making the best cookies. Fresh ingredients are vital for rich flavor. I shared steps for prepping, shaping, and baking, plus common mistakes to avoid. You learned about fun variations, smart storage tips, and answers to common questions. Now you can bake cookies that delight. Remember, practice makes perfect. Enjoy your baking journey!

Raspberry Almond Snowball Cookies Simple and Sweet

Indulge in the sweet delight of Raspberry Almond Snowball Cookies! In this guide, I’ll show you how to make these

- 1 cup natural creamy peanut butter - 1/2 cup honey or maple syrup - 2 cups rolled oats - 1 cup coconut flour - 1/2 cup dark chocolate chips - 1/4 teaspoon sea salt - 1 teaspoon vanilla extract Each ingredient plays a key role in making these bars tasty and easy to prepare. Natural creamy peanut butter gives a rich flavor and smooth texture. Honey or maple syrup adds sweetness, while rolled oats provide fiber and a chewy bite. Coconut flour helps bind everything together and adds a subtle coconut flavor. Dark chocolate chips give a sweet and slightly bitter contrast, making every bite delightful. Sea salt enhances all the flavors, and vanilla extract adds warmth to the mix. - You can try different sweeteners, like agave or coconut sugar. - For nut butter, almond or cashew work well. - If you need gluten-free options, look for gluten-free oats. These substitutions let you customize the bars to your taste. Whether you prefer a different nut butter or sweetener, feel free to swap them in. Using gluten-free oats ensures everyone can enjoy these bars, no matter their dietary needs. For the full recipe, check out the steps to make these delicious treats. 1. Combine peanut butter and honey in a bowl. 2. Mix in rolled oats, coconut flour, sea salt, and vanilla. 3. Fold in dark chocolate chips. Making these bars is quick and easy. Start by taking a medium bowl. Add 1 cup of natural creamy peanut butter and 1/2 cup of honey or maple syrup. Stir until it’s smooth and creamy. Next, add 2 cups of rolled oats, 1 cup of coconut flour, 1/4 teaspoon of sea salt, and 1 teaspoon of vanilla extract. Mix it all up until you see no dry bits. This ensures every bite is tasty. Now, gently fold in 1/2 cup of dark chocolate chips. This adds a rich flavor that pairs well with peanut butter. - Line the baking pan with parchment paper. - Press the mixture firmly into the pan. Get an 8x8 inch baking pan and line it with parchment paper. Leave some paper hanging over the sides. This makes it easy to lift out the bars later. Next, pour the peanut butter mixture into the pan. Use a spatula or your hands to press it down evenly. Make sure it’s packed tightly. This helps the bars hold their shape. - Refrigerate for at least 2 hours. - Cut into squares and presentation tips. Place the pan in the refrigerator. Let it chill for at least 2 hours. This makes the bars firm and easy to cut. Once they are set, lift them out using the parchment paper. Cut them into squares or rectangles. For a fun touch, arrange the bars on a nice platter. Drizzle some melted chocolate over the top or sprinkle a bit of sea salt before serving. Enjoy your delicious homemade no-bake peanut butter bars! For the full recipe, check out the complete guide. To get the best no-bake peanut butter bars, focus on the right consistency. The mixture should be thick enough to hold its shape but still moist. If it's too dry, add a bit more peanut butter or honey. If it's too wet, mix in more oats or coconut flour. When packing the mixture into your pan, use a spatula or your hands. Press it down firmly and evenly. This helps the bars hold together well after chilling. These bars taste great on their own, but you can enhance them. Serve with a scoop of ice cream for a fun dessert. Fresh fruits like bananas or strawberries add a nice touch too. For a decadent twist, drizzle melted chocolate over the top. Just melt some chocolate chips in the microwave, then pour it on your bars. This will make them even more special! One mistake is overmixing the ingredients. This can make the bars tough. Mix just until everything combines. Another common issue is not chilling long enough. Be patient! Let the bars chill for at least two hours. This makes them firm and easy to cut. Following these tips will help you create perfect no-bake peanut butter bars every time. For the full recipe, check out the details above. {{image_2}} No-bake peanut butter bars are a blank canvas for flavor. You can easily tweak the recipe to fit your taste. - Adding spices: A sprinkle of cinnamon or nutmeg can add warmth. Simply mix about a teaspoon into the peanut butter for a cozy flavor. - Using different types of chocolate: Try milk or white chocolate instead of dark. Each type brings its own unique taste. Melt some on top for a fun look. - Using sunflower seed butter: If you need a nut-free choice, sunflower seed butter works great. It has a similar texture and taste. - Alternative toppings: You can add seeds or dried fruit on top. They give a nice crunch and sweetness. - Vegan sweeteners and chocolate: If you want a vegan version, use agave syrup and dairy-free chocolate. They taste just as good! - Omitting chocolate for a lighter version: You can skip the chocolate. This makes the bars lighter and lets the peanut butter shine. For all these ideas, check out the full recipe to explore more ways to enjoy these tasty bars! To keep your no-bake peanut butter bars fresh, you have two main options: the fridge or the freezer. In the refrigerator, the bars stay firm but soft enough to bite into. Use an airtight container to prevent them from drying out. If you want to save bars for later, the freezer works great. Just wrap them well in plastic wrap before placing them in a container. This method keeps the bars tasty for months. In the fridge, these bars last about a week. If you freeze them, they can last up to three months. Just remember to label your containers with dates. This helps you know when to enjoy them. When you’re ready to eat a frozen bar, take it out and let it sit at room temperature for about fifteen minutes. This makes it easier to chew. You can also cut them into smaller pieces for quick snacks. Portioning helps you grab a treat on the go without feeling guilty about overindulging. If you want, you can drizzle some melted chocolate over the top for a special touch. Yes, you can use crunchy peanut butter. It will give your bars a different texture. You’ll enjoy extra crunch, which can be fun. The flavor remains rich and delicious. These bars need about 2 hours in the fridge to set. This time helps them firm up well. If you want them extra firm, chill them longer. Just be sure to cover them to keep them fresh. Yes, No-Bake Peanut Butter Bars can be healthy. They have good fats from peanut butter. Oats add fiber, which is great for digestion. Using natural sweeteners like honey or maple syrup helps, too. Enjoy them in moderation for a balanced treat. Absolutely! These bars are perfect for meal prep. Make a batch and store them in the fridge. They stay fresh for about a week. Just cut them into squares before serving for easy snacks. If you don’t have coconut flour, try almond flour. Almond flour will change the texture a bit but still works well. You could also use whole wheat flour for a denser bar. Just remember to adjust the liquid if needed. No-bake peanut butter bars are easy to make and delicious. You need just a few key ingredients, like peanut butter, honey, and oats. I shared tips on how to customize flavors and perfect your bars. Remember to chill them well for the best taste. These treats are great for snacking and can last for weeks. Enjoy experimenting with variations and find your favorite! Store them right, and you'll always have a tasty treat ready to enjoy.

No-Bake Peanut Butter Bars Tasty and Simple Treat

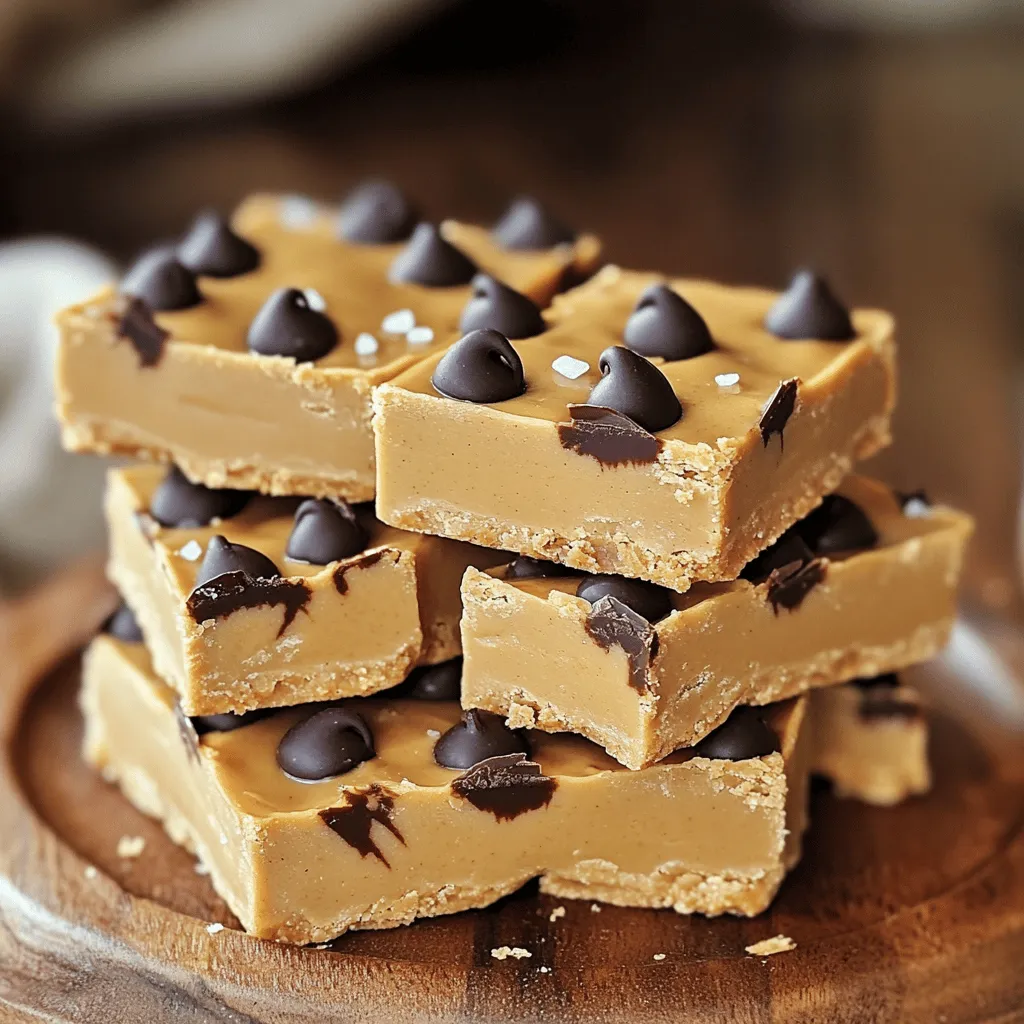
Are you craving a sweet treat that requires no baking? Look no further! My No-Bake Peanut Butter Bars are a

- 2 cups shredded rotisserie chicken - 1 (8 oz) package cream cheese, softened - 1 cup ranch dressing The main ingredients for Crack Chicken Bake are simple yet flavorful. The rotisserie chicken saves time. It already has great flavor. Cream cheese adds a creamy texture. Ranch dressing brings a tangy taste. Together, they create a rich filling that you'll love. - 1 cup shredded cheddar cheese - 1 cup scallions, sliced (green parts only) - 1 tablespoon garlic powder - 1 teaspoon onion powder - 1 teaspoon smoked paprika - Salt and pepper to taste Adding flavor is key. Shredded cheddar cheese melts well and adds richness. Scallions give a fresh crunch. Garlic powder, onion powder, and smoked paprika boost the flavor profile. Don't forget salt and pepper to enhance everything. - 1 (16 oz) package refrigerated crescent roll dough - Fresh parsley, chopped (for garnish) The crescent roll dough is the base of this dish. It wraps around the filling nicely. It gets golden and flaky in the oven. Fresh parsley adds a pop of color and freshness when you serve it. For the full recipe, check the details above. First, grab a large mixing bowl. Add 2 cups of shredded rotisserie chicken. Next, toss in 1 package of softened cream cheese. Pour in 1 cup of ranch dressing. Mix these together until smooth. This step is key for a rich flavor. Now, it's time to spice things up! Add in 1 cup of shredded cheddar cheese, 1 cup of sliced scallions, 1 tablespoon of garlic powder, 1 teaspoon of onion powder, and 1 teaspoon of smoked paprika. Don't forget salt and pepper to taste. Mix everything well until it's fully blended. The filling should be creamy and flavorful. Next, let's work on the dough. Unroll your package of refrigerated crescent roll dough onto a clean surface. Separate it into individual triangles as shown on the package. This step is simple and quick. Take a tablespoon of your chicken filling and place it at the wide end of each dough triangle. Roll the dough around the filling, starting from the wide end and moving to the point. Pinch the edges tightly to seal them. This helps keep the filling inside during baking. Now, preheat your oven to 375°F (190°C). Take a greased baking sheet and place the rolled crescents on it. Make sure to leave space between each one for even cooking. Once all the crescents are on the tray, sprinkle the remaining cheddar cheese over the top. This adds a nice cheesy crust. Bake in the oven for 15-20 minutes. Look for a golden brown color to know they are done. When they are ready, take them out and let them cool for about 5 minutes. Garnish with fresh parsley before serving. For the full recipe, check the earlier section! To get the best flavor in your Crack Chicken Bake, use fresh ingredients. Start with rotisserie chicken. It's juicy and full of flavor. Mix it with room temperature cream cheese. This makes it easy to blend. If the cream cheese is cold, it won't mix well. Add ranch dressing for a creamy taste. Season with garlic powder and smoked paprika for depth. Always taste your mixture before you fill the dough. Adjust seasoning to your liking. When rolling out the crescent dough, work on a floured surface. This keeps the dough from sticking. Unroll it gently to avoid tearing. Place a tablespoon of your filling at the wide end of the triangle. Roll it up tightly, starting from the wide end. Pinch the edges to seal the filling inside. This step is key. If you don’t seal it well, the filling may leak out during baking. Keep an eye on your crescents as they bake. They should turn a nice golden brown. Set a timer for 15 minutes, then check. If they look pale, give them a few more minutes. Overbaking can dry them out, so watch closely. You want them soft and flaky, not hard. Once done, let them cool for five minutes. This helps the filling set and makes them easier to eat. For more tips, refer to the Full Recipe. {{image_2}} You can change the protein in Crack Chicken Bake. Instead of chicken, try turkey or ham. Both options work well and add a new taste. If you're looking for a lighter version, shredded tofu is a great swap too. You might want to switch the cream cheese. Greek yogurt can replace it for a tangy twist. Softened ricotta cheese works well too. It adds a creamy texture without being too heavy. Feel free to play with the seasonings in Crack Chicken Bake. Add some fresh herbs like thyme or basil for a bright flavor. You can also try a mix of Italian seasoning for a different vibe. If you enjoy heat, make a spicy version. Add jalapeños or crushed red pepper flakes to the filling. This brings a kick that warms the taste buds. Adjust the amount based on your spice level preference. Leftovers from Crack Chicken Bake can shine in new dishes. Chop the crescents and mix them into a salad. You can also add them to a wrap with fresh veggies for lunch. Pair your Crack Chicken Bake with simple side dishes. A fresh green salad or steamed broccoli balances the meal. You can also serve it with mashed potatoes for a cozy dinner. For more details on making this dish, check the Full Recipe. To keep your Crack Chicken Bake fresh, store leftovers in an airtight container. Refrigerate them within two hours of cooking. This keeps your dish safe and tasty. When stored properly, it can last for about 3 to 4 days in the fridge. If you want to keep it longer, freezing is a great option. To freeze, let it cool completely. Then, wrap it tightly in plastic wrap and place it in a freezer-safe bag. It can last for about 2 to 3 months in the freezer. When it's time to enjoy your leftovers, you have a few options. The oven is the best way to reheat Crack Chicken Bake. Preheat your oven to 350°F (175°C). Place the leftovers in a baking dish and cover with foil. Heat for about 15 to 20 minutes or until warm. If you're short on time, the microwave works too. Just place a serving on a microwave-safe plate and heat for 1 to 2 minutes. Make sure to check it, so it doesn't get too hot. In the fridge, your Crack Chicken Bake will last about 3 to 4 days. If you freeze it, you can keep it for 2 to 3 months. After that, the quality may decline. Be sure to label your containers with the date. This way, you know when to enjoy it at its best. It takes about 15 minutes to prep the dish. The cook time is 15-20 minutes. So, in just about 35 minutes, you can have this tasty meal ready to go. Yes, you can prep this dish ahead of time. Mix the filling and fill the crescent rolls. Then, cover and keep them in the fridge for up to a day. When you’re ready, bake them straight from the fridge. This makes dinner easy for busy nights. Crack Chicken Bake pairs well with many sides. Consider serving it with: - A fresh green salad - Roasted vegetables - Garlic bread - Mashed potatoes These sides balance the rich flavors of the bake. They also add color to your plate. Enjoy your meal! In this blog post, we explored how to make a delicious Crack Chicken Bake. We covered its main ingredients, like shredded chicken and cream cheese, and added flavor from spices and cheese. The step-by-step guide walks you through mixing, rolling, and baking the dish. With helpful tips, variations, and storage info, you can create, enjoy, and store this meal with ease. My final thought? This dish is perfect for sharing and will surely impress anyone who tries it. Dive in and enjoy your cooking!

Crack Chicken Bake Delicious Dinner You’ll Love

Are you ready to discover a dinner that’s both easy to make and oh-so-delicious? Meet Crack Chicken Bake—the perfect comfort

Chicken and Coating Ingredients - 4 boneless, skinless chicken breasts - 1/2 cup grated Parmesan cheese - 1/4 cup bread crumbs (preferably Italian seasoned) - 4 cloves garlic, minced - 1/4 cup unsalted butter, melted - 2 tablespoons olive oil Seasoning Components - 1 teaspoon dried oregano - Salt and pepper to taste Optional Garnishes - Fresh parsley, chopped This recipe for Blackstone Garlic Parmesan Chicken is all about simple, fresh ingredients. Each one adds a unique taste and texture. The chicken breasts are the star of this dish. They soak up all the flavors from the garlic and cheese. The bread crumbs give a nice crunch. When you mix the cheese, bread crumbs, and garlic, it creates a rich coating. This blend adds depth to the chicken. The melted butter and olive oil help the coating stick. Plus, they add a lovely richness. Don't forget the seasonings! Oregano, salt, and pepper are key. They enhance the dish and make it more flavorful. If you want a pop of color, add parsley on top when serving. It brightens the plate and adds a fresh note. Make sure you have everything ready before you start cooking. This will help you move smoothly through the steps. You can find the Full Recipe to guide you through the process. Enjoy your cooking adventure! Prepping the Griddle Start by preheating your Blackstone griddle over medium heat. This step ensures even cooking. You want a nice sizzle when the chicken hits the griddle. If it doesn't sizzle, wait a bit longer. Dipping and Coating Process In a shallow dish, mix the grated Parmesan cheese, bread crumbs, minced garlic, dried oregano, salt, and pepper. This is your flavorful coating. In another bowl, combine melted butter and olive oil. Dip each chicken breast in this mixture first. Make sure each piece is well-coated. Let any excess drip off before moving to the next step. Now, dredge the chicken in the Parmesan mixture. Press gently to make the coating stick well. Cooking Time and Technique Once all chicken breasts are coated, place them on the griddle. Cook for about six to seven minutes. Look for a golden brown color. After that, flip each piece and cook for another six to seven minutes. Adjust the heat to prevent burning. Use a meat thermometer to check for doneness. The chicken should reach an internal temperature of 165°F (75°C). After cooking, let the chicken rest for a few minutes. This helps keep it juicy. Optionally, garnish with chopped fresh parsley before serving. For the full recipe, check out the detailed instructions above. To get that nice, crispy crust on your Blackstone Garlic Parmesan Chicken, follow these tips. Cooking Temperature Control Set your Blackstone griddle to medium heat. This helps the chicken cook evenly. Too high, and you risk burning the outside before the inside cooks. Keep an eye on the heat. Adjust as needed for best results. Using a Meat Thermometer A meat thermometer is your best friend here. Insert it into the thickest part of the chicken. Aim for 165°F (75°C). This ensures your chicken is safe to eat and not dry. Common Mistakes to Avoid Avoid flipping the chicken too soon. Let it brown well on one side first. Also, don’t overcrowd the griddle. Give each piece space to cook properly. This helps create that lovely crust. For more details on how to prepare this dish, check out the Full Recipe. {{image_2}} You can add a few twists to the classic Blackstone Garlic Parmesan Chicken. Here are some fun ideas: - Spicy Garlic Parmesan Chicken: For a kick, mix in some red pepper flakes. Just a teaspoon will add a nice heat without overpowering the garlic. You can add more if you like it spicier! - Herb-Infused Versions: Try mixing fresh herbs into the coating. Basil, thyme, or rosemary work well. Just chop them finely and blend them in with the bread crumbs. This adds a fresh, vibrant taste to every bite. - Alternative Coatings and Breading: If you want to change things up, use crushed cornflakes or panko instead of regular bread crumbs. These options can give your chicken an extra crunch. You can also experiment with different cheeses, like mozzarella or cheddar, for a unique flavor. These variations keep your meal exciting. Each tweak can change the whole vibe of the dish. If you want to explore more, check out the Full Recipe for different combinations and tips! Refrigeration Guidelines After cooking, let the Garlic Parmesan Chicken cool. Place the chicken in an airtight container. You can store it in the fridge for up to three days. Make sure to keep it away from strong-smelling foods to avoid flavor transfer. Reheating Instructions To reheat, take the chicken out of the fridge. Use a skillet over medium heat. Add a bit of olive oil or butter to keep it moist. Heat for about 5 to 7 minutes, flipping halfway. You can also use a microwave, but it may not keep the crispiness. Freezing Tips If you want to save the chicken for later, freezing works great. Wrap each piece tightly in plastic wrap. Then, place them in a freezer bag. Label the bag with the date. It can last up to three months in the freezer. Thawing and Cooking from Frozen To thaw, move the chicken from the freezer to the fridge a day before you plan to cook. If you need it fast, you can thaw it in cold water for about an hour. Cook it right away after thawing. Always check that the internal temperature reaches 165°F (75°C). This ensures safety and great taste. For the full recipe, refer back to the main article. What is the best way to season this dish? To season the garlic parmesan chicken well, use a mix of salt and pepper. You can also add dried herbs like oregano or basil. Fresh herbs like parsley work great too. This adds flavor and depth to each bite. Always taste your mix before you coat the chicken. A good seasoning makes a big difference. Can I use different cuts of chicken? Yes, you can use different cuts of chicken. Thighs or drumsticks work well. Just keep the cooking time in mind. Thicker pieces take longer to cook. Make sure each piece reaches 165°F for safety. You can also use bone-in chicken for added flavor. How do I know when the chicken is fully cooked? The best way to know if chicken is cooked is by using a meat thermometer. Insert it into the thickest part of the meat. It should read 165°F (75°C). If you don't have a thermometer, cut into the chicken. The juices should run clear, not pink. Always let it rest for a few minutes before serving. This keeps it juicy. For the full recipe, check out the details above and enjoy making this dish! In this post, we explored how to make Garlic Parmesan Chicken. We listed all the ingredients you need, from chicken to spices. We covered steps for prepping and cooking, plus tips for a perfect crust. Variations like spicy garlic and herb-infused options add fun. Lastly, we discussed how to store leftovers to keep them tasty. Cooking can be simple and rewarding. Enjoy creating your own flavorful dishes!

Blackstone Garlic Parmesan Chicken Flavorful Recipe

Are you ready to whip up a delicious meal that your family will love? My Blackstone Garlic Parmesan Chicken recipe

- 4 boneless, skinless chicken breasts - 1 (8 oz) package cream cheese, softened - 1 can (10.5 oz) cream of chicken soup - 1 package (1 oz) ranch dressing mix - 1 cup chicken broth - 1 tablespoon garlic powder - 1 teaspoon onion powder - Fresh parsley, chopped (for garnish) - Salt and pepper to taste - Cooked egg noodles or rice (for serving) When I make Slow Cooker Angel Chicken, I always start with the main ingredients. The chicken breasts are key for a tender meal. Cream cheese adds a rich taste, while the cream of chicken soup brings creaminess. Next, I grab the additional ingredients. The ranch dressing mix gives it a nice zing. Chicken broth helps the sauce stay smooth. Garlic and onion powders add flavor without any fuss. I always finish with fresh parsley for color. For serving, I recommend cooked egg noodles or rice. They soak up all the creamy sauce. You can find the full recipe above for all the details! To make Slow Cooker Angel Chicken, follow these simple steps. You will create a creamy, tasty dish that everyone will love. - Mix cream cheese and sauces: In a bowl, combine the softened cream cheese, cream of chicken soup, ranch dressing mix, chicken broth, garlic powder, onion powder, salt, and pepper. Stir it well until it forms a smooth, creamy sauce. - Coat chicken in the mixture: Place your boneless, skinless chicken breasts in the slow cooker. Pour the creamy sauce over the chicken. Make sure the chicken is fully coated with the sauce. This step makes the chicken flavorful and juicy. - Set slow cooker to low or high: Cover the slow cooker. You can cook on low for 6 to 7 hours or on high for 3 to 4 hours. The low setting helps the chicken stay moist and tender. - Shred and integrate chicken into the sauce: When the chicken is cooked through, take two forks and shred it right in the slow cooker. Mix the shredded chicken with the sauce until it is well combined. This will ensure every bite is packed with flavor. This recipe is easy and fun. You can serve your Slow Cooker Angel Chicken over cooked egg noodles or rice. Don't forget to check out the Full Recipe for detailed steps! To keep your chicken juicy, start with high-quality chicken breasts. The best slow cooker settings are low for about 6 to 7 hours or high for 3 to 4 hours. Always check the chicken's internal temperature; it should reach 165°F. If you want more flavor, add extra spices to the cream sauce. A splash of lemon juice can also enhance the taste. If you use frozen chicken, add an hour to the cooking time. This dish pairs well with cooked egg noodles or rice. The creamy sauce coats them beautifully. For a nice touch, garnish with fresh parsley. It adds color and a fresh taste. You can also sprinkle some black pepper for a mild kick. If you want to impress, serve it in a beautiful bowl. Drizzle some sauce on top for a restaurant-style look. For the full recipe, be sure to check the details above. {{image_2}} You can get creative with this slow cooker angel chicken recipe. If you want to swap out cream cheese, try using Greek yogurt. It gives a nice tang and is lower in fat. You could also use ricotta for a lighter touch. For the broth, chicken broth works best, but vegetable broth is a great choice too. It adds a different flavor and makes it vegetarian-friendly. You can also use homemade broth if you have it. It enhances the taste and makes the dish rich. If you're looking for gluten-free options, make sure to choose gluten-free ranch dressing mix. You can easily find this at most grocery stores. Also, check the cream of chicken soup for gluten. Many brands offer gluten-free versions now. For low-carb variations, skip the noodles or rice. Instead, serve the angel chicken over cauliflower rice or zucchini noodles. This keeps the dish light and packs in more veggies. Using these swaps makes it easy to enjoy this dish while meeting your dietary needs. For the full recipe, check out the Heavenly Slow Cooker Angel Chicken section. After enjoying your Slow Cooker Angel Chicken, let the leftovers cool. This step helps keep the chicken safe. Place the chicken in a shallow container. This way, it cools quickly and evenly. Use airtight containers for storage. Glass or plastic containers work well. Make sure the lid seals tight. You can store the chicken in the fridge for up to three days. If you want to keep it longer, freeze it. To freeze, use freezer-safe bags or containers. Squeeze out extra air from bags. This helps prevent freezer burn. You can freeze the chicken for up to three months. Be sure to label the container with the date. When you’re ready to eat again, reheating is key. The best way is to use the oven. Preheat it to 350°F (175°C). Place the chicken in an oven-safe dish. Add a little chicken broth to keep it moist. Cover with foil to avoid drying out. Heat for about 20 minutes or until warm. You can also use the microwave. Place the chicken in a microwave-safe bowl. Add a splash of broth or water. Cover it with a lid or wrap. Heat in short bursts, stirring in between. This helps heat evenly. Avoid overcooking, as it can dry out the chicken. Enjoy your creamy angel chicken again! How do I know when the chicken is fully cooked? You can tell the chicken is done when it reaches an internal temperature of 165°F. Use a meat thermometer to check this. The chicken should look white and should shred easily with a fork. It should not be pink inside. This ensures it is safe to eat and super tender. Can I use frozen chicken breasts? Yes, you can use frozen chicken breasts. Just remember to cook it longer. If you cook on low, it will take about 8 to 9 hours. On high, it may take 4 to 5 hours. Make sure to check the temperature to ensure it is fully cooked. What are the best side dishes to serve with Slow Cooker Angel Chicken? I love to serve Slow Cooker Angel Chicken with cooked egg noodles or rice. Both soak up the creamy sauce well. You can also add steamed veggies like broccoli or green beans for color and nutrition. A fresh salad on the side makes a great choice too. For a fun twist, try garlic bread or a crusty baguette to dip in the sauce. This blog post covered everything you need to know about making Slow Cooker Angel Chicken. We shared the main and additional ingredients, along with step-by-step instructions for preparation and cooking. You also learned cooking tips, serving suggestions, and ways to adjust the recipe for dietary needs. In my view, this dish is easy to make and perfect for any meal. Enjoy cooking, and don’t forget to get creative with your serving ideas. Your family will love this yummy dish.

Slow Cooker Angel Chicken Simple and Tasty Recipe

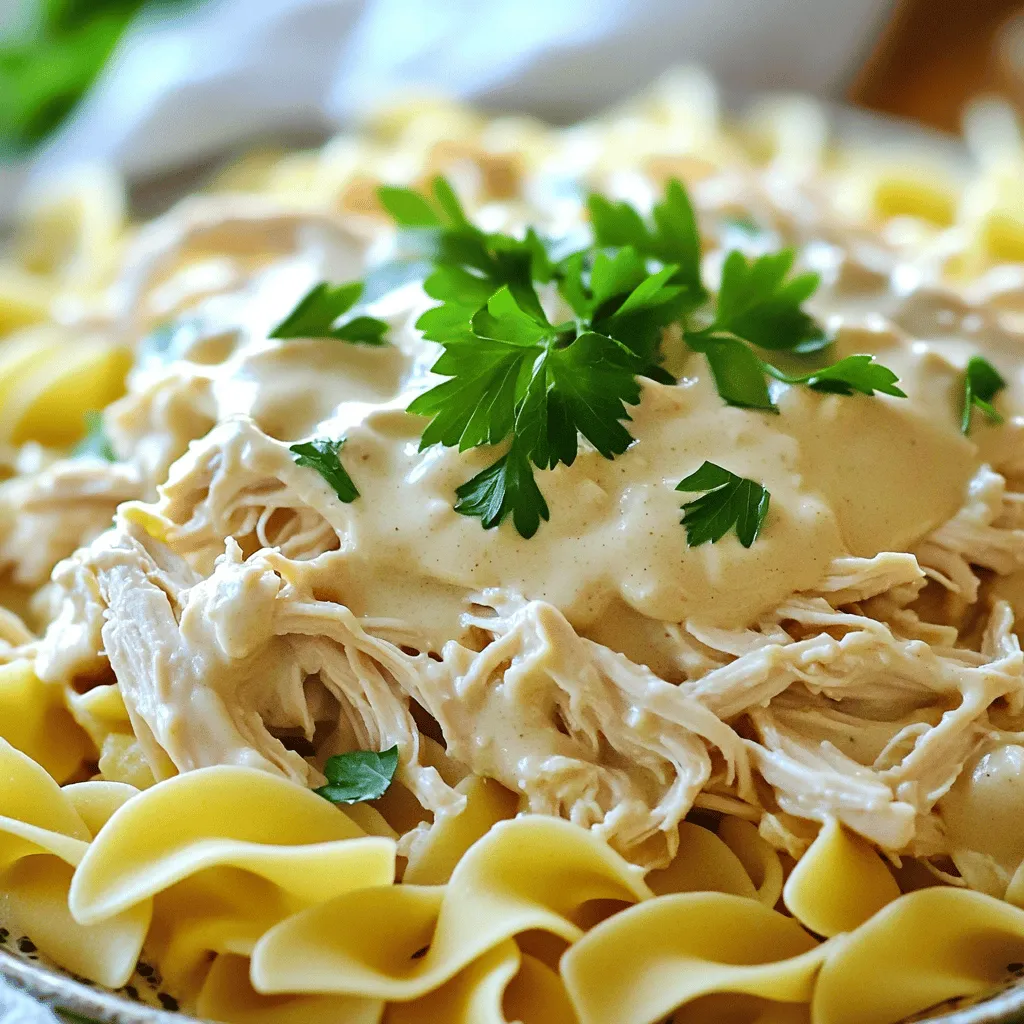
Are you ready to make a meal that’s easy and full of flavor? Slow Cooker Angel Chicken is your answer!

- 2 cups cherry tomatoes, halved - 1 small red onion, finely chopped - 2 cloves garlic, minced - 1-2 jalapeños, deseeded and minced - 1/4 cup fresh cilantro, chopped - Juice of 1 lime - 2 tablespoons olive oil - Salt and pepper to taste - Baking sheet - Parchment paper - Mixing bowl Roasted cherry tomato salsa is a bright and fresh dish. You need ripe cherry tomatoes. They bring sweetness and a burst of flavor. The red onion adds crunch and a bit of sharpness. Garlic gives depth, while jalapeños add heat. You can adjust the spice by using fewer or more jalapeños. Cilantro adds a nice herbal note. Lime juice brightens the salsa with a zesty kick. Olive oil helps blend all the flavors together. Salt and pepper enhance the taste. To make this salsa, you need some basic kitchen tools. A baking sheet helps roast the tomatoes evenly. Parchment paper makes cleanup simple and keeps the salsa from sticking. A mixing bowl is essential for combining all the fresh ingredients. You can find the full recipe for roasted cherry tomato salsa in the recipe section. Enjoy making this fresh flavor explosion! - Preheat oven to 400°F (200°C). - Wash and halve the cherry tomatoes. - Chop the red onion and mince the garlic. - Deseed and mince the jalapeños. - In a mixing bowl, combine cherry tomatoes, onion, garlic, and jalapeños. - Drizzle olive oil over the mix. - Season with salt and pepper to taste. - Toss everything gently to coat well. - Spread the mixture evenly on a baking sheet lined with parchment paper. - Roast for 20-25 minutes until blistered and caramelized. - Let the roasted mix cool for a few minutes. - Transfer the roasted mixture to a bowl. - Add chopped cilantro and lime juice. - Stir well and taste. Adjust seasoning, if needed. This recipe creates a fresh flavor explosion. Check out the Full Recipe for more details! - Use ripe cherry tomatoes for sweetness. They make the salsa taste fresh and bright. - Adjust jalapeños based on desired spice level. More jalapeños mean more heat. - Prepare ingredients in advance for quicker assembly. This helps save time when making salsa. - Roast tomatoes earlier in the day for easier meal prep. Roasted tomatoes are great for snacks or meals. - Serve with tortilla chips in a colorful bowl. A vibrant bowl makes the dish pop. - Garnish with lime wedges and extra cilantro for added freshness. This gives a nice look and taste boost. For the full recipe, check out the section above. {{image_2}} Want more heat? Add extra jalapeños or a pinch of cayenne pepper. This will kick up the spice level and excite your taste buds. If you like it really hot, try both! The heat balances well with the sweetness of the tomatoes. For a fun twist, incorporate roasted bell peppers or corn. Roasted bell peppers bring a smoky taste, while corn adds a nice crunch. You can roast these along with the tomatoes. This variation makes the salsa even more colorful and tasty. You can change the herbs too. Substitute cilantro with parsley or basil for a different taste profile. Each herb gives the salsa a new flavor. Basil adds a sweet touch, while parsley keeps it fresh. Experiment and find your favorite mix! Check out the Full Recipe for all the details on making this delicious salsa! Store your roasted cherry tomato salsa in an airtight container in the fridge. It stays fresh for up to 5 days. Keeping it sealed helps maintain its bright flavors and texture. You can freeze the salsa in a sealed container for up to 3 months. Just make sure to leave some space in the container. This allows for expansion as it freezes. When you're ready to use your frozen salsa, thaw it in the refrigerator overnight. This slow thaw keeps the flavors intact and helps preserve its quality. Yes, you can use other small tomatoes. However, cherry tomatoes are the best choice for sweetness. Their natural sugars shine when roasted, giving you a rich flavor. The spice level can be adjusted with the amount of jalapeños used. If you like heat, add more jalapeños. For a milder version, use just one or remove the seeds. This salsa is great as a dip with chips. It also makes a tasty topping for grilled meats or stirred into pasta dishes. Try it with tacos or on a fresh salad! Roasting intensifies the sweetness and adds a smoky flavor to the salsa. The heat brings out the tomatoes' natural sugars, making each bite a burst of flavor. For the full flavor experience, check out the Full Recipe. This blog post covered how to make a tasty roasted cherry tomato salsa. You learned about fresh ingredients, seasonings, and the tools needed. We went through each step, from preparation to roasting. I shared tips for flavor and storage options. Finally, we explored variations to suit your taste. Enjoy making your salsa, and remember, fresh is best! You can customize it however you like.

Roasted Cherry Tomato Salsa Fresh Flavor Explosion

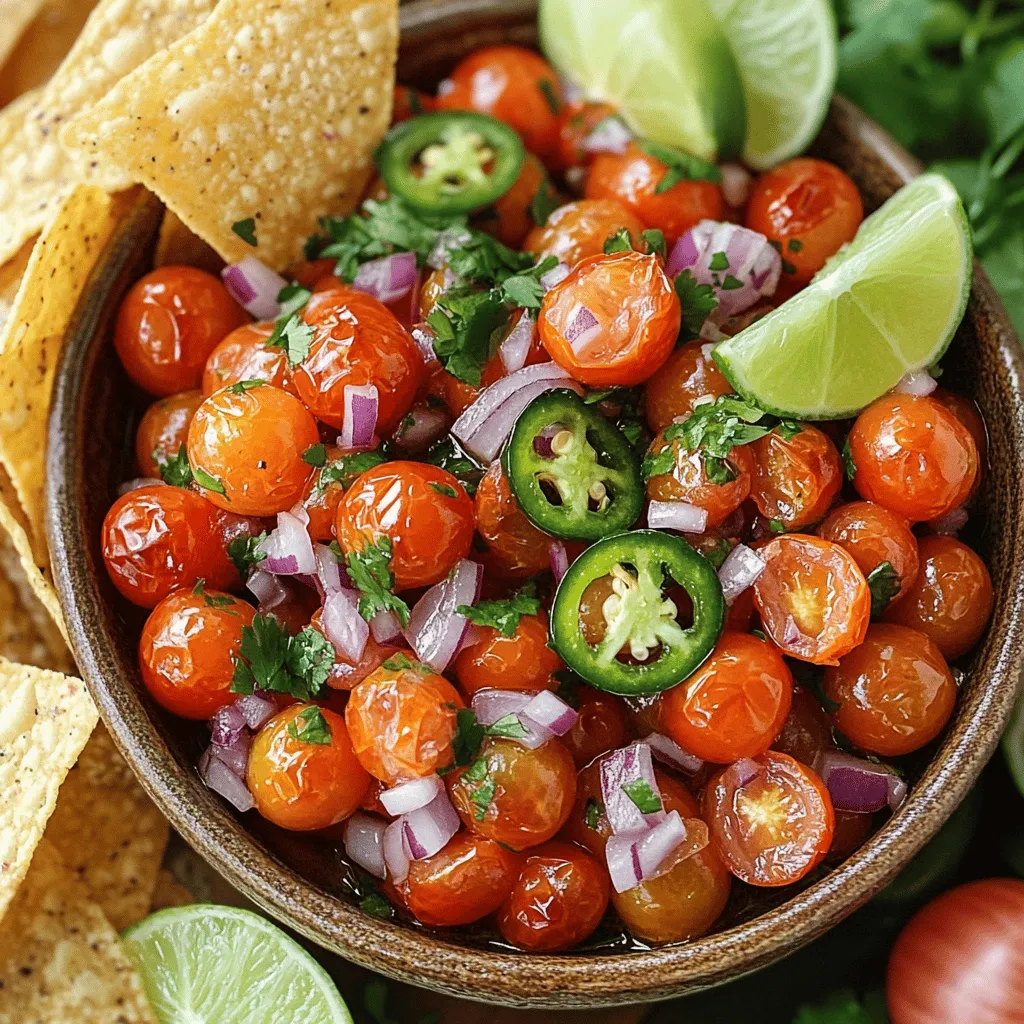
Get ready for a fresh flavor explosion with roasted cherry tomato salsa! This vibrant dip combines sweet cherry tomatoes, zesty

To make your classic hearty beef stew, you need these key ingredients: - 2 lbs beef chuck, cut into 1-inch cubes - 3 tablespoons olive oil - 1 large onion, chopped - 3 cloves garlic, minced - 4 carrots, sliced - 4 medium-sized potatoes, diced - 2 stalks celery, chopped - 4 cups beef broth - 2 tablespoons tomato paste - 1 teaspoon dried thyme - 1 teaspoon dried rosemary - 2 bay leaves - Salt and pepper to taste These ingredients create a rich and warm flavor. The beef chuck gives a nice texture and taste. The veggies add color and nutrients. You can also add a few optional ingredients: - 1 cup frozen peas (for a pop of color) These extras can enhance the stew's look and flavor. The peas add sweetness and brightness. For a finishing touch, consider these garnishes: - Fresh parsley, chopped Garnishing with parsley gives a fresh taste and a splash of color. It makes the dish even more inviting. Serve your stew in rustic bowls, paired with crusty bread for a complete meal. The Full Recipe will guide you in making this heartwarming dish. Start by gathering all your ingredients. You need beef chuck, onions, garlic, carrots, potatoes, celery, and spices. Chop the onions and garlic, slice the carrots, and dice the potatoes. This prep makes cooking easier. Heat a large pot or Dutch oven over medium heat. Add the olive oil. Once it's hot, add the beef cubes in batches. Browning the meat gives it flavor. Cook for about 5-7 minutes until brown. Remove the beef and set it aside. In the same pot, add the chopped onions. Sauté them until they are soft and translucent, about 3-4 minutes. Then, add the minced garlic and cook for one more minute. This step builds a great base for your stew. Return the browned beef to the pot. Stir in the tomato paste to coat everything. Next, add the carrots, potatoes, and celery. Pour in the beef broth and stir well. Now, add the dried thyme, rosemary, bay leaves, salt, and pepper. Bring the stew to a gentle boil. Once it starts boiling, reduce the heat to low and cover the pot. Let it simmer for 1.5 to 2 hours. This helps the beef become tender and the flavors to mix. Stir occasionally. If it looks dry, add more broth or water. If you want to add peas, do so about 10 minutes before serving. They should be bright and warm. Before you serve, take out the bay leaves. Taste the stew and adjust salt and pepper if needed. When ready, ladle the stew into bowls. Garnish with fresh parsley for color. Serve with crusty bread on the side. This meal will warm your soul. Enjoy! For the complete process, check out the Full Recipe. To make beef tender, choose the right cut. I recommend beef chuck. It has more fat and flavor. Cut it into 1-inch cubes for even cooking. When you brown the beef, let it sit in the pot for a few minutes. This creates a nice crust. This crust adds flavor to your stew. Simmer the stew for at least 1.5 hours. This slow cooking breaks down tough fibers. The beef will become soft and juicy. To boost flavor, use fresh herbs like thyme and rosemary. They add depth to your stew. Don’t forget the bay leaves; they give a nice aroma. Adding tomato paste helps create a rich base. You can also sprinkle in a bit of Worcestershire sauce for a savory kick. If you like, toss in a splash of red wine. It adds richness and rounds out the flavor profile. For a hint of sweetness, add a bit of sugar or a splash of balsamic vinegar. Want to save time? Chop your veggies ahead of time. You can store them in the fridge. This way, they are ready when you cook. Use a pressure cooker for faster results. It can cut the cooking time in half. If you have leftovers, make a big batch. You can freeze extra stew for later. This makes weekday meals easy. Just reheat and enjoy! For the full recipe, check out the Classic Hearty Beef Stew section above. {{image_2}} You can change the taste of your beef stew by adding different vegetables. Try using green beans or parsnips for a fresh twist. Sweet potatoes add a nice sweetness that complements the beef. You can also toss in some mushrooms for a rich, earthy flavor. Just remember to cut the veggies into similar sizes for even cooking. If you want to switch up the meat, there are great options! Pork shoulder works well and gives a different flavor. Chicken thighs can also be a tasty choice, though they cook faster. For a gamey taste, try venison or lamb. Each meat brings its own unique character to the stew. You can make a hearty stew without meat. Use hearty vegetables like mushrooms, carrots, and potatoes. Swap beef broth for vegetable broth to keep it rich. Add lentils or chickpeas for protein and texture. This way, you create a stew that is warm and filling, perfect for everyone. For the full recipe, check out Classic Hearty Beef Stew. After enjoying your hearty beef stew, let it cool to room temperature. Transfer the stew to an airtight container. Store it in the fridge. It will stay fresh for about three to four days. To avoid spoilage, make sure it is sealed tightly. Label the container with the date. This helps you keep track of how long it has been stored. To reheat the beef stew, you can use the stove or microwave. If using the stove, pour the stew into a pot. Heat it on low to medium heat. Stir often to prevent it from sticking. It should be heated through in about 10 to 15 minutes. If using a microwave, place the stew in a microwave-safe bowl. Heat it for 2 to 3 minutes, stirring halfway through. Make sure the stew is hot all the way through before serving. If you want to keep your stew longer, freezing is a great option. Pour the cooled stew into freezer-safe containers. Leave some space at the top for expansion. Seal them tightly and label with the date. Your stew can last up to three months in the freezer. To thaw, move it to the fridge overnight. You can reheat it as described above. Enjoy your flavorful meal anytime! Classic Hearty Beef Stew lasts 3 to 5 days in the fridge. Store it in an airtight container. Make sure to cool it first before you seal it up. If you freeze it, it can last for about 3 months. Just make sure to use freezer-safe containers. Yes, you can use a slow cooker for this recipe. First, brown the beef on the stove. Then, place all your ingredients into the slow cooker. Cook it on low for 6 to 8 hours or on high for 4 to 5 hours. This will help the flavors mix well. Beef stew pairs well with many sides. Here are some great options: - Crusty bread for dipping - Mashed potatoes for a creamy touch - Rice to soak up the sauce - A fresh salad for a light contrast These sides will make your meal even more satisfying. For the full recipe, check out the Classic Hearty Beef Stew section! You learned about making classic hearty beef stew. We covered key ingredients, from main to optional. You now know the best cooking steps and helpful tips to make your stew taste great. There are many variations you can try, including vegetarian options. You also gained insight on storing and reheating leftovers. This dish is perfect for sharing and enjoying. Take these tips and create your own stew masterpiece. Happy cooking!

Classic Hearty Beef Stew Flavorful and Warm Meal

Looking for a meal that warms your heart and fills your belly? You’ve come to the right place! My Classic

- 4 large russet potatoes, thinly sliced - 2 cups heavy cream - 1 cup whole milk - 2 cups sharp cheddar cheese, shredded - 1 cup Gruyère cheese, shredded - 3 cloves garlic, minced - 1 tablespoon fresh thyme leaves - 1 tablespoon fresh parsley, chopped - 1 teaspoon onion powder - 1 teaspoon salt - 1/2 teaspoon black pepper - 1/4 teaspoon paprika (for garnish) - 2 tablespoons unsalted butter (for greasing the baking dish) When I make my copycat steakhouse potatoes au gratin, I always choose russet potatoes. Their starchy texture makes them perfect for this dish. I slice the potatoes thinly. This helps them cook evenly and get creamy. For the creamy base, I combine heavy cream and whole milk. The mix gives a rich taste. I add sharp cheddar and Gruyère cheeses for depth. Cheddar brings a tangy flavor while Gruyère adds nuttiness. Next, I chop fresh herbs. Thyme and parsley brighten the dish. Garlic gives it a warm, comforting smell. Onion powder, salt, and pepper round out the flavors. A sprinkle of paprika on top adds a nice color. - 9x13 inch baking dish - Mixing bowls - Whisk - Knife and cutting board Having the right tools is key. A 9x13 inch baking dish is perfect for the layers. Mixing bowls help me combine the creamy base. A whisk ensures everything blends well. A sharp knife and cutting board make slicing potatoes easy. - Fresh herbs (parsley, thyme) - Additional shredded cheese Garnishing makes the dish look fancy. I like to add fresh herbs for color. Extra cheese on top creates a delicious crust. These little touches make the dish even more special. For the full recipe, don’t forget to check out the instructions! - Preheat the oven to 375°F (190°C). - Grease the baking dish with unsalted butter. First, I preheat my oven. This ensures even cooking. I set it to 375°F (190°C). Next, I take unsalted butter to grease my baking dish. I use a paper towel or my fingers to coat the bottom and sides well. This helps prevent sticking. - Arrange the sliced potatoes, cream mixture, and cheese layers. Now, I start layering the dish. I take my thinly sliced russet potatoes and spread half of them in the bottom of the greased dish. I make sure to overlap them a bit. Then, I pour half of my creamy mixture over the potatoes. I want to cover them well. After that, I sprinkle half of the shredded cheddar and Gruyère cheese on top. I repeat this process with the remaining potatoes, cream, and cheese. I finish with a nice layer of cheese at the top. This will get golden and bubbly as it bakes. - Cover with foil and bake for the initial 45 minutes. - Remove foil and continue baking for 20-25 minutes. I cover the baking dish with foil. This keeps the moisture in. I bake it for 45 minutes. Then, I carefully remove the foil. I bake it again for an extra 20 to 25 minutes. I watch for the top to turn golden brown. This gives a nice crisp finish. After baking, I let it sit for about 10 minutes. This resting time helps the layers set. For the final touch, I sprinkle some fresh parsley and paprika on top. The dish is now ready to serve! You can find the full recipe for details on the ingredients and exact steps. To make a creamy cheese sauce, start with heavy cream and whole milk. This mix gives the sauce richness. Heat the milk and cream together gently. Stir in the cheese slowly. This helps it melt well without clumping. For cheese, I love sharp cheddar and Gruyère. Both add great flavor. You can mix different cheeses too. Try mozzarella for stretchiness or feta for a tangy kick. Just keep the total cheese amount the same. Even slices make sure the potatoes cook the same. If some slices are thick, they take longer to cook. Thin slices get soft and creamy, while thick ones stay firm. Use a sharp knife or a mandoline for even slices. A mandoline cuts quickly and evenly, which saves time. If you have one, it’s a great tool for this dish. Potatoes au gratin pair well with many main dishes. I love serving them with steak, chicken, or roasted vegetables. They add a rich, creamy touch to any meal. For garnishing, fresh herbs are a nice touch. Sprinkle chopped parsley or thyme on top before serving. You can also add a pinch of paprika for color. It makes the dish look even more appetizing! For the full recipe, check out the Full Recipe section. {{image_2}} You can boost the flavor of your potatoes au gratin. One tasty option is to add bacon bits. Crispy bacon gives a nice crunch and a smoky taste. Another idea is to mix in herbs and spices. Try rosemary for a fragrant touch or smoked paprika for a deeper flavor. If you want to swap cheeses, you have options. For a milder taste, use Monterey Jack instead of cheddar. If you can't find Gruyère, fontina works well too. For those who prefer a dairy-free version, look for vegan cheese made from nuts or soy. These can melt and provide creaminess, just like traditional cheese. Want to make your dish more colorful? Add some vegetables like spinach or mushrooms. These veggies add nutrients and enhance the flavor. You can also layer in proteins like shredded chicken. This makes the dish heartier and perfect for a full meal. To store leftover potatoes au gratin, let them cool first. Place the dish in the fridge within two hours of cooking. Use an airtight container to keep them fresh. Glass or plastic containers with tight lids work best. Make sure to separate any layers with parchment paper to avoid sticking. To reheat, use the oven for best results. Preheat it to 350°F (175°C). Place the potatoes in an oven-safe dish. Cover with foil to keep moisture in. Heat for about 20-30 minutes. For a crisp top, remove the foil for the last 5-10 minutes. This way, you keep the creamy inside warm and the top golden. If you want to freeze potatoes au gratin, first let them cool completely. Cut them into portions and wrap each piece tightly in plastic wrap. Then, place them in a freezer-safe bag or container. This helps prevent freezer burn. To thaw, move the dish to the fridge overnight. To reheat from frozen, bake at 350°F (175°C) for about 45-60 minutes, covered, then uncover to crisp the top. For the full recipe, check out the complete guide! Yes, you can prepare this dish ahead of time. Just follow the steps until you layer the potatoes. Then, cover the dish and put it in the fridge. You can bake it the next day. Just add a few extra minutes to the baking time. This way, you save time and still enjoy great taste. I recommend using russet potatoes for this recipe. They have a nice starchy texture. If you want, you can also try Yukon Gold potatoes. They add a buttery flavor. Both types give you that creamy, dreamy texture you crave in potatoes au gratin. Leftovers stay fresh in the fridge for about 3 to 5 days. Make sure to keep them in an airtight container. This helps keep the flavors locked in. When you're ready to eat, just reheat in the oven or microwave. Enjoy that cheesy goodness again! This blog post detailed how to make a tasty potatoes au gratin. We covered ingredients like russet potatoes, heavy cream, and cheese. You learned steps for preparing, layering, and baking. Tips helped you get the best cheese sauce and slice potatoes right. We explored variations and smart ways to store leftovers. In conclusion, this dish combines flavor and comfort. With a few simple swaps, you can make it your own. Enjoy experimenting and sharing this dish with others. Your kitchen adventure with potatoes au gratin awaits!

Copycat Steakhouse Potatoes au Gratin Delight

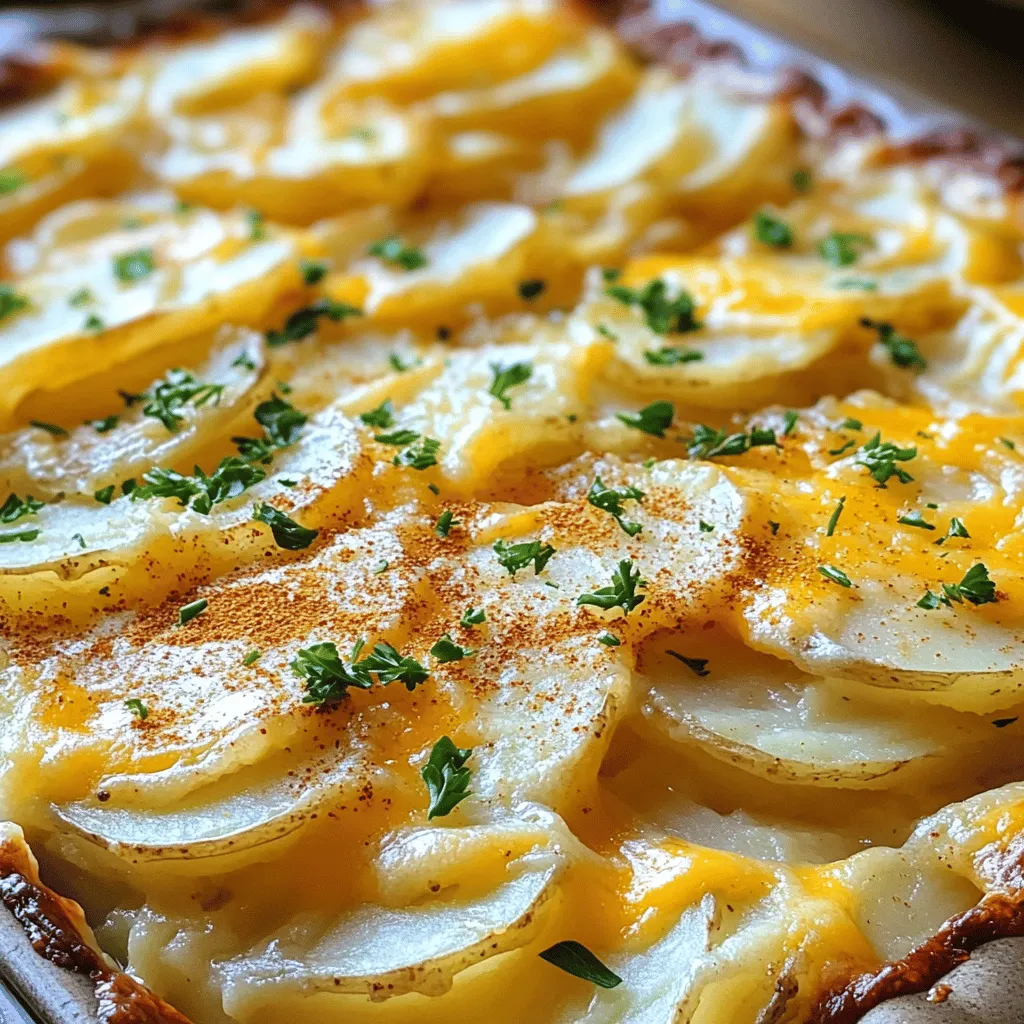
If you love rich, creamy potatoes au gratin, you need this copycat recipe. My Copycat Steakhouse Potatoes au Gratin Delight

- Chicken and Vegetables - 1 lb (450g) boneless, skinless chicken breasts, thinly sliced - 1 red bell pepper, sliced - 1 green bell pepper, sliced - 1 cup snap peas - 2 garlic cloves, minced - 1 inch fresh ginger, grated - Sauces and Seasonings - 2 tablespoons cornstarch - 1 tablespoon vegetable oil - 1/4 cup sweet chili sauce - 2 tablespoons soy sauce - 1 tablespoon rice vinegar - 1 teaspoon sesame oil - Salt and pepper to taste - Garnishes - Sesame seeds for garnish - Green onions, sliced for garnish The right mix of ingredients makes this dish pop with flavor. I use chicken for protein and colorful veggies for crunch. Sweet chili sauce adds a tasty glaze. The ginger and garlic give a warm, savory note. Don't skip the sesame seeds and green onions; they add a nice touch. For the full recipe, check my earlier section. You will love how easy it is to whip up this dish with fresh and simple ingredients. Preparing the Chicken First, slice 1 pound of boneless, skinless chicken breasts into thin strips. This makes cooking faster and helps it absorb flavors well. Next, place the chicken in a bowl. Add 2 tablespoons of cornstarch and toss until every piece is coated. This step creates a nice crust when cooked. Preparing the Vegetables Now, wash and slice your vegetables. Use 1 red bell pepper and 1 green bell pepper for color and crunch. Also, grab 1 cup of snap peas. These will add a fresh taste. Mince 2 garlic cloves and grate 1 inch of fresh ginger. These will give your stir-fry a great aromatic flavor. Searing the Chicken Heat 1 tablespoon of vegetable oil in a large skillet or wok over medium-high heat. When the oil is hot, add the coated chicken in a single layer. Let it sear for about 4-5 minutes. Turn occasionally until it turns golden brown and is fully cooked. Once done, remove it from the pan and set it aside. Stir-Frying the Vegetables In the same pan, add the sliced red and green bell peppers along with the snap peas. Stir-fry these for about 3-4 minutes. You want them to be tender but still crisp. Then, add the minced garlic and grated ginger. Cook for another minute until you can smell their lovely aroma. Combining and Finalizing the Dish Return the cooked chicken to the pan. Pour in 1/4 cup of sweet chili sauce, 2 tablespoons of soy sauce, 1 tablespoon of rice vinegar, and 1 teaspoon of sesame oil. Stir well to mix everything together. Cook for another minute to heat through. Finally, season with salt and pepper to taste. Add sesame seeds and sliced green onions as a garnish before serving. For more detailed instructions, check the Full Recipe. Achieving the Perfect Stir-Fry To make a great stir-fry, use thin slices of chicken. This helps cook the meat fast. Coat the chicken in cornstarch. It gives the chicken a nice, light crust. Always use a hot pan. This keeps the chicken juicy and the veggies crisp. Adjusting Sweetness and Saltiness Taste your stir-fry as you cook. If it is too sweet, add a splash of soy sauce. If it needs more sweetness, a bit more sweet chili sauce works wonders. Balance is key for flavor. Importance of High Heat High heat is crucial for stir-frying. It cooks the food quickly and evenly. This method locks in flavors and keeps everything fresh. If your pan is not hot enough, the chicken will steam instead of sear. Tips for Quick Cooking Prep all your ingredients before you start. This saves time and keeps the cooking process smooth. Cook vegetables in batches if needed. Remove them from the pan before adding the chicken. This way, you avoid overcooking. Remember, quick cooking is the secret to a great stir-fry! For the complete cooking process, check out the Full Recipe. {{image_2}} You can swap chicken for other meats. Try using shrimp or beef. Both cook quickly. For a lighter option, use turkey. Each protein brings its own taste. Adjust cooking times as needed. Shrimp cooks in just a few minutes. Beef may take a bit longer. Feel free to add your favorite veggies. Broccoli, carrots, or zucchini work well. These add color and nutrients. Just cut them into small pieces. Stir-frying should take about 3-4 minutes. This way, they stay crisp and fresh. You can also add mushrooms for an earthy flavor. To make this dish gluten-free, use tamari instead of soy sauce. Tamari has a similar taste but is safe for gluten-free diets. Always check your sweet chili sauce for gluten. Some brands add wheat. Most are gluten-free, but it's best to confirm. For a vegetarian twist, replace chicken with tofu or tempeh. Both options absorb flavors well. Press tofu before cooking to remove excess water. Cut it into cubes and stir-fry until golden. This adds a great texture. You can also use chickpeas for added protein. You can keep leftover Sweet Chili Chicken Stir-Fry in the fridge. Store it in an airtight container. It stays good for up to three days. Make sure it cools down before sealing it. This keeps the chicken juicy and the veggies crisp. If you want to save it longer, freeze the stir-fry. First, let it cool completely. Then, place it in a freezer-safe bag or container. It can last for up to three months. When you’re ready to eat it, just thaw it overnight in the fridge. The best way to reheat this dish is in a pan. Heat it on medium heat. Add a splash of water or oil to keep it moist. Stir often to heat it evenly. You can also use a microwave. Place it in a bowl and cover it. Heat in short bursts to avoid overcooking. To keep the flavor and texture, avoid high heat when reheating. This helps the chicken stay tender. If using a microwave, heat until just warm. Stir well before serving to ensure even heat. Enjoy the great taste of your Sweet Chili Chicken Stir-Fry! Can I use frozen chicken? Yes, you can use frozen chicken. Thaw it first in the fridge overnight. This makes it easier to slice. Cook it a bit longer in the pan to ensure it’s fully done. What type of sweet chili sauce is best? Look for a sauce that has a good balance of heat and sweetness. Brands with natural ingredients work best. I prefer ones with a bit of garlic or vinegar for added flavor. How to serve it for a dinner party? Serve this dish in large bowls for a family-style meal. Add some fresh herbs like cilantro or basil on top. It looks pretty and tastes great! You can also prepare a few extra sides to impress your guests. What sides go well with this dish? This stir-fry pairs well with jasmine rice or quinoa. You can also serve it with steamed broccoli or a fresh salad. These sides complement the flavors nicely and add color to your plate. Is this recipe healthy? Yes, this recipe is healthy. It includes lean protein from the chicken and lots of colorful veggies. The sweet chili sauce adds flavor without many calories. You can enjoy it guilt-free! How can I make it lower in calories? To cut calories, use less sweet chili sauce. You can also use a low-sodium soy sauce. Swap out the rice for cauliflower rice for a lighter meal. These swaps keep the dish tasty while making it healthier. For the full recipe, be sure to check out the details above! To make Sweet Chili Chicken Stir-Fry, start by coating the chicken with cornstarch. This gives it a nice texture. Next, heat oil in a skillet. Sear the chicken until golden, then set it aside. Stir-fry your bell peppers and snap peas until they are crisp. Add garlic and ginger for flavor. Finally, mix in the chicken and sauces. Heat everything through and season to your taste. Garnish with sesame seeds and green onions. Serve this dish over fluffy jasmine rice or quinoa. This adds a nice base to soak up the sauce. You can also drizzle extra sweet chili sauce on top for more flavor. For a fresh crunch, add a side salad or serve with steamed broccoli. Make sure your pan is hot before adding the chicken. This helps it sear properly. Don't overcrowd the pan; cook in batches if needed. Taste the sauce before serving. Adjust sweetness or saltiness to fit your taste. For a fun touch, consider adding crushed peanuts or cashews for crunch. For the full recipe, check out the details above. This blog post covers everything you need for a great sweet chili chicken stir-fry. You learned about the key ingredients, step-by-step cooking, and useful tips to enhance your dish. I shared variations to suit different diets and storage advice to keep your food fresh. Remember, stir-frying is quick, so keep your heat high and your ingredients ready. Enjoy experimenting with flavors and textures. You can create a dish that’s both fun and delicious!

Sweet Chili Chicken Stir-Fry Flavorful Quick Meal

If you’re hungry for a fast and tasty meal, look no further than Sweet Chili Chicken Stir-Fry. This dish bursts

Older posts
Newer posts
← Previous Page1 … Page3 Page4 Page5 … Page57 Next →

dsad

© 2025 savorystride • Built with GeneratePress

Our Policies

  • Copyright Policy
  • Cookie Policy
  • GDPR Policy
  • Privacy Policy
  • Disclaimer
  • Terms Of Use

More Information

  • Home
  • About
  • Contact
  • Appetizers
  • Dessert
  • Dinner
  • Drinks
©2025, savorystride About Back To Top