Get ready to dive into a fun fall treat with my Pumpkin Patch Dirt Cups! This simple dessert is not only adorable but also packed with tasty layers of chocolate and pumpkin. Perfect for kids and adults alike, you can customize them for any occasion. Keep reading to learn how to whip up these delightful cups and make your pumpkin patch parties even sweeter!
Ingredients
Required Ingredients for Pumpkin Patch Dirt Cups
To make these fun and tasty Pumpkin Patch Dirt Cups, you need:
- 1 package of chocolate pudding mix
- 2 cups cold milk
- 1 cup crushed chocolate sandwich cookies (like Oreos)
- 1 cup whipped topping (like Cool Whip)
- 1 cup pumpkin puree
- 1 teaspoon pumpkin pie spice
- 2 tablespoons granulated sugar
- 12 gummy worms
These base ingredients create a creamy and rich dessert that kids and adults will love. The chocolate pudding adds a smooth layer, while the pumpkin mixture gives that autumn flavor.
Optional Ingredients for Decoration
For extra fun and flair, consider these optional items:
- 1 small pumpkin for decoration
- Additional gummy worms or candy
- Edible glitter for a festive touch
These decorations can enhance the look of your dessert. A small pumpkin next to your cups adds a nice fall vibe, making your treat stand out even more.
Recommended Tools and Equipment
To prepare your Pumpkin Patch Dirt Cups, gather these essential tools:
- Mixing bowls
- Whisk
- Clear cups for serving
- Spoon or spatula for layering
Using clear cups allows everyone to see the fun layers. It makes the dessert even more appealing and exciting to eat!
Step-by-Step Instructions
Preparing the Chocolate Pudding Layer
First, grab a medium bowl. Add the chocolate pudding mix and cold milk. Whisk them together until smooth and thick. This should take about two minutes. Let the mixture sit for five minutes. This helps it firm up nicely.
Making the Pumpkin Mixture
Next, take another bowl. Combine the pumpkin puree, pumpkin pie spice, and granulated sugar in it. Stir well until the mix is smooth. This pumpkin mixture gives our dessert its fall flavor. Now, fold in the whipped topping gently. This makes the pumpkin layer creamy and light.
Assembling the Dirt Cups
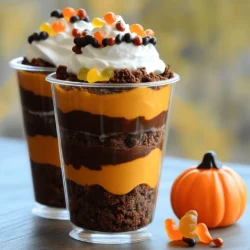
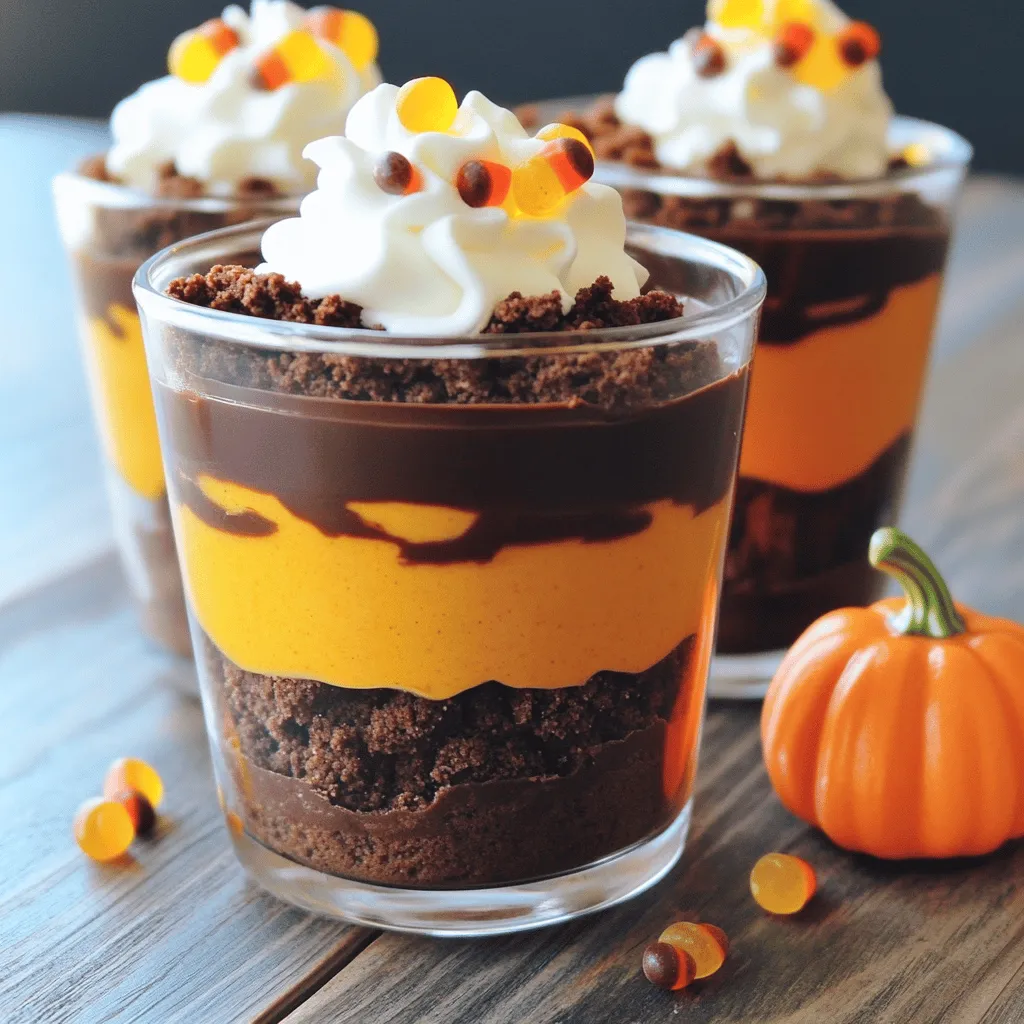
Now we can build our dirt cups. Start by adding a layer of chocolate pudding to the bottom of each cup. This will be the first layer. Next, sprinkle crushed chocolate cookies over the pudding. This creates a “dirt” layer. Then, spoon the pumpkin mixture on top of the cookies. Repeat these layers until the cups are full. Finish with a layer of crushed cookies. Finally, add gummy worms on top for fun. If you like, place a small pumpkin next to the cups for decoration.
Tips & Tricks
Customization Options for Personal Touch
You can make these cups your own in fun ways. Try using vanilla pudding instead of chocolate for a twist. Add different spices like cinnamon for extra flavor. You can also swap out the gummy worms for candy corn or chocolate spiders. Want a healthier option? Use Greek yogurt instead of whipped topping for creaminess without the extra sugar. Your choices make each cup unique!
Storage Tips for Leftovers
If you have extra dirt cups, store them in the fridge. Use airtight containers to keep them fresh. They will last about three days. If you want to save some for a later date, avoid adding gummy worms until you serve them. This keeps them from getting soggy. Enjoy your sweet treats later without worry!
Presentation Tips for a Festive Look
To impress your guests, serve the cups in clear plastic cups. This lets everyone see the fun layers. You can top each cup with a dollop of whipped topping. For an extra touch, place a gummy worm hanging off the side. If you want to go all out, add a small pumpkin next to the cups. This brings the fall theme to life!
Variations
Alternative Flavor Profiles (e.g., vanilla or butterscotch)
You can switch up the flavors in your Pumpkin Patch Dirt Cups. Instead of chocolate pudding, use vanilla or butterscotch. These flavors add a new twist. Just follow the same steps with your chosen flavor. The creamy texture of the pudding pairs well with pumpkin. Each bite will still taste great and keep the fun look.
Gluten-Free or Dairy-Free Modifications
If you need gluten-free or dairy-free options, it’s easy to adjust. For gluten-free, choose gluten-free cookies. Many brands offer tasty options. For dairy-free, use almond milk or coconut milk in your pudding. You can also find dairy-free whipped topping. These swaps help everyone enjoy this treat without worry.
Themed Additions for Different Occasions
You can make your Pumpkin Patch Dirt Cups fit any event. For Halloween, add candy corn on top. It looks festive and adds crunch. For Thanksgiving, use cinnamon sticks as decoration. For Christmas, sprinkle red and green edible glitter. These fun touches make your dessert stand out. You can get creative with what you have at home.
Storage Info
Best Practices for Storing Dirt Cups
To keep your Pumpkin Patch Dirt Cups fresh, store them in the fridge. Use airtight containers or cover each cup with plastic wrap. This helps keep the layers intact and prevents drying out. Avoid stacking the cups to keep the layers pretty.
Refrigeration and Shelf Life
When stored properly, these dirt cups last for up to three days in the fridge. The flavors blend nicely, making them taste even better. However, the gummy worms may lose their chewy texture after a day. If you want to keep them fresh, add the worms just before serving.
Freezing Recommendations
I don’t recommend freezing these dirt cups. The texture of the pudding and whipped topping changes when frozen. If you want to prepare them ahead, make the layers and store them separately in the fridge. Assemble the cups right before serving for the best taste and look.
FAQs
Can I make Pumpkin Patch Dirt Cups ahead of time?
Yes, you can make Pumpkin Patch Dirt Cups ahead of time. I often prepare them a day before serving. This helps the flavors meld together. Just store them in the fridge. Cover each cup to keep them fresh.
What can I substitute for chocolate pudding mix?
If you want to switch it up, try vanilla pudding mix instead. It pairs well with pumpkin. You can also use butterscotch pudding for a fun twist. Just follow the same steps in the recipe.
How do I ensure the cups stay layered without mixing?
To keep the layers neat, build the cups slowly. Add each layer gently. Use the back of a spoon to spread the layers. This method helps avoid mixing. Also, chill the cups before serving.
In this post, we explored how to make Pumpkin Patch Dirt Cups. I covered essential ingredients, tools, and a simple step-by-step guide. Tips for decorating, storing, and customizing your cups helped add a personal touch. You can even try different flavor options or themes to make them unique. These treats are easy to prepare and perfect for any occasion. Enjoy making these fun desserts and share them with friends and family.