Chocolate Peanut Butter Bars Easy No-Bake Recipe

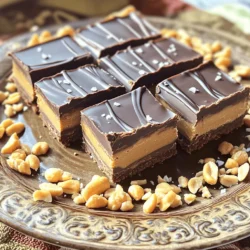
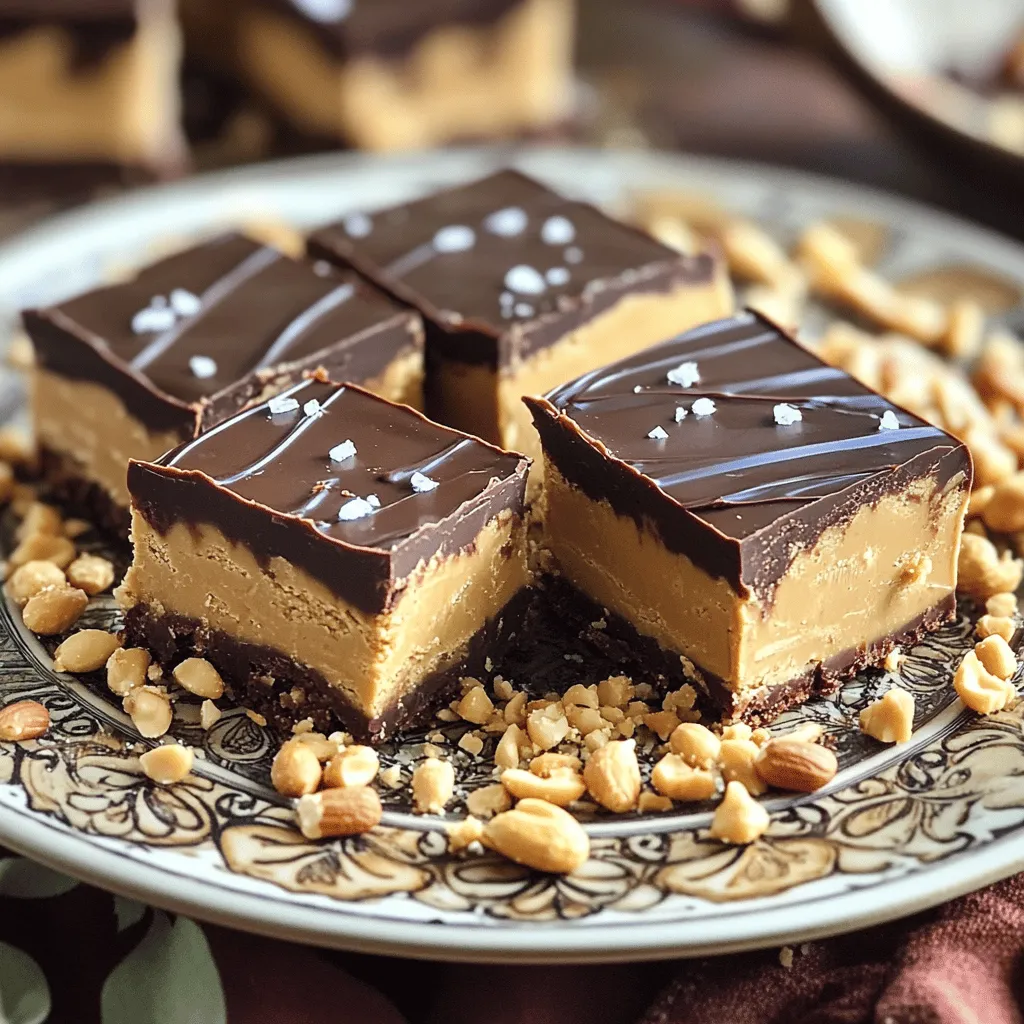
Are you craving a sweet treat that’s both easy to make and tasty? This no-bake Chocolate Peanut Butter Bars recipe is perfect for you! With just a handful of simple ingredients, you can whip up these delicious bars in no time. Whether you want a quick dessert or a nutritious snack, these bars are sure to satisfy your sweet tooth. Let’s dive into the recipe and discover how you can create these delightful treats!

Ingredients

List of Ingredients

To make these tasty chocolate peanut butter bars, gather these items:

– 1 cup natural peanut butter (smooth)

– 1/2 cup maple syrup (or honey)

– 1/4 cup coconut oil, melted

– 1 cup rolled oats

– 1/2 cup chocolate chips (dark or semi-sweet)

– 1/2 cup cocoa powder

– 1 teaspoon vanilla extract

– 1/4 teaspoon salt

Ingredient Substitutions

You can change some ingredients based on what you have.

Alternatives for peanut butter: Try almond butter or sunflower seed butter. Both work well.

Sweetener options: Honey is great, but you can also use agave syrup or stevia.

Oil replacements: You can swap coconut oil for vegetable oil or melted butter.

Optional Add-ins

Make your bars even more special with some add-ins.

Nuts and seeds: Chopped walnuts, almonds, or pumpkin seeds add crunch.

Dried fruits: Raisins, cranberries, or chopped apricots give a sweet burst.

Flavor enhancements: A sprinkle of cinnamon or a dash of espresso can boost the taste.

These choices let you create a version just for you! For the full recipe, check out the details above.

Step-by-Step Instructions

Preparation Guide

To start, gather your tools. You need a large mixing bowl, a spatula, and an 8×8 inch baking dish. Don’t forget parchment paper. It helps with easy removal of the bars later.

Measuring ingredients is key. Use dry measuring cups for the oats and cocoa powder. For the peanut butter and oil, use liquid measuring cups. Accurate measurements ensure your bars turn out perfect every time.

Baking Process

Now, let’s mix the ingredients. In the large bowl, add the smooth peanut butter, maple syrup, and melted coconut oil. Stir them together until smooth.

Next, add the rolled oats, cocoa powder, vanilla extract, and salt. Mix it all until it forms a thick batter. This is important for the texture of your bars.

Gently fold in the chocolate chips. You want them to be evenly distributed. Pour the mixture into the lined baking dish. Press it down firmly with a spatula or your hands.

Setting the Bars

Refrigerate the dish for at least 1-2 hours. This helps the bars set and firm up nicely. If you skip this step, your bars may fall apart when you cut them.

Once they are firm, lift the bars out using the parchment paper. Place them on a clean surface and slice them into squares or rectangles. For clean cuts, use a sharp knife and wipe it between slices.

For the full recipe, you can refer to the provided details.

Tips & Tricks

Perfecting Your Bars

To get the right texture in your chocolate peanut butter bars, focus on mixing. Combine the peanut butter, maple syrup, and melted coconut oil well. This makes a smooth base. When adding oats and cocoa, mix until you see no dry spots. If your bars feel too crumbly, you might need a bit more maple syrup or coconut oil.

Common mistakes include not measuring ingredients accurately. Always use measuring cups or a scale. Another mistake is not chilling the bars long enough. Refrigerate for at least 1-2 hours to help them set properly. If they are too soft, they won’t hold their shape when cut.

Serving Suggestions

These bars taste great on their own. However, you can elevate them with some fun extras. Serve on a decorative plate for a nice touch. Drizzle some melted chocolate on top for added sweetness. A sprinkle of sea salt or crushed peanuts also adds a nice crunch. You can even pair them with fresh fruit, like strawberries or bananas, for a fun dessert.

Healthy Modifications

You can make these bars gluten-free by using gluten-free oats. They work just as well and keep the same texture. If you want to reduce sugar, try cutting the syrup by a quarter. You might also use mashed ripe bananas instead. This keeps the bars sweet while adding nutrients.

For more ideas, feel free to check the Full Recipe.

Variations

Flavor Variations

You can change the taste of your Chocolate Peanut Butter Bars by using different nut butters. Almond butter or cashew butter works great. Each nut butter brings its unique flavor. You could also try sunflower seed butter for a nut-free option.

For chocolate types, you can switch it up too. Use white chocolate for a sweeter taste. You can also try milk chocolate for a creamier flavor. Dark chocolate gives a rich taste and pairs well with peanut butter.

Dietary Adaptations

If you want a vegan version, swap honey for maple syrup. Make sure to use dairy-free chocolate chips. This keeps the bars fully plant-based.

For nut-free options, use sunflower seed butter. You can still enjoy these bars without nuts. Just check labels to avoid cross-contamination.

Seasonal Twists

To make your bars festive, add holiday-themed touches. Use peppermint extract for a minty flavor during winter. You can also sprinkle crushed candy canes on top.

In summer, add fresh fruits like strawberries or raspberries. This adds a burst of color and flavor. You can even mix in seasonal spices like cinnamon for fall.

For the full recipe, check out the detailed instructions to create these tasty treats!

Storage Info

Storing the Bars

To keep your chocolate peanut butter bars fresh, use an airtight container. This method prevents air and moisture from making them soggy. Place parchment paper between layers if you stack them. This will also help with easy access. Store them in the fridge for up to one week. You can also enjoy them cold or let them sit at room temperature for a few minutes before eating.

Freezing Tips

Want to enjoy these bars later? Freezing is a great option. Cut the bars into squares before freezing. Then, wrap each piece tightly in plastic wrap. Place the wrapped bars in a freezer-safe bag or container. They will stay fresh for up to three months. When you’re ready to enjoy them, take a bar out and let it thaw in the fridge. It usually takes a few hours to soften.

Shelf Life

Understanding how long your bars last is key. The main ingredients, like peanut butter and oats, have a good shelf life. In the fridge, the bars last about one week. If frozen, they can last up to three months without losing flavor. Always check for any signs of spoilage, like a strange smell or change in texture. This ensures you enjoy the best taste every time!

FAQs

How long do Chocolate Peanut Butter Bars last?

Chocolate peanut butter bars last about one week in the fridge. Store them in an airtight container to keep them fresh. If you freeze them, they can last up to three months. Just wrap each bar well in plastic wrap and place them in a freezer bag. When you want to enjoy them, let them thaw in the fridge overnight.

Can I use different sweeteners in this recipe?

Yes, you can use other sweeteners. For example, you can swap maple syrup with honey or agave syrup. You can also try erythritol or stevia if you want a lower-calorie option. Just remember that these sweeteners may change the taste a bit. Adjust the amount to reach your desired sweetness.

Are these bars healthy?

These bars can be a healthier treat. They contain natural peanut butter, which provides protein and healthy fats. One bar has about 150 calories and 8 grams of fat, depending on your ingredients. Remember, they are still a dessert, so enjoy them in moderation.

You now have a solid guide for making delicious chocolate peanut butter bars. You can swap ingredients and add your favorites. Follow the easy steps to bake and store these treats well. Remember, practice makes perfect. Don’t hesitate to try new flavors and tweaks. Enjoy your homemade bars with friends and family. With some creativity, you can make them your own! Dive into this fun kitchen adventure. Indulge in goodness, and share the joy!

To make these tasty chocolate peanut butter bars, gather these items: - 1 cup natural peanut butter (smooth) - 1/2 cup maple syrup (or honey) - 1/4 cup coconut oil, melted - 1 cup rolled oats - 1/2 cup chocolate chips (dark or semi-sweet) - 1/2 cup cocoa powder - 1 teaspoon vanilla extract - 1/4 teaspoon salt You can change some ingredients based on what you have. - Alternatives for peanut butter: Try almond butter or sunflower seed butter. Both work well. - Sweetener options: Honey is great, but you can also use agave syrup or stevia. - Oil replacements: You can swap coconut oil for vegetable oil or melted butter. Make your bars even more special with some add-ins. - Nuts and seeds: Chopped walnuts, almonds, or pumpkin seeds add crunch. - Dried fruits: Raisins, cranberries, or chopped apricots give a sweet burst. - Flavor enhancements: A sprinkle of cinnamon or a dash of espresso can boost the taste. These choices let you create a version just for you! For the full recipe, check out the details above. To start, gather your tools. You need a large mixing bowl, a spatula, and an 8x8 inch baking dish. Don't forget parchment paper. It helps with easy removal of the bars later. Measuring ingredients is key. Use dry measuring cups for the oats and cocoa powder. For the peanut butter and oil, use liquid measuring cups. Accurate measurements ensure your bars turn out perfect every time. Now, let's mix the ingredients. In the large bowl, add the smooth peanut butter, maple syrup, and melted coconut oil. Stir them together until smooth. Next, add the rolled oats, cocoa powder, vanilla extract, and salt. Mix it all until it forms a thick batter. This is important for the texture of your bars. Gently fold in the chocolate chips. You want them to be evenly distributed. Pour the mixture into the lined baking dish. Press it down firmly with a spatula or your hands. Refrigerate the dish for at least 1-2 hours. This helps the bars set and firm up nicely. If you skip this step, your bars may fall apart when you cut them. Once they are firm, lift the bars out using the parchment paper. Place them on a clean surface and slice them into squares or rectangles. For clean cuts, use a sharp knife and wipe it between slices. For the full recipe, you can refer to the provided details. To get the right texture in your chocolate peanut butter bars, focus on mixing. Combine the peanut butter, maple syrup, and melted coconut oil well. This makes a smooth base. When adding oats and cocoa, mix until you see no dry spots. If your bars feel too crumbly, you might need a bit more maple syrup or coconut oil. Common mistakes include not measuring ingredients accurately. Always use measuring cups or a scale. Another mistake is not chilling the bars long enough. Refrigerate for at least 1-2 hours to help them set properly. If they are too soft, they won’t hold their shape when cut. These bars taste great on their own. However, you can elevate them with some fun extras. Serve on a decorative plate for a nice touch. Drizzle some melted chocolate on top for added sweetness. A sprinkle of sea salt or crushed peanuts also adds a nice crunch. You can even pair them with fresh fruit, like strawberries or bananas, for a fun dessert. You can make these bars gluten-free by using gluten-free oats. They work just as well and keep the same texture. If you want to reduce sugar, try cutting the syrup by a quarter. You might also use mashed ripe bananas instead. This keeps the bars sweet while adding nutrients. For more ideas, feel free to check the Full Recipe. {{image_2}} You can change the taste of your Chocolate Peanut Butter Bars by using different nut butters. Almond butter or cashew butter works great. Each nut butter brings its unique flavor. You could also try sunflower seed butter for a nut-free option. For chocolate types, you can switch it up too. Use white chocolate for a sweeter taste. You can also try milk chocolate for a creamier flavor. Dark chocolate gives a rich taste and pairs well with peanut butter. If you want a vegan version, swap honey for maple syrup. Make sure to use dairy-free chocolate chips. This keeps the bars fully plant-based. For nut-free options, use sunflower seed butter. You can still enjoy these bars without nuts. Just check labels to avoid cross-contamination. To make your bars festive, add holiday-themed touches. Use peppermint extract for a minty flavor during winter. You can also sprinkle crushed candy canes on top. In summer, add fresh fruits like strawberries or raspberries. This adds a burst of color and flavor. You can even mix in seasonal spices like cinnamon for fall. For the full recipe, check out the detailed instructions to create these tasty treats! To keep your chocolate peanut butter bars fresh, use an airtight container. This method prevents air and moisture from making them soggy. Place parchment paper between layers if you stack them. This will also help with easy access. Store them in the fridge for up to one week. You can also enjoy them cold or let them sit at room temperature for a few minutes before eating. Want to enjoy these bars later? Freezing is a great option. Cut the bars into squares before freezing. Then, wrap each piece tightly in plastic wrap. Place the wrapped bars in a freezer-safe bag or container. They will stay fresh for up to three months. When you’re ready to enjoy them, take a bar out and let it thaw in the fridge. It usually takes a few hours to soften. Understanding how long your bars last is key. The main ingredients, like peanut butter and oats, have a good shelf life. In the fridge, the bars last about one week. If frozen, they can last up to three months without losing flavor. Always check for any signs of spoilage, like a strange smell or change in texture. This ensures you enjoy the best taste every time! Chocolate peanut butter bars last about one week in the fridge. Store them in an airtight container to keep them fresh. If you freeze them, they can last up to three months. Just wrap each bar well in plastic wrap and place them in a freezer bag. When you want to enjoy them, let them thaw in the fridge overnight. Yes, you can use other sweeteners. For example, you can swap maple syrup with honey or agave syrup. You can also try erythritol or stevia if you want a lower-calorie option. Just remember that these sweeteners may change the taste a bit. Adjust the amount to reach your desired sweetness. These bars can be a healthier treat. They contain natural peanut butter, which provides protein and healthy fats. One bar has about 150 calories and 8 grams of fat, depending on your ingredients. Remember, they are still a dessert, so enjoy them in moderation. You now have a solid guide for making delicious chocolate peanut butter bars. You can swap ingredients and add your favorites. Follow the easy steps to bake and store these treats well. Remember, practice makes perfect. Don't hesitate to try new flavors and tweaks. Enjoy your homemade bars with friends and family. With some creativity, you can make them your own! Dive into this fun kitchen adventure. Indulge in goodness, and share the joy!

Chocolate Peanut Butter Bars

Indulge in the deliciousness of homemade Chocolate Peanut Butter Bars! These easy-to-make treats are packed with rich flavor and nutritious ingredients like peanut butter, oats, and dark chocolate. Perfect for snacks or dessert, they take just 10 minutes of prep time before chilling. Ready to satisfy your sweet tooth? Click through to explore the full recipe and learn how to create these irresistible bars at home!

Ingredients
  

1 cup natural peanut butter (smooth)

1/2 cup maple syrup (or honey)

1/4 cup coconut oil, melted

1 cup rolled oats

1/2 cup chocolate chips (dark or semi-sweet)

1/2 cup cocoa powder

1 teaspoon vanilla extract

1/4 teaspoon salt

Instructions
 

Line an 8x8 inch baking dish with parchment paper, leaving some overhang for easy removal.

    In a large mixing bowl, combine the peanut butter, maple syrup, and melted coconut oil. Stir until smooth and well combined.

      Add the rolled oats, cocoa powder, vanilla extract, and salt to the peanut butter mixture. Mix until everything is incorporated into a thick batter.

        Fold in the chocolate chips gently until evenly distributed.

          Pour the mixture into the prepared baking dish and press it down evenly using a spatula or your hands.

            Place the dish in the refrigerator for at least 1-2 hours, or until set.

              Once firm, lift the bars out by the parchment paper and cut them into squares or rectangles.

                Store any leftovers in an airtight container in the refrigerator for up to one week.

                  Prep Time: 10 minutes | Total Time: 2 hours 10 minutes | Servings: 16 bars

                    - Presentation Tips: Serve these bars on a decorative plate, drizzling some melted chocolate on top for an elegant touch. You can also sprinkle some sea salt or crushed peanuts for added texture and visual appeal.

                      Leave a Comment

                      Recipe Rating