![To make your no-bake peanut butter bars, you need these key items: - 1 cup creamy peanut butter - 1/2 cup honey or maple syrup - 2 cups rolled oats These ingredients work together to create a sweet and chewy treat. The peanut butter gives a rich flavor, while the honey adds sweetness. The rolled oats hold everything together. You can make these bars even better with a few extra ingredients: - 1/2 cup vanilla protein powder - 1/4 cup dark chocolate chips - 1/4 cup chopped nuts Adding protein powder boosts nutrition. Dark chocolate chips add a sweet touch. Chopped nuts give a nice crunch and extra flavor. For an extra kick, add: - A pinch of sea salt This small amount of salt balances the sweetness. It makes every bite taste even better. Follow the [Full Recipe] for complete steps and tips on how to make these delicious no-bake peanut butter bars. First, grab a medium mixing bowl. In it, combine 1 cup of creamy peanut butter and 1/2 cup of honey or maple syrup. Mix well until these two are smooth and creamy. Next, add 2 cups of rolled oats into your mixture. If you want, you can also add 1/2 cup of vanilla protein powder for an extra boost. Stir until every oat is coated and the texture is even. Now it's time to make these bars even better. Gently fold in 1/4 cup of dark chocolate chips and 1/4 cup of chopped nuts, like almonds or walnuts. Be careful not to break the chocolate chips as you mix. This adds a delightful crunch and rich flavor to the bars. Let’s prepare for the final step. Line an 8x8 inch baking dish with parchment paper. Make sure to leave some paper hanging over the edges. This will help you lift the bars out later. Now, take your mixture and transfer it into the dish. Press it down firmly using a spatula or your hands. Make sure it’s even and smooth. For a nice touch, sprinkle a pinch of sea salt on top. Cover the dish with plastic wrap and refrigerate for at least 2 hours. This helps the bars set up nicely. Once they are chilled, lift the bars out using the parchment paper and cut them into squares. You can find the full recipe for more detailed instructions. To avoid dry bars, use creamy peanut butter. This keeps your bars moist and tasty. If you find your mix too thick, add a splash of water or extra honey. This helps bind the oats and keeps your bars soft. When pressing down the mixture, use a spatula or your hands. Make sure to press firmly but gently. This will help the mixture hold together. If you don't press it down enough, your bars may crumble. Aim for an even surface, so every bite is just as good. You can add toppings to boost flavor. Try drizzling some melted chocolate on top. Chopped fruits like bananas or strawberries also work well. For a crunchy twist, sprinkle more nuts on top. If you want to use alternative sweeteners, consider agave syrup or coconut sugar. These can change the taste a bit. They might also add a unique flavor to your bars. To save time, prepare the bars in advance. Mix and press the mixture into the baking dish the night before. Then, let them chill in the fridge overnight. This makes it easy to grab a bar for breakfast or a snack. You can also double the recipe. This way, you'll have extra bars ready for later. Just remember to store them in an airtight container to keep them fresh. {{image_2}} You can change the taste of these bars easily. If you want a different nut butter, try almond or cashew butter. Both options are creamy and tasty. They will give your bars a unique flavor. You can also switch up the chocolate. Instead of dark chocolate chips, use milk or white chocolate. Each type brings its own sweetness. This change can make your no-bake peanut butter bars even more fun. If you follow a vegan diet, you can still enjoy these bars. Just use maple syrup instead of honey. It works well and keeps the bars sweet. For those who need gluten-free options, rolled oats are safe. Just check that they are certified gluten-free. This way, everyone can enjoy these tasty treats without worry. You can add fruits to make your bars more special. Dried fruits like cranberries or raisins add sweetness and chewiness. Fresh fruit slices, like bananas or strawberries, can also be tasty. Just remember to adjust the oats if you add a lot of fruit. These variations let you make the bars your own. You can mix and match to find your favorite flavors. For the full recipe, check the earlier section! To keep your no-bake peanut butter bars fresh, use airtight containers. Glass or plastic containers work well. Make sure the bars are cool before sealing the container. This prevents moisture from building up. Store the bars in the fridge for best results. They can also go in the freezer for longer storage. These bars last about one week in the fridge. If you freeze them, they can last up to three months. Always check for signs of spoilage. If you see any mold or if they smell off, it’s best to throw them out. Fresh bars should be firm and smell sweet and nutty. For easy snacks, cut the bars into small squares. This makes portioning simple. You can wrap each square in parchment paper for grab-and-go convenience. This way, you have tasty snacks ready whenever you need them. You can also keep them in a lunch box or snack bag for your kids. Yes, you can freeze No-Bake Peanut Butter Bars. To freeze, first cut the bars into squares. Then, wrap each piece in plastic wrap. Place the wrapped bars in an airtight container or a freezer bag. This keeps them fresh and safe from freezer burn. They can last in the freezer for up to three months. When you want to eat them, let them thaw in the fridge overnight. This keeps their texture nice. You can make these bars healthier by using less honey or maple syrup. Try swapping half the amount for mashed bananas or unsweetened applesauce. You can also use sugar-free peanut butter. If you want to lower the calories, skip the chocolate chips. Instead, you can add more nuts or seeds. This keeps the flavor while cutting down the sugar. If you need a substitute for peanut butter, here are some options: - Almond butter: Creamy and nutty, great for taste. - Sunflower seed butter: Good for nut allergies. - Cashew butter: Smooth and slightly sweet. - Soy nut butter: A nut-free option that’s rich in flavor. These substitutes work well and can change the taste while keeping it yummy. You learned how to make no-bake peanut butter bars. We covered ingredients, both essential and optional. I provided step-by-step instructions for mixing and setting your bars. You also received tips to perfect texture and enhance flavor. In the end, these bars are easy to customize. Try different flavors and add-ins to make them yours. You can enjoy a tasty treat that's also healthy. Go ahead and make your own batch!](https://savorystride.com/wp-content/uploads/2025/06/868742f3-e3bb-4586-8146-602d3cb27239-768x768.webp)
If you’re craving a quick and tasty treat, these No-Bake Peanut Butter Bars are for you! With just a few simple ingredients like creamy peanut butter, oats, and honey, you can whip up delicious bars in no time. Plus, you can customize them with add-ins like chocolate chips or nuts. Let’s dive into this easy recipe that will impress your friends and satisfy your sweet tooth!
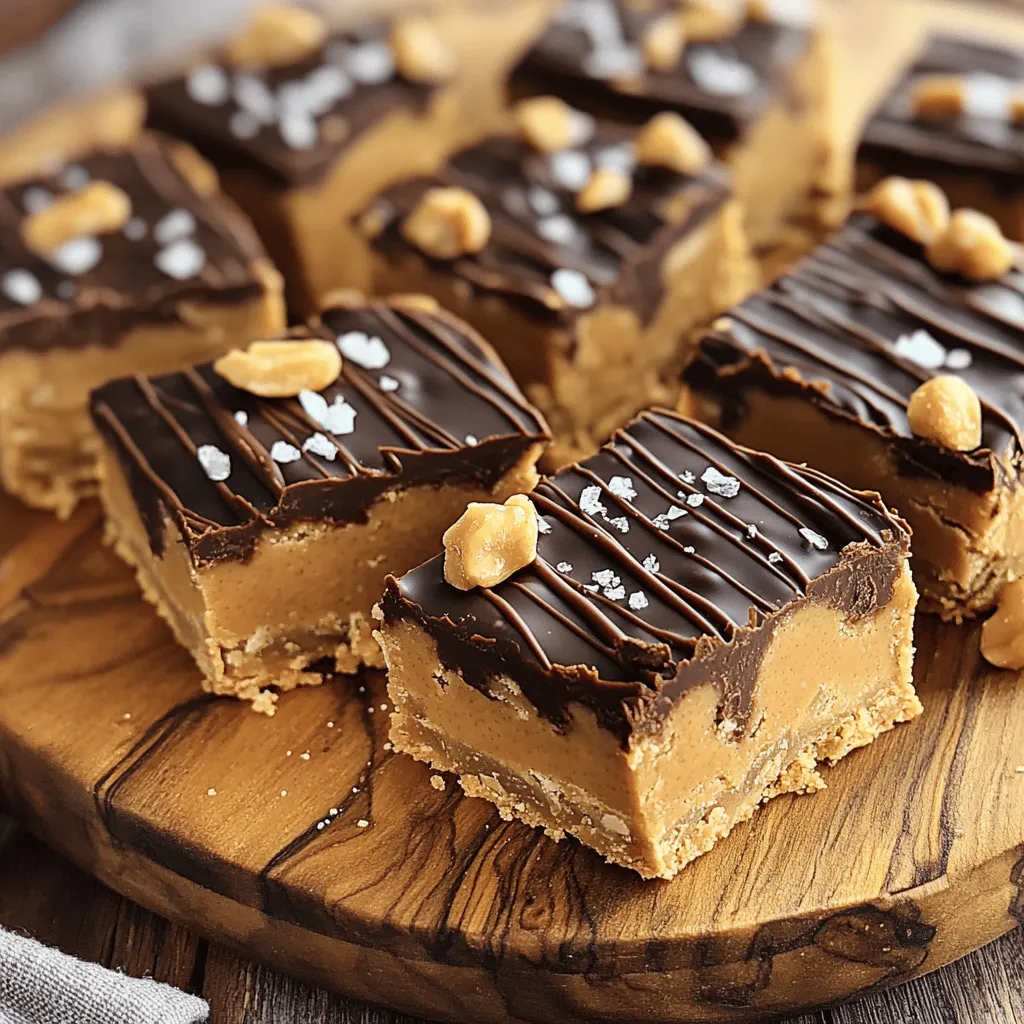
Ingredients
List of Essential Ingredients
To make your no-bake peanut butter bars, you need these key items:
- 1 cup creamy peanut butter
- 1/2 cup honey or maple syrup
- 2 cups rolled oats
These ingredients work together to create a sweet and chewy treat. The peanut butter gives a rich flavor, while the honey adds sweetness. The rolled oats hold everything together.
Optional Add-Ins
You can make these bars even better with a few extra ingredients:
- 1/2 cup vanilla protein powder
- 1/4 cup dark chocolate chips
- 1/4 cup chopped nuts
Adding protein powder boosts nutrition. Dark chocolate chips add a sweet touch. Chopped nuts give a nice crunch and extra flavor.
Additional Flavor Enhancers
For an extra kick, add:
- A pinch of sea salt
This small amount of salt balances the sweetness. It makes every bite taste even better.
Step-by-Step Instructions
Preparation Steps
First, grab a medium mixing bowl. In it, combine 1 cup of creamy peanut butter and 1/2 cup of honey or maple syrup. Mix well until these two are smooth and creamy. Next, add 2 cups of rolled oats into your mixture. If you want, you can also add 1/2 cup of vanilla protein powder for an extra boost. Stir until every oat is coated and the texture is even.
Mixing in Special Ingredients
Now it’s time to make these bars even better. Gently fold in 1/4 cup of dark chocolate chips and 1/4 cup of chopped nuts, like almonds or walnuts. Be careful not to break the chocolate chips as you mix. This adds a delightful crunch and rich flavor to the bars.
Setting the Bars
Let’s prepare for the final step. Line an 8×8 inch baking dish with parchment paper. Make sure to leave some paper hanging over the edges. This will help you lift the bars out later. Now, take your mixture and transfer it into the dish. Press it down firmly using a spatula or your hands. Make sure it’s even and smooth. For a nice touch, sprinkle a pinch of sea salt on top. Cover the dish with plastic wrap and refrigerate for at least 2 hours. This helps the bars set up nicely. Once they are chilled, lift the bars out using the parchment paper and cut them into squares.
Tips & Tricks
Perfecting the Texture
To avoid dry bars, use creamy peanut butter. This keeps your bars moist and tasty. If you find your mix too thick, add a splash of water or extra honey. This helps bind the oats and keeps your bars soft.
When pressing down the mixture, use a spatula or your hands. Make sure to press firmly but gently. This will help the mixture hold together. If you don’t press it down enough, your bars may crumble. Aim for an even surface, so every bite is just as good.
Enhancing Flavor
You can add toppings to boost flavor. Try drizzling some melted chocolate on top. Chopped fruits like bananas or strawberries also work well. For a crunchy twist, sprinkle more nuts on top.
If you want to use alternative sweeteners, consider agave syrup or coconut sugar. These can change the taste a bit. They might also add a unique flavor to your bars.
Making Ahead
To save time, prepare the bars in advance. Mix and press the mixture into the baking dish the night before. Then, let them chill in the fridge overnight. This makes it easy to grab a bar for breakfast or a snack.
You can also double the recipe. This way, you’ll have extra bars ready for later. Just remember to store them in an airtight container to keep them fresh.
Variations
Flavor Variations
You can change the taste of these bars easily. If you want a different nut butter, try almond or cashew butter. Both options are creamy and tasty. They will give your bars a unique flavor.
You can also switch up the chocolate. Instead of dark chocolate chips, use milk or white chocolate. Each type brings its own sweetness. This change can make your no-bake peanut butter bars even more fun.
Dietary Adjustments
If you follow a vegan diet, you can still enjoy these bars. Just use maple syrup instead of honey. It works well and keeps the bars sweet.
For those who need gluten-free options, rolled oats are safe. Just check that they are certified gluten-free. This way, everyone can enjoy these tasty treats without worry.
Customizable Ingredients
You can add fruits to make your bars more special. Dried fruits like cranberries or raisins add sweetness and chewiness. Fresh fruit slices, like bananas or strawberries, can also be tasty. Just remember to adjust the oats if you add a lot of fruit.
These variations let you make the bars your own. You can mix and match to find your favorite flavors.
Storage Info
Best Storage Practices
To keep your no-bake peanut butter bars fresh, use airtight containers. Glass or plastic containers work well. Make sure the bars are cool before sealing the container. This prevents moisture from building up. Store the bars in the fridge for best results. They can also go in the freezer for longer storage.
Shelf Life
These bars last about one week in the fridge. If you freeze them, they can last up to three months. Always check for signs of spoilage. If you see any mold or if they smell off, it’s best to throw them out. Fresh bars should be firm and smell sweet and nutty.
Meal Prep Guidelines
For easy snacks, cut the bars into small squares. This makes portioning simple. You can wrap each square in parchment paper for grab-and-go convenience. This way, you have tasty snacks ready whenever you need them. You can also keep them in a lunch box or snack bag for your kids.
FAQs
Can I freeze No-Bake Peanut Butter Bars?
Yes, you can freeze No-Bake Peanut Butter Bars. To freeze, first cut the bars into squares. Then, wrap each piece in plastic wrap. Place the wrapped bars in an airtight container or a freezer bag. This keeps them fresh and safe from freezer burn. They can last in the freezer for up to three months. When you want to eat them, let them thaw in the fridge overnight. This keeps their texture nice.
How do I make these bars healthier?
You can make these bars healthier by using less honey or maple syrup. Try swapping half the amount for mashed bananas or unsweetened applesauce. You can also use sugar-free peanut butter. If you want to lower the calories, skip the chocolate chips. Instead, you can add more nuts or seeds. This keeps the flavor while cutting down the sugar.
What can I substitute for peanut butter?
If you need a substitute for peanut butter, here are some options:
- Almond butter: Creamy and nutty, great for taste.
- Sunflower seed butter: Good for nut allergies.
- Cashew butter: Smooth and slightly sweet.
- Soy nut butter: A nut-free option that’s rich in flavor.
These substitutes work well and can change the taste while keeping it yummy.
You learned how to make no-bake peanut butter bars. We covered ingredients, both essential and optional. I provided step-by-step instructions for mixing and setting your bars. You also received tips to perfect texture and enhance flavor.
In the end, these bars are easy to customize. Try different flavors and add-ins to make them yours. You can enjoy a tasty treat that’s also healthy. Go ahead and make your own batch!
![To make your no-bake peanut butter bars, you need these key items: - 1 cup creamy peanut butter - 1/2 cup honey or maple syrup - 2 cups rolled oats These ingredients work together to create a sweet and chewy treat. The peanut butter gives a rich flavor, while the honey adds sweetness. The rolled oats hold everything together. You can make these bars even better with a few extra ingredients: - 1/2 cup vanilla protein powder - 1/4 cup dark chocolate chips - 1/4 cup chopped nuts Adding protein powder boosts nutrition. Dark chocolate chips add a sweet touch. Chopped nuts give a nice crunch and extra flavor. For an extra kick, add: - A pinch of sea salt This small amount of salt balances the sweetness. It makes every bite taste even better. Follow the [Full Recipe] for complete steps and tips on how to make these delicious no-bake peanut butter bars. First, grab a medium mixing bowl. In it, combine 1 cup of creamy peanut butter and 1/2 cup of honey or maple syrup. Mix well until these two are smooth and creamy. Next, add 2 cups of rolled oats into your mixture. If you want, you can also add 1/2 cup of vanilla protein powder for an extra boost. Stir until every oat is coated and the texture is even. Now it's time to make these bars even better. Gently fold in 1/4 cup of dark chocolate chips and 1/4 cup of chopped nuts, like almonds or walnuts. Be careful not to break the chocolate chips as you mix. This adds a delightful crunch and rich flavor to the bars. Let’s prepare for the final step. Line an 8x8 inch baking dish with parchment paper. Make sure to leave some paper hanging over the edges. This will help you lift the bars out later. Now, take your mixture and transfer it into the dish. Press it down firmly using a spatula or your hands. Make sure it’s even and smooth. For a nice touch, sprinkle a pinch of sea salt on top. Cover the dish with plastic wrap and refrigerate for at least 2 hours. This helps the bars set up nicely. Once they are chilled, lift the bars out using the parchment paper and cut them into squares. You can find the full recipe for more detailed instructions. To avoid dry bars, use creamy peanut butter. This keeps your bars moist and tasty. If you find your mix too thick, add a splash of water or extra honey. This helps bind the oats and keeps your bars soft. When pressing down the mixture, use a spatula or your hands. Make sure to press firmly but gently. This will help the mixture hold together. If you don't press it down enough, your bars may crumble. Aim for an even surface, so every bite is just as good. You can add toppings to boost flavor. Try drizzling some melted chocolate on top. Chopped fruits like bananas or strawberries also work well. For a crunchy twist, sprinkle more nuts on top. If you want to use alternative sweeteners, consider agave syrup or coconut sugar. These can change the taste a bit. They might also add a unique flavor to your bars. To save time, prepare the bars in advance. Mix and press the mixture into the baking dish the night before. Then, let them chill in the fridge overnight. This makes it easy to grab a bar for breakfast or a snack. You can also double the recipe. This way, you'll have extra bars ready for later. Just remember to store them in an airtight container to keep them fresh. {{image_2}} You can change the taste of these bars easily. If you want a different nut butter, try almond or cashew butter. Both options are creamy and tasty. They will give your bars a unique flavor. You can also switch up the chocolate. Instead of dark chocolate chips, use milk or white chocolate. Each type brings its own sweetness. This change can make your no-bake peanut butter bars even more fun. If you follow a vegan diet, you can still enjoy these bars. Just use maple syrup instead of honey. It works well and keeps the bars sweet. For those who need gluten-free options, rolled oats are safe. Just check that they are certified gluten-free. This way, everyone can enjoy these tasty treats without worry. You can add fruits to make your bars more special. Dried fruits like cranberries or raisins add sweetness and chewiness. Fresh fruit slices, like bananas or strawberries, can also be tasty. Just remember to adjust the oats if you add a lot of fruit. These variations let you make the bars your own. You can mix and match to find your favorite flavors. For the full recipe, check the earlier section! To keep your no-bake peanut butter bars fresh, use airtight containers. Glass or plastic containers work well. Make sure the bars are cool before sealing the container. This prevents moisture from building up. Store the bars in the fridge for best results. They can also go in the freezer for longer storage. These bars last about one week in the fridge. If you freeze them, they can last up to three months. Always check for signs of spoilage. If you see any mold or if they smell off, it’s best to throw them out. Fresh bars should be firm and smell sweet and nutty. For easy snacks, cut the bars into small squares. This makes portioning simple. You can wrap each square in parchment paper for grab-and-go convenience. This way, you have tasty snacks ready whenever you need them. You can also keep them in a lunch box or snack bag for your kids. Yes, you can freeze No-Bake Peanut Butter Bars. To freeze, first cut the bars into squares. Then, wrap each piece in plastic wrap. Place the wrapped bars in an airtight container or a freezer bag. This keeps them fresh and safe from freezer burn. They can last in the freezer for up to three months. When you want to eat them, let them thaw in the fridge overnight. This keeps their texture nice. You can make these bars healthier by using less honey or maple syrup. Try swapping half the amount for mashed bananas or unsweetened applesauce. You can also use sugar-free peanut butter. If you want to lower the calories, skip the chocolate chips. Instead, you can add more nuts or seeds. This keeps the flavor while cutting down the sugar. If you need a substitute for peanut butter, here are some options: - Almond butter: Creamy and nutty, great for taste. - Sunflower seed butter: Good for nut allergies. - Cashew butter: Smooth and slightly sweet. - Soy nut butter: A nut-free option that’s rich in flavor. These substitutes work well and can change the taste while keeping it yummy. You learned how to make no-bake peanut butter bars. We covered ingredients, both essential and optional. I provided step-by-step instructions for mixing and setting your bars. You also received tips to perfect texture and enhance flavor. In the end, these bars are easy to customize. Try different flavors and add-ins to make them yours. You can enjoy a tasty treat that's also healthy. Go ahead and make your own batch!](https://savorystride.com/wp-content/uploads/2025/06/868742f3-e3bb-4586-8146-602d3cb27239-250x250.webp)
