No-Bake Strawberry Cheesecake Cups Delightful Treats

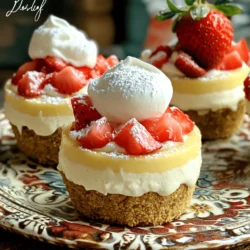
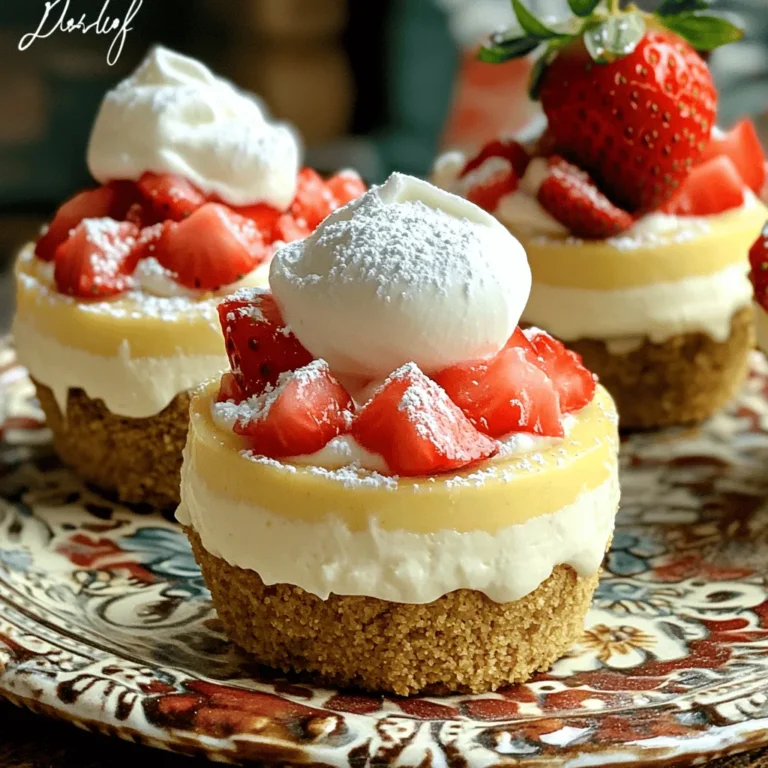
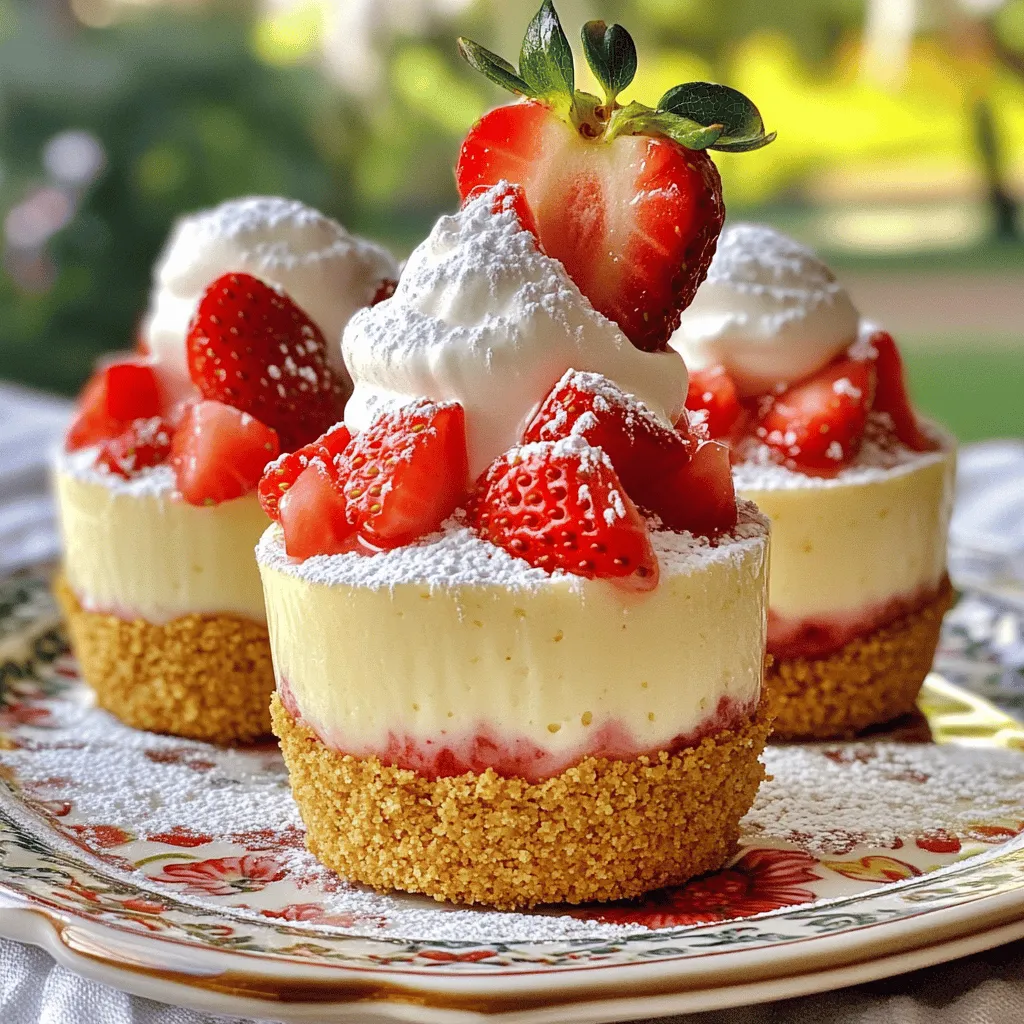
Are you ready for a sweet treat that’s effortless yet impressive? These No-Bake Strawberry Cheesecake Cups are just what you need. With a delicious graham cracker base and creamy filling, they’re perfect for any occasion. You’ll learn how to whip these up quickly and find tips for the best strawberries, too. Let’s dive into this delightful dessert and discover how easy it is to impress your friends and family!

Ingredients

Complete List of Ingredients

– 1 cup graham cracker crumbs

– 2 tablespoons sugar

– 1/2 cup unsalted butter, melted

– 1 cup cream cheese, softened

– 1/2 cup powdered sugar

– 1 teaspoon vanilla extract

– 1 cup heavy cream

– 1 cup fresh strawberries, diced

– Additional strawberries for topping

For this recipe, I love using graham cracker crumbs to create a tasty crust. You can also use cookie crumbs if you prefer. They give a sweet base that pairs well with the creamy filling.

Ingredient Substitutions

If you want to switch up the crust, consider using crushed Oreos or digestive biscuits. They add a fun twist to the flavor. For a dairy-free option, try using cashew cream or coconut cream in place of cream cheese and heavy cream. These swaps keep the dessert rich and creamy while catering to different diets.

Tips for Fresh Strawberries

When picking strawberries, look for ones that are bright red and firm. Avoid any that have green or white spots. These may not be ripe. Wash your strawberries gently under cold water to remove any dirt. After washing, slice them for the best flavor. Always dry them on a clean towel to avoid excess moisture in your cups.

Step-by-Step Instructions

Preparation Steps

Mixing the graham cracker crust is simple and fun. Start by taking a bowl. Add 1 cup of graham cracker crumbs and 2 tablespoons of sugar. Then, pour in 1/2 cup of melted unsalted butter. Mix it well until all crumbs are coated. This will create a tasty base for your cups.

Next, we will combine the cream cheese filling. In a separate bowl, beat 1 cup of softened cream cheese until smooth. Gradually mix in 1/2 cup of powdered sugar and 1 teaspoon of vanilla extract. Keep mixing until it is creamy and well combined. This filling will be rich and flavorful.

Layering Process

Now, let’s move on to crust assembly in cups. Take your serving cups and spoon about 2 tablespoons of the crumb mixture into the bottom of each cup. Press the crumbs down gently to form a nice crust layer. This step is key for a great texture.

Now it’s time for filling the cups with the cream cheese mixture. Gently fold 1 cup of whipped heavy cream into the cream cheese mixture. This will make it light and fluffy. Then, layer this cream mixture over the crust in each cup. Fill them about three-quarters full.

Setting the Cheesecake

To set the cheesecake, refrigerate the cups for at least 2 hours. This chilling time helps the layers come together. For optimal setting, cover each cup with plastic wrap. This keeps them fresh and prevents odors from mixing.

I recommend letting them chill for up to 4 hours. Longer chilling creates a better flavor and firmer texture. After waiting, these delightful treats will be ready to enjoy! For the full recipe, check the previous section.

Tips & Tricks

Achieving the Perfect Texture

To get the best texture for your cheesecake cups, start with soft cream cheese. Softening it makes mixing much easier. You can leave it out for a bit or warm it gently in the microwave. This step is key to avoiding lumps in your filling.

Next, fold in the whipped cream carefully. Use a spatula to mix gently. This keeps the light and fluffy texture. If you stir too hard, you might deflate the cream.

Presentation Ideas

When serving, think outside the box! Use clear cups to show off the layers. You can also mix up the serving sizes. Try mini cups for a fun twist.

For garnishing, fresh strawberries are a must. Place them on top for color. A mint leaf adds a nice touch, too. You can also dust the cups with powdered sugar for extra flair.

Common Mistakes to Avoid

One common mistake is over mixing the cream cheese. This can make the filling runny. Mix just until smooth to keep it thick and creamy.

Another pitfall is using too much liquid in the crust. Stick to the recipe for the right amount of butter. If the crust is too wet, it won’t hold together well in the cups.

Variations

Flavor Variations

You can make this dessert even more fun. Try adding chocolate or vanilla layers. Just melt some chocolate and mix it with cream cheese. You can also use vanilla extract for a smooth, sweet taste. This change makes the cups richer and more exciting.

Another great idea is to use other fruits. Blueberries and raspberries pair nicely with the cream cheese. They add a nice color and tartness. You can layer them or mix them into the cream cheese. Both options work well and taste great.

Dietary Variations

If you need a gluten-free option, swap graham crackers for gluten-free cookies. Many brands offer tasty gluten-free crumbs. This lets everyone enjoy the dessert without worry.

For a vegan version, use dairy-free cream cheese and coconut cream. These ingredients can create a creamy texture. They also keep the treat light and delicious without any animal products.

Seasonal Ingredients

Using seasonal fruits can enhance this recipe. In summer, try peaches or cherries. In fall, apples can add a nice crunch. Seasonal fruits often taste better and bring a fresh twist to the cups.

You can also adjust the recipe for special occasions. For holidays, add festive colors or toppings. Use crushed candy canes for winter or citrus zest for spring. This makes each serving special and memorable.

Storage Info

Best Storage Practices

To keep your no-bake strawberry cheesecake cups fresh, store them in the fridge. Use an airtight container to prevent any odors from seeping in. Place a layer of plastic wrap on top to seal it tight. If you have leftover cheesecake cups, you can freeze them for later enjoyment. To freeze, wrap each cup in plastic wrap and then in foil. This helps protect them from freezer burn.

Shelf Life

No-bake strawberry cheesecake cups can last in the fridge for about 3 to 4 days. If you freeze them, they will stay good for about 1 to 2 months. Just remember that the longer they sit, the more the texture may change.

Re-serving Tips

If you pull out frozen cups, let them thaw in the fridge. This keeps them creamy and delicious. If they seem a bit soft after thawing, whip some heavy cream and add a dollop on top. You can also use leftovers to create a parfait. Layer crumbs, cheesecake, and fruit in a new cup for a fun twist. Using the full recipe, you can easily make a new dessert with what you have left.

FAQs

Can I use low-fat cream cheese?

Yes, you can use low-fat cream cheese. It will change the texture a bit. The cheesecake may not be as rich or creamy. However, it can still taste good. Just keep in mind the flavor might be less bold.

How long does it take for the cheesecake to set?

The cheesecake needs at least 2 hours to set in the fridge. If your kitchen is warm, it may take longer. To check if it’s ready, gently shake the cup. If it jiggles slightly, it’s set.

Can I make this a day in advance?

Absolutely! You can make these cups a day ahead. Just keep them covered in the fridge. This helps the flavors blend well. Just remember to add the fresh strawberries right before serving for the best taste.

For the full recipe, check out the details above.

This blog post covered everything about making No-Bake Strawberry Cheesecake Cups. We explored the key ingredients, tips for fresh strawberries, and step-by-step instructions for perfecting this treat. I shared helpful tips to avoid common mistakes and ways to customize the recipe for your needs.

With these details, you can create delicious cheesecake cups that impress. Enjoy your cooking and share these tasty treats with friends and family!

- 1 cup graham cracker crumbs - 2 tablespoons sugar - 1/2 cup unsalted butter, melted - 1 cup cream cheese, softened - 1/2 cup powdered sugar - 1 teaspoon vanilla extract - 1 cup heavy cream - 1 cup fresh strawberries, diced - Additional strawberries for topping For this recipe, I love using graham cracker crumbs to create a tasty crust. You can also use cookie crumbs if you prefer. They give a sweet base that pairs well with the creamy filling. If you want to switch up the crust, consider using crushed Oreos or digestive biscuits. They add a fun twist to the flavor. For a dairy-free option, try using cashew cream or coconut cream in place of cream cheese and heavy cream. These swaps keep the dessert rich and creamy while catering to different diets. When picking strawberries, look for ones that are bright red and firm. Avoid any that have green or white spots. These may not be ripe. Wash your strawberries gently under cold water to remove any dirt. After washing, slice them for the best flavor. Always dry them on a clean towel to avoid excess moisture in your cups. Mixing the graham cracker crust is simple and fun. Start by taking a bowl. Add 1 cup of graham cracker crumbs and 2 tablespoons of sugar. Then, pour in 1/2 cup of melted unsalted butter. Mix it well until all crumbs are coated. This will create a tasty base for your cups. Next, we will combine the cream cheese filling. In a separate bowl, beat 1 cup of softened cream cheese until smooth. Gradually mix in 1/2 cup of powdered sugar and 1 teaspoon of vanilla extract. Keep mixing until it is creamy and well combined. This filling will be rich and flavorful. Now, let’s move on to crust assembly in cups. Take your serving cups and spoon about 2 tablespoons of the crumb mixture into the bottom of each cup. Press the crumbs down gently to form a nice crust layer. This step is key for a great texture. Now it's time for filling the cups with the cream cheese mixture. Gently fold 1 cup of whipped heavy cream into the cream cheese mixture. This will make it light and fluffy. Then, layer this cream mixture over the crust in each cup. Fill them about three-quarters full. To set the cheesecake, refrigerate the cups for at least 2 hours. This chilling time helps the layers come together. For optimal setting, cover each cup with plastic wrap. This keeps them fresh and prevents odors from mixing. I recommend letting them chill for up to 4 hours. Longer chilling creates a better flavor and firmer texture. After waiting, these delightful treats will be ready to enjoy! For the full recipe, check the previous section. To get the best texture for your cheesecake cups, start with soft cream cheese. Softening it makes mixing much easier. You can leave it out for a bit or warm it gently in the microwave. This step is key to avoiding lumps in your filling. Next, fold in the whipped cream carefully. Use a spatula to mix gently. This keeps the light and fluffy texture. If you stir too hard, you might deflate the cream. When serving, think outside the box! Use clear cups to show off the layers. You can also mix up the serving sizes. Try mini cups for a fun twist. For garnishing, fresh strawberries are a must. Place them on top for color. A mint leaf adds a nice touch, too. You can also dust the cups with powdered sugar for extra flair. One common mistake is over mixing the cream cheese. This can make the filling runny. Mix just until smooth to keep it thick and creamy. Another pitfall is using too much liquid in the crust. Stick to the recipe for the right amount of butter. If the crust is too wet, it won’t hold together well in the cups. {{image_2}} You can make this dessert even more fun. Try adding chocolate or vanilla layers. Just melt some chocolate and mix it with cream cheese. You can also use vanilla extract for a smooth, sweet taste. This change makes the cups richer and more exciting. Another great idea is to use other fruits. Blueberries and raspberries pair nicely with the cream cheese. They add a nice color and tartness. You can layer them or mix them into the cream cheese. Both options work well and taste great. If you need a gluten-free option, swap graham crackers for gluten-free cookies. Many brands offer tasty gluten-free crumbs. This lets everyone enjoy the dessert without worry. For a vegan version, use dairy-free cream cheese and coconut cream. These ingredients can create a creamy texture. They also keep the treat light and delicious without any animal products. Using seasonal fruits can enhance this recipe. In summer, try peaches or cherries. In fall, apples can add a nice crunch. Seasonal fruits often taste better and bring a fresh twist to the cups. You can also adjust the recipe for special occasions. For holidays, add festive colors or toppings. Use crushed candy canes for winter or citrus zest for spring. This makes each serving special and memorable. To keep your no-bake strawberry cheesecake cups fresh, store them in the fridge. Use an airtight container to prevent any odors from seeping in. Place a layer of plastic wrap on top to seal it tight. If you have leftover cheesecake cups, you can freeze them for later enjoyment. To freeze, wrap each cup in plastic wrap and then in foil. This helps protect them from freezer burn. No-bake strawberry cheesecake cups can last in the fridge for about 3 to 4 days. If you freeze them, they will stay good for about 1 to 2 months. Just remember that the longer they sit, the more the texture may change. If you pull out frozen cups, let them thaw in the fridge. This keeps them creamy and delicious. If they seem a bit soft after thawing, whip some heavy cream and add a dollop on top. You can also use leftovers to create a parfait. Layer crumbs, cheesecake, and fruit in a new cup for a fun twist. Using the full recipe, you can easily make a new dessert with what you have left. Yes, you can use low-fat cream cheese. It will change the texture a bit. The cheesecake may not be as rich or creamy. However, it can still taste good. Just keep in mind the flavor might be less bold. The cheesecake needs at least 2 hours to set in the fridge. If your kitchen is warm, it may take longer. To check if it's ready, gently shake the cup. If it jiggles slightly, it's set. Absolutely! You can make these cups a day ahead. Just keep them covered in the fridge. This helps the flavors blend well. Just remember to add the fresh strawberries right before serving for the best taste. For the full recipe, check out the details above. This blog post covered everything about making No-Bake Strawberry Cheesecake Cups. We explored the key ingredients, tips for fresh strawberries, and step-by-step instructions for perfecting this treat. I shared helpful tips to avoid common mistakes and ways to customize the recipe for your needs. With these details, you can create delicious cheesecake cups that impress. Enjoy your cooking and share these tasty treats with friends and family!

No-Bake Strawberry Cheesecake Cups

Indulge in a delightful dessert with these No-Bake Strawberry Cheesecake Cups that are perfect for any occasion! Made with a buttery graham cracker crust and a creamy cheesecake filling, these cups are topped with fresh strawberries for a burst of flavor. Quick to prepare and beautifully presented, they’re a treat everyone will love. Click through to discover the full recipe and impress your friends and family with this easy, irresistible dessert!

Ingredients
  

1 cup graham cracker crumbs

2 tablespoons sugar

1/2 cup unsalted butter, melted

1 cup cream cheese, softened

1/2 cup powdered sugar

1 teaspoon vanilla extract

1 cup heavy cream

1 cup fresh strawberries, diced

Additional strawberries for topping

Instructions
 

In a mixing bowl, combine the graham cracker crumbs, sugar, and melted butter. Mix until the crumbs are evenly coated.

    Spoon about two tablespoons of the crumb mixture into the bottom of each serving cup, pressing down gently to create a crust layer.

      In another bowl, beat the cream cheese until smooth. Gradually add the powdered sugar and vanilla extract, mixing until well combined.

        In a separate bowl, whip the heavy cream until stiff peaks form. Gently fold the whipped cream into the cream cheese mixture until combined.

          Layer the cream cheese mixture over the graham cracker crust in each cup, filling them about three-quarters of the way full.

            Top each cup with the diced strawberries, pressing them gently into the cream cheese layer for added flavor.

              Finish by adding a dollop of the remaining cream cheese mixture on top and garnish with a fresh strawberry slice.

                Refrigerate the cups for at least 2 hours to allow them to set before serving.

                  Prep Time: 15 minutes | Total Time: 2 hours 15 minutes | Servings: 6 cups

                    - Presentation Tips: Serve the cheesecake cups on a decorative platter. Dust with additional powdered sugar and add a mint leaf for a pop of color.

                      Leave a Comment

                      Recipe Rating