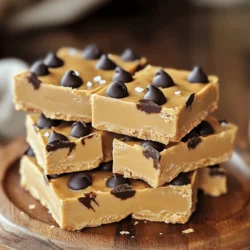
No-Bake Peanut Butter Bars
Indulge in the delightful taste of creamy no-bake peanut butter bars that are easy to make and irresistibly scrumptious! With just a handful of ingredients like natural peanut butter, honey, and dark chocolate chips, you can whip up a tasty treat in no time. Perfect for satisfying your sweet tooth or as a healthy snack option.