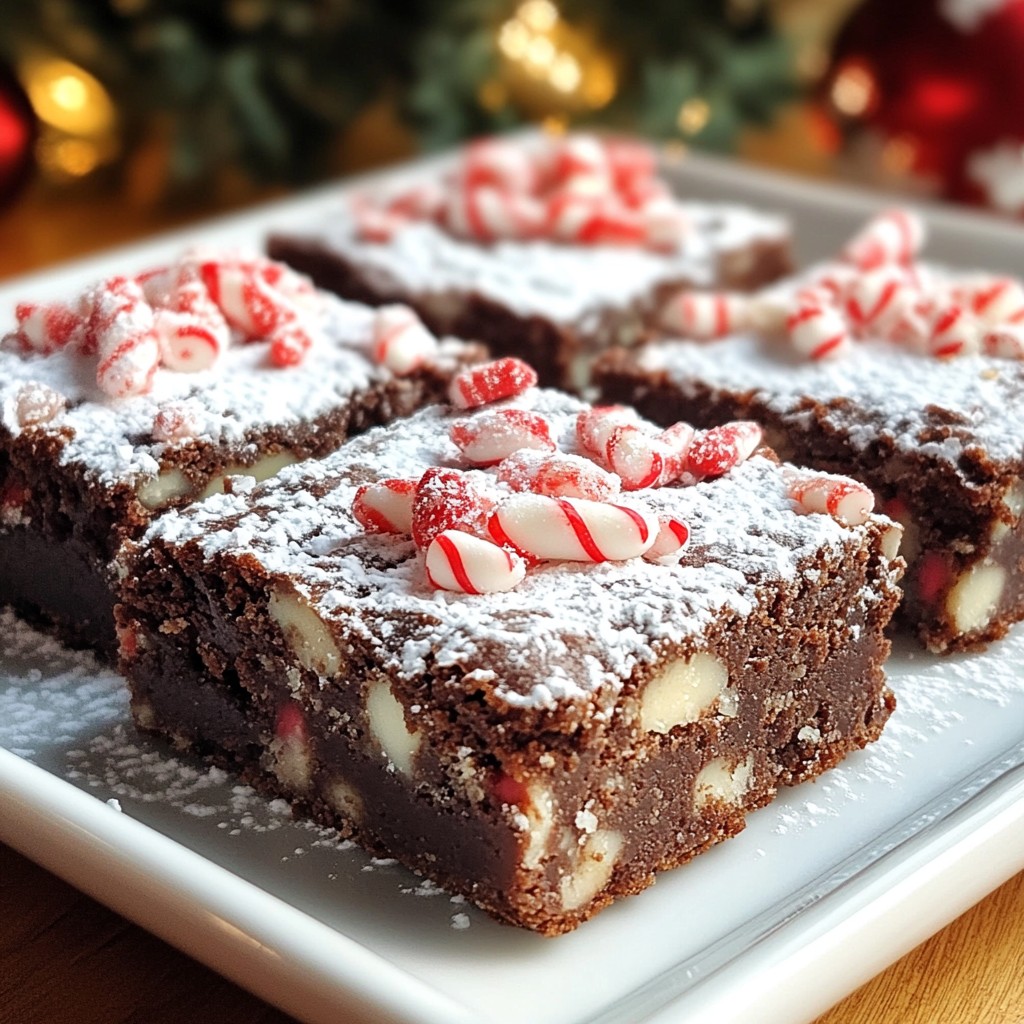
Get ready to spread joy with my Snowy Holiday Brownies! These festive treats are rich, soft, and topped with a snowy layer of powdered sugar. Whether you're baking for a gathering or just craving something sweet, this recipe has you covered. I’ll guide you through easy steps, ingredient swaps, and fun variations to make your brownies shine. Let’s dive into these delightful bites that capture the spirit of the season!
Why I Love This Recipe
- Easy to Make: This brownie recipe is straightforward and requires minimal ingredients, making it perfect for bakers of all skill levels.
- Decadent Flavor: The combination of rich chocolate and sweet powdered sugar creates a deliciously indulgent treat that everyone loves.
- Customizable: Add your favorite toppings, like crushed peppermint or nuts, to personalize each batch and make them festive.
- Perfect for Sharing: With 16 generous squares, these brownies are ideal for holiday gatherings, parties, or simply sharing with friends and family.
Ingredients
Complete list of ingredients
To make Snowy Holiday Brownies, gather these ingredients:
- 1 cup (226g) unsalted butter
- 2 cups (400g) granulated sugar
- 4 large eggs
- 1 teaspoon vanilla extract
- 1 cup (125g) all-purpose flour
- 1 cup (90g) unsweetened cocoa powder
- 1 teaspoon baking powder
- 1/2 teaspoon salt
- 1 cup (175g) chocolate chips (semi-sweet or dark)
- 1 cup (100g) powdered sugar (for dusting)
- Optional toppings: crushed peppermint candies, chopped nuts
Measurements and substitutions
These measurements are key for great brownies. If you don’t have unsalted butter, you can use salted butter but reduce the salt to 1/4 teaspoon. Granulated sugar gives the right sweetness, but brown sugar adds a nice chew. You can mix flours too. If you need gluten-free brownies, use a gluten-free flour blend in the same amount.
Optional toppings for festive flair
To make your brownies special, consider adding toppings. Crushed peppermint candies bring a fresh taste. They also add a pop of color. Chopped nuts can give a nice crunch and flavor. You can mix and match these toppings. Dust the brownies with powdered sugar for a snowy look. This makes them festive and fun!

Step-by-Step Instructions
Preparing the oven and baking pan
First, preheat your oven to 350°F (175°C). This step is key for even baking. While the oven heats, prepare your baking pan. Use a 9x13 inch pan. Grease it with cooking spray, or line it with parchment paper. The parchment helps with easy removal later.
Mixing wet ingredients
Next, melt 1 cup of unsalted butter in a medium saucepan over low heat. Stir until fully melted, then remove it from the heat. Add 2 cups of granulated sugar. Mix them well until you see no butter lumps. Let this mixture cool for a few minutes. Then, add in 4 large eggs, one at a time. After each egg, mix well. Finally, stir in 1 teaspoon of vanilla extract. This adds a nice flavor to your brownies.
Combining dry and wet ingredients
In a large bowl, sift together 1 cup of all-purpose flour, 1 cup of unsweetened cocoa powder, 1 teaspoon of baking powder, and 1/2 teaspoon of salt. This helps to mix the dry ingredients well and removes any lumps. Slowly pour the melted butter mixture into the dry ingredients. Stir just until combined; it’s okay if there are a few lumps. Now, fold in 1 cup of chocolate chips. This will make your brownies rich and gooey. Pour the batter into the prepared pan and spread it out evenly.
Tips & Tricks
Achieving the perfect brownie texture
To make the best brownies, aim for a fudgy texture. Start by melting the butter slowly. Mix it with sugar until smooth. Adding eggs one at a time helps create a rich batter. Be careful not to over-mix when combining wet and dry ingredients. A few lumps are fine. This keeps your brownies moist and chewy.
How to create a snowy effect with powdered sugar
To make your brownies look festive, dust them with powdered sugar. After they cool, use a sifter or fine mesh strainer. Hold it above the brownies and gently tap it. This creates an even snowy layer. For a fun touch, use a stencil for shapes. This adds a lovely design to your treats.
Best practices for cutting and serving
Cutting brownies can be tricky. Use a sharp knife for clean edges. To avoid sticking, warm the knife under hot water first. Wipe it dry before each cut. This way, your brownies stay neat. Serve them on a decorative platter. Offer toppings like crushed peppermint candies or nuts on the side. This lets your guests customize their brownies.
Pro Tips
- Use Room Temperature Eggs: Allow your eggs to come to room temperature before adding them to the batter. This helps to create a smoother and more evenly mixed brownie batter.
- Don’t Overbake: Keep an eye on your brownies while they bake. For fudgy brownies, remove them from the oven when a toothpick inserted comes out with a few moist crumbs, as they will continue to set as they cool.
- Chill for Better Texture: For a denser, more fudgy texture, consider chilling the brownies in the refrigerator for a couple of hours after they have completely cooled. This allows the flavors to meld beautifully.
- Customize Your Toppings: Get creative with toppings! Aside from powdered sugar, try drizzling melted chocolate or caramel on top, or adding a sprinkle of sea salt for a delightful contrast to the sweetness.
Variations
Flavor variations (mint, peanut butter, etc.)
You can easily change the flavor of your Snowy Holiday Brownies. Try adding mint extract for a cool twist. Use 1 teaspoon of mint extract instead of vanilla. For a rich taste, mix in peanut butter. Swirl 1 cup of creamy peanut butter into the batter before baking. You can also add orange zest for a citrus kick. This brightens the chocolate flavor and adds a fresh scent.
Gluten-free options
If you want gluten-free brownies, swap out the all-purpose flour. Use a gluten-free flour blend instead. Make sure it includes xanthan gum, which helps with texture. You can also use almond flour or coconut flour. Just remember, these may change the taste and texture slightly. Always check that your baking powder is gluten-free, too.
Creative presentation ideas
Make your brownies stand out when serving. Cut them into fun shapes with cookie cutters. You can make stars, hearts, or even holiday trees! Serve them on a colorful platter. Add toppings like crushed peppermint or chopped nuts on the side. This way, guests can customize their brownies. For a festive touch, sprinkle extra powdered sugar on top before serving. This gives them a snowy look that adds to the holiday spirit.
Storage Information
How to store leftover brownies
To keep your snowy holiday brownies fresh, start by letting them cool completely. Once cooled, you can place them in an airtight container. This helps prevent them from drying out. If you have a lot of brownies, you can layer them with parchment paper. This keeps them from sticking together.
Freezing and thawing tips
Brownies freeze very well. To freeze, wrap each brownie tightly in plastic wrap. Then, place them in a freezer-safe bag. This helps keep them fresh for up to three months. When you are ready to enjoy them, take them out and let them thaw at room temperature. You can also warm them slightly in the microwave for a few seconds for that fresh-baked taste.
Shelf life and freshness
If stored properly, brownies can last about one week at room temperature. They will stay fresh longer if kept in the fridge. However, the fridge can make them a bit firmer. If you want the best taste and texture, I recommend enjoying them within a few days. You can always dust them with more powdered sugar before serving to refresh their snowy look!
FAQs
Can I use different types of chocolate?
Yes, you can use different types of chocolate for your brownies. I love mixing semi-sweet and dark chocolate chips for depth. You can also try milk chocolate for a sweeter taste. Just remember that each chocolate type adds its own flavor. Adjust the sugar in the recipe if you use milk chocolate to keep it balanced.
What should I do if my brownies are too dry?
If your brownies turn out dry, don’t worry! A few simple fixes can help. First, check your baking time. Overbaking can cause dryness. Next, try adding a bit of melted butter or a splash of milk to the warm brownie mix. This will help add moisture back in. Lastly, serve the brownies with ice cream or whipped cream to make them taste richer.
How do I make these brownies dairy-free?
To make these brownies dairy-free, swap the unsalted butter for a dairy-free alternative. You can use coconut oil, vegan butter, or even applesauce. Just keep the same amount as the butter in the recipe. Make sure to check the labels on your chocolate chips, as some may contain dairy. Look for dairy-free chocolate chips to ensure your brownies are completely dairy-free.
In this blog post, we covered all the key parts of making brownies. We looked at ingredients, steps, and tips for great results. I shared ways to add flavor and fun with toppings. You can store brownies well to enjoy later, too. Remember, making brownies is all about having fun. Customize them however you want. Whether you bake them classic or try something new, each batch can bring joy. Enjoy your brownie-making journey!