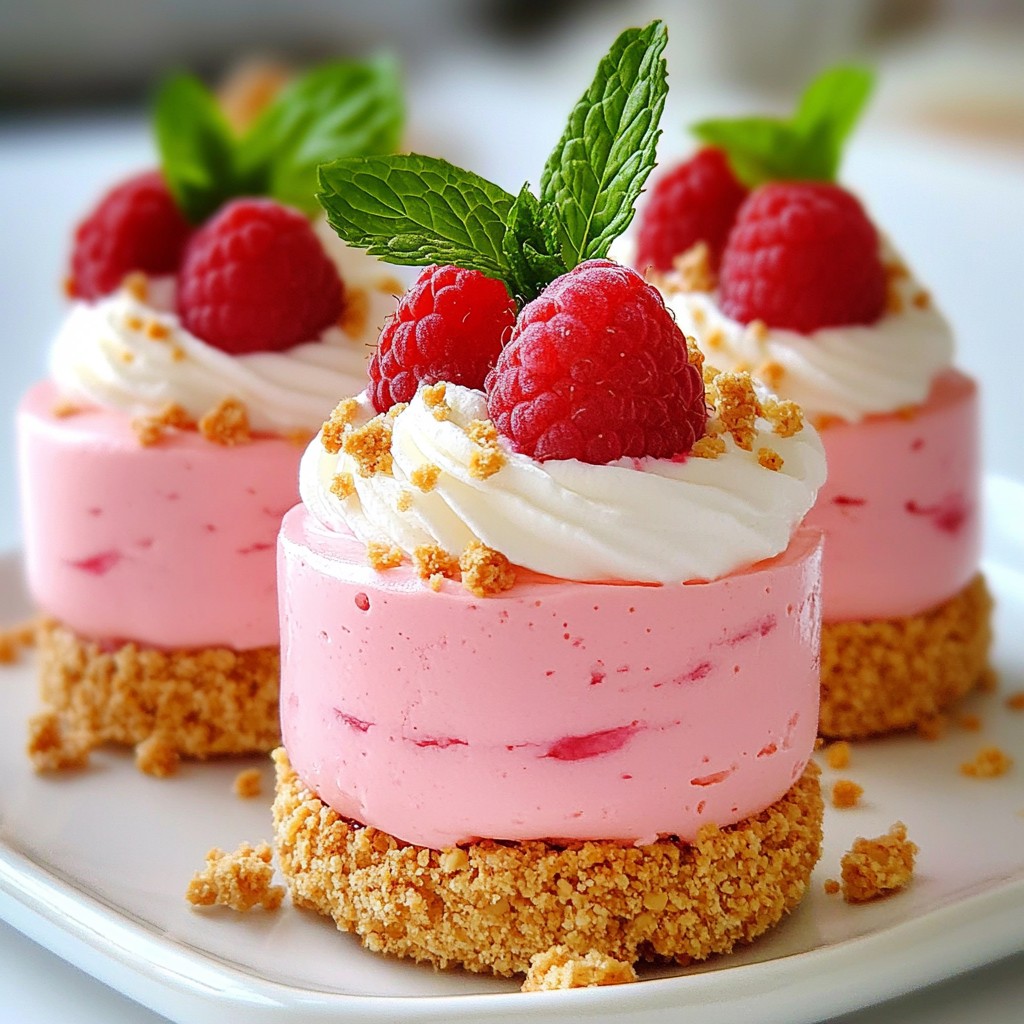
Looking for a light and refreshing dessert that dazzles? Try my Raspberry Cloud Mousse Cups! This delightful treat blends fresh raspberries, whipped cream, and Greek yogurt to create a fluffy mousse that's hard to resist. Perfect for any occasion, I’ll guide you through each step to ensure your mousse is both tasty and beautiful. Get ready to impress your friends and family with this easy, delicious dessert!
Why I Love This Recipe
- Deliciously Light: The airy texture of the mousse combined with the tartness of raspberries creates a delightful contrast that feels indulgent yet light.
- Easy to Make: This recipe requires minimal effort and ingredients, making it perfect for both novice cooks and experienced bakers.
- Versatile Presentation: These mousse cups can be dressed up for formal occasions or enjoyed casually at home, making them a versatile dessert choice.
- Healthier Indulgence: With Greek yogurt and fresh fruit, this dessert offers a healthier twist without compromising on flavor.
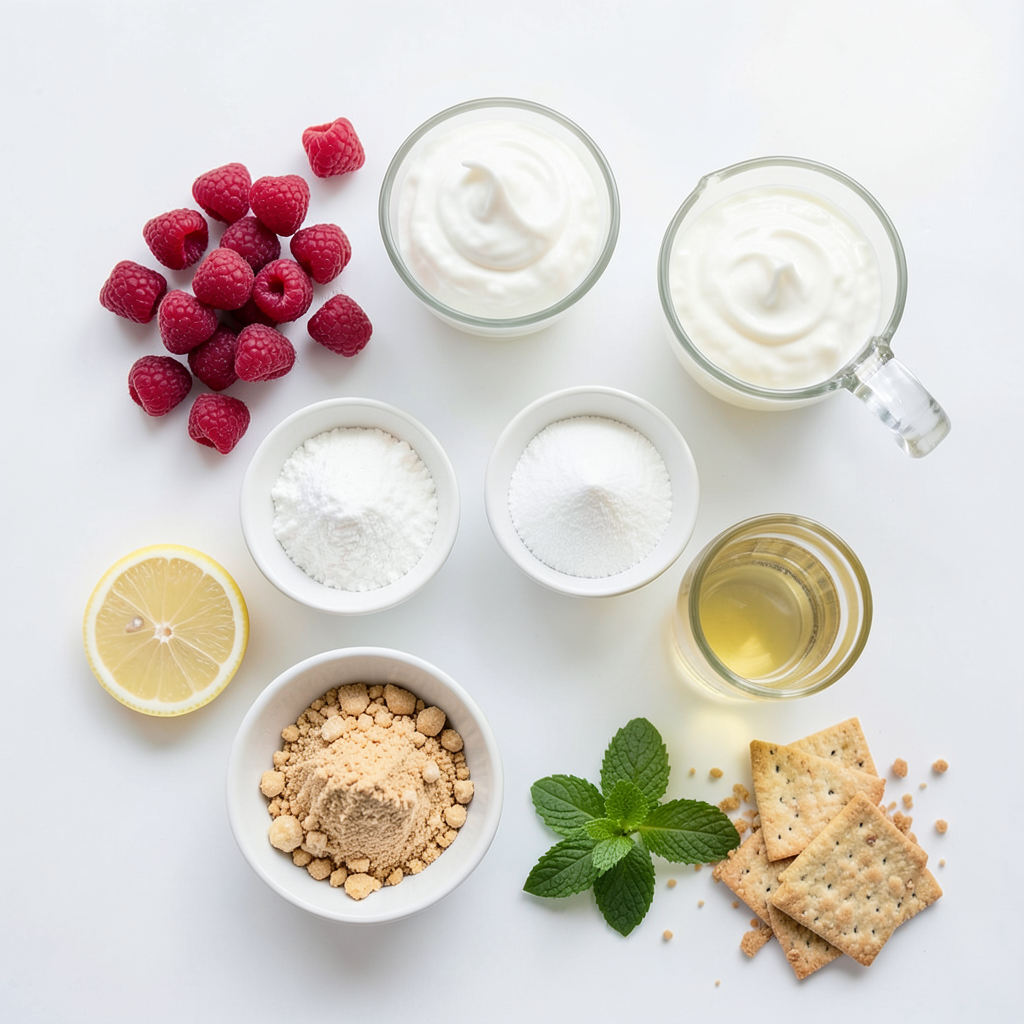
Ingredients
Required Ingredients
- 1 cup fresh raspberries
- 1 cup heavy whipping cream
- 1/2 cup powdered sugar
- 1 teaspoon vanilla extract
- 1/2 cup Greek yogurt
- 1 tablespoon lemon juice
- Fresh mint leaves for garnish
- Crushed graham crackers for base
To make these Raspberry Cloud Mousse Cups, gather all the required ingredients. Fresh raspberries provide bright flavor and color. Heavy whipping cream adds the right amount of richness. Powdered sugar sweetens without making the mousse grainy. Vanilla extract gives a lovely aroma. Greek yogurt adds creaminess and tang. Lemon juice lifts the flavor and adds brightness. Fresh mint leaves give a nice touch for garnish, while crushed graham crackers form a delicious base.
Ingredient Substitutions
- You can use alternate fruits, like blueberries or strawberries, for a fun twist.
- For those needing non-dairy options, try coconut cream or almond yogurt instead of cream and yogurt.
Swapping ingredients can create new flavors. If you prefer other berries, feel free to use them. The mousse will still taste amazing. Non-dairy options can also provide a light and fluffy texture. This way, everyone can enjoy this dessert.
Measurement Tips
- Accurate measurements are key for great results.
- Use measuring cups and spoons for liquid and dry ingredients.
When measuring ingredients, make sure to level off the tops. This step ensures you don’t add too much or too little. For liquids, use clear measuring cups to see the exact amount. If you follow these tips, your mousse will turn out perfect every time.
Step-by-Step Instructions
Preparing the Raspberries
To start, gather your fresh raspberries. Take half of them and place them into a medium bowl. Use a fork to gently mash the raspberries. You want a mix of smooth and chunky bits. This gives your mousse a nice texture. Set aside the other half of the raspberries to use as garnish later.
Whipping the Cream
Next, grab a separate bowl for whipping cream. Pour in the heavy whipping cream. Use an electric mixer on medium speed to beat it until soft peaks form. This means the cream should hold its shape but still be a bit wobbly. Slowly add in the powdered sugar and vanilla extract. Keep mixing until you see stiff peaks. Stiff peaks stand up straight and don’t fall over when you lift the mixer.
Combining and Folding Ingredients
Now it's time to combine the whipped cream with the yogurt. Add the Greek yogurt and lemon juice to the whipped cream. Use a spatula to fold them in gently. Be careful not to stir too hard. You want to keep the air in the whipped cream. This air makes your mousse light and fluffy.
Next, take your mashed raspberries and fold them into the mixture. Do this slowly, creating a marbled effect. You want to see ribbons of raspberry throughout. Avoid mixing completely so that the mousse stays airy.
Layering the Cups
For layering, take your serving cups. Start with a spoonful of crushed graham crackers at the bottom. This gives a nice crunch. Then, add a layer of the raspberry mousse mixture on top. Repeat these layers until your cups are almost full. Finish with a layer of mousse on top. This way, the top looks smooth and inviting.
Chilling
Cover your cups with plastic wrap. Place them in the refrigerator for at least 2 hours. This time helps the mousse set up nicely. It’s important to keep them covered to prevent any odors from getting in.
Serving Suggestions
When you're ready to serve, take the cups out of the fridge. Garnish each cup with the whole raspberries you set aside. Add a sprig of fresh mint for a pop of color. For an extra touch, serve the cups on a beautiful platter. You can drizzle some raspberry sauce around the base for an elegant look.
Tips & Tricks
Enhancing Flavor
To make the most of your raspberry mousse, start by picking ripe raspberries. Look for bright red berries that are plump and firm. Avoid any berries that are mushy or dull. Use fresh raspberries for the best taste and texture. You can also mix in other flavors. Try adding a splash of orange juice or a hint of mint. These additions can lift the mousse and surprise your taste buds.
Consistency Control
Getting the right thickness for your mousse is key. If your mousse is too runny, you can try adding more whipped cream. This will help it hold its shape. If it becomes too thick, gently fold in a bit of milk or cream to lighten it. Remember, the goal is a light, airy texture that melts in your mouth.
Presentation Techniques
How you serve the mousse can make it even more special. Use clear cups or small jars to show off those beautiful layers. For a fun twist, try using old tea cups or shot glasses. To make it look extra fancy, add a mint leaf or a whole raspberry on top. Crushed graham crackers can also add a nice crunch. Drizzle some raspberry sauce around the base for a pop of color and flavor.
Pro Tips
- Fresh Raspberries: Always opt for fresh raspberries for the best flavor and texture. If they're not in season, consider using frozen raspberries, but make sure to thaw and drain them well before use.
- Perfect Whipping: Ensure your mixing bowl and beaters are cold before whipping the cream. This will help achieve maximum volume and stability in your whipped cream.
- Layering Technique: When layering the mousse and graham crackers, use an offset spatula to spread the mousse evenly. This creates a beautiful presentation and ensures each layer is distinct.
- Chilling Time: Allowing the mousse to chill for at least 2 hours is crucial for the flavors to meld and for the mousse to set properly, ensuring a perfect texture when served.
Variations
Flavor Variations
You can switch up the raspberries for other berries. Try strawberries or blueberries for a change. Each berry brings its unique taste. You can also add chocolate for a rich twist. Melt some chocolate and swirl it into the mousse. For a refreshing citrus flavor, add orange or lime zest. This will brighten the mousse and give it a fun kick.
Dietary Adaptations
To make it vegan-friendly, swap heavy cream with coconut cream. Use a plant-based yogurt instead of Greek yogurt. For sweetening, consider agave syrup or maple syrup. This way, you keep the mousse creamy without dairy. If you want sugar-free options, use a sugar substitute. Look for options like erythritol or stevia. These will not change the taste much.
Seasonal Variations
You can add seasonal fruits to your mousse. In summer, try peaches or cherries for a fresh taste. In fall, use apples or pears for a cozy twist. This keeps your dessert exciting throughout the year. For holidays, add spices like cinnamon or nutmeg. This will make your mousse more festive and fun. You can even decorate with seasonal colors to match the theme.
Storage Info
Best Storage Practices
To keep your Raspberry Cloud Mousse Cups fresh, follow these tips:
- Use airtight containers: This helps prevent air from spoiling the mousse.
- Cover with plastic wrap: If you don't have a lid, wrap the cups tightly.
- Store in the fridge: Always keep them cold to maintain their light texture.
Freezing the Mousse
You can freeze the mousse, but some care is needed:
- Use freezer-safe containers: This stops ice crystals from forming.
- Spoon portions into containers: Leave some space at the top for expansion.
- To thaw, place the mousse in the fridge overnight. This keeps the texture smooth.
Shelf Life
Raspberry Cloud Mousse Cups last about three days in the fridge.
- Check for signs of spoilage: Look for changes in color or smell.
- If the mousse has a watery layer or a strange odor, it is best to throw it away.
FAQs
Can I use frozen raspberries?
Yes, you can use frozen raspberries. They may change the texture slightly. Frozen berries can be softer and release more juice. This may make the mousse a bit runnier. If you use frozen raspberries, let them thaw and drain excess liquid before mashing. This helps keep the flavor bright.
How long can I prepare this dessert in advance?
You can prepare Raspberry Cloud Mousse Cups up to two days in advance. Store them in the fridge until you are ready to serve. Cover the cups tightly with plastic wrap to keep them fresh. This dessert tastes best when chilled, so make it ahead of time if you want.
What can I substitute for heavy cream?
If you need a substitute for heavy cream, try coconut cream. It has a nice texture and flavor. You can also use full-fat coconut milk. This option works well for those with dairy sensitivity. Just be sure to chill it before whipping.
How do I make raspberry sauce for drizzling?
To make raspberry sauce, mash 1 cup of fresh raspberries in a bowl. Add 1-2 tablespoons of sugar, depending on taste, and mix well. Heat in a small saucepan over low heat until warm. Stir until the sauce thickens slightly, about 5-10 minutes. Cool and drizzle over your mousse cups for a lovely touch.
This blog post has covered the important steps to create Raspberry Cloud Mousse Cups. You learned about the key ingredients, how to prepare them, and tips for great results. Remember, it's all about balance. Mixing flavors and achieving the right texture makes a big difference.
Don't be afraid to experiment with substitutions or variations. You can make this dessert your own! Keep these tips in mind as you create, and you’ll impress everyone with your delicious mousse. Happy cooking!