If you love quick and tasty treats, these No-Bake Peanut Butter Bars are for you! With just a handful of simple ingredients, you can create a dessert that’s both sweet and satisfying. You won’t need to turn on the oven—it’s easy and fun! In this post, I'll guide you through the steps, tips, and variations to make your perfect peanut butter bars. Let’s dive in and start creating!
Why I Love This Recipe
- Quick and Easy: This recipe requires no baking, making it a quick treat to whip up in just 15 minutes!
- Healthy Ingredients: Made with wholesome ingredients like oats and peanut butter, these bars are a nutritious snack option.
- Versatile Flavor: You can easily customize these bars by adding your favorite mix-ins such as nuts or dried fruits.
- Perfect for Meal Prep: These bars can be made ahead of time and stored, making them great for on-the-go snacking.
Ingredients
List of Ingredients
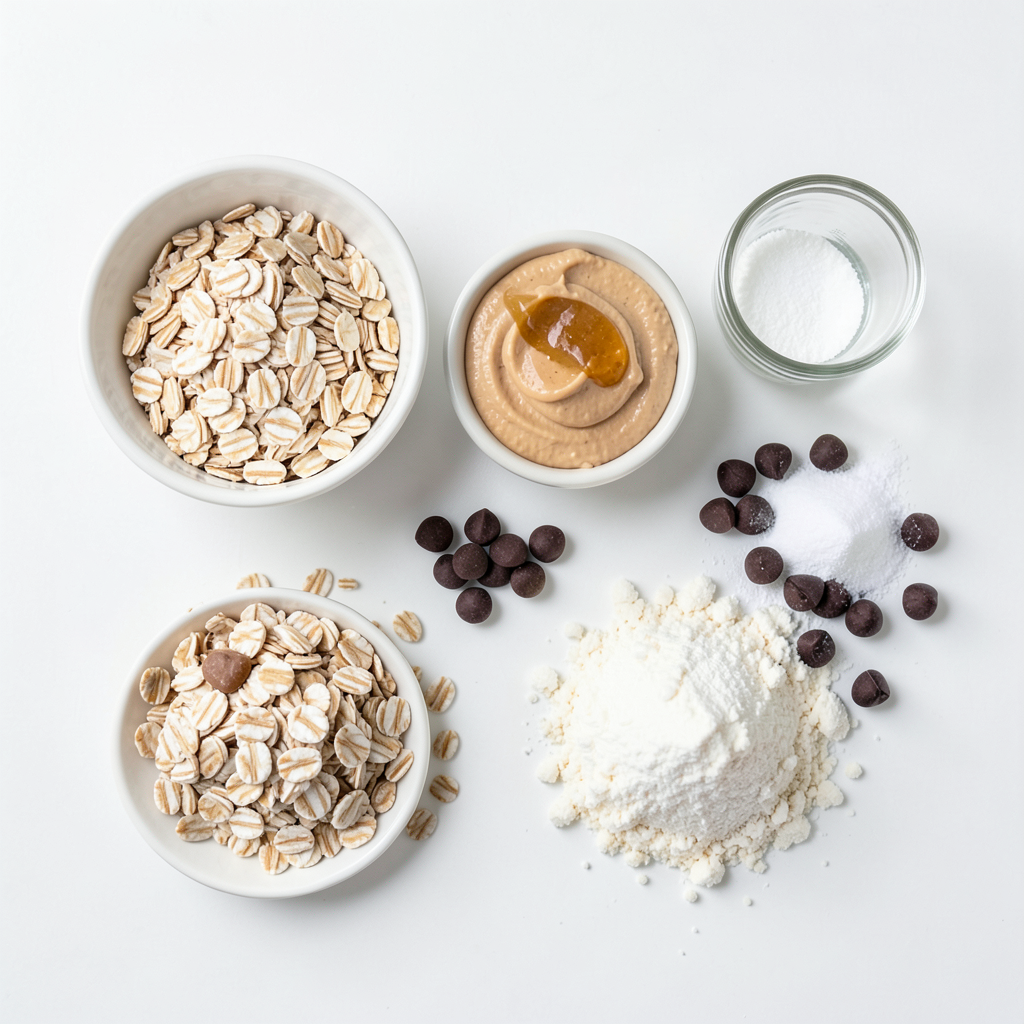
To make these no-bake peanut butter bars, you need:
- 1 cup creamy peanut butter
- 1 cup rolled oats
- 1/2 cup honey or maple syrup
- 1/4 cup coconut flour
- 1/2 cup chocolate chips (semi-sweet or dark)
- 1/4 teaspoon salt
- 1 teaspoon vanilla extract
Ingredient Substitutions
You can swap some ingredients if you need. Here are my favorites:
- Use almond butter instead of peanut butter for a nut-free option.
- Maple syrup works well in place of honey for a vegan choice.
- Try oat flour if you don’t have coconut flour. It gives a nice texture.
- For a different flavor, use white chocolate chips or even dried fruit.
Important Notes on Ingredient Quality
Always choose high-quality ingredients for the best taste.
- Select natural, creamy peanut butter without added sugars or oils.
- Use organic rolled oats for a fresher flavor.
- Check that your chocolate chips are made with real cocoa.
- Fresh vanilla extract adds a rich taste. The better the ingredients, the better your bars will be!
Step-by-Step Instructions
Preparation Steps
Start by gathering all your ingredients. You need creamy peanut butter, rolled oats, honey or maple syrup, coconut flour, chocolate chips, salt, and vanilla extract. The prep time is just 15 minutes, so let’s get going!
Mixing and Combining Ingredients
In a large mixing bowl, add 1 cup of creamy peanut butter, 1/2 cup of honey or maple syrup, and 1 teaspoon of vanilla extract. Mix these until they are smooth and well combined. Next, add 1 cup of rolled oats, 1/4 cup of coconut flour, and 1/4 teaspoon of salt to the bowl. Mix everything until it looks like a thick dough. This step is crucial, as it helps the bars hold together. Finally, gently fold in 1/2 cup of chocolate chips. Make sure the chips are evenly spread out in the mixture.
Chilling and Setting the Bars
Now, line an 8x8-inch baking dish with parchment paper. Leave some overhang on the sides. This makes it easy to lift the bars out later. Pour your peanut butter mixture into the dish. Press it down firmly with a spatula, spreading it evenly. Place the dish in the fridge for about 30 minutes to 1 hour. This helps the bars set and become firm. Once they are ready, lift them out using the parchment paper. Cut them into squares or rectangles for serving. Enjoy your tasty no-bake peanut butter bars!
Tips & Tricks
Best Practices for Mixing
When mixing your ingredients, use a large bowl. This helps prevent spills. Start with the peanut butter. It should be creamy and smooth. Add honey or maple syrup and vanilla extract next. Mix these well until they blend into a thick paste. Then, add rolled oats, coconut flour, and salt. Stir until everything is combined. You want a thick dough.
How to Achieve the Perfect Texture
To get the best texture, make sure your peanut butter is at room temperature. Cold peanut butter can be hard to mix. When you press the mixture into the pan, use the back of a spatula. This helps pack it tightly. If you want a softer bar, reduce the coconut flour. For a firmer bar, add a bit more.
Additional Serving Suggestions
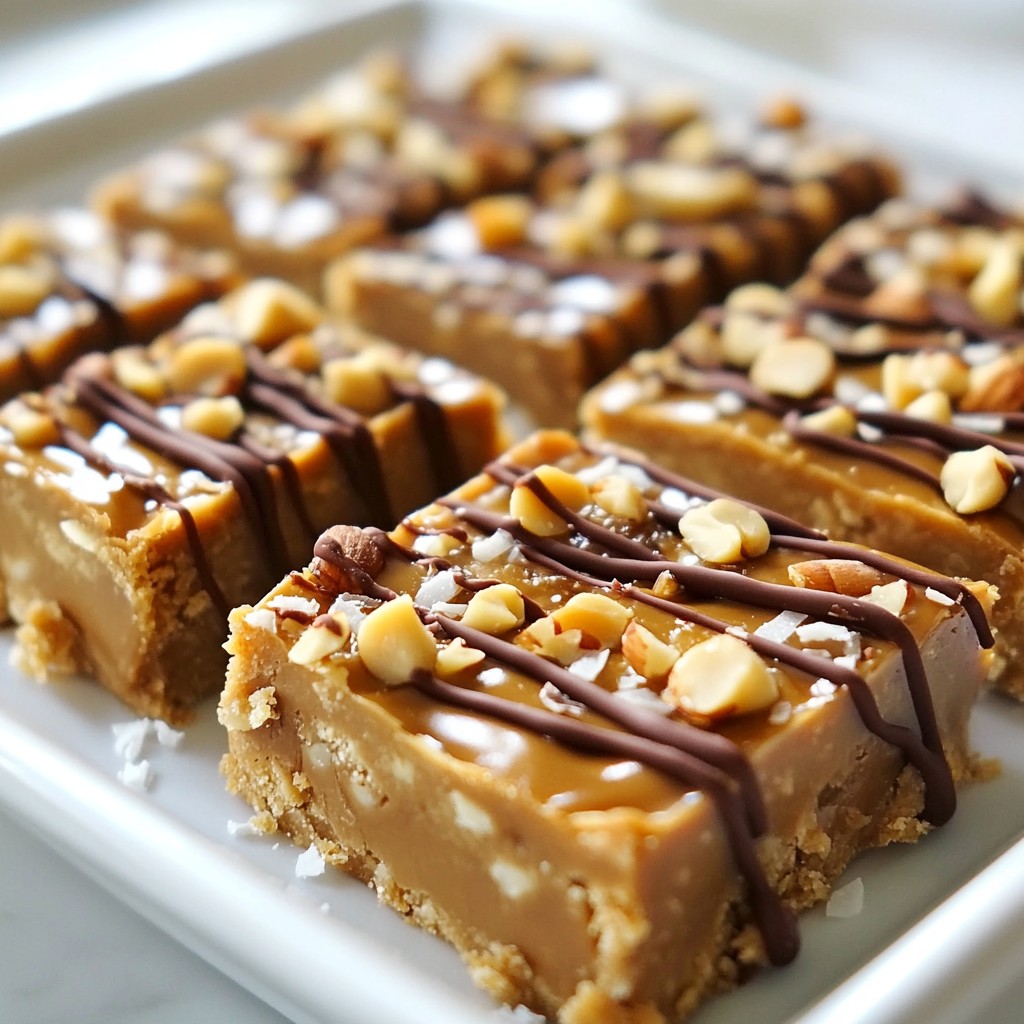
For a fun twist, drizzle melted chocolate on top of the bars. It adds extra flavor and looks pretty too. You can also sprinkle crushed nuts or shredded coconut. These toppings give a nice crunch and flavor. Serve the bars cold for a refreshing treat.
Pro Tips
- Use Natural Peanut Butter: Opt for natural peanut butter without added sugars or oils for a healthier option that enhances the flavor of the bars.
- Chill for Extra Firmness: For a firmer texture, chill the bars longer than the recommended time; this will make them easier to cut and handle.
- Customize with Mix-ins: Feel free to add your favorite mix-ins like dried fruits, nuts, or seeds to personalize the bars to your taste.
- Store Properly: Keep the bars in an airtight container in the refrigerator to maintain freshness and prevent them from becoming too soft.
Variations
Flavor Additions and Modifications
You can add fun flavors to your no-bake peanut butter bars. Try adding a teaspoon of cinnamon or a pinch of nutmeg for warmth. You can also use different nut butters, like almond or cashew. For a chocolate kick, mix in cocoa powder or use chocolate peanut butter. Each choice gives your bars a new taste.
Healthy Ingredient Swaps
Want to make your bars healthier? Swap honey for agave syrup or maple syrup for a lower glycemic index. Instead of coconut flour, use almond flour for a nutty flavor and extra protein. You can also replace chocolate chips with dark chocolate or dried fruit for a fruity twist. These swaps keep your bars tasty and nutritious.
Different Toppings and Mix-Ins
Toppings can make your bars even better. Drizzle melted dark chocolate on top for a rich finish. You can sprinkle crushed nuts, like almonds or walnuts, for a crunchy bite. Shredded coconut adds a tropical feel. For a fruity touch, mix in dried cranberries or raisins. Each topping changes the look and taste of your bars.
Storage Info
How to Store No-Bake Peanut Butter Bars
To keep your no-bake peanut butter bars fresh, store them in an airtight container. Place a piece of parchment paper between layers if stacking. This prevents sticking and keeps them neat. Store the bars in the fridge for the best taste and texture. They stay firm and delicious that way.
Freezing Instructions
You can freeze these bars for longer storage. Wrap each bar in plastic wrap or foil. Then place them in a freezer-safe bag or container. They will keep well for up to three months. When you want to eat one, let it sit at room temperature for a few minutes before enjoying.
Shelf Life and Signs of Spoilage
The bars last about one week in the fridge. Check for any signs of spoilage before eating. If you notice a change in smell, color, or texture, it’s best to throw them out. Proper storage helps keep them tasty and safe to eat. Enjoy your sweet treat with confidence!
FAQs
Can I use crunchy peanut butter instead of creamy?
Yes, you can use crunchy peanut butter. It adds a nice texture. The bars will have bits of peanuts that give a fun crunch. Just make sure to mix well so everything combines evenly.
How can I make these bars vegan?
To make these bars vegan, swap honey for maple syrup. Use dairy-free chocolate chips too. The rest of the ingredients are already plant-based. This way, you keep all the great flavor while making it suitable for vegans.
What is the best way to cut no-bake bars?
For cutting the bars, use a sharp knife. First, chill the bars until firm. Then, lift them out using the parchment paper. Place them on a cutting board. Cut them into squares or rectangles. To get neat edges, wipe the knife with a damp cloth between cuts.
We covered all the key parts of making no-bake peanut butter bars. From choosing the right ingredients to mixing and chilling, every step matters. Remember to focus on ingredient quality for the best taste. Use our tips to get the perfect texture and try your favorite flavor variations. Store your bars well to keep them fresh. This recipe is easy and fun! You can enjoy these treats anytime, making them a great snack choice. Follow these steps, and you’ll impress everyone with your no-bake bars.