Who doesn’t love a quick and tasty treat? These No-Bake Peanut Butter Bars are the answer! You only need a few simple ingredients to whip up a delicious snack in no time. I’ll guide you through each step, with tips to ensure your bars come out perfect. You can customize them to your taste, making them truly your own. Are you ready to make a sweet treat that’s easy and fun? Let’s dive in!
Why I Love This Recipe
- Quick and Easy: This recipe takes only 10 minutes of prep time, making it perfect for a last-minute treat.
- No Baking Required: With no need to turn on the oven, these bars are a great option for hot days or simple snack cravings.
- Healthy Ingredients: Packed with peanut butter, oats, and honey, these bars provide a satisfying and nutritious snack.
- Customizable: Feel free to swap in your favorite nut butter or mix-ins like nuts or dried fruit for a personal touch.
Ingredients
Complete list of ingredients
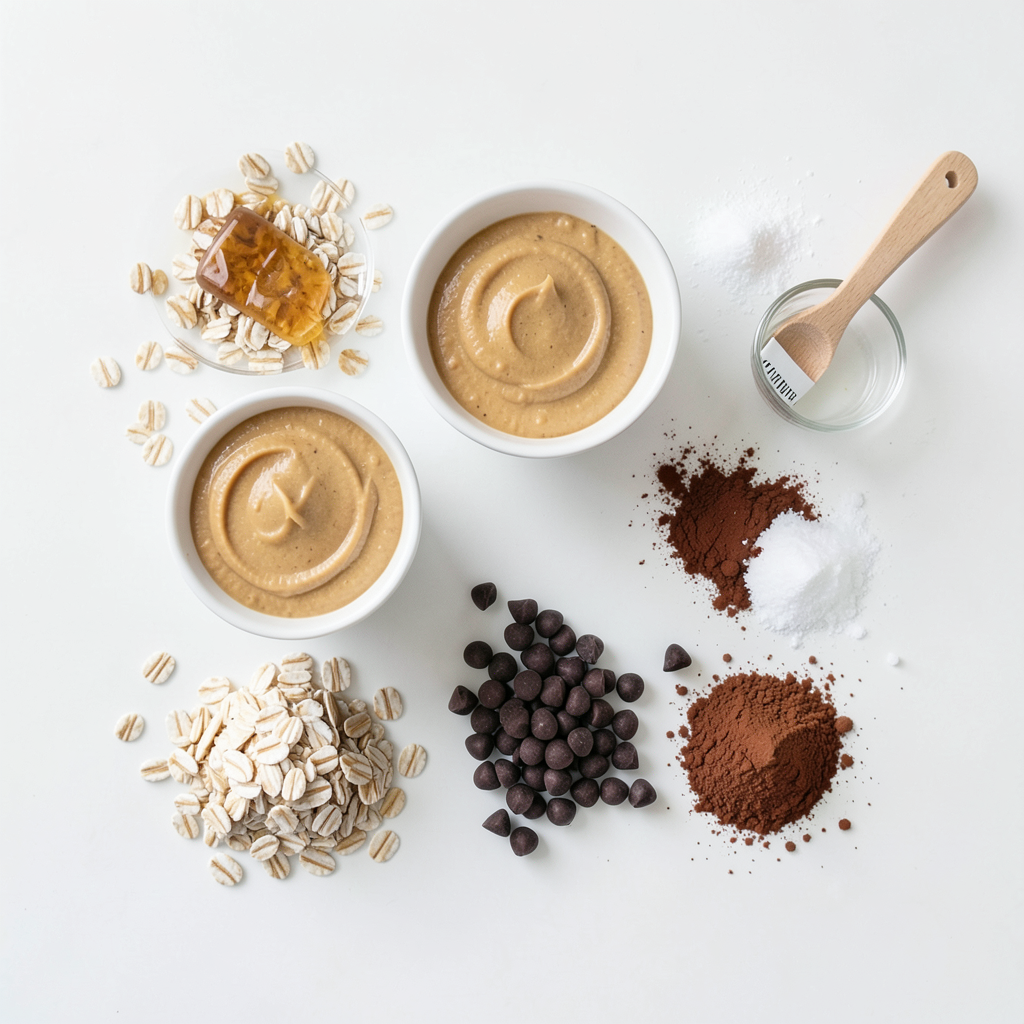
To make no-bake peanut butter bars, gather these simple items:
- 1 cup creamy peanut butter
- 1/2 cup honey or maple syrup
- 2 cups rolled oats
- 1 cup chocolate chips (dark or milk, your choice)
- 1/4 cup unsweetened cocoa powder
- 1/2 teaspoon vanilla extract
- A pinch of salt
Substitutions for key ingredients
If you want to change things up, here are some easy swaps:
- Use almond butter instead of peanut butter for a different nutty flavor.
- Maple syrup works well if you want a vegan option instead of honey.
- Quick oats can replace rolled oats in a pinch, but they may change the texture slightly.
Optional add-ins for enhanced flavor
Add some fun twists to your bars with these extras:
- Mix in chopped nuts like walnuts or almonds for crunch.
- Stir in dried fruit like cranberries or raisins for some sweetness.
- Toss in a sprinkle of cinnamon or nutmeg for added warmth and spice.
Step-by-Step Instructions
Detailed cooking instructions
1. Start by grabbing a large mixing bowl. Add 1 cup of creamy peanut butter and 1/2 cup of honey or maple syrup. Stir until smooth and mixed well.
2. Next, add 1/4 cup of unsweetened cocoa powder, 1/2 teaspoon of vanilla extract, and a pinch of salt. Mix everything together until it is well combined.
3. Slowly fold in 2 cups of rolled oats. Make sure every oat is coated in the mix. You want a thick, dense mixture at this stage.
4. Take an 8x8-inch baking dish and line it with parchment paper. Leave some paper hanging over the edges for easy removal.
5. Pour the mixture into the lined dish. Press it down firmly with a spatula or your hands. Ensure it is evenly spread and packed tightly.
6. Now, melt 1 cup of chocolate chips in the microwave. Use 30-second intervals, stirring in between. You can also use a double boiler if you prefer.
7. Once the chocolate is smooth, pour it over the pressed oat mixture. Spread it evenly for a nice finish.
8. Finally, place the dish in the refrigerator for at least 2 hours. This helps the bars firm up. When set, lift the bars out using the parchment, and cut them into squares or rectangles.
Visual aids to enhance understanding
- Mixing bowl: A clear view of the mixture helps you judge texture.
- Pressing the mixture: A visual of how tightly to pack down the bars shows the right consistency.
- Chocolate melting: A photo of smooth melted chocolate ensures you know the right stage.
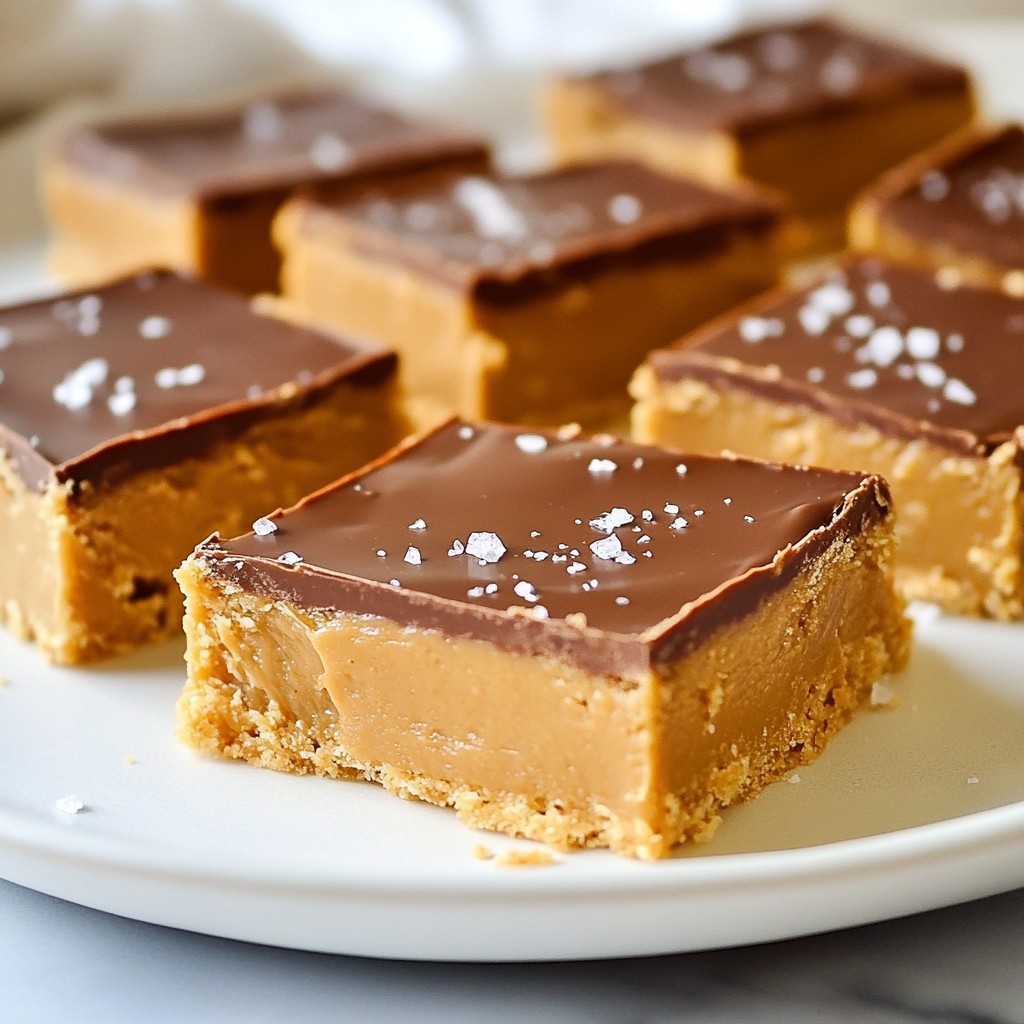
- Final cut bars: Show finished bars for a tasty visual reward.
Common mistakes to avoid
- Not mixing well: If you skip mixing enough, the bars may not stick.
- Packing too lightly: If you don’t press the mixture down firmly, bars may fall apart.
- Skipping the chill time: Not refrigerating can lead to gooey bars that won’t hold shape.
- Overheating chocolate: Watch the chocolate closely to avoid burning.
Tips & Tricks
Best practices for achieving the perfect texture
To get the best texture in your no-bake peanut butter bars, start with creamy peanut butter. It blends well with other ingredients. Mix your peanut butter and honey until smooth. This step ensures even flavor. When adding oats, do it gradually. This way, you avoid clumps. Press the mixture firmly into the dish. A tight pack helps the bars hold their shape.
Time-saving hacks for preparation
Preparation can be quick and easy. Use quick oats instead of rolled oats for a faster mix. You can melt the chocolate while mixing the other ingredients. This cuts down on waiting time. Use a microwave for melting chocolate. It’s fast and easy! Also, use parchment paper to line your dish. This makes cleanup simple and fast.
Storage suggestions for longevity
To keep your bars fresh, store them in an airtight container. They can last up to one week in the fridge. If you want to keep them longer, try freezing them. Wrap each bar in plastic wrap and place them in a freezer bag. They can last up to three months in the freezer. Just thaw them in the fridge before enjoying!
Pro Tips
- Storage Tip: Keep the bars in an airtight container in the refrigerator to maintain their freshness and prevent melting.
- Peanut Butter Variation: Try using crunchy peanut butter for added texture and a delightful crunch in every bite.
- Sweetener Choice: Experiment with agave nectar or brown rice syrup if you're looking for an alternative to honey or maple syrup.
- Chocolate Options: Use white chocolate chips for a different flavor profile, or mix dark and milk chocolate for a balanced taste.
Variations
Adding chocolate or nuts
You can easily add more flavor to your bars. Try mixing in chocolate chips or chopped nuts. They add crunch and taste. Use dark chocolate for a rich flavor. If you like, use almonds or walnuts for some extra texture. Just fold them into the mixture before you press it into the pan.
Gluten-free or vegan adaptations
Making these bars gluten-free is simple. Use certified gluten-free oats in your recipe. For a vegan version, swap honey for maple syrup. This keeps the bars sweet and plant-based. You can also choose dairy-free chocolate chips for a vegan treat. These changes keep the bars tasty and suitable for different diets.
Flavor modifications for personalization
Feel free to get creative with flavors. You can add spices like cinnamon or nutmeg for warmth. Want a tropical twist? Mix in shredded coconut! You might also try adding a splash of almond extract for a nutty taste. These small changes can make your bars unique and fun to eat.
Storage Info
Best practices for storing no-bake peanut butter bars
To keep your no-bake peanut butter bars fresh, store them in an airtight container. Use parchment paper to separate layers. This prevents sticking and makes serving easy. Keep the container in the fridge. The cool temperature helps maintain their shape and flavor.
How long the bars will last
When stored properly, these bars last up to one week in the fridge. You might notice they get a bit soft over time. They still taste great, just a little different in texture. If you want the best taste, eat them within the first few days.
Freezing options for extended shelf life
You can also freeze these bars for longer storage. Cut them into squares before freezing. Place the bars in a single layer on a baking sheet. Freeze until solid, then transfer them to a freezer-safe bag. They can last up to three months in the freezer. When you want to eat them, thaw in the fridge overnight. Enjoy them cold or at room temperature!
FAQs
Can I use natural peanut butter instead of creamy?
Yes, you can use natural peanut butter. It may change the texture a bit. Natural peanut butter has oil on top. You must stir it well before using. If you want a creamier bar, stick to creamy peanut butter.
What can I use instead of honey?
You can use maple syrup as a great substitute. Agave syrup is another option. Both will keep the bars sweet and tasty. If you want a sugar-free option, try using date syrup. This will change the flavor, but it will still be good!
How do I know when the bars are set?
The bars are set when they feel firm to touch. After two hours in the fridge, check their firmness. If they are still soft, leave them for another hour. Once firm, they are ready to slice and enjoy!
This article covered everything you need for no-bake peanut butter bars. We looked at key ingredients, helpful substitutions, and ways to boost flavor. The step-by-step guide gives clear cooking instructions to avoid mistakes. I shared tips for the best texture and time-saving hacks. You'll find fun variations, storage tips, and answers to common questions.
Now you can make delicious bars with confidence. Enjoy your time in the kitchen!