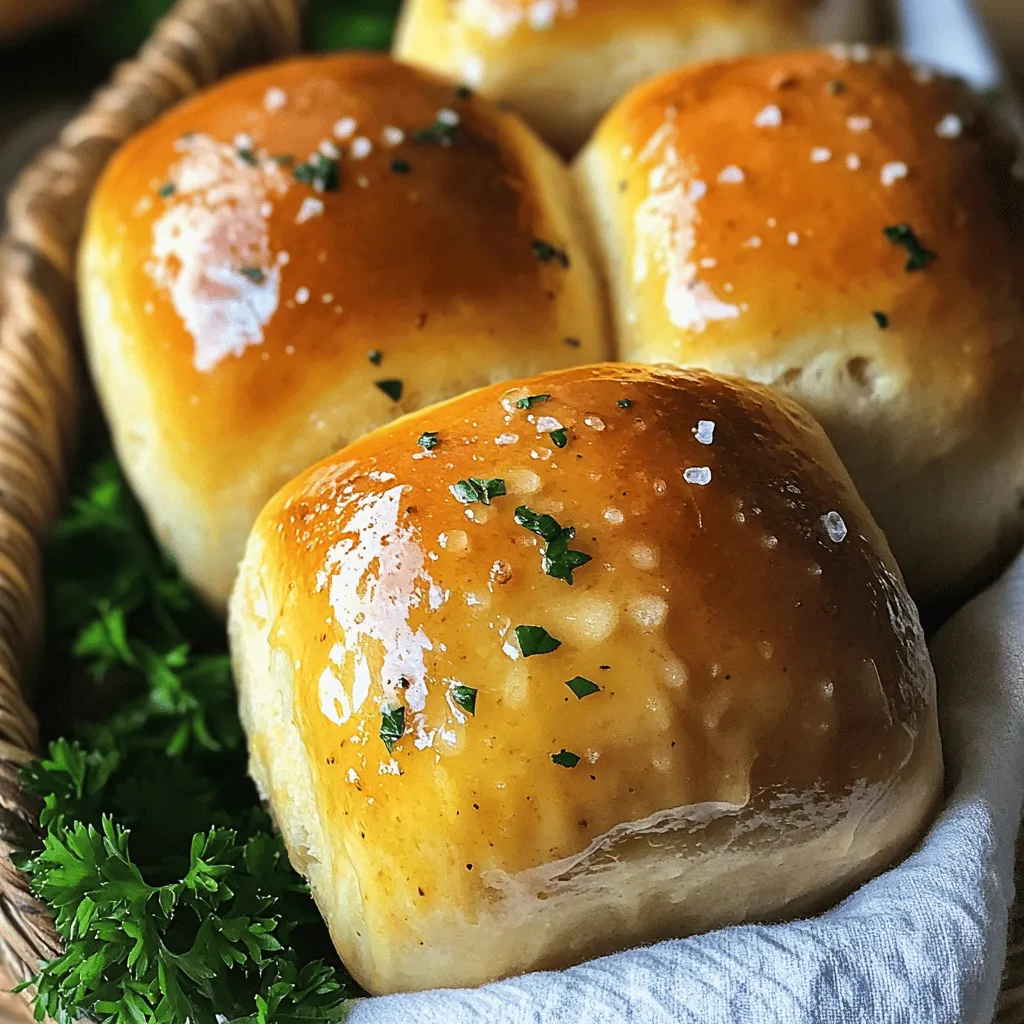
Imagine sinking your teeth into a soft, buttery roll, bursting with garlic flavor. These Garlic Butter Dinner Rolls are the ultimate comfort food. In this article, I’ll share my secrets for crafting perfect rolls, from the ingredients to the baking tips. Whether you’re new to baking or a seasoned pro, you’ll find easy steps and helpful advice. Let’s get ready to elevate your dinner experience with these delightful treats!
Ingredients
List of Ingredients
To make these soft and flavorful garlic butter dinner rolls, gather these items:
– 3 1/2 cups all-purpose flour
– 1 packet (2 1/4 teaspoons) instant yeast
– 1/4 cup sugar
– 1 teaspoon salt
– 1 cup warm milk (about 110°F/43°C)
– 1/4 cup unsalted butter, melted
– 1 large egg
– 4 tablespoons unsalted butter, softened
– 4 cloves garlic, minced
– 2 tablespoons fresh parsley, chopped
– Salt to sprinkle on top
Measuring Tips
When measuring flour, use the spoon and level method. Spoon the flour into your measuring cup. Then, level it with a knife. This method helps avoid too much flour, which can make rolls dense. For the sugar, simply scoop and level as well. When measuring liquids like milk, always use a liquid measuring cup for accuracy.
Quality Suggestions
Choosing the right ingredients makes a big difference. Use fresh garlic for the best flavor. Fresh parsley adds a vibrant taste and color. For flour, all-purpose is perfect, but you can use bread flour for a chewier texture. Ensure your yeast is fresh for good rising. Always check the expiration date on the packet!
Step-by-Step Instructions
Preparation of Dough
To start, gather all your ingredients. In a mixing bowl, combine warm milk, instant yeast, and sugar. Let this sit for 5-10 minutes until it gets foamy. This step helps the yeast activate. Next, in a large bowl, mix flour and salt. Make a well in the center. Pour in the yeast mixture, melted butter, and egg. Stir with a wooden spoon until a dough forms.
Knead the dough on a lightly floured surface for about 8-10 minutes. Keep kneading until the dough feels smooth and elastic. This step builds gluten, which gives the rolls their soft texture.
Rising and Shaping
Now, place the dough in a greased bowl. Cover it with a clean kitchen towel. Let it rise in a warm place for about 1 hour, or until it doubles in size. This is when the yeast does its magic! While the dough rises, prepare the garlic butter. In a small bowl, combine softened butter, minced garlic, and chopped parsley. Set this aside; it will add great flavor.
Once the dough has risen, punch it down to release air. Divide the dough into 12 equal pieces. Shape each piece into a ball. Place these dough balls in a greased baking dish or on a parchment-lined baking sheet, spaced evenly. Cover the rolls again and let them rise for another 30 minutes until puffy.
Baking and Finishing Touches
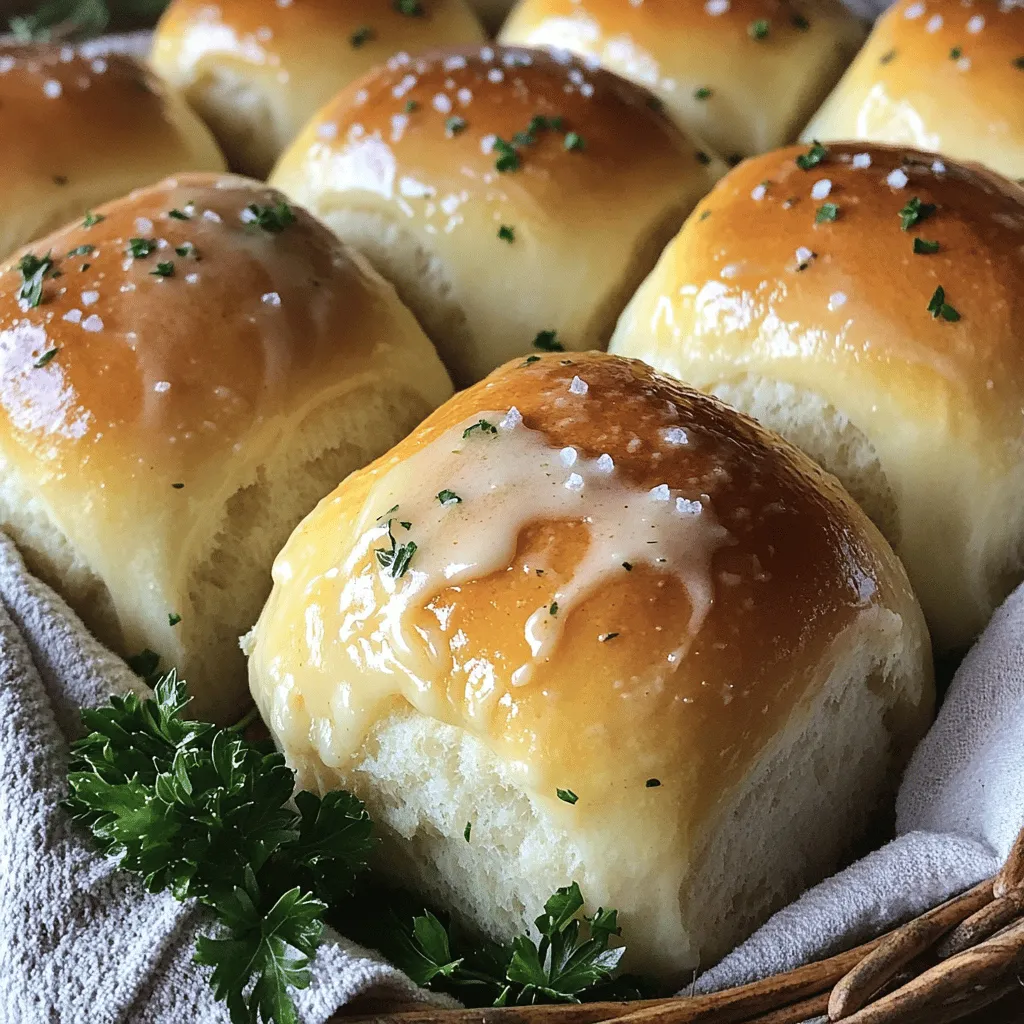
Preheat your oven to 350°F (175°C). Bake the rolls for 20-25 minutes, or until they turn golden brown. When they are out of the oven, brush them with the garlic butter mixture. Don’t forget to sprinkle a little salt on top! Let the rolls cool for a few minutes before serving.
This process makes warm, soft, and flavorful garlic butter dinner rolls.Enjoy every bite!
Tips & Tricks
Successful Rising Techniques
To make your rolls rise well, start with warm milk. The warm milk activates the yeast. Make sure it is not too hot; 110°F is perfect. After mixing the yeast and sugar, let it sit until foamy. This shows the yeast is alive. When kneading, aim for a smooth and elastic dough. Knead for about 8-10 minutes. This helps develop gluten, which supports the rise. For the best results, let the dough rise in a warm spot, free from drafts.
Flavor Enhancements
Adding garlic butter is the star of this dish! Use fresh garlic for the best flavor. You can also mix in herbs like rosemary or thyme. They add a nice aroma to the rolls. For a cheesy twist, sprinkle in some grated parmesan or cheddar. This will make the rolls even richer. Brushing the rolls with extra garlic butter after baking keeps them moist and tasty.
Recipe Mistakes to Avoid
One common mistake is not measuring ingredients correctly. Use dry measuring cups for flour and sugar. Too much flour can lead to dry rolls. Another mistake is skipping the second rise. This step makes the rolls light and fluffy. Don’t rush the process, even if you’re hungry! Lastly, avoid opening the oven door while baking. This can cause temperature drops, affecting the rolls’ rise and texture. Stick to these tips for perfect garlic butter dinner rolls!
Variations
Herb-Infused Options
You can add fresh herbs to your garlic butter dinner rolls. Try rosemary, thyme, or dill. Chop the herbs finely and mix them into the garlic butter. This will make your rolls smell amazing and taste fresh.
Different Cheese Additions
Adding cheese takes these rolls to another level. You can use cheddar, mozzarella, or even feta. Fold shredded cheese into the dough before the first rise. For a stronger flavor, sprinkle cheese on top before baking.
Sweet vs. Savory Twists
Want to switch it up? Try a sweet version! Add honey and a pinch of cinnamon to the dough. You can also mix in dried fruits like cranberries or raisins. This gives you a lovely contrast to the savory rolls.
Storage Info
Best Practices for Storing Rolls
To keep your garlic butter dinner rolls fresh, store them in an airtight container. This helps prevent them from drying out. You can also wrap them tightly in plastic wrap or foil. For best results, keep them at room temperature for up to two days. If you want to keep them longer, refrigeration is not the best option since it can make them stale.
Reheating Instructions
If your rolls cool down, you can easily reheat them. Preheat your oven to 350°F (175°C). Place the rolls on a baking sheet and cover them loosely with foil. Heat for about 10-15 minutes. This helps keep them soft and warm. If you want a bit of extra flavor, brush them with a little garlic butter before reheating.
Freezing Tips
Freezing is a great way to store leftover rolls. Allow them to cool completely before freezing. Place the rolls in a freezer-safe bag or container. They can stay fresh for up to three months. When you want to enjoy them again, simply thaw them in the fridge overnight. Reheat as explained above, and they will taste almost fresh out of the oven.
FAQs
How to make Garlic Butter Dinner Rolls?
To make garlic butter dinner rolls, you start by mixing warm milk, instant yeast, and sugar. Let this sit until it’s foamy. Next, combine flour and salt in a bowl. Make a well in the center, and add the yeast mixture, melted butter, and egg. Stir until a dough forms. Knead the dough for about 8-10 minutes until smooth. Let it rise until it doubles in size.
After the first rise, punch down the dough and divide it into 12 pieces. Shape each piece into a ball. Place the balls in a greased dish and let them rise again. Preheat your oven to 350°F (175°C) and bake for 20-25 minutes. Brush the rolls with garlic butter right when they come out.
Can I use regular yeast instead of instant yeast?
Yes, you can use regular yeast instead of instant yeast. However, it needs a bit more time. You must activate regular yeast in warm water with sugar first. This takes about 5-10 minutes. After it bubbles, mix it with your other ingredients like the instant yeast. Just keep in mind that the total rise time may increase.
What to serve with Garlic Butter Dinner Rolls?
Garlic butter dinner rolls pair well with many dishes. Here are some ideas:
– Soups: They go great with chicken noodle or tomato soup.
– Salads: Serve them alongside a fresh garden salad.
– Main Dishes: They complement roasted meats or pasta dishes well.
– Dips: Enjoy them with hummus or spinach dip for a snack.
These rolls add warmth and flavor to any meal.
In this post, we covered how to make delicious garlic butter dinner rolls. We discussed key ingredients, measuring tips, and how to ensure quality. I shared step-by-step instructions for dough prep, rising, and baking. We also explored tips for better flavor and avoiding common mistakes. Lastly, I shared variations and storage tips to keep your rolls fresh. Remember, great rolls take practice, so keep baking until you get it just right. Enjoy your rolls with meals or as a snack!