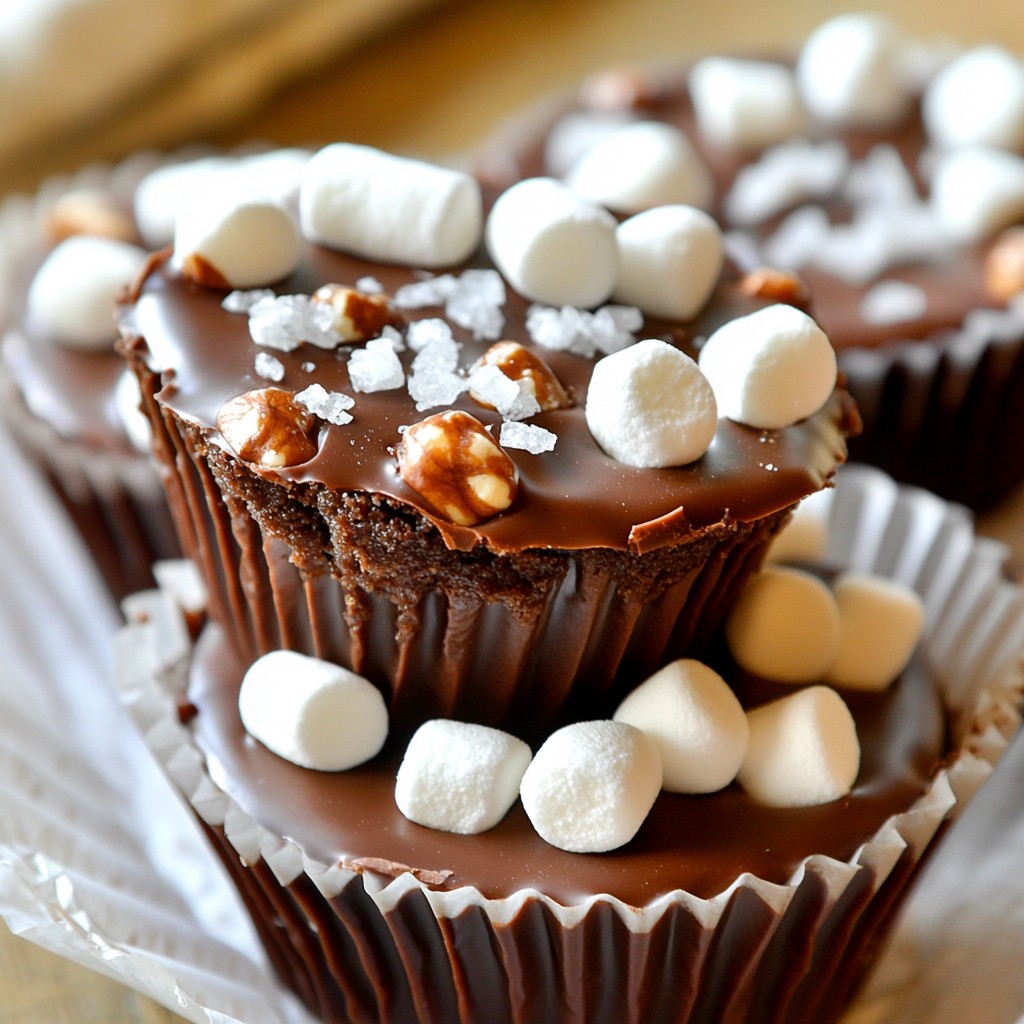
If you love chocolate, you’re in for a treat! I’m excited to share my easy recipe for Chocolate Fudge Cups. These quick and tasty treats require just a few ingredients and minimal fuss. Perfect for parties or a sweet snack, you'll impress everyone with this delicious dessert. Let’s dive in and discover how simple it is to create your own homemade fudge cups!
Why I Love This Recipe
- Decadent Flavor: These fudge cups are rich and chocolatey, delivering a delightful taste that satisfies any sweet tooth.
- Easy to Make: With just a few simple ingredients and steps, you can whip up these treats in no time.
- Customizable: You can easily modify the recipe by adding your favorite nuts or toppings for a personal touch.
- Perfect for Any Occasion: These fudge cups are great for parties, holidays, or any time you want a little indulgence.
Ingredients
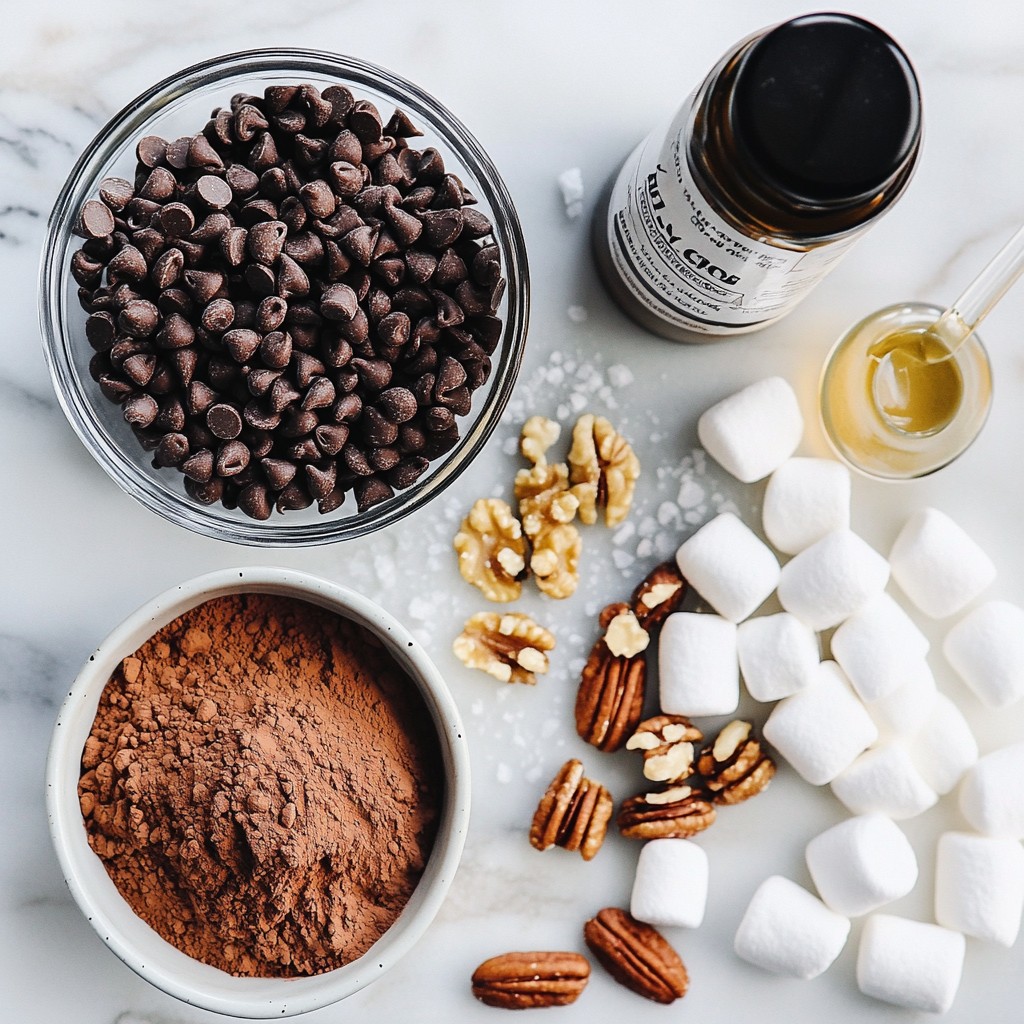
Complete Ingredient List for Easy Chocolate Fudge Cups
- 1 cup dark chocolate chips
- 1/2 cup sweetened condensed milk
- 1/4 cup unsweetened cocoa powder
- 1 teaspoon vanilla extract
- 1/4 cup chopped nuts (walnuts or almonds)
- 1/4 cup mini marshmallows (optional for topping)
- Sea salt for garnish
Importance of Each Ingredient
Each ingredient plays a key role in making these fudge cups great.
- Dark chocolate chips provide a rich, smooth flavor. They melt well and form the base.
- Sweetened condensed milk adds creaminess and sweetness, making the fudge soft and smooth.
- Unsweetened cocoa powder adds a deep chocolate taste, making the fudge even more chocolatey.
- Vanilla extract enhances the chocolate flavor and adds warmth.
- Chopped nuts give a nice crunch and extra flavor. You can choose walnuts or almonds.
- Mini marshmallows are optional but bring a fun, fluffy touch on top.
- Sea salt adds a touch of contrast, making the sweet taste pop.
Substitute Options for Allergies or Preferences
You can easily swap ingredients to fit your needs.
- Use milk chocolate chips if you prefer a sweeter taste.
- If you are dairy-free, try coconut milk or almond milk instead of sweetened condensed milk.
- For a nut-free option, leave out the nuts or replace them with seeds like sunflower seeds.
- You can also skip the marshmallows if you want a simpler treat.
- If you like a stronger flavor, add a bit more cocoa powder or vanilla extract.
These options help you enjoy fudge cups no matter your taste or dietary needs.
Step-by-Step Instructions
Preparing the Muffin Tin
First, grab your muffin tin. You want to line it with paper liners. This step helps you easily remove the fudge cups later. Make sure to press the liners down well so they fit snugly. It takes just a minute, but it makes a big difference.
Melting the Chocolate Mixture
Next, take a microwave-safe bowl. Add 1 cup of dark chocolate chips and 1/2 cup of sweetened condensed milk. Heat this mixture in the microwave. Set it for 30 seconds at a time. Stir the mixture after each interval. Keep going until it melts smoothly. You want it to be shiny and thick, not lumpy.
Combining Ingredients for the Fudge Mix
Now, stir in 1/4 cup of unsweetened cocoa powder and 1 teaspoon of vanilla extract. Mix until fully combined. The mixture should look rich and glossy. Then, fold in 1/4 cup of chopped nuts, like walnuts or almonds. This adds a nice crunch to your fudge.
Filling and Setting the Fudge Cups
Use a spoon to fill each muffin liner with the fudge mix. Fill them about 3/4 full. If you like, add mini marshmallows on top. They melt a bit and add sweetness. Finally, sprinkle a pinch of sea salt on each cup. This gives a great flavor contrast. Place the muffin tin in the fridge for at least 2 hours. Once they are set, gently peel off the liners. Enjoy your easy chocolate fudge cups!
Tips & Tricks
Best Practices for Melting Chocolate
Melting chocolate can be tricky. Here are some simple steps to help you.
- Use a microwave-safe bowl: This ensures safe and even melting.
- Heat in short bursts: Microwave the chocolate in 30-second intervals. Stir after each interval. This helps prevent burning.
- Check for smoothness: The chocolate should be shiny and fully melted. If it looks thick, keep stirring.
These tips will help you achieve the right texture for your fudge cups.
How to Achieve the Perfect Fudge Consistency
Getting the right consistency is key for fudge. Here’s how to do it well:
- Balance your ingredients: Use the right amounts of chocolate and sweetened condensed milk. This mix creates a creamy base.
- Stir well: Combine the cocoa powder and vanilla extract thoroughly. This step adds rich flavor and keeps the fudge smooth.
- Fold in nuts gently: Add chopped nuts last. This keeps them evenly distributed without breaking the chocolate mixture.
Following these steps will give you a thick, glossy fudge that holds its shape.
Common Mistakes to Avoid
Even pros make mistakes. Here are some pitfalls to watch for:
- Overheating the chocolate: If you heat it too long, it can seize up. Always use short bursts.
- Not cooling enough: Allow the fudge to set in the fridge for at least 2 hours. Rushing this step can lead to soft fudge.
- Skipping the salt: A pinch of sea salt really brings out the chocolate flavor. Don’t skip this step!
Avoiding these mistakes ensures delicious fudge cups every time you make them.
Pro Tips
- Use Quality Chocolate: The better the chocolate, the richer the flavor. Opt for high-quality dark chocolate chips for a more decadent taste.
- Chill for Best Texture: Allowing the fudge cups to set in the refrigerator for at least 2 hours will ensure they hold their shape and have a firm texture.
- Customize Your Nuts: Feel free to experiment with different types of nuts or even add a mix for a unique crunch in each bite.
- Sea Salt Finish: A pinch of sea salt enhances the chocolate flavor and adds a sophisticated touch. Don’t skip this step!
Variations
Flavor Additions (Mint, Orange Zest, etc.)
You can easily add flavors to your fudge. Mint extract brings a cool touch. Just use 1/4 teaspoon for a nice kick. Orange zest adds a bright, citrus flavor. Use 1 teaspoon for a fresh twist. Both options make your fudge even more fun!
Alternate Toppings (Coconut, Sprinkles, etc.)
Toppings can change the look and taste of your fudge cups. Shredded coconut offers a sweet, chewy texture. Add it on top for a tropical vibe. Colorful sprinkles can make your fudge look festive. Use any topping you like to match your mood or the season.
Dietary Variations (Vegan, Gluten-Free Options)
You can make these fudge cups fit different diets. For vegan options, use dairy-free chocolate chips and coconut milk instead of sweetened condensed milk. For gluten-free fudge, check the labels on your chocolate. Most are naturally gluten-free. These swaps keep everyone happy and included!
Storage Information
Best Storage Practices for Chocolate Fudge Cups
Store your chocolate fudge cups in an airtight container. This keeps them fresh and tasty. Place parchment paper between layers to avoid sticking. Keep the container in the fridge to maintain firmness.
How Long Do They Last?
These fudge cups last up to one week in the fridge. If you want to enjoy them longer, freezing is a great option. Always check for any off smells or changes in texture before eating.
Freezing Instructions for Long-Term Storage
To freeze, wrap each fudge cup in plastic wrap. Then, place them in a freezer bag or container. Label the bag with the date. They stay good for about three months. When ready to eat, thaw them in the fridge overnight.
FAQs
Can I use milk chocolate instead of dark chocolate?
Yes, you can use milk chocolate. It will make the fudge sweeter and creamier. However, the texture may change slightly. Dark chocolate gives a richer taste, but milk chocolate is a great choice if you prefer it sweeter. Experiment with both to find your favorite!
How do I know when the fudge is set?
The fudge is set when it feels firm to the touch. It will no longer be sticky or soft. You can also check by gently pressing on the top; it should hold its shape. Chill it for at least 2 hours for the best results.
Can I make the fudge cups ahead of time?
Yes, you can! Make them a day or two ahead. Just store them in the fridge. This makes it easy to serve at parties or events. The fudge cups taste even better after chilling for a while.
What can I serve with chocolate fudge cups?
You can serve them with whipped cream or ice cream. Fresh fruit, like strawberries or raspberries, also pairs well. For a fun twist, try adding a drizzle of caramel sauce or a sprinkle of sea salt. Enjoy it your way!
You learned how to make easy chocolate fudge cups with key tips and tricks. Each ingredient plays a role in creating a rich flavor. Using substitutes helps everyone enjoy this treat, regardless of dietary needs.
Remember to store your fudge cups properly to keep them fresh. You can try fun flavors and toppings to mix things up. With the right steps, you’ll avoid common mistakes and achieve a perfect dessert every time. Now, you’re ready to make fudge cups that impress!