Skip to content
DisclaimerTerms Of UseGDPR PolicyCookie Policy

savorystride

  • Home
  • Drinks
  • Appetizers
  • Dinner
  • Dessert
  • About
  • Contact
  • Privacy Policy
DisclaimerTerms Of UseGDPR PolicyCookie Policy

Hazel

- 1 lb ground beef - 12 oz pasta (such as penne or fusilli) - 4 cups beef broth - 1 cup heavy cream - 4 garlic cloves, minced - 1 medium onion, chopped - 1 cup grated Parmesan cheese - 2 tablespoons olive oil - 1 teaspoon Italian seasoning - Salt and pepper to taste - Fresh parsley, chopped (for garnish) Ground beef brings protein and iron, which fuel your body. Pasta offers carbs for energy. Beef broth adds depth and flavor to the dish. Heavy cream makes it rich and creamy. Garlic boosts your immune system and adds zest. Onions provide sweetness and texture. Parmesan cheese enhances flavor and adds calcium. Olive oil is heart-healthy and adds richness. Italian seasoning brings a blend of herbs that elevate the taste. Fresh parsley adds color and freshness to your plate. If you want to change things up, use ground turkey or chicken instead of beef. Whole wheat pasta can make it healthier. For a dairy-free option, swap heavy cream with coconut cream or cashew cream. You can use vegetable broth instead of beef broth for a lighter flavor. If you lack fresh garlic, garlic powder works in a pinch. For a nutty twist, consider using pecorino instead of Parmesan cheese. Start by gathering all your ingredients. This makes cooking smooth and fun. You will need ground beef, pasta, beef broth, cream, garlic, onion, cheese, oil, and seasonings. Chop the onion and mince the garlic. Measure out everything before you start. This helps you stay organized and focused. 1. Heat the olive oil in a large pot over medium heat. Add the chopped onion and minced garlic. Sauté them for about 2-3 minutes. The onion should look clear, and the garlic should smell great. 2. Raise the heat to medium-high. Add the ground beef to the pot. Cook it for about 5-6 minutes until it is brown. Use a wooden spoon to break it into small pieces. Add salt, pepper, and Italian seasoning for flavor. 3. Now, add the uncooked pasta to the pot. Pour in the beef broth and stir it well. Make sure the pasta is fully submerged in the broth. 4. Bring the pot to a boil. Once it bubbles, lower the heat. Cover the pot and let it simmer for 10-12 minutes. Stir it every few minutes. The pasta should be soft but still firm. 5. After the pasta is cooked, stir in the heavy cream and grated Parmesan cheese. Mix until it becomes creamy. Taste it and add more salt or pepper if needed. 6. Take the pot off the heat. Let it sit for a few minutes. This will help it thicken. 7. Serve the dish hot. Don’t forget to sprinkle fresh parsley on top for color and taste. - Always use plenty of water and salt when cooking pasta. This adds flavor. - Stir the pasta often while it cooks. This helps prevent it from sticking together. - Test the pasta a minute before the package time is up. You want it al dente, not mushy. - If you want a creamier sauce, add more cream or cheese at the end. For the complete recipe, check the [Full Recipe]. To cook One-Pot Creamy Beef and Garlic Pasta quickly, prep your ingredients first. Chop the onion and garlic before you start. Use pre-grated Parmesan cheese to save time. You can also use a microwave to heat the broth quickly. This cuts down on cooking time and helps you get dinner on the table faster. A common mistake is overcooking the pasta. Keep an eye on it while it simmers. Stir often to prevent sticking. Don't skip the seasoning; salt and pepper enhance the dish. Lastly, avoid adding the cream too soon. Wait until the pasta is cooked for a creamy texture. To boost flavor, add fresh herbs like basil or thyme. A splash of lemon juice can brighten the dish. If you like heat, add red pepper flakes. You can also sauté mushrooms or bell peppers with the onion for extra taste. These simple tweaks will elevate your creamy beef and garlic pasta to new heights. For the full recipe, check out the details above. {{image_2}} You can easily add vegetables to this dish. Vegetables boost flavor and nutrition. Good choices include spinach, bell peppers, or mushrooms. Simply chop them up and add them when you cook the onions and garlic. This gives them time to soften and blend in. For a pop of color, add cherry tomatoes near the end of cooking. They will stay juicy and bright. If you want a different protein, you have options. Ground turkey or chicken works great instead of beef. These meats are leaner but still tasty. You can also use plant-based meat for a vegetarian twist. Just remember to adjust cooking times as needed. Cook until browned for all meats, ensuring they are safe to eat. The pasta you choose can change the dish's texture. While penne and fusilli are great, try spaghetti or farfalle for fun. Each type absorbs sauce differently, giving a unique bite. Cooking time may vary, so check the package for guidance. For a whole grain option, use whole wheat pasta. It adds fiber and keeps you full longer. Feel free to explore these variations to make One-Pot Creamy Beef and Garlic Pasta your own. For the complete recipe, check the Full Recipe section. To keep your One-Pot Creamy Beef and Garlic Pasta fresh, store it in an airtight container. Let the pasta cool completely before sealing it. Place the container in the fridge. It stays good for about 3 to 4 days. If you want to keep it longer, freezing is a great option. When you're ready to enjoy the leftovers, take them out of the fridge. You can reheat the pasta on the stove or in the microwave. For the stove, add a splash of beef broth or water in a pan. Heat slowly over medium heat until warm. If using a microwave, place the pasta in a microwave-safe bowl. Cover it with a lid or paper towel. Heat for 1 to 2 minutes, stirring halfway through. If you want to freeze One-Pot Creamy Beef and Garlic Pasta, first let it cool. Then, place it in a freezer-safe bag or container. Remove as much air as possible. This helps prevent freezer burn. It can last up to 3 months in the freezer. When you're ready to eat, thaw it in the fridge overnight. Then, reheat as mentioned above. Yes, you can make One-Pot Creamy Beef and Garlic Pasta gluten-free. Use gluten-free pasta instead of regular pasta. Many brands offer great options that taste just as good. Always check the beef broth for gluten, as some brands may contain it. This small switch will keep the dish tasty and safe for gluten-sensitive folks. If you want to add some heat, try a few simple tricks. You can mix in red pepper flakes while cooking the beef. Start with a pinch, and taste as you go. You can also add diced jalapeños or a splash of hot sauce. Adjust the spice level to match your taste. You can always add more, but you can't take it out! This dish is quite filling on its own, but some sides work great too. A fresh green salad pairs well, adding a crisp bite. You could also serve garlic bread for some extra flavor. Roasted vegetables are another delicious choice. Feel free to mix and match, and make it your own! For the full recipe, check out the complete guide. This blog post covered all aspects of making One-Pot Creamy Beef and Garlic Pasta. We explored key ingredients, their benefits, and suggested swaps. I shared detailed steps for preparation and cooking, plus tips to avoid mistakes. Variations like adding veggies or choosing different pasta types were discussed, along with storage info. In the end, this dish is tasty and easy to adapt. Enjoy your pasta adventure!

One-Pot Creamy Beef and Garlic Pasta Savory Delight

Are you ready to dive into a creamy, savory delight? My One-Pot Creamy Beef and Garlic Pasta is your new

To make Fruity Pebbles Rice Krispie Treats, gather these simple ingredients: - 4 cups Fruity Pebbles cereal - 4 cups Rice Krispies cereal - 1/2 cup unsalted butter - 10 oz (1 bag) mini marshmallows - 1 teaspoon vanilla extract - 1/4 teaspoon salt - Extra Fruity Pebbles for topping (optional) Using fresh ingredients makes a big difference. I always choose high-quality marshmallows. They melt better and create a smooth mix. For butter, use unsalted to control the salt flavor. Fresh Fruity Pebbles will give your treats a bright color and fruity taste. Look for the cereal with the longest shelf life for best results. You can swap some ingredients if needed. If you want a dairy-free option, use vegan butter. For the marshmallows, there are plant-based ones available. To add more flavor, try adding a pinch of cinnamon or nutmeg. If you want a gluten-free treat, check that your cereals are labeled as gluten-free. This way, everyone can enjoy these fun, colorful treats! Start by greasing a 9x13 inch baking dish. You can use butter or cooking spray. This step helps the treats release easily later. Set the dish aside for now. In a large saucepan, melt 1/2 cup of unsalted butter over medium heat. Watch it closely so it doesn't burn. Once melted, add a 10-ounce bag of mini marshmallows. Stir them continuously until they melt completely. This usually takes about 3 to 5 minutes. The mixture should be smooth and creamy. After that, take the pan off the heat and mix in 1 teaspoon of vanilla extract and 1/4 teaspoon of salt. This adds great flavor to your treats. In a big bowl, combine 4 cups of Fruity Pebbles cereal and 4 cups of Rice Krispies cereal. Pour the melted marshmallow mix over the cereal. Stir well until every piece is coated. It’s important to mix fast so the marshmallow stays warm. Once mixed, transfer the cereal mixture to your greased baking dish. Use a spatula or your hands, lightly buttered, to press it down evenly. Make sure it’s firm, so the treats hold their shape. Let the treats cool at room temperature for about 30 minutes. This helps them set properly. If you want, you can place them in the fridge for a quicker cool-down. Once firm, cut them into squares or bars. Enjoy your sweet and colorful Fruity Pebbles Rice Krispie Treats! For the complete recipe, refer to the Full Recipe. To get the best texture, use fresh marshmallows. Old marshmallows can harden and won't melt well. Melt the butter slowly over medium heat. Stir it frequently to avoid burning. When you add the marshmallows, keep stirring until they are smooth and creamy. This step is key for soft treats. After mixing, press the mixture firmly into the pan. This helps hold everything together. You can make this treat your own! Try adding chocolate chips or colorful sprinkles for a fun twist. For a fruity kick, mix in some dried fruit or mini gummy bears. If you want a crunch, toss in some nuts or seeds. You can even swap out the Fruity Pebbles for another cereal you love. Just remember to keep the Rice Krispies for that classic crunch. These treats are great for any occasion! Cut them into squares for a fun snack at parties or gatherings. You can also wrap them in cellophane for a cute gift. Serve them alongside ice cream for a tasty dessert combo. For a colorful display, stack them on a tiered cake stand. The bright colors will make any table pop! Check out the Full Recipe for more details. {{image_2}} You can switch up the cereals for fun! Try using Cocoa Pebbles for a chocolate twist. Corn Pops add a crunchy texture. If you like a mix of flavors, combine Fruity Pebbles with Cheerios. Each option gives a new taste and keeps things exciting! Boost your Rice Krispie treats with mix-ins! Adding mini chocolate chips gives a sweet surprise. Chopped nuts add crunch and a nutty flavor. You can also use dried fruits for a fruity kick. Just fold in your mix-ins before pressing the mixture into the pan. Get creative with themed versions for holidays! For Halloween, add orange and black sprinkles. For Christmas, use red and green candies. You can even shape them into hearts for Valentine’s Day. These special touches make your treats fun and festive for any occasion. For the full recipe, check out the complete guide to making Fruity Pebbles Rice Krispie Treats! Store your Fruity Pebbles Rice Krispie Treats in an airtight container. This keeps them fresh and chewy. You can stack them in layers with parchment paper in between. It helps prevent sticking. Find a cool, dry spot in your kitchen for the best results. When stored properly, these treats last about a week. After a few days, they may become a bit hard. To bring back some softness, just microwave them for a few seconds. Check for any signs of spoilage, like an off smell or weird texture before eating. You can freeze these treats for up to three months. Cut them into squares first. Wrap each square tightly in plastic wrap, then place them in a freezer bag. Label the bag with the date. To enjoy, let them thaw at room temperature. You can also warm them up for a fresh taste. For the full recipe, refer back to the main article. Yes, you can use different marshmallows. Regular marshmallows work great. You can also try flavored marshmallows for a twist. Just remember, the size should be the same. Mini marshmallows melt faster and blend well. If your treats are sticky, you can lightly grease your hands. This helps you shape them without the mess. You can also try adding more Rice Krispies. This absorbs some of the stickiness and balances the mix. Fruity Pebbles are gluten-free, making this treat safe for many. Check the Rice Krispies brand. Some brands may contain gluten, so look at the label. If you want to be sure, use gluten-free Rice Krispies. To make these treats healthier, use less butter and marshmallows. You can swap in coconut oil for butter. Add nuts or dried fruits for extra nutrition. Using whole grain Rice Krispies can also boost health benefits. For the full recipe, check the section above. In this post, we covered the key ingredients for Rice Krispie treats, along with useful substitutions. I detailed step-by-step instructions to ensure your treats come out perfect each time. We also shared tips for texture and customization ideas, plus ways to serve them. You learned about fun variations and how to store your treats for lasting freshness. Remember, making Rice Krispie treats is simple and fun. Enjoy personalizing them to match your taste and keep experimenting!

Fruity Pebbles Rice Krispie Treats Fun and Easy Recipe

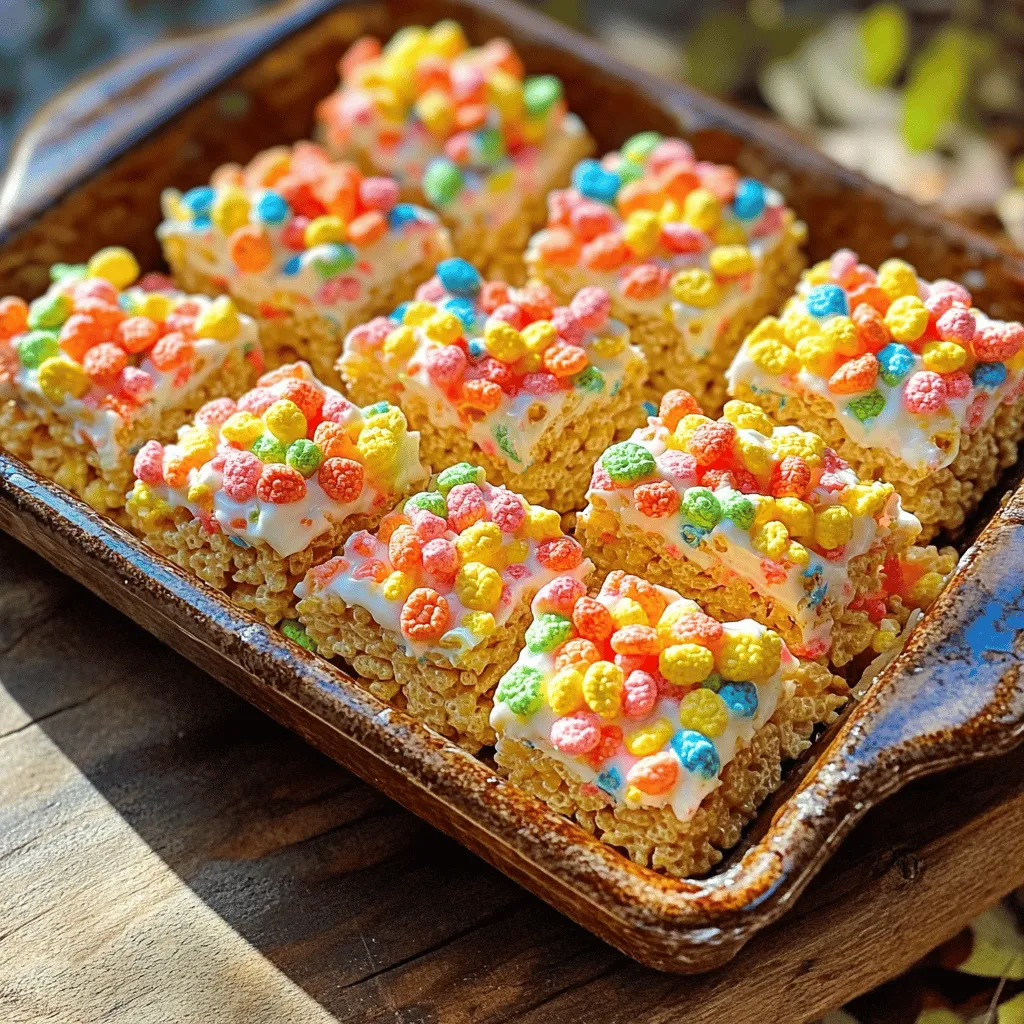
Get ready to make your snack time a blast with Fruity Pebbles Rice Krispie Treats! This fun and easy recipe

To make delicious homemade pistachio butter, you need just a few simple ingredients. Here’s what you’ll need: - 1 ½ cups unsalted roasted pistachios, shelled - 2 tablespoons honey or maple syrup - 1 tablespoon coconut oil - ¼ teaspoon sea salt - Optional: ½ teaspoon vanilla extract These ingredients combine to create a creamy and flavorful spread. The roasted pistachios give a rich taste. Honey or maple syrup adds sweetness. Coconut oil helps with creaminess. Sea salt balances the flavors perfectly. If you want a bit more depth, the vanilla extract is a nice touch. Using high-quality ingredients makes a big difference. Fresh pistachios will have the best flavor. If you can, toast your pistachios for a few minutes. This makes the flavor pop even more. You can find the full recipe in the previous section. First, we need to toast the pistachios. Toasting enhances their flavor and brings out their natural oils. Preheat your oven to 350°F (175°C). Spread the shelled pistachios on a baking sheet. Toast them for about 5-7 minutes. Don’t forget to stir them halfway through. Once they smell nutty, take them out and let them cool for a few minutes. Cooling is key. It helps prevent steam from forming in your food processor. Now that the pistachios are cool, it’s time to blend. Place the cooled pistachios in your food processor with the sea salt. Pulse until they break down into a fine meal. This usually takes about one minute. Scrape down the sides as needed. Next, add the honey or maple syrup and the coconut oil. If you want extra flavor, add the vanilla extract. Blend for 5-8 minutes. Keep checking the texture. You want it smooth and creamy. If it feels too thick, add a little more coconut oil. Taste your mixture and adjust the sweetness or salt if needed. After blending, it’s time to store your pistachio butter. Transfer it to a clean jar. Make sure the lid seals tightly. You can keep it in the refrigerator for up to 2 weeks. For longer storage, freeze it. This way, you can enjoy your creamy pistachio butter for months. Just remember to thaw it in the fridge before using. For more details on making this delicious spread, check out the Full Recipe. To make smooth pistachio butter, you need a strong food processor. A high-powered machine breaks down the nuts well. If your processor is weaker, it may take longer to get the creamy texture you want. When blending, you will need to scrape down the bowl often. This step helps to mix the nuts evenly. If you don’t scrape, some nuts may stay whole. This can lead to a lumpy butter. Pause the processor every minute or so to ensure even blending. You can adjust the sweetness to fit your taste. Start with two tablespoons of honey or maple syrup. After blending, taste it. If you want it sweeter, add more. Remember, you can always add but can’t take it out! Adding vanilla extract can also enhance the flavor. Just half a teaspoon is enough to bring warmth and depth to your pistachio butter. It’s a simple trick to make your spread even more delightful. Enjoy experimenting with flavors! {{image_2}} You can take your pistachio butter to the next level with some simple tweaks. Add a pinch of cinnamon for warmth or a dash of nutmeg for a cozy flavor. If you enjoy chocolate, try mixing in some cocoa powder. You can also enhance the taste with extracts like almond or maple. For a unique twist, consider blending in other nuts or seeds. Try adding walnuts for a rich taste or sunflower seeds for a nut-free option. Mixing different flavors can make your pistachio butter even more exciting. If you want to keep it vegan, use maple syrup instead of honey. This keeps the sweetness without animal products. You can also use agave nectar as another vegan option. For those who need a nut-free spread, consider using sunflower seeds. They blend well and create a similar creamy texture. Pumpkin seeds are another great choice. These seeds pack a punch of flavor and nutrients. You can still enjoy a delicious spread without nuts. To keep your pistachio butter fresh, use a clean glass jar with a tight lid. Glass jars are best because they do not absorb odors. Avoid plastic containers as they may retain flavors over time. Always use a clean spoon when scooping to prevent bacteria from getting in. Store the jar in the refrigerator, away from light and heat. This helps keep the flavors intact and prevents spoilage. Homemade pistachio butter can last up to two weeks in the refrigerator. Keep an eye on its color and smell. If it changes, it might be time to toss it. For longer storage, you can freeze it. In the freezer, it can last for up to three months. Make sure to use an airtight container for freezing. When you’re ready to use it, let it thaw in the fridge overnight. For the full recipe, check out Creamy Dreamy Homemade Pistachio Butter 🥜. Yes, you can! If you don’t have a food processor, try using a high-power blender. A mortar and pestle also works but takes longer. You can grind the pistachios in small batches. Just be patient and keep mixing until you get a creamy texture. If your pistachio butter is too thick, add more coconut oil. Start with a teaspoon at a time. Blend it in until you reach your desired smoothness. You can also try adding a little warm water for a lighter texture. Just remember to blend well after each addition. You can spread pistachio butter on toast or pancakes. It’s great in smoothies for an extra nutty flavor. Try mixing it into yogurt or oatmeal. You can also use it in baking for cookies or cakes. The options are endless! Homemade pistachio butter is a tasty treat made with just a few ingredients. You learned how to prepare, blend, and store it well. I shared tips for the creamiest texture and ways to customize flavors. You can adjust sweetness or add spices for new tastes. Remember to store it in the right container for freshness. Enjoy experimenting with your creations!

Homemade Pistachio Butter Creamy and Flavorful Spread

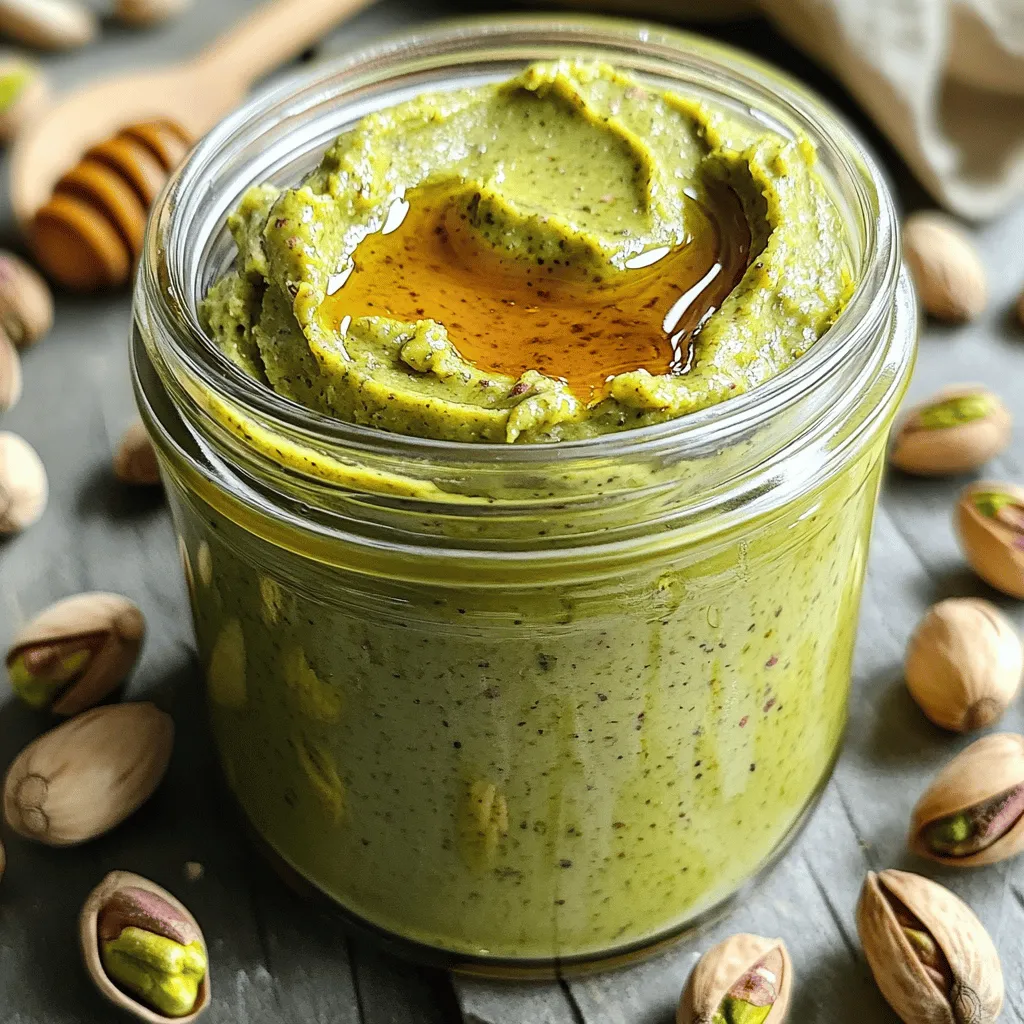
Are you ready to take your spreads to a whole new level? Homemade pistachio butter is creamy, flavorful, and easy

To make a savory sweet potato green bean casserole, gather these items: - 2 medium sweet potatoes, peeled and diced - 2 cups fresh green beans, trimmed and cut into 1-inch pieces - 1 cup mushrooms, sliced - 1 small onion, finely chopped - 2 cloves garlic, minced - 1 cup vegetable broth - 1 cup coconut milk - 1 cup crispy fried onion rings (store-bought or homemade) - 1 teaspoon thyme - 1 teaspoon rosemary - Salt and pepper to taste - 1 tablespoon olive oil These simple ingredients create layers of flavor and nutrition. Sweet potatoes bring natural sweetness and fiber. Fresh green beans add crispness and bright color. Mushrooms, onion, and garlic provide rich umami notes. You can choose vegetable broth or coconut milk based on your taste. The broth adds depth, while coconut milk gives a creamy texture. Use fresh herbs like thyme and rosemary for aromatic flair. Remember, crispy fried onion rings add that satisfying crunch on top. They make the dish visually appealing and add texture. Each ingredient plays a crucial role in making this casserole a delightful experience. You can find the full recipe in the article for detailed steps. Start by preheating your oven to 375°F (190°C). This warm-up gets the oven ready for our casserole. Next, fill a large pot with water and bring it to a boil. Add the diced sweet potatoes and cook them for 10-12 minutes. You want them fork-tender but not mushy. Once cooked, drain the sweet potatoes and set them aside for later. In a large skillet, heat 1 tablespoon of olive oil over medium heat. Add the finely chopped onion and minced garlic. Sauté these for about 3-4 minutes until they smell great. Next, toss in 1 cup of sliced mushrooms. Cook these for about 5 minutes until they soften. Then, add 2 cups of trimmed and cut green beans. Pour in 1 cup of vegetable broth and 1 cup of coconut milk. Sprinkle in 1 teaspoon each of thyme and rosemary, plus salt and pepper to your taste. Mix everything well and cook for 5-7 minutes. The green beans should turn bright but stay crisp. In a large mixing bowl, combine the cooked sweet potatoes with the green bean mixture. Stir gently to mix everything. Pour this mix into a greased baking dish. Top it all with crispy fried onion rings. Bake in the preheated oven for 25-30 minutes. You want the casserole bubbling and the onion rings golden brown. After baking, let it cool for a few minutes before serving. Enjoy this savory sweet potato green bean casserole delight! For the full recipe, check above. To get the best crunch from your green beans, cook them for about 5-7 minutes. You want them bright green but still crisp. If you like them softer, cook them a bit longer. Adjust the seasonings to fit your taste. Add more thyme or rosemary if you love herbs. A pinch of salt can also enhance the dish. This casserole shines at holiday meals. Pair it with roasted turkey or glazed ham. It also goes great with a fresh salad. For a beautiful presentation, serve in a large dish. Sprinkle extra crispy onion rings on top for a fun touch. Add a sprig of fresh thyme for color. Want to impress guests? Use a vibrant plate to make the colors pop. Explore the [Full Recipe] for more ideas! {{image_2}} You can easily change some ingredients in this casserole. If you want to swap proteins, try adding chickpeas or lentils. They add a nice bite and extra fiber. You could also use shredded chicken or turkey for a heartier dish. Both options work well! For those who need dairy-free or gluten-free choices, coconut milk is a great option. It gives a creamy texture without dairy. Use gluten-free fried onion rings for the topping. Check the labels to be sure they fit your needs. Want to give your casserole a unique taste? Add a pinch of nutmeg or smoked paprika. These spices can really elevate the flavor. Fresh herbs like parsley or chives also add a nice touch. Just sprinkle them on top before serving for a burst of color and freshness. If you're feeling adventurous, try topping it with crumbled feta or goat cheese. This adds a tangy flavor that pairs well with the sweet potatoes. For crunch, you could sprinkle crushed nuts or seeds on top for a delightful texture. For the full recipe, check out the Sweet Potato Green Bean Casserole. To keep your sweet potato green bean casserole fresh, use these simple tips: - Refrigerating Leftovers: Allow the casserole to cool completely. Then, cover it tightly with plastic wrap or aluminum foil. Place it in the fridge. It will stay good for about 3 to 4 days. - Freezing Instructions: If you plan to freeze it, let it cool first. Then, transfer the casserole to a freezer-safe dish. Wrap it tightly in plastic wrap, then foil. It can last up to 3 months in the freezer. Reheating your casserole is easy and can bring back its tasty texture: - Best Methods: The best way to reheat is in the oven. Preheat it to 350°F (175°C). Place the casserole in a baking dish, cover it with foil, and heat for about 20-30 minutes. - Maintaining Texture and Flavor: To keep the dish moist, add a splash of vegetable broth or coconut milk before covering. This helps the casserole stay soft and tasty while warming up. How long can I store sweet potato green bean casserole? You can store this casserole in the fridge for up to three days. Just cover it well. Can I make this casserole ahead of time? Yes, you can prepare it a day before. Just keep it in the fridge until you bake it. What can I use instead of vegetable broth? You can use chicken broth or even water. Just remember, it will change the flavor a bit. What is the best way to prepare green beans for casserole? Trim the ends and cut them into one-inch pieces. Blanching them in boiling water for a few minutes helps keep them bright and crisp. How long to bake if using a larger dish? If you use a larger dish, bake it for 35 to 40 minutes. Just make sure it bubbles and the onion rings are golden. How can I add more protein to the casserole? You can add cooked chicken, turkey, or even beans. Just mix them in with the sweet potatoes and green beans for a hearty meal. This recipe for sweet potato green bean casserole offers a blend of flavors and textures. You learned about the main ingredients, preparation steps, and storage tips. I shared ways to adapt the dish to meet your tastes and needs. Remember, cooking should be enjoyable. Don't hesitate to experiment with flavors and ingredients to make it your own. Perfect this casserole for your next gathering, and it will surely impress everyone!

Savory Sweet Potato Green Bean Casserole Delight

Looking for a tasty side dish that shines at any meal? You’ve found it! My Savory Sweet Potato Green Bean

- 1 lb shrimp, peeled and deveined - 1/2 cup vegetable oil - 1/2 cup all-purpose flour - 1 large onion, finely chopped - 2 celery stalks, finely chopped - 1 green bell pepper, finely chopped - 4 cloves garlic, minced - 2 cups vegetable broth - 1 can (14 oz) diced tomatoes, undrained - 2 cups okra, sliced - 2 teaspoons Cajun seasoning - 1 teaspoon smoked paprika - Salt and pepper to taste - 3 green onions and fresh parsley for garnish To make a great shrimp etouffee, you need fresh ingredients. First, choose good shrimp that are peeled and deveined. This makes cooking easier. Next, the roux is key. You will mix vegetable oil with flour. This mix will give your dish a rich flavor and nice texture. Stir it often to avoid burning. The holy trinity of Cajun cooking, which is onion, celery, and green bell pepper, adds depth. These veggies bring a sweet and earthy taste. Garlic adds a punch that makes the dish pop. Don’t forget the vegetable broth! It forms the base of your etouffee, adding moisture and flavor. The diced tomatoes give a nice acidity that balances the richness. Okra is essential, too. It adds a unique taste and helps thicken the sauce. Cajun seasoning and smoked paprika create warmth and spice. Lastly, fresh green onions and parsley add a bright touch. They make the dish look amazing and taste fresh. If you want the full recipe with instructions, check out the Full Recipe. Heat the vegetable oil in a large pot over medium heat. Once hot, whisk in the flour. Keep stirring for about 15 to 20 minutes. You want a deep caramel color. This step gives the etouffee its rich base. Watch carefully to avoid burning! After the roux is ready, it’s time for the "holy trinity." Add in the chopped onion, bell pepper, and celery. Stir them in and let them cook for about 5 minutes. This helps to soften the veggies. The aroma will make your kitchen smell amazing! Then, add minced garlic. Cook for another minute until it becomes fragrant. Now, pour in the vegetable broth. Add the canned diced tomatoes, too. Stir everything well and bring it to a simmer. Next, toss in the sliced okra and all the seasonings: Cajun seasoning, smoked paprika, salt, and pepper. Let this cook for about 10 to 15 minutes. Keep stirring until the okra is tender. Finally, add the shrimp to the pot. Cook until they turn pink, which should take about 5 to 7 minutes. You can now taste the etouffee and adjust the seasoning if needed. Serve your shrimp etouffee over warm rice for a delightful meal. For the full details on the ingredients and cooking times, check out the Full Recipe. To make a great roux, you must control the heat. Start with medium heat and whisk the flour into the oil. Stir often to avoid burning. Aim for a deep caramel color, which takes about 15-20 minutes. If it turns dark brown or black, you need to start over. Use a wooden spoon or a whisk for smooth mixing. A smooth roux is key for a perfect etouffee. If you see lumps, keep stirring until they disappear. This will ensure a creamy texture in your final dish. Taste as you cook! Start with the basic seasoning and adjust it to your liking. You can add more salt or Cajun seasoning for extra flavor. Remember, it’s easier to add than to take away. Fresh herbs like parsley or green onions can boost flavor. Add them near the end of cooking for a fresh taste. Don’t skip this step; it makes a big difference! Serve your shrimp etouffee over warm, fluffy white rice. Long-grain rice works best, as it absorbs the sauce well. You can also use jasmine rice for a fragrant twist. For a beautiful presentation, use deep bowls. This gives a nice look to the stew-like dish. Top each serving with fresh green onions and chopped parsley for color. Enjoy your meal! {{image_2}} You can switch up the seafood in your etouffee. Use crab, crawfish, or mixed seafood for fun. These options add different textures and flavors. If you prefer a vegetarian option, try mushrooms or tofu. Both choices soak up the delicious sauce, making them great substitutes. Adjust the spice to fit your taste. If you want more heat, add extra Cajun seasoning. This brings a nice kick. For those who love heat, a dash of hot sauce works wonders. Start with a little, then add more as you taste. If you're gluten-free, you can make a special roux. Use gluten-free flour or cornstarch to thicken your dish. This keeps the flavor while meeting dietary needs. For a low-carb version, skip the rice. Instead, serve the shrimp etouffee over cauliflower rice. This keeps it light and tasty without losing that classic flavor. Shrimp etouffee lasts about three days in the fridge. Store it in an airtight container. Make sure it cools down first before sealing it. This helps keep the taste fresh. When you want to eat it again, just look for any signs of spoilage. If it smells off or looks weird, it’s best to toss it. For longer storage, you can freeze shrimp etouffee. Use freezer-safe containers. Leave some space at the top for expansion. It can stay good for up to three months. When you are ready to eat it, thaw it in the fridge overnight. This helps keep the texture nice. To reheat, you can use the stove or microwave. If using the stove, warm it slowly over low heat. Stir often to prevent sticking. If using a microwave, cover it loosely to keep moisture in. Add a splash of broth or water to help with dryness. This keeps your etouffee creamy and tasty. Shrimp etouffee is a classic dish from Louisiana. It brings together the flavors of the South. The name "etouffee" means "smothered" in French. This dish features shrimp cooked in a thick, flavorful sauce. It often uses a roux, which is a mix of flour and fat. The dish highlights the "holy trinity" of Cajun cooking: onion, bell pepper, and celery. These ingredients give it a rich flavor. Shrimp etouffee is often served over rice. This dish celebrates the blend of cultures in Louisiana, making it a true comfort food. Yes, you can make shrimp etouffee ahead of time. This makes it perfect for meal prep. Cook it fully and let it cool before storing. Place it in an airtight container in the fridge. It will stay fresh for up to three days. When you’re ready to eat, simply reheat it. This saves you time on busy days. Just be careful not to overcook the shrimp again. It’s best to add fresh shrimp if you want to freeze it. To reheat shrimp etouffee, use low heat. A saucepan works best for even heating. Add a splash of broth or water to keep it moist. Stir gently to avoid breaking up the shrimp. Heat until warmed through, about 5-10 minutes. You can also use the microwave. Place it in a microwave-safe dish and cover it. Heat in short bursts, stirring in between. This helps avoid overcooking the shrimp. Shrimp etouffee pairs well with several sides. Here are some great options: - Cooked white rice - Garlic bread - Cornbread - Coleslaw - Steamed vegetables Each of these sides enhances the meal. They add texture and balance to the rich sauce. Enjoy your shrimp etouffee with these simple sides for a complete meal. For the full recipe, be sure to check out the complete guide. In this blog post, we explored how to make shrimp etouffee. We started with the key ingredients needed for this flavorful dish. Then, I laid out easy steps to cook it perfectly. I also shared tips for a tasty roux and ideas for variations to try. Finally, I provided storage and serving advice for your leftovers. This dish is not only rich in flavor but also fun to make. Enjoy it with friends and family; it’s perfect for any meal!

Savory Shrimp Etouffee Flavorful Southern Classic

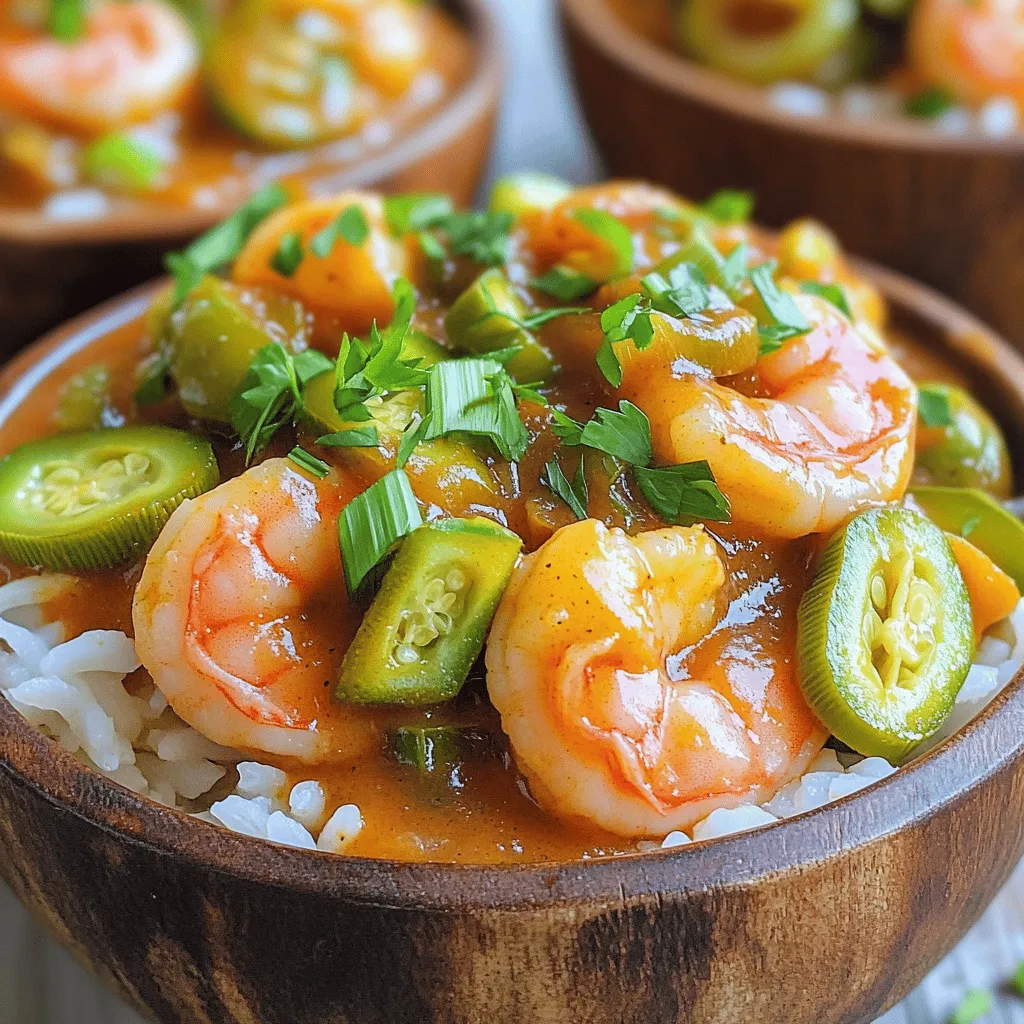
If you’re craving a flavorful dish that embodies the heart of Southern cuisine, look no further than Shrimp Etouffee. This

To make these tasty kiwi cupcakes, you need some basic ingredients. Here’s what you should gather: - 1 cup all-purpose flour - 1/2 cup granulated sugar - 1/4 cup unsalted butter, softened - 1 large egg - 1/2 cup milk - 1 teaspoon baking powder - 1/2 teaspoon baking soda - 1/4 teaspoon salt - 1 teaspoon vanilla extract - 1 ripe kiwi, peeled and diced These ingredients come together to create a fluffy and delicious cupcake base that bursts with kiwi flavor. For the finishing touch, you’ll want some extra ingredients for the frosting and toppings: - 1/4 cup whipped cream cheese (for frosting) - Green food coloring (optional) - Shredded coconut (for garnish, optional) These additions will enhance your cupcakes and make them look even more appealing. Choosing ripe kiwis is key for the best flavor in your cupcakes. Here are some tips: - Look for kiwis that feel slightly soft when you press them. - They should have a smooth, brown skin without blemishes. - Avoid kiwis that feel too hard or mushy. Ripe kiwis lend a sweet and tangy taste that makes these cupcakes truly shine. Check out the Full Recipe to put all of this together and create your delightful kiwi cupcakes! To start, gather your ingredients for the batter. You need all-purpose flour, sugar, butter, egg, milk, baking powder, baking soda, salt, and vanilla extract. 1. Preheat your oven to 350°F (175°C). Line a cupcake pan with paper liners. 2. In a medium bowl, cream the softened butter and sugar. Beat until light and fluffy. 3. Add in the egg and vanilla extract. Mix until everything is well combined. 4. In another bowl, whisk together the flour, baking powder, baking soda, and salt. 5. Gradually add the dry mix to the wet mix. Alternate with the milk. Stir until just combined. Now comes the fun part: adding kiwi! You want to use a ripe kiwi. Peel and dice it into small pieces. 1. Gently fold the diced kiwi into the batter. Ensure it spreads evenly throughout the mix. 2. If you like, add a few drops of green food coloring for a fun twist. Mix well but don’t overdo it! It’s time to bake your delightful kiwi cupcakes! 1. Fill each cupcake liner about two-thirds full with batter. 2. Bake for 18-20 minutes. Check with a toothpick; it should come out clean. 3. After baking, let the cupcakes cool in the pan for 5 minutes. Then, transfer them to a wire rack to cool completely. Follow these steps carefully, and you will have fluffy, tasty kiwi cupcakes! Make sure to check the Full Recipe for all details. To get light and fluffy kiwi cupcakes, follow these tips: - Use room temperature ingredients. This helps the batter blend well. - Cream the butter and sugar until they are pale and fluffy. This adds air. - Avoid over-mixing the batter. Stop as soon as the dry ingredients disappear. - Fold in the kiwi gently. This keeps the batter airy and light. Make your kiwi cupcakes look as good as they taste with these fun ideas: - Use whipped cream cheese frosting for a smooth finish. - Add kiwi slices on top for a fresh look. - Sprinkle shredded coconut for a tropical feel. - Drizzle a little honey for extra sweetness and shine. If your cupcakes sink or don’t rise, here’s what to check: - Ensure your baking powder is fresh. Old leavening agents can cause flat cupcakes. - Don’t open the oven door too soon. This lets out heat and can deflate cupcakes. - Fill each cupcake liner no more than 2/3 full. This allows room to rise. - If they sink, try reducing the oven temperature slightly next time. For more detailed steps, check out the Full Recipe. {{image_2}} To make vegan kiwi cupcakes, swap the egg and dairy. Use a flax egg instead of a regular egg. Mix 1 tablespoon of ground flaxseed with 2.5 tablespoons of water, and let it sit for five minutes. For milk, use almond or oat milk. Replace the butter with coconut oil or vegan butter. These swaps keep the cupcakes light and fluffy while staying dairy-free. If you need a gluten-free option, use a gluten-free flour blend. Look for a blend that includes xanthan gum. This helps mimic the texture of regular cupcakes. When you mix, be gentle. Overmixing can make the cupcakes dense. Bake as usual, keeping an eye on them for doneness. You can mix other fruits with kiwi for fun flavors. Try adding diced strawberries or blueberries for a twist. You can also use lime or lemon zest for a zesty kick. For a tropical vibe, combine kiwi with coconut or pineapple. These additions create new taste experiences that excite the palate. Explore these variations to add your own flair to the Kiwi Cupcakes. Use the Full Recipe for guidance on the base cupcake. Enjoy the process and let your creativity shine! To keep your kiwi cupcakes fresh, store them in an airtight container. This helps prevent them from drying out. Place parchment paper between layers of cupcakes to avoid sticking. Keep them at room temperature for 2-3 days. If your kitchen is hot, consider refrigerating them. You can freeze both un-frosted and frosted cupcakes. For un-frosted ones, wrap each cupcake tightly in plastic wrap. Place them in a freezer-safe bag. For frosted cupcakes, freeze them on a baking sheet first. Once frozen, wrap them as mentioned above. They can stay in the freezer for up to three months. When stored properly, kiwi cupcakes last about 2-3 days at room temperature. In the fridge, they can stay fresh for about a week. If frozen, they maintain quality for about three months. Just remember to thaw them in the fridge overnight before serving. Enjoy your delightful and fluffy treats! Yes, you can swap kiwi for other fruits. Try bananas, strawberries, or blueberries. Each fruit brings a unique taste. Make sure to adjust the amount based on the fruit's moisture. For example, bananas are thicker, so use less milk. To boost flavor, add zest from citrus fruits like lemon or orange. You can also mix in spices like cinnamon or nutmeg for warmth. Extracts like almond or coconut enhance the taste too. Don't forget to taste your batter before baking! Start by using a spatula or a piping bag for smooth frosting. For a classic look, spread frosting on top with a knife. If you want to impress, try piping swirls. Always frost cooled cupcakes to avoid melting. Add kiwi slices on top for a fun finish. For the full recipe, check out the details above! Kiwi cupcakes offer a fun twist for any occasion. We explored essential ingredients, from butter to coconut toppings, ensuring delicious results. I shared step-by-step instructions to mix, bake, and cool them perfectly. Tips for texture and decorating ideas help bring your cupcakes to life. We even covered fun variations for vegan or gluten-free options. Remember, proper storage keeps cupcakes fresh longer. With these insights, you can create delightful kiwi cupcakes that wow your friends and family! Enjoy the process and happy baking!

Kiwi Cupcakes Delightful and Fluffy Treats

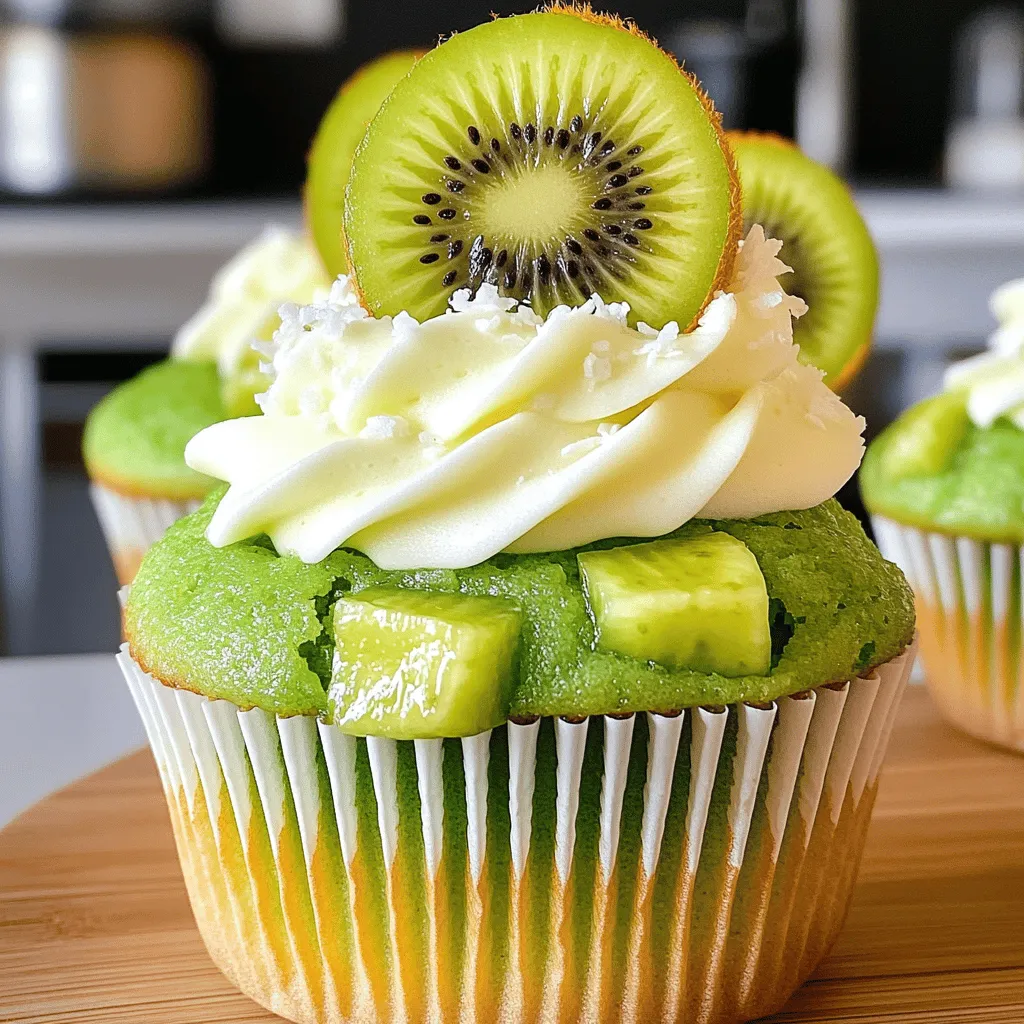
Who doesn’t love a sweet treat that bursts with flavor? Kiwi Cupcakes are not just tasty; they’re light, fluffy, and

To make Pina Colada Fluff, you need a few simple ingredients. Each one adds to the tropical taste. Here’s the list: - 1 cup crushed pineapple, drained - 1 cup coconut cream - 1 cup heavy whipping cream - 1/2 cup powdered sugar - 1 teaspoon vanilla extract - 1/4 cup shredded coconut, toasted - Maraschino cherries for garnish (optional) These ingredients create a light and fluffy dessert. The crushed pineapple gives a sweet and tangy flavor. Coconut cream adds richness, while heavy whipping cream makes it fluffy. The powdered sugar sweetens the mix, and vanilla extract enhances the taste. Toasted coconut adds a crunchy texture, and maraschino cherries make it pretty. Gather these ingredients before you start. I find it helpful to prep everything first. This makes the cooking process smooth and fun! For the full recipe, check out the detailed instructions. - Combine crushed pineapple and coconut cream. Start by draining the pineapple. Mix it with the coconut cream in a medium bowl. This creates a sweet base for your fluff. - Whip the heavy cream until soft peaks form. In a large bowl, use a mixer to whip the heavy cream. Watch for soft peaks to form. This makes the dessert light and airy. - Fold in the pineapple and coconut mixture. Carefully add the pineapple and coconut mix to the whipped cream. Gently fold it in, so you keep that fluffy texture. - Incorporate toasted shredded coconut. Next, add the toasted shredded coconut to the fluff mix. This adds a crunch and enhances the flavor. - Transfer to a serving bowl or cups. Use a spatula to scoop the fluff into a bowl or individual dessert cups. This makes it easy to serve. - Refrigerate before serving. Chill the fluff for at least one hour. This lets the flavors blend perfectly. You can find the full recipe at the beginning of this article. To make the best Pina Colada Fluff, texture is key. Start with the whipped cream. Beat it until you see soft peaks. This means it holds its shape but still looks smooth. Then, slowly add the powdered sugar. This step helps sweeten the cream without making it too thick. Keep beating until you see stiff peaks. The cream should stand tall and not droop. Next, draining the crushed pineapple is vital. Too much juice can make your fluff runny. Place the crushed pineapple in a fine mesh strainer. Let it sit for about ten minutes. You want it to be moist but not soggy. This keeps your dessert light and fluffy. Folding the ingredients together is a gentle process. Use a spatula for this. Start by adding a small amount of whipped cream to the pineapple mixture. Stir it gently to lighten it up. Then, add the pineapple mix to the rest of the whipped cream. Use a folding motion, not stirring. This keeps air in the fluff. You want a light and airy texture. For even more fun, try adding toasted coconut last. This adds a nice crunch and flavor. Just remember to save some for the top! You can find the Full Recipe above for all the steps in detail. Enjoy your delightful dessert! {{image_2}} You can change the recipe for Pina Colada Fluff to suit your taste. Here are some fun swaps: - Using Greek yogurt instead of heavy cream: This swap makes the fluff lighter. Greek yogurt adds creaminess and a bit of tang. It’s a great option if you want a healthier dessert. - Experimenting with different fruit flavors: Try mango or passion fruit instead of pineapple. Each fruit gives a new twist and keeps it exciting. You can mix and match to find your favorite flavor combo. - Alternatives for coconut cream: If you don’t have coconut cream, use whipped coconut milk. It offers a similar taste and texture. You can also try almond or cashew cream for a nutty flavor. Presentation can elevate your dessert experience. Here are some ideas to make your Pina Colada Fluff shine: - Ideas for dessert presentation: Serve the fluff in clear cups or jars. This lets the layers show off. You can add a sprinkle of toasted coconut on top. A maraschino cherry adds a pop of color and fun. - Pairing with tropical fruits or other desserts: Serve alongside fresh pineapple, mango, or strawberries. These fruits enhance the tropical vibe. You can also pair it with chocolate cake or brownies for a sweet mix. For the complete recipe, check out the [Full Recipe]. To keep your Pina Colada Fluff fresh, store it in an airtight container. This method stops air from getting in and keeps your dessert creamy. Place the container in the fridge right after serving. This treat can stay good for about 2 to 3 days. However, it tastes best within the first day or two. The longer it sits, the more the texture may change. If you want to save some for later, freezing is a great option. First, spoon the fluff into a freezer-safe container. Leave some space at the top, as it may expand. Seal the lid tightly to avoid freezer burn. You can freeze it for up to 2 months. When you’re ready to eat, take it out of the freezer. Let it thaw in the fridge for a few hours. Once it’s soft, stir it gently before serving. This keeps the fluff nice and light! Pina Colada Fluff is a light, creamy dessert that tastes like a tropical drink. It combines crushed pineapple, coconut cream, and whipped cream. This dessert is fluffy and refreshing, perfect for warm days. You can serve it at parties or enjoy it at home. It is a fun twist on the classic Pina Colada. Yes, you can make Pina Colada Fluff ahead of time. It tastes even better after chilling for a few hours. Prepare it in the morning and serve it at night. Just cover it well in the fridge to keep it fresh. This makes it a great option for busy days. You can easily adjust the sweetness of Pina Colada Fluff. If you like it sweeter, add more powdered sugar. Start with a tablespoon at a time. If you prefer it less sweet, cut back on the sugar. Taste as you go to find your perfect balance. Get creative with toppings for Pina Colada Fluff! You can use fresh fruit like mango or banana. Try adding crushed nuts for crunch, or use chocolate shavings for a twist. Whipped cream on top adds extra fluffiness. Choose what you love to make it your own! Pina Colada Fluff is a fun and easy treat with a tropical twist. You combine simple ingredients like pineapple and coconut cream for a delicious dessert. Following clear steps ensures a perfect fluffy texture. Remember to chill it for the best taste. You can even switch up the ingredients or try different toppings to make it your own. Enjoy this dessert at your next gathering, and impress your friends with your skills! Keep it fresh by following storage tips, and don't hesitate to experiment with flavors.

Pina Colada Fluff Irresistible Dessert Delight

Are you ready to take your dessert game to new heights? Pina Colada Fluff is the tropical treat you’ve been

To make delicious espresso brownie cupcakes, you will need the following ingredients: - 1 cup unsalted butter (2 sticks) - 2 cups granulated sugar - 4 large eggs - 1 teaspoon vanilla extract - 1 cup all-purpose flour - 1 cup unsweetened cocoa powder - 1 teaspoon baking powder - 1/2 teaspoon salt - 2 tablespoons instant espresso powder - 1/2 cup chocolate chips (optional for extra gooeyness) - Powdered sugar for dusting (optional) These ingredients create a rich, chocolatey base with a kick of espresso. You can take your cupcakes to the next level with these optional ingredients: - 1/2 cup chopped nuts (like walnuts or pecans) - 1 teaspoon almond extract for a nutty twist - Sea salt flakes for a sweet and salty finish These add-ins can enhance the flavor and texture of your cupcakes. Here are some handy conversions for your ingredients: - 1 cup = 240 milliliters - 1 tablespoon = 15 milliliters - 1 teaspoon = 5 milliliters - 1 cup of all-purpose flour = 120 grams - 1 cup of granulated sugar = 200 grams - 1 cup of cocoa powder = 100 grams Understanding these conversions helps when you need to adjust your recipe. For the full recipe, check the recipe card above. Start by preheating your oven to 350°F (175°C). This step warms up the oven so your cupcakes cook evenly. Next, take a muffin pan and line it with cupcake liners. This keeps your cupcakes from sticking and helps with easy serving. In a medium saucepan, melt 1 cup of unsalted butter over low heat. Once it melts, take it off the heat and let it cool a bit. Add 2 cups of granulated sugar to the butter. Stir well until the sugar mixes in nicely. Now, crack 4 large eggs into the mix, adding them one at a time. Stir well after each egg. Finally, add 1 teaspoon of vanilla extract and mix until smooth. In another bowl, whisk together 1 cup of all-purpose flour, 1 cup of unsweetened cocoa powder, 1 teaspoon of baking powder, 1/2 teaspoon of salt, and 2 tablespoons of instant espresso powder. This mix gives your cupcakes a rich flavor. Gently fold the dry mix into the wet mix. Be careful not to overmix, or your cupcakes can turn out tough. If you like, fold in 1/2 cup of chocolate chips for extra gooeyness. Evenly divide the batter among the lined muffin cups, filling each about 2/3 full. Place the pan in the preheated oven and bake for 18-20 minutes. To check if they are done, insert a toothpick into the center. It should come out with a few moist crumbs. After baking, let the cupcakes cool in the pan for 5 minutes. Then, transfer them to a wire rack to cool completely. If you want, dust them with powdered sugar for a sweet touch. For the full recipe, check the details above. To get the best espresso taste, use good quality espresso powder. Instant espresso powder works well in this recipe. It gives a nice, bold flavor without being too bitter. Mix the espresso powder with the dry ingredients to help it blend in well. You can also brew a small shot of espresso and add it to the wet mix for more depth. This makes your cupcakes rich and full of flavor. One common mistake is overmixing the batter. When you mix too much, your cupcakes can become tough. Mix until just combined for a soft texture. Another mistake is not measuring ingredients accurately. Use a kitchen scale for best results. Make sure your oven is at the right temperature, too. An oven thermometer can help ensure accuracy. Lastly, don’t skip cooling time. Let the cupcakes cool for the best taste and texture. To keep your cupcakes fresh, store them in an airtight container. This helps prevent them from drying out. If you want to keep them longer, you can freeze them. Wrap each cupcake in plastic wrap and place them in a freezer bag. When you’re ready to eat, let them thaw at room temperature. For a sweet touch, dust with powdered sugar before serving. Enjoy your delicious treats! For the full recipe, check the earlier section. {{image_2}} You can add nuts to your espresso brownie cupcakes to boost flavor and crunch. I love using walnuts or pecans. They blend well with the rich chocolate and coffee taste. Simply chop the nuts and fold them into the batter. Use about 1/2 to 1 cup, depending on your taste. The nuts will add texture and make each bite even more exciting. If you need a gluten-free option, swap the all-purpose flour for a gluten-free mix. Many brands offer great blends that work well in baking. Just be sure to check that they contain xanthan gum or add it yourself. This will help your cupcakes rise and stay soft. The flavor stays rich, and no one will guess they are gluten-free! You can also make these cupcakes vegan. Replace the eggs with flaxseed meal or applesauce. For each egg, use 1 tablespoon of flaxseed mixed with 2.5 tablespoons of water. Let it sit until it thickens. For the butter, use coconut oil or vegan butter. The cupcakes will still be rich and tasty, perfect for anyone who avoids animal products. You can find the full recipe earlier in this article to get started on these variations. Enjoy experimenting! I love these espresso brownie cupcakes fresh, but leftovers are a treat too. Store the cupcakes in an airtight container. This keeps them moist and soft. They stay good at room temperature for about three days. If you want them to last longer, put them in the fridge. They can last up to a week in the fridge. Just remember to bring them to room temperature before you enjoy them. Freezing these cupcakes is easy and smart. First, let the cupcakes cool completely. Then, wrap each one in plastic wrap. Place them in a freezer bag or a container. They can stay fresh for up to three months in the freezer. When you’re ready to eat, just take out what you need. After freezing, the cupcakes may lose some moisture. To refresh them, let them thaw in the fridge overnight. You can warm them up in the microwave for 10 to 15 seconds. This makes them soft and tasty again. Dust with powdered sugar if you want a sweet touch. Enjoy your espresso brownie cupcakes as if they were just baked! You can use brewed espresso or strong coffee. Brew a cup of espresso, then reduce it to about 1 tablespoon. This will give you a strong flavor. If you don't have espresso, use instant coffee granules. Just make sure they dissolve well in your mix. Yes, you can! If you want a rich taste, use cocoa powder. You can replace chocolate chips with an equal amount of cocoa powder. This will keep the chocolate flavor strong. Just remember to balance the sugar since cocoa can be less sweet. Espresso brownie cupcakes last about 3 days at room temperature. Store them in an airtight container to keep them fresh. If you want to save them longer, freeze them. They can last up to 3 months in the freezer. Just thaw them before serving. For the full recipe, check out the details above. You now have the tools to make great espresso brownie cupcakes. We explored ingredients, step-by-step instructions, and handy tips. You can create tasty variations and store your treats like a pro. Remember, practice makes perfect when baking. These cupcakes are fun to make and share with friends. Enjoy your baking journey and the delicious results!

Espresso Brownie Cupcakes Rich and Decadent Delight

Get ready to indulge in a rich and decadent delight: Espresso Brownie Cupcakes! These treats combine the deep, bold flavor

To make a tasty and filling potato stew, gather these main ingredients: - 4 large russet potatoes, peeled and diced - 2 carrots, chopped - 2 celery stalks, chopped - 1 medium onion, diced - 3 cloves garlic, minced - 1 cup green peas (fresh or frozen) - 4 cups vegetable broth - 1 teaspoon dried thyme - 1 teaspoon smoked paprika - 1 bay leaf - Salt and pepper to taste - 2 tablespoons olive oil These ingredients blend well together. The potatoes give the stew that hearty base. The carrots and celery add crunch and flavor. Garlic and onion bring a lovely aroma to the dish. You can add some optional ingredients for more flavor. Here are a few ideas: - 1 teaspoon of rosemary for a fresh taste - 1 cup of corn for sweetness - 1 tablespoon of soy sauce for umami - 1 teaspoon of chili powder for a kick These extras can help you customize your stew. Feel free to experiment with what you have on hand. Once you finish cooking your hearty potato stew, garnishing makes it even better. Try these garnishes: - Fresh parsley, chopped - A sprinkle of grated cheese - A dash of hot sauce for spice Garnishing adds color and can enhance the taste. It makes your dish look inviting and delicious. For the full recipe, check out the detailed cooking instructions. To start, gather all your ingredients. You will need: - 4 large russet potatoes, peeled and diced - 2 carrots, chopped - 2 celery stalks, chopped - 1 medium onion, diced - 3 cloves garlic, minced - 1 cup green peas (fresh or frozen) - 4 cups vegetable broth - 1 teaspoon dried thyme - 1 teaspoon smoked paprika - 1 bay leaf - Salt and pepper to taste - 2 tablespoons olive oil - Fresh parsley for garnishing Wash and peel the potatoes. Dice them into cubes. Chop the carrots and celery into small pieces. Dice the onion and mince the garlic. Set everything aside. Now, let’s cook. In a large pot, heat the olive oil over medium heat. Add the diced onion and minced garlic. Sauté them together until the onion turns soft, about 4-5 minutes. Next, add the chopped carrots and celery to the pot. Stir them in and cook for another 5 minutes. This helps release their sweet flavors. Time to add the main ingredients! Toss in the diced potatoes, vegetable broth, dried thyme, smoked paprika, and bay leaf. Bring this mix to a boil, then reduce the heat to low. Cover the pot with a lid and let it simmer for 20 minutes. Check if the potatoes are tender by piercing them with a fork. After 20 minutes, stir in the green peas. Cook for another 5 minutes. This gives the peas a nice warmth. Season your stew with salt and pepper. Taste it and adjust the flavors as needed. Finally, remove the bay leaf and discard it. Your hearty potato stew is ready to enjoy! Serve it hot in bowls. Garnish each bowl with fresh parsley for a pop of color. You can pair this stew with crusty bread or a simple salad. It’s a warm meal that brings comfort to any table. For the full recipe, check out the section above! To make the best hearty potato stew, start with fresh ingredients. Use ripe, firm potatoes for the best taste. Cut your veggies into equal sizes. This helps them cook evenly. Sauté the onions and garlic well. This brings out their sweet flavors. Let the stew simmer gently. This allows the flavors to blend well. You can easily swap ingredients to fit your needs. If you need a gluten-free option, use gluten-free broth. For a vegan stew, skip the butter and use olive oil. You can also add chickpeas instead of peas for more protein. If you like a thicker stew, add a bit of cornstarch mixed with water. Add herbs like rosemary or basil for a fresh taste. You can try using vegetable broth instead of water. This adds depth to your stew. Another tip is to toss in a splash of white wine. It gives a nice zing! For creaminess, stir in a dollop of sour cream or coconut milk before serving. These tips will make your hearty potato stew shine. For the complete recipe, check out the Full Recipe section. {{image_2}} You can easily make this stew vegetarian or vegan. Simply use vegetable broth, like in the Full Recipe. Skip any meat and add more veggies. Try adding zucchini or bell peppers for extra flavor. Use beans or lentils to give it heartiness. They add protein and make the stew filling. If you want to add protein, beans or lentils work great. Black beans or kidney beans are tasty choices. Lentils cook fast and blend well with the stew. You can also add meat if you prefer. Chicken or beef adds a rich taste. Brown the meat first, then follow the stew steps. Want to change the flavor? Try different spices! Add cumin for warmth or turmeric for a golden color. You can use fresh herbs like rosemary or basil too. A splash of hot sauce can spice things up. Adjust the seasoning to fit your taste. Each change makes the stew unique and fun. To store leftover hearty potato stew, let it cool first. Once cool, transfer it to an airtight container. Make sure to seal it well. Place the container in the fridge. Leftovers can stay fresh for up to three days. If you plan to eat it later, freezing is a good option. To freeze the stew, use a freezer-safe container. Leave some space at the top. This space lets the stew expand as it freezes. You can freeze it for about three months. When you’re ready to eat, thaw it in the fridge overnight. This keeps the flavors intact. When reheating, use a pot on the stove. Heat it on low to medium heat. Stir often to avoid sticking. You might need to add a splash of broth or water. This helps to regain the stew's original texture. If you use a microwave, heat in short bursts. Stir in between to ensure even heating. Enjoy your comforting stew! Hearty Potato Stew stays fresh in the fridge for about three to five days. Keep it in an airtight container. This helps to lock in flavor and moisture. If you notice any odd smell or color, it's best to toss it. Trust your senses; they guide you well. Yes, you can make Hearty Potato Stew in advance. It tastes even better the next day! The flavors meld together nicely as it sits. Just let it cool before storing it in the fridge. When you are ready to eat, simply reheat it on the stove or in the microwave. Hearty Potato Stew pairs well with many sides. Here are some great options: - Crusty bread or rolls for dipping - A fresh green salad to add crunch - Rice or quinoa for extra fiber - Pickles or relishes for a tangy bite These sides will make your meal more filling and fun. Enjoy the stew with your favorite choices! For the full recipe, check out the Hearty Potato Stew details above. Hearty potato stew is a warm and filling dish. We discussed key ingredients, preparation, and cooking steps. I shared tips to improve your stew with swaps and variations. You can make it vegetarian or add protein for a boost. Remember to store leftovers properly for later meals. This dish is flexible and easy to make, perfect for any home. Enjoy trying your own creations!

Hearty Potato Stew Comforting and Easy Family Meal

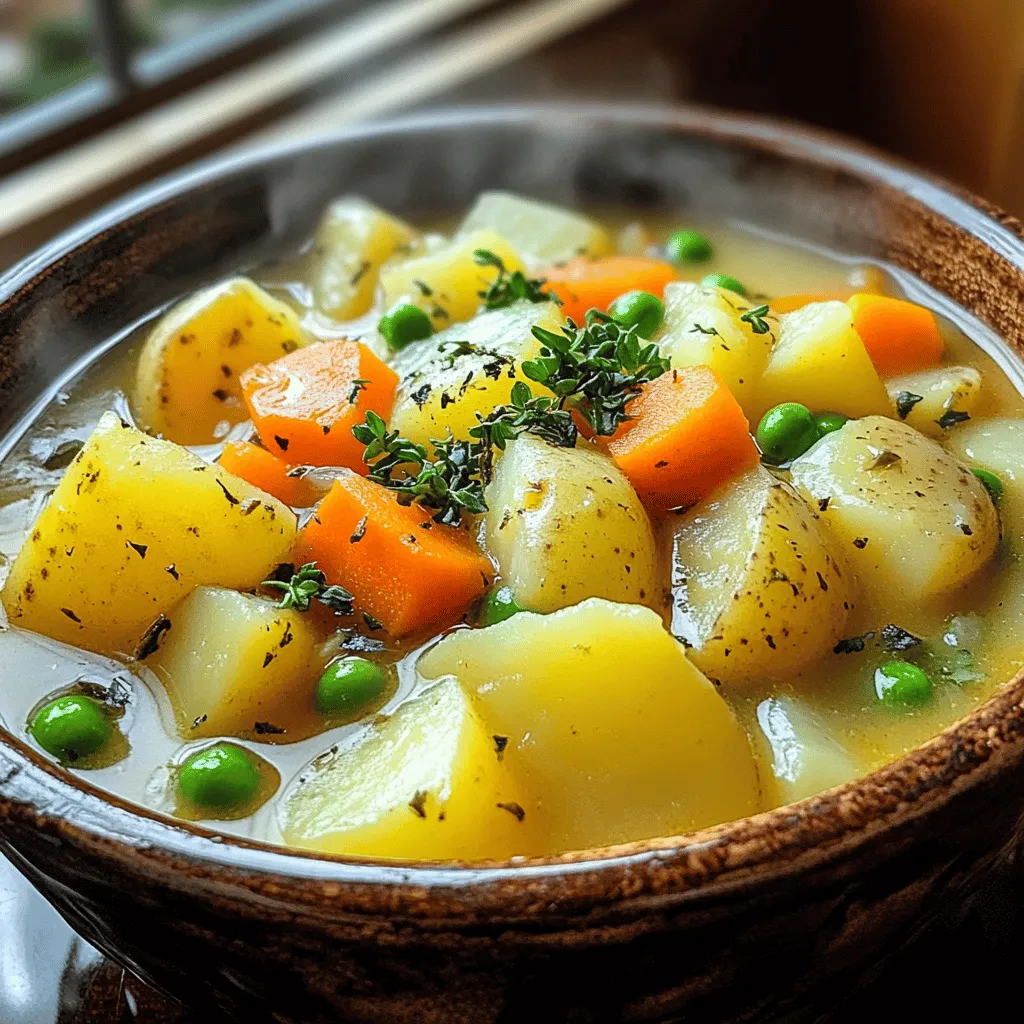
Are you looking for a warm and cozy meal that the whole family will love? Hearty Potato Stew is the

To make creamy Parmesan beef rigatoni, you will need these key ingredients: - 12 oz rigatoni pasta - 1 lb ground beef - 1 medium onion, diced - 3 cloves garlic, minced - 1 cup vegetable broth - 1 cup heavy cream - 1 cup grated Parmesan cheese - 1 teaspoon Italian seasoning - Salt and pepper to taste - 2 tablespoons olive oil - Fresh parsley, chopped (for garnish) These ingredients create a perfect blend of flavors and textures. The rigatoni holds the sauce well. The ground beef gives it heartiness. The cream and cheese make it rich and smooth. If you want to switch things up, consider these alternatives: - Use turkey or chicken instead of ground beef for a lighter dish. - Swap heavy cream with half-and-half for a lighter sauce. - Try using vegetable broth for a vegetarian version. - You can replace Parmesan with Pecorino Romano for a sharper flavor. These swaps can help you cater to your taste or dietary needs. They keep the dish exciting and fresh. To make this meal, you’ll need some basic kitchen tools: - Large pot for boiling pasta - Large skillet for cooking beef and making the sauce - Spatula for stirring and breaking up the beef - Measuring cups for accurate ingredient portions - Knife and cutting board for chopping onion and garlic Having the right tools makes cooking easier and more enjoyable. You can find all these items in most kitchens. If you follow the full recipe, you’ll create a delicious dish that everyone will love. To make creamy Parmesan beef rigatoni, start with the pasta. Bring a large pot of salted water to a boil. Add 12 oz of rigatoni pasta and cook it until it's al dente. This usually takes around 10-12 minutes, so check the package for exact times. Once done, drain the pasta and set it aside. Next, heat 2 tablespoons of olive oil in a large skillet over medium heat. Add 1 medium diced onion and 3 minced garlic cloves. Sauté them until the onion turns translucent. This step adds great flavor to the dish. Now, add 1 lb of ground beef to the skillet. Break it apart with a spatula and cook for about 5-7 minutes until it is browned and cooked through. Season the beef with salt and pepper to taste. After the beef is browned, pour in 1 cup of vegetable broth. Stir it well and let it simmer for about 3 minutes. This will help reduce the broth. Then, lower the heat and add 1 cup of heavy cream. Stir continuously while adding 1 cup of grated Parmesan cheese gradually. Mix until the cheese melts and the sauce becomes creamy. Finally, stir in 1 teaspoon of Italian seasoning for extra flavor. Now, combine the cooked rigatoni with the sauce in the skillet. Toss everything together until the pasta is well coated. If the sauce seems too thick, add a splash of pasta water until you reach your desired creaminess. Serve your dish hot, garnished with freshly chopped parsley for a pop of color. - Always use a large pot with plenty of water for boiling pasta. - Add salt to the boiling water; it should taste like the sea. - Stir the pasta occasionally to prevent sticking. - Check the pasta a minute before the package time to avoid overcooking. 1. Boil pasta: 10-12 minutes. 2. Sauté onion and garlic: 3-4 minutes. 3. Brown beef: 5-7 minutes. 4. Simmer broth: 3 minutes. 5. Make the sauce: 5 minutes. 6. Combine and serve: 2 minutes. This timing ensures you have a delicious, creamy dish ready in about 30 minutes. For the full recipe, check the details above! To make your Creamy Parmesan Beef Rigatoni truly shine, focus on the flavors. Use fresh garlic and onion; they add depth. Try adding a splash of white wine when cooking the beef. This adds a nice acidity that balances the creaminess. For more flavor, add a pinch of red pepper flakes for a mild heat. Fresh herbs like basil or thyme can brighten the dish. Just chop them and sprinkle on top just before serving. One common mistake is overcooking the pasta. Cook it al dente, as it will soften further in the sauce. Another mistake is not seasoning enough. Always season your beef while cooking. Taste the sauce before mixing in the pasta. If it needs salt or pepper, add it now. Lastly, don’t rush the sauce. Let it simmer to allow the flavors to meld. To reheat your Creamy Parmesan Beef Rigatoni, use a skillet instead of the microwave. Add a splash of cream or broth to keep it creamy. Heat over medium-low, stirring gently until warm. This way, your dish stays rich and delicious. If you use the microwave, do it in short bursts and stir in between. This helps maintain the creamy texture. For best results, serve fresh, but leftovers can still taste great if reheated properly. {{image_2}} You can easily make a vegetarian version of creamy Parmesan rigatoni. Start by swapping the ground beef for mushrooms or lentils. Mushrooms add a rich flavor and meaty texture. Lentils are great for protein and fiber. You can use 1 lb of either option. Follow the same cooking steps as in the full recipe. Just be sure to sauté them well to enhance their flavors. If you want to change the protein, there are many options. Ground turkey or chicken works well. You can also use plant-based crumbles for a vegan dish. Consider adding cooked sausage for a spicy kick. Each choice gives a different taste but keeps the dish creamy and delicious. Adding vegetables boosts nutrition and flavor. Try spinach or kale for a pop of color and health benefits. Bell peppers or zucchini can add sweetness and crunch. Fresh herbs like basil or thyme will brighten the dish. Toss them in during the last few minutes of cooking. This way, they stay vibrant and fresh. Experiment with what you love to make your rigatoni unique! To keep your creamy Parmesan beef rigatoni fresh, store it in an airtight container. Make sure it cools down to room temperature before sealing. This helps prevent moisture build-up. Always label the container with the date. This way, you can track how long it has been stored. You can freeze creamy Parmesan beef rigatoni for later. First, let it cool completely. Next, portion the rigatoni into freezer-safe bags or containers. Remove as much air as possible before sealing. This helps prevent freezer burn. When you're ready to enjoy it again, thaw it overnight in the fridge before reheating. In the fridge, creamy Parmesan beef rigatoni lasts about three to four days. When reheating, use a skillet over low heat for even warming. Add a splash of water or broth to help restore creaminess. You can also microwave it in short bursts, stirring in between. Make sure it’s heated all the way through before serving. For best results, consume it within the first few days. You can find the full recipe to enjoy this dish fresh and hot. To make creamy Parmesan beef rigatoni, follow these steps: 1. Cook 12 oz of rigatoni pasta in salted water until al dente. 2. In a skillet, heat 2 tablespoons of olive oil. 3. Add 1 medium diced onion and 3 minced garlic cloves, cooking until soft. 4. Add 1 lb of ground beef, breaking it up with a spatula. Cook until browned. 5. Pour in 1 cup of vegetable broth and let it simmer for 3 minutes. 6. Lower the heat and add 1 cup of heavy cream, stirring well. 7. Gradually mix in 1 cup of grated Parmesan cheese until melted. 8. Add Italian seasoning, salt, and pepper to taste. 9. Toss the cooked rigatoni in the creamy sauce. 10. Serve hot, garnished with fresh parsley. This method gives you a rich and creamy dish that's simple to make. For the full recipe, check the recipe section above. Yes, you can use other pasta shapes. Penne or fusilli work well too. Each shape holds the sauce differently. Rigatoni has ridges that catch the creamy sauce. This makes every bite delicious. If you want a gluten-free option, use gluten-free pasta. Just follow the cooking time on the package. If you want to replace heavy cream, use milk and butter instead. Mix 3/4 cup of milk with 1/4 cup of melted butter. This will give a similar richness. You can also use half-and-half for a lighter option. For a dairy-free choice, try coconut cream or cashew cream. Each substitute will change the flavor a bit, so choose what you like best! This article covered how to make creamy Parmesan beef rigatoni, ingredient options, and key tools. You learned step-by-step cooking tips to ensure perfect pasta. We explored common mistakes and reheating methods for great taste. Variations, like vegetarian options and adding vegetables, let you customize your dish. Finally, you found best practices for storing and freezing leftovers. Use these tips to create a comforting meal your family will love. Enjoy the cooking process and impress your loved ones with your skills.

Creamy Parmesan Beef Rigatoni Simple and Delicious Meal

Looking for a quick and tasty dinner idea? Creamy Parmesan Beef Rigatoni is your answer! This dish combines rich flavors

Older posts
Newer posts
← Previous Page1 … Page47 Page48 Page49 Next →

dsad

© 2025 savorystride • Built with GeneratePress

Our Policies

  • Copyright Policy
  • Cookie Policy
  • GDPR Policy
  • Privacy Policy
  • Disclaimer
  • Terms Of Use

More Information

  • Home
  • About
  • Contact
  • Appetizers
  • Dessert
  • Dinner
  • Drinks
©2025, savorystride About Back To Top