Skip to content
DisclaimerTerms Of UseGDPR PolicyCookie Policy

savorystride

  • Home
  • Drinks
  • Appetizers
  • Dinner
  • Dessert
  • About
  • Contact
  • Privacy Policy
DisclaimerTerms Of UseGDPR PolicyCookie Policy

Hazel

When making Sticky Honey Garlic Sausage Pasta, you need fresh and simple ingredients. Here’s what you will need: - 250g pasta (penne or fusilli) - 250g Italian sausages (chicken, turkey, or plant-based) - 3 tablespoons honey - 4 cloves garlic (minced) - 1 tablespoon soy sauce - 2 tablespoons olive oil - 1 teaspoon red pepper flakes - 1 bell pepper (diced) - 1 cup broccoli florets - 2 green onions (sliced, for garnish) - Fresh parsley (chopped, for garnish) - Salt and pepper These ingredients create a balance of sweet and savory flavors. The honey adds a nice touch of sweetness, while the garlic gives a strong kick. Choose your favorite sausage to make this dish your own. For the veggies, feel free to mix it up based on what you have. You can add or swap in your favorites. This recipe is flexible and fun! For the full recipe, check out the detailed instructions and tips to make your cooking easy and enjoyable. To cook pasta to al dente, start with a large pot. Fill it with water and add a generous amount of salt. The water should taste like the sea. Bring it to a boil. Once boiling, add your pasta. Stir it occasionally. Cook according to package instructions, usually about 8 to 10 minutes. Check the pasta a minute or two early. It should be firm but not hard. Drain and set it aside. For the sausage, take it out of its casing. Use your hands to crumble it into pieces. Heat olive oil in a large skillet over medium heat. Add the crumbled sausage to the skillet. Cook for 6 to 8 minutes. Stir often until it is browned and fully cooked. This adds great flavor to the dish. Once the sausage is done, it’s time for the veggies. Add diced bell pepper and broccoli florets to the skillet. Cook them for 3 to 4 minutes until they are tender. While the veggies cook, whisk together the sauce. In a small bowl, mix honey, minced garlic, soy sauce, and red pepper flakes. Once the veggies are ready, pour the sauce over them. Now, let’s bring it all together! Add the cooked pasta to the skillet. Toss everything well. Make sure the pasta is coated in the sauce. Cook for an additional 2 to 3 minutes to heat through. This helps the flavors meld. Taste your dish before serving. Adjust seasoning with salt and pepper. If you want it sweeter, drizzle in more honey. This will balance the flavors perfectly. Enjoy your Sticky Honey Garlic Sausage Pasta! For the complete recipe, check the Full Recipe link. - Best pasta varieties for this dish: I love using penne or fusilli. They hold the sauce well. Their shapes catch the honey garlic sauce, giving each bite flavor. - How to avoid overcooking vegetables: Cook your bell peppers and broccoli just until tender. This keeps them bright and crisp. I suggest sautéing for 3-4 minutes. This way, you keep the nutrients and texture. - Presentation tips for a beautiful dish: Serve the pasta in deep bowls. Drizzle a bit of extra honey on top for shine. Add a sprinkle of green onions and parsley for color. A bit of grated Parmesan cheese adds a nice touch too. - Adding sides or garnishes: A simple green salad pairs well with this pasta. Garlic bread makes a great side too. Both add freshness and balance to the meal. - Recommended skillet type: Use a large, non-stick skillet for cooking. This helps prevent sticking and makes cleanup easy. A cast-iron skillet also works great for a nice sear on the sausage. - Useful kitchen utensils for preparation: Have a good chef's knife for chopping. A sturdy cutting board is also handy. Use a whisk for mixing the sauce smoothly. A pasta pot with a colander insert makes draining easy too. For the full recipe, make sure to check out the Sticky Honey Garlic Sausage Pasta recipe! {{image_2}} You can change up the sausage type in this dish. Chicken or turkey sausages work great. If you want a plant-based version, try using vegan sausages. Each type brings its own flavor. For vegetables, feel free to swap in what you have. Zucchini, spinach, or snap peas can work well. You can also use seasonal veggies. Fresh ingredients make the dish shine. To make this dish gluten-free, choose gluten-free pasta. Many brands offer great options that taste just as good. Just check the labels to ensure they meet your needs. If you want vegetarian or vegan adaptations, use plant-based sausage and gluten-free pasta. You can also add more veggies like mushrooms or eggplant to make it heartier. Want to add a kick? Try adding more red pepper flakes or some cayenne pepper. A little heat can really boost the flavors. You can also mix in other sauces. A splash of balsamic vinegar or a dash of hot sauce could elevate the taste. You can even top it with cheese, like parmesan, for a creamy finish. Feel free to get creative with these ideas and make the dish your own. Check out the Full Recipe for more details! To keep your sticky honey garlic sausage pasta fresh, use airtight containers. Glass or plastic containers work well. Make sure they seal tightly. Store leftovers in the fridge. They are best eaten within three days. After that, the flavor may fade. When you’re ready to enjoy leftovers, the best way to reheat pasta is on the stove. Place the pasta in a skillet with a splash of water or broth. Heat it over medium-low heat. Stir often to keep it moist. You can also use the microwave, but check and stir every minute. This helps avoid drying out the dish. If you want to save some for later, you can freeze the pasta. Let it cool completely before packing it away. Use freezer-safe containers or bags. Label them with the date. To thaw, place it in the fridge overnight. Reheat as mentioned above. This way, you'll enjoy your sticky honey garlic sausage pasta even months later! For the full recipe, check out the [Full Recipe]. This dish takes about 35 minutes total. You need 10 minutes to prep and 25 minutes to cook. This quick time makes it great for busy days. Yes, you can make this pasta ahead of time. Cook the pasta and sausage as directed. Store them separately in the fridge. Mix them together when ready to serve. This helps keep the pasta from getting soggy. You can serve this pasta with garlic bread or a fresh salad. A simple green salad pairs well. Try adding some crunchy veggies to your salad for extra flavor. You can use regular garlic. Just chop it finely to get the right flavor. Minced garlic gives a stronger taste. Adjust the amount to suit your taste. Yes, this pasta is kid-friendly! The sweet honey and mild sausage make it tasty for children. You can adjust the red pepper flakes to keep it mild. For the full Sticky Honey Garlic Sausage Pasta recipe, click [here](#). You learned how to create a tasty Sticky Honey Garlic Sausage Pasta. We covered the key ingredients, cooking steps, and helpful tips. This dish is easy to make and perfect for any meal. You can tweak the recipe for different diets or flavors. Plus, we talked about storing leftovers and reheating them. Now you have all the tools to impress anyone with this dish. Enjoy making it your own!

Sticky Honey Garlic Sausage Pasta Flavorful Dinner Delight

Are you ready to elevate your dinner game? My Sticky Honey Garlic Sausage Pasta is both easy and delicious. This

- 1 pound ground beef - 1 tablespoon olive oil - 1 medium onion, diced - 2 cloves garlic, minced - 1 can (15 oz) black beans, rinsed and drained - 1 cup corn kernels (fresh or frozen) - 1 cup shredded cheddar cheese - 4 large flour tortillas - 1 cup salsa - 1 avocado, sliced (for serving) - Fresh cilantro, chopped (for garnish) - Frozen French fries (or homemade), for serving In this recipe, ground beef is the star. It offers a hearty flavor and pairs well with spices. Olive oil helps sauté the onion and garlic, making a tasty base. Don’t skip the black beans; they add protein and fiber. Corn brings a sweet crunch, while cheddar cheese melts beautifully, making everything gooey. Tortillas wrap all these ingredients and keep them together. Salsa adds a fresh kick, and avocado gives a creamy touch. Lastly, fries add that crispy side, making this meal extra fun. - Additional toppings: sour cream, jalapeños - Alternative protein options: chicken, turkey, or plant-based Feel free to customize your burritos! You can add sour cream for creaminess. Jalapeños offer heat if you like spice. If you want a twist, try chicken or turkey instead of beef. Plant-based proteins are great too! You can use lentils or beans for a veggie version. For the full recipe, check the main article. 1. Sautéing onion and garlic: Start by heating 1 tablespoon of olive oil in a large skillet over medium heat. Add 1 medium onion, diced, and cook for about 3-4 minutes. You want the onion to turn translucent. Next, add 2 cloves of minced garlic and cook for another minute. This step builds flavor. 2. Browning ground beef and adding spices: Increase the heat to medium-high. Add 1 pound of ground beef to the skillet. Cook until it is brown, breaking it apart with a wooden spoon. Drain any excess fat. Stir in 1 teaspoon of ground cumin, 1 teaspoon of chili powder, and ½ teaspoon of paprika. Mix well to combine all the spices. 1. Combining beef with beans and corn: Lower the heat to medium. Add 1 can of black beans (rinsed and drained) and 1 cup of corn kernels to the skillet. Cook for another 2-3 minutes until everything is heated through. Remove from heat and stir in half of the 1 cup of shredded cheddar cheese. 2. Preparing and filling tortillas: Warm 4 large flour tortillas in a dry skillet until they are pliable. On each tortilla, place a generous scoop of the beef mixture and a spoonful of salsa. Roll up the tortilla tightly, folding in the sides as you go. 1. Melting cheese in the skillet: Place the burritos seam-side down in the same skillet. Top each burrito with the remaining shredded cheese. Cover the skillet and cook over low heat for about 3-5 minutes until the cheese melts. 2. Cooking fries according to instructions: While the burritos cook, prepare the frozen French fries according to the package instructions. Bake or fry them until they are crispy. For the full recipe, check out the details above. Enjoy these cheesy beef burritos with fries for a tasty meal! To make the best burrito, start with warm tortillas. This keeps them soft and easy to roll. Heat them in a dry skillet for a few seconds on each side. If they are too cold, they may crack. When rolling your burrito, place a good amount of filling in the center. Fold in the sides first, then roll from the bottom up. Tuck it tightly as you go. This way, your fillings stay put, and you get that perfect shape. Pair your burritos with crispy fries for a tasty meal. You can also add some fresh salsa or guacamole on the side for extra flavor. Sliced avocado adds creaminess too. A sprinkle of fresh cilantro gives a nice touch. For drinks, consider serving with a cold soda or a refreshing iced tea. These drinks complement the flavors well and enhance your meal experience. If you want some heat, add hot sauce to your beef filling. This gives your burritos a spicy kick that many love. You can also try jalapeños for an extra punch. For a vegetarian option, swap the beef for black beans and vegetables like bell peppers or zucchini. This keeps the meal hearty and adds great flavor. You can still use the same spices to keep it tasty. For the full recipe, click here: [Full Recipe]. {{image_2}} You can switch the ground beef for chicken, turkey, or even sausage. Each meat brings its own flavor. If you want a healthier choice, consider ground turkey. It has less fat than beef but still tastes great. Chicken is also a lighter option. Just cook it until it's juicy, and it will work well in the burrito. Changing the spice level is easy. You can add more chili powder for a kick or try some cayenne pepper. If you like it mild, just stick to the basic spices. Adding unique ingredients can also change the taste. Roasted peppers add a nice smoky flavor. You can even toss in some corn or black olives for extra texture. A side salad pairs well with these burritos. Just mix some greens with tomatoes and a light dressing. It adds freshness to your meal. You can also try different fry options. Sweet potato fries are a tasty alternative. They bring a sweet touch that contrasts nicely with the savory burritos. To keep your cheesy beef burritos fresh, store them in the fridge. I recommend using airtight containers. This helps prevent moisture loss and keeps the flavors intact. Make sure to let the burritos cool before sealing them up. If you do this, they will stay tasty for up to three days. When it's time to enjoy leftovers, you have a couple of great options. The oven is best for reheating burritos. Preheat it to 350°F (175°C) and wrap the burrito in foil. Bake for about 15-20 minutes until hot. If you're in a hurry, the microwave works too. Just place the burrito on a microwave-safe plate. Heat it for one to two minutes, but keep an eye on it. To keep that nice texture, avoid overcooking. You can freeze these burritos for later too. If you want to freeze them before cooking, wrap each one tightly in foil or plastic wrap. Place them in a freezer bag. They can last for up to three months. When you’re ready to eat, thaw them in the fridge overnight. To cook from frozen, bake at 350°F (175°C) for about 30-35 minutes. If you freeze after cooking, let them cool first. Then, follow the same steps for wrapping and freezing. Enjoy your cheesy beef burritos whenever you want! For the full recipe, check out the [Full Recipe]. Yes, you can prepare these burritos ahead of time. It's simple! Cook the beef mixture and let it cool. Then, fill the tortillas and wrap them tightly. You can store them in the fridge for up to two days. When ready to eat, just heat them in a skillet until warm. This saves time on busy days! Several tasty sides pair well with cheesy beef burritos. Here are a few ideas: - Mexican rice: This adds a nice flavor and texture. - Guacamole: Creamy and fresh, it complements the burrito well. - Corn salad: A refreshing mix that balances the meal. - Chips and salsa: Crunchy and zesty, they make great snacks. These sides enhance your meal and make it even more satisfying. Making healthier burritos is easy. Here are some options: - Use lean beef: Ground turkey or chicken can cut calories. - Add more veggies: Spinach, bell peppers, or zucchini boost nutrition. - Opt for whole wheat tortillas: These offer more fiber. - Skip or reduce cheese: Use less cheese or try a lighter version. These small changes can make your burritos healthier without losing taste. For the full recipe, check out the detailed instructions above! In this guide, I've shared how to make delicious cheesy beef burritos. You learned about the key and optional ingredients, cooking methods, and tips to perfect your burritos. Remember, you can customize them with different proteins and flavors. Don't hesitate to experiment with sides and toppings that enhance your meal. With these insights, you're ready to create a burrito that fits your taste and brings joy to your table. Enjoy crafting your perfect burrito!

Cheesy Beef Burritos with Fries Tasty and Satisfying

If you’re craving a meal that’s cheesy, beefy, and totally satisfying, you’re in the right place! Cheesy Beef Burritos with

To make a delightful cast iron banana bread, you need these key ingredients: - 3 ripe bananas, mashed - 1/3 cup melted coconut oil - 1/2 cup brown sugar - 1/4 cup granulated sugar - 1 egg, beaten - 1 teaspoon vanilla extract - 1 teaspoon baking soda - Pinch of salt - 1 cup all-purpose flour - 1/2 cup chopped walnuts or pecans (optional) - 1/2 teaspoon cinnamon (optional) Each ingredient plays a role in creating the perfect texture and flavor. Ripe bananas add natural sweetness and moisture, making the bread tender. Coconut oil keeps it rich and flavorful. Using brown sugar gives a deeper flavor, while granulated sugar adds sweetness. The beaten egg helps bind everything together. Vanilla extract gives a warm aroma. Baking soda acts as a leavening agent, allowing the bread to rise. A pinch of salt balances the flavors. All-purpose flour provides structure, while the optional nuts and cinnamon bring extra texture and warmth to the taste. Gather these ingredients and get ready to create a warm, tasty treat! For the full recipe with instructions, check out the [Full Recipe]. 1. Preheat your oven and cast iron skillet. Set your oven to 350°F (175°C). Place your 10-inch cast iron skillet inside. This helps the bread cook evenly and develop a nice crust. 2. Combine ingredients in the correct order. In a large bowl, mash the 3 ripe bananas. Mix in 1/3 cup melted coconut oil until smooth. Then, add 1/2 cup brown sugar and 1/4 cup granulated sugar. Stir well until combined. 3. Folding in optional ingredients. Next, mix in 1 beaten egg and 1 teaspoon vanilla extract. Add 1 teaspoon baking soda and a pinch of salt. Slowly fold in 1 cup all-purpose flour until just mixed. If you want to add flavor, gently fold in 1/2 cup chopped nuts and 1/2 teaspoon cinnamon. 1. Pour batter into the skillet. Carefully take the hot skillet out of the oven using oven mitts. Pour the batter in and spread it evenly with a spatula. 2. Baking time and temperature. Place the skillet back in the oven. Bake for 50-60 minutes. Keep an eye on it as it bakes. 3. Checking for doneness. To check if your banana bread is ready, insert a toothpick into the center. If it comes out clean, your bread is done! Let it cool for about 10 minutes in the skillet before moving it to a wire rack. For more details, check the Full Recipe. Enjoy your delicious cast iron banana bread! - Best bananas for flavor Use ripe bananas. Look for ones with lots of brown spots. They are sweet and flavorful. Overripe bananas make the best banana bread. - Avoiding overmixing the batter Mix gently when you add flour. Overmixing can make the bread tough. A few lumps are okay. This keeps your bread light and fluffy. - Ensuring even cooking in a cast iron skillet Preheat your skillet. This helps the bread cook evenly. Pour the batter into the hot skillet. It will create a nice crust. - Benefits of baking with cast iron Cast iron holds heat well. This gives your bread a crispy crust. It also helps with even baking. Plus, cast iron can go from stovetop to oven. - Maintenance tips for cast iron skillets Clean your skillet with hot water. Avoid soap, as it strips the seasoning. Dry it well to prevent rust. Apply a light coat of oil after cleaning to keep it in good shape. For a full recipe, check out the detailed steps above. Enjoy your baking! {{image_2}} You can make your cast iron banana bread even better with some fun additions. Here are a few ideas: - Chocolate chips: Adding chocolate chips makes it taste rich and sweet. You can use semi-sweet or dark chocolate. - Cocoa powder: Mixing in cocoa powder will give your banana bread a chocolate twist. Use about ¼ cup to start. - Different nuts: Try adding pecans, almonds, or hazelnuts. Each nut adds a nice crunch and flavor. - Dried fruits: Raisins, cranberries, or dates can add sweetness and chewiness. They work well with the banana flavor. If you need to change the recipe for dietary needs, there are easy swaps: - Gluten-free options: Use gluten-free flour blends to make this banana bread gluten-free. Make sure the blend has xantham gum to help with texture. - Vegan substitutes: For a vegan version, replace the egg with flaxseed meal or applesauce. Use coconut oil or a vegan butter for a dairy-free option. These variations make the recipe more fun and tasty! You can find the full recipe to get started on your delicious cast iron banana bread. You can store banana bread in two ways: at room temperature or in the fridge. - Room temperature: If you plan to eat it within two to three days, just wrap it in plastic wrap or foil. This keeps it soft and fresh. - Refrigerating: If you want to keep it longer, place it in the fridge. It can last up to a week this way, but it may dry out a bit. To freeze banana bread, wrap slices tightly in plastic wrap or foil. Place them in a freezer bag. This method keeps the bread fresh for up to three months. When it’s time to enjoy your banana bread again, reheating is key. Here are the best methods: - Microwave: Place a slice on a plate. Heat for 10 to 15 seconds. This warms it up nicely. - Oven: Preheat the oven to 350°F (175°C). Wrap the bread in foil to keep it moist. Bake for about 10 to 15 minutes. To keep the bread moist, avoid reheating it too long. Check often to ensure you don’t dry it out. Enjoy your delicious treat warm! Banana bread can last for about 3 to 5 days at room temperature. To keep it fresh, store it in an airtight container. You can also refrigerate it for up to a week. If you want it to last longer, freeze it. Wrap slices or the whole loaf tightly in plastic wrap and foil. This way, it can last up to 3 months. Yes, you can use frozen bananas! They work great in this recipe. Just let them thaw before mashing. The bananas may be mushy, but that’s perfect for banana bread. You can even mash them while still frozen. This makes it easy to add them to your mix. Banana bread is tasty on its own, but you can enhance it. Try spreading butter or cream cheese on warm slices. For breakfast, serve it with yogurt or fresh fruit. As a dessert, add a scoop of vanilla ice cream. You can also drizzle honey or maple syrup on top for extra sweetness. To check if your banana bread is done, insert a toothpick into the center. If it comes out clean or with a few crumbs, it’s ready. If it has wet batter, it needs more time. The top should be golden brown, and the edges may pull away from the skillet. This shows it's cooked well. In this article, I shared simple steps to bake delicious banana bread. We discussed ingredients like ripe bananas, coconut oil, and optional nuts. I detailed the preparation, baking process, and key tips for perfect results. You learned about variations to suit different tastes and dietary needs. Finally, we covered how to store and reheat your banana bread. Enjoy the process and experiment with flavors. Baking banana bread can be easy and fun. Now, get started and enjoy your creation!

Cast Iron Banana Bread Classic and Tasty Treat

Are you ready to make a delicious cast iron banana bread? This classic treat is easy and fun to whip

To make Creamy Shrimp Enchiladas, you need fresh and tasty ingredients. Here is what you'll need: - 1 pound shrimp, peeled and deveined - 2 tablespoons olive oil - 1 small onion, finely chopped - 2 cloves garlic, minced - 1 cup corn kernels (fresh or frozen) - 1 cup black beans, rinsed and drained - 1 teaspoon cumin - 1 teaspoon smoked paprika - 1/2 teaspoon chili powder - Salt and pepper to taste - 8 corn tortillas - 1 cup sour cream - 1 cup shredded cheese (cheddar or Mexican blend) - 1/2 cup fresh cilantro, chopped - 1 lime, juiced These ingredients create a creamy and flavorful filling. The shrimp gives a sweet taste, while spices add warmth. You can add a few items for an extra flavor boost. Here are some great options: - Chopped jalapeños for heat - Avocado slices for creaminess - Extra lime juice for tang - Diced tomatoes for freshness - Extra spices like oregano or cayenne These additions can take your enchiladas to the next level. Fresh shrimp makes a big difference in taste. Here are some tips to find the best shrimp: - Look for shrimp with a clean, ocean-like smell. - Choose shrimp that are firm to the touch. - Avoid shrimp with black spots or a slimy texture. - If buying frozen, ensure they are properly packaged and not freezer-burned. With these tips, you'll pick shrimp that adds flavor and quality to your dish. For the complete instructions on how to prepare this dish, check the Full Recipe. First, gather your ingredients for the shrimp filling. This part sets the stage for a tasty dish. In a skillet, heat 2 tablespoons of olive oil over medium heat. Once hot, add 1 small chopped onion. Cook it until it becomes soft, about 5 minutes. Then, add 2 minced garlic cloves and cook for 1 more minute. This makes your kitchen smell amazing! Next, add 1 pound of peeled and deveined shrimp. The shrimp should turn pink and opaque after about 3 to 4 minutes. Stir in 1 cup of corn, 1 cup of black beans, and spices: 1 teaspoon of cumin, 1 teaspoon of smoked paprika, and 1/2 teaspoon of chili powder. Season with salt and pepper to your taste. After mixing well, remove the skillet from heat. Stir in half of the sour cream and half of the chopped cilantro. Now, let’s assemble the enchiladas. Start by warming 8 corn tortillas. You can do this in a dry skillet or use the microwave. Warm tortillas are easier to roll. Take a tortilla and spoon a generous amount of the shrimp mixture into it. Roll it up tightly and place it seam-side down in a greased baking dish. Repeat this for all tortillas. For the next step, mix the remaining sour cream with the juice of 1 lime in a separate bowl. Pour this creamy mixture over the enchiladas in the baking dish. Top with 1 cup of shredded cheese. I suggest using cheddar or a Mexican blend for extra flavor. Now, bake your enchiladas in a preheated oven at 375°F (190°C) for 20 to 25 minutes. You’ll know they are ready when the cheese is bubbly and slightly golden. Once done, let them cool for a few minutes. Garnish with the remaining cilantro for a fresh touch. Follow these steps from the Full Recipe, and you’ll have a delicious plate of creamy shrimp enchiladas ready to enjoy! To make creamy shrimp enchiladas, start by cooking your shrimp just right. Overcooking can make them tough. Cook the shrimp until they turn pink and opaque. Use fresh shrimp for the best flavor. You can mix in a good amount of spices. Cumin and smoked paprika add a nice depth. Warm your corn tortillas before filling them. This makes them easier to roll. Use a dry skillet or microwave to warm them up. Don’t forget to use a greased dish to prevent sticking. Pour the creamy lime sauce over the rolled tortillas for added moisture. One common mistake is skipping the warming of tortillas. Cold tortillas break easily when rolling. Another mistake is adding too much filling. If you overstuff, your enchiladas can spill out. Make sure to use just enough filling for a tight roll. Also, avoid using low-quality cheese. Good cheese melts better and adds flavor. Finally, don’t forget to let your dish cool a bit after baking. This helps the enchiladas set and makes serving easier. To make these enchiladas, you’ll need some basic kitchen tools. A good skillet is essential for cooking the shrimp. Use a sharp knife for chopping onions and garlic. A sturdy spatula helps in mixing and serving. An oven-safe baking dish is a must for baking. Consider using a large spoon for filling the tortillas. Finally, a zester or juicer is helpful for the lime juice. These tools make the cooking process smooth and quick. For the full recipe, check out the detailed instructions above! {{image_2}} You can easily make vegetarian enchiladas. Just swap shrimp with vegetables. Try using zucchini, bell peppers, and mushrooms. These veggies add great flavor. You can also add black beans for protein. Use the same spices for a tasty dish. Top with cheese and sour cream for creaminess. Want a kick? Add some heat to your shrimp enchiladas. You can increase the chili powder or add sliced jalapeños. For more spice, consider using a spicy cheese. Pepper jack is a great choice. This will elevate the flavor and give you a nice burn. Serve with fresh lime to balance the heat. If you need a gluten-free option, use corn tortillas instead of flour. They work well with the creamy filling. Make sure to check labels on all ingredients. Some sauces and spices may have gluten. You can enjoy the same delicious taste, without gluten. It’s easy to adapt this dish for everyone. For the full recipe, check out the full details mentioned earlier. To store leftover enchiladas, let them cool first. Once cool, place them in an airtight container. This keeps them fresh for up to three days. You can also cover them tightly with plastic wrap. Make sure to keep them in the fridge. If you want to save enchiladas for later, freezing works great. Wrap each enchilada in plastic wrap. Then, place them in a freezer-safe bag or container. They can last up to three months in the freezer. When ready to eat, thaw them in the fridge overnight. To reheat your enchiladas, preheat the oven to 350°F (175°C). Place the enchiladas in a baking dish. Cover with foil to keep moisture in. Heat for about 20 minutes or until warm throughout. You can also microwave them. Just place on a microwave-safe plate and cover. Heat for 1-2 minutes, checking often. Enjoy your delicious, reheated enchiladas! Creamy Shrimp Enchiladas stay fresh in the fridge for about three to four days. Make sure to place them in an airtight container. This helps keep the flavors intact. If you want to enjoy them later, just reheat them before serving. I recommend using the oven for the best results. Yes, you can use frozen shrimp. Just make sure to thaw them first. Place the shrimp in the fridge overnight or run them under cold water for quick thawing. Using frozen shrimp can save time and still gives you great flavor. You can serve Creamy Shrimp Enchiladas with various sides. Here are some tasty options: - Mexican rice - Refried beans - Fresh guacamole - Crispy tortilla chips - A simple green salad These sides add great color and flavor to your meal. You can also explore the Full Recipe for more inspiration! In this post, we explored making creamy shrimp enchiladas from start to finish. We covered essential and optional ingredients, tips for selecting fresh shrimp, and step-by-step instructions for preparing and baking. I shared helpful tips to avoid common mistakes and variations for everyone’s taste. Lastly, we discussed storage and reheating methods. Enjoying creamy shrimp enchiladas is easy with these tips. Happy cooking!

Creamy Shrimp Enchiladas Savory and Flavorful Dish

Get ready for a taste explosion with my Creamy Shrimp Enchiladas! This dish combines tender shrimp, rich sauce, and soft

To make delicious quiche stuffed bagels, you need simple ingredients. Gather these items: - 4 plain bagels, sliced in half - 1 cup spinach, chopped - 1 cup cherry tomatoes, halved - 1/2 cup bell pepper, diced - 4 large eggs - 1/2 cup heavy cream - 1 cup shredded cheese (Cheddar or Gruyère) - Salt and pepper to taste - 1 tablespoon olive oil - Fresh herbs (such as chives or parsley) for garnish For these bagels, cheese adds rich flavor. I recommend using: - Cheddar for a sharp taste - Gruyère for a nutty flavor - Mozzarella for creaminess - Feta for a tangy touch Feel free to mix and match these cheeses for even more flavor! Fresh herbs brighten up the dish. Here are some great options: - Chives add a mild onion taste - Parsley gives a fresh kick - Basil offers a sweet aroma - Dill adds a unique flavor Sprinkle these herbs on top after baking for a burst of freshness! First, slice your plain bagels in half. This creates a sturdy base for your quiche filling. Place the bagel halves cut side up on a baking tray. They will hold all the goodness you add later. Preheat your oven to 375°F (190°C) to ensure they bake evenly. Heat one tablespoon of olive oil in a skillet over medium heat. Add one cup of chopped spinach, half a cup of diced bell pepper, and one cup of halved cherry tomatoes. Sauté these vegetables for about three to four minutes. You want them soft but still colorful. Season with salt and pepper to enhance the flavors. Once done, remove the skillet from heat and set the veggie mix aside. In a mixing bowl, crack four large eggs. Add half a cup of heavy cream to the eggs and whisk them together. Season with a pinch of salt and pepper. Once mixed, gently fold in the sautéed vegetables and half of your shredded cheese. This mixture creates a creamy filling. Spoon the quiche filling onto each bagel half, making sure to fill them well, but don’t overflow. Sprinkle the rest of the cheese on top. Your bagels are now ready for baking. For the full recipe, check the detailed instructions. To get a great bagel, start with fresh ones. Fresh bagels hold their shape better. Slice them evenly in half to create a flat surface. This helps them bake evenly. When placing them on a tray, make sure there's space between each bagel half. This allows hot air to circulate. Bake them until the cheese is golden. Check for a slight puff in the egg filling to ensure it's done. You can easily change the spice levels to fit your taste. If you want more heat, add a pinch of cayenne pepper to the egg mixture. For a milder taste, keep the seasoning light. Fresh herbs can also add flavor without heat. Try adding chopped chives or parsley for a fresh touch. Always taste your filling before baking. This way, you can adjust as needed. Many substitutions work well for these bagels. Use egg substitutes if you want to make them vegan. Silken tofu or chickpea flour can replace eggs. For a dairy-free option, choose plant-based cream and cheese. If you're gluten-free, use gluten-free bagels. You can also swap out vegetables based on what you like or have on hand. Bell peppers can be replaced with zucchini or mushrooms. This recipe is very flexible, and you can make it your own. For the full recipe, check the recipe section. {{image_2}} You can add meat to your stuffed bagels for extra flavor. Cooked bacon, sausage, or ham work great. Just chop the meat into small pieces. Sauté the meat with the veggies to add depth. Try adding pepperoni for a fun twist. You can also use turkey or chicken for a lighter option. Each meat adds its own taste to the filling. If you want a veggie option, go for mushrooms, zucchini, or broccoli. These fresh veggies add nice texture and taste. You can also add artichoke hearts or sun-dried tomatoes for a burst of flavor. If you love beans, try black beans or chickpeas. They add protein and make the filling hearty. Mix and match to find your favorite blend. Seasonal ingredients can change your stuffed bagels each time you make them. In spring, use fresh asparagus or peas for a bright touch. During summer, add corn or fresh herbs from your garden. In fall, roasted pumpkin or butternut squash can give warmth. Winter brings root vegetables like sweet potatoes and carrots. These ingredients keep your bagels exciting and full of flavor. To store leftover stuffed bagels, let them cool first. Place them in an airtight container. You can keep them in the fridge for up to three days. This keeps the bagels fresh and tasty. When you're ready to enjoy your bagels again, preheat your oven to 350°F (175°C). Place the bagels on a baking sheet. Heat them for about 10-15 minutes until warm. You can also use a microwave if you need a quicker option. Just heat them for about 30 seconds to 1 minute. To freeze stuffed bagels, wrap each one tightly in plastic wrap. Then, place them in a freezer-safe bag. You can freeze them for up to a month. When you're ready to eat, thaw them in the fridge overnight. Then, reheat in the oven as mentioned above. This way, you can enjoy your delicious quiche stuffed bagels anytime! For the full recipe, check out the main section of the article. Delicious Quiche Stuffed Bagels are a fun twist on classic quiche. They combine bagels with a creamy, savory filling. The filling includes eggs, cheese, and tasty veggies. You can enjoy them for breakfast, lunch, or a snack. They are easy to make and perfect for sharing. Yes, you can make these bagels ahead. Prepare the filling and fill the bagels. Then, cover them and store them in the fridge. Bake them fresh when you are ready to eat. This way, you save time. They still taste great even after a day in the fridge. You can tell the quiche filling is done when it is set. The edges should be firm, and the center should not jiggle. The cheese will be bubbly and golden brown. A toothpick inserted in the center should come out clean. These signs mean your bagels are ready to enjoy. Quiche stuffed bagels are fun and tasty. You learned about key ingredients, cooking steps, and handy tips. Experiment with different cheeses and herbs to suit your taste. Remember to store any leftovers properly to enjoy later. This dish is simple to make and offers many variations for everyone. Try changing up the filling, adding meats or veggies. Now, you’re ready to make your own delicious bagels that impress! Enjoy every bite you create.

Delicious Quiche Stuffed Bagels Easy and Tasty Recipe

Are you ready to elevate your breakfast game? This Delicious Quiche Stuffed Bagels recipe combines warm, fresh bagels with creamy

To make the Kielbasa Cheesy Potato Casserole, gather these items: - 1 lb kielbasa sausage, sliced - 4 cups potatoes, peeled and diced - 1 small onion, diced - 2 cups shredded sharp cheddar cheese - 1 cup sour cream - 1 cup milk - 2 cloves garlic, minced - 1 teaspoon dried thyme - 1 teaspoon paprika - Salt and pepper to taste - 1 tablespoon olive oil Feel free to add your twist to this dish with these options: - ½ cup breadcrumbs (for topping) - Fresh parsley (for garnish) - Other cheeses, like mozzarella or gouda - Veggies like bell peppers or spinach This dish serves six. Each serving has about: - Calories: 450 - Protein: 20g - Carbohydrates: 30g - Fat: 30g - Fiber: 2g This simple yet tasty meal combines rich flavors and hearty ingredients, making it a family favorite. Check out the [Full Recipe] for step-by-step instructions to create this delicious casserole. First, gather your ingredients. You'll need kielbasa, potatoes, onion, cheese, sour cream, milk, garlic, thyme, paprika, salt, pepper, olive oil, and breadcrumbs if you want a crunchy top. It's nice to have everything ready before you start cooking. Next, peel and dice your potatoes. Aim for small, even pieces. This helps them cook evenly. Dice the onion and mince the garlic too. Slice the kielbasa into bite-sized pieces. Now, heat the olive oil in a large skillet over medium heat. Add the onion and sauté it for about three minutes. You want it soft and fragrant. Then, add the sliced kielbasa. Cook it for five more minutes until it’s lightly browned. Finally, stir in the minced garlic and cook for one more minute. This step really brings out the flavors. In a large bowl, mix the diced potatoes, sour cream, milk, thyme, paprika, salt, and pepper. Stir until everything is well combined. Fold the kielbasa mixture and half of the cheese into the potato mixture. Make sure to distribute everything evenly. Now, transfer the mixture into a greased 9x13 inch baking dish. Top it with the remaining cheese. If you want a crunchy topping, sprinkle breadcrumbs on top. Cover the dish with aluminum foil and bake it in a preheated oven at 375°F (190°C) for 30 minutes. After that, remove the foil and bake for another 15 to 20 minutes. You want the casserole to be bubbly and golden brown on top. For the best texture, make sure not to overmix your potato mixture. This keeps the potatoes creamy and fluffy. If you like a crispy topping, use breadcrumbs. They add a nice crunch when baked. Let the casserole cool for a few minutes before serving. This allows the flavors to settle. Serve hot, and feel free to garnish with fresh parsley for a pop of color. You can even use individual ramekins for a fun presentation at your next gathering. Enjoy your kielbasa cheesy potato casserole! For the full recipe, check out the recipe section above. To bring out the best in this dish, focus on your spices. Use fresh garlic for a stronger taste. Dried thyme adds warmth, while paprika gives a nice color. You can also add a pinch of cayenne for heat. Layer flavors by sautéing the onions and kielbasa until golden. This step builds a deep, rich taste. If you need to swap ingredients, it’s easy. Use turkey kielbasa for a lighter option. For a dairy-free version, try almond milk and a vegan cheese. Greek yogurt can replace sour cream for a healthier twist. If you're avoiding gluten, use gluten-free breadcrumbs or skip them altogether. Always taste and adjust seasonings after substitutions. Prep your ingredients ahead of time. Dice your potatoes and onions in advance to save time. You can also cook the kielbasa mixture a day before. Store it in the fridge until you're ready to bake. This dish takes about one hour, but with prep, you can cut down on cooking time. Remember to let it cool for a few minutes before serving, as this helps the casserole set. For the full recipe, check out the details above! {{image_2}} If you want a meatless version, you can replace the kielbasa. Use sautéed mushrooms or a mix of bell peppers and zucchini instead. Both options add great texture and flavor. You can also add lentils for protein. This way, your dish remains hearty and satisfying without the meat. Cheddar cheese is a classic choice, but you can try others too. Gouda adds a nice smoky flavor, while Monterey Jack makes it creamier. For a little kick, add pepper jack cheese. Mixing two or more cheeses can create a deeper taste. Feel free to experiment with your favorite kinds! While kielbasa shines in this recipe, other sausages work well too. You could try smoked sausage for a rich taste or turkey sausage for a lighter option. Andouille sausage adds heat and flavor, if you like a spicy twist. Each type gives a unique spin to your casserole. You can mix and match to find what you love best! For the complete preparation, check the Full Recipe. When you have leftovers from your Kielbasa Cheesy Potato Casserole, proper storage is key. This dish stays tasty and fresh when stored correctly. - Cool Down: Let the casserole cool to room temperature first. - Use Airtight Containers: Transfer the leftovers into airtight containers. This helps keep moisture in and air out. - Label and Date: Write the date on the container. This way, you can track how long it has been stored. - Refrigerate Quickly: Store in the fridge within two hours of cooking. It can last for about 3-4 days. - Cool Completely: Ensure the casserole is cool before you freeze it. - Use Freezer-Safe Containers: Place the casserole in a freezer-safe dish or wrap it tightly in plastic wrap and aluminum foil. - Label and Date: Mark the container with the date. It helps you remember when it was frozen. - Freeze Immediately: It can last in the freezer for up to three months. For best taste, try to eat it sooner. - Thaw First: If frozen, thaw the casserole overnight in the fridge. - Oven Reheat: Preheat your oven to 350°F (175°C). Cover the casserole with foil to keep it moist. Heat for about 25-30 minutes. - Microwave Option: If you need it fast, you can microwave individual portions. Heat in short bursts, checking often. - Check Temperature: Ensure it’s heated through to 165°F (74°C) before serving. Enjoy the dish just like the first time! You can pair this casserole with many sides. A simple green salad adds freshness. Steamed broccoli or green beans also work well. For a heartier meal, serve with crusty bread. These sides balance the richness of the casserole. To make this dish gluten-free, swap regular breadcrumbs with gluten-free ones. Ensure the kielbasa you choose is gluten-free as well. Most brands offer gluten-free options. Always read labels to be sure. You can also skip the breadcrumbs entirely for a lighter version. Yes, you can prepare this casserole in advance. Assemble the dish, but don’t bake it right away. Cover it and store it in the fridge for up to 24 hours. When ready, bake it as directed. This saves time on busy days. For the full recipe, refer back to the instructions above. This blog post covered all you need for Kielbasa Cheesy Potato Casserole. We discussed the key ingredients and some optional ones to make it your own. I shared important cooking steps and baking tips for great results. You learned variations for different diets and how to store leftovers. Finally, we answered common questions to help you in the kitchen. I hope you feel confident in making this dish, enjoying every bite. Your kitchen adventures await, so get cooking!

Kielbasa Cheesy Potato Casserole Simple and Tasty Dish

Are you ready to enjoy a dish that’s both simple and delicious? My Kielbasa Cheesy Potato Casserole brings comfort food

For these cookies, we start with the dry ingredients. You will need: - 2 ½ cups all-purpose flour - 1 teaspoon baking soda - ½ teaspoon baking powder - 1 teaspoon ground cinnamon - ½ teaspoon salt These dry ingredients create the structure of your cookies. The flour gives it body, while baking soda and baking powder help them rise. Cinnamon adds that warm, sweet flavor we all love. Now, onto the wet ingredients. Grab these: - ¾ cup unsalted butter, softened - 1 cup brown sugar, packed - ½ cup granulated sugar - 1 large egg - 1 teaspoon vanilla extract These ingredients bring moisture and sweetness. The butter makes them soft and rich. Using both brown and granulated sugar gives a nice balance of flavor and texture. To top off your cookies, you’ll need frosting. Gather these: - 1 cup powdered sugar - 2 tablespoons milk - ½ teaspoon vanilla extract for frosting - A sprinkle of cinnamon for garnish The frosting is simple yet effective. It adds a sweet finish to your cookies. The cinnamon garnish makes it look pretty and adds a little extra flavor. For the full recipe, check out the details above. Enjoy making these delicious cookies! - Preheat the oven: Set your oven to 350°F (175°C). This temperature helps the cookies bake evenly. Line a baking sheet with parchment paper to prevent sticking. - Prepare dry ingredients: In a medium bowl, whisk together the all-purpose flour, baking soda, baking powder, ground cinnamon, and salt. Make sure these dry ingredients are mixed well for a smooth dough. - Cream butter and sugars: In a large mixing bowl, use an electric mixer to beat the softened butter with brown sugar and granulated sugar. Mix on medium speed until it becomes light and fluffy. This should take about 2 to 3 minutes. - Add egg and vanilla: Crack one large egg into the butter mixture. Pour in 1 teaspoon of vanilla extract. Mix until these ingredients are fully blended together. - Shape cookies: Using a tablespoon or cookie scoop, drop dough portions onto the prepared baking sheet. Leave about 2 inches of space between each cookie. They will spread while baking. - Bake and cool: Place the baking sheet in your preheated oven. Bake for 10 to 12 minutes. The edges should be lightly golden, while the centers stay soft. Once baked, cool the cookies on the sheet for 5 minutes before moving them to a wire rack. - Mix frosting ingredients: In a small bowl, combine powdered sugar, milk, and ½ teaspoon of vanilla extract. Stir until smooth. If your frosting is too thick, add more milk a teaspoon at a time until it reaches the right consistency. - Frosting technique: After the cookies have cooled completely, drizzle the frosting over the tops. For a finishing touch, sprinkle a light dusting of cinnamon on top. You can find the full recipe for these delightful cookies in the earlier sections. Enjoy baking! To get soft and chewy cookies, don’t overmix the dough. Mix until just combined. This keeps the cookies tender. Also, pay attention to the baking time. Bake them for 10-12 minutes. Take them out when the edges are golden, and the center looks soft. They will firm up as they cool. You can tell when the cookies are done by their edges. They should be light golden. The centers will look a bit underbaked. This is perfect for that soft bite we love. For ideal cookie spread, leave enough space between each cookie on the tray. They will spread as they bake. When making frosting, aim for a smooth and pourable consistency. If it’s too thick, add milk slowly. Just a teaspoon at a time will do. For decoration, drizzle the frosting back and forth over the cookies. You can also add a sprinkle of cinnamon on top. This gives them a nice finish. For the full recipe, check the main section. {{image_2}} You can customize your soft and chewy cinnamon roll cookies with fun flavors. Adding nuts or chocolate chips can give them a delightful twist. For a nutty crunch, mix in ½ cup of chopped walnuts or pecans. If you love chocolate, add ½ cup of chocolate chips. Both options enhance the cookie's taste and texture. You can also explore different spices. Try adding ground nutmeg or ginger for a warm flavor. A pinch of cardamom can add an exotic touch. These spices work well with cinnamon, creating a unique taste. If you need a gluten-free version, you can swap regular flour for gluten-free all-purpose flour. Make sure to check that the flour blend contains xantham gum for the best texture. This change keeps the cookies soft and chewy. For vegan-friendly adjustments, replace the egg with ¼ cup of unsweetened applesauce or a flax egg. To make the frosting vegan, use plant-based milk and a vegan butter alternative. This way, everyone can enjoy these tasty treats! The classic frosting is always a hit, but there are many options. For a rich flavor, try cream cheese frosting. Just mix 4 ounces of cream cheese with the powdered sugar and milk until smooth. This gives the cookies a tangy twist. Another fun option is a chocolate glaze. Melt 1 cup of chocolate chips and combine with 2 tablespoons of coconut oil. Drizzle this over the cooled cookies for a sweet, chocolaty finish. You can mix and match these ideas to create your perfect cookie! For the full recipe, check the link above. To keep your cookies fresh, store them in an airtight container. This helps maintain their soft and chewy texture. You can use a plastic container or a glass jar with a lid. For added freshness, place a slice of bread in the container. This keeps the cookies moist longer. If you want to save cookies for later, freezing is a great option. First, let the cookies cool completely. Then, place them in a single layer on a baking sheet. Freeze until solid, about one hour. Once frozen, transfer them to a freezer-safe bag. Be sure to remove as much air as possible to prevent freezer burn. When you're ready to enjoy them, take out the desired number of cookies. Let them thaw at room temperature for about 30 minutes. For a warm treat, you can reheat them in the oven at 350°F (175°C) for 5-7 minutes. These cookies are best enjoyed within 5 days when stored at room temperature. If frozen, they can last up to 3 months. Always check for signs of spoilage. If the cookies smell off or have an unusual texture, it’s best to discard them. Enjoy your sweet treats while they’re at their best! The best way to soften butter is to leave it out at room temperature for about 30 minutes. This allows it to warm up and become creamy. If you need it quickly, cut it into small pieces. Place the pieces in a bowl and let them sit for about 10 minutes. You can also microwave it for 5-8 seconds, but be careful not to melt it. Yes, you can make these cookies without eggs. Use a substitute like flaxseed meal or applesauce. For flaxseed, mix 1 tablespoon of flaxseed meal with 2.5 tablespoons of water. Let it sit for about 5 minutes until it thickens. For applesauce, use 1/4 cup to replace one egg. This keeps the cookies moist while making them egg-free. You can tell when the cookies are fully baked by looking at the edges. They should be lightly golden, while the center should look soft and slightly puffy. If you press a cookie gently, it should spring back. If it leaves an imprint, give them another minute. Remember, they will continue to cook a bit after you take them out. Absolutely! A stand mixer is great for this recipe. It can save you time and effort. Use the paddle attachment to cream the butter and sugars. This will ensure a smooth and fluffy mixture. Just be careful not to overmix when you add the dry ingredients. Mix until just combined for the best texture. To make your cookies less spreadable, chill the dough for at least 30 minutes before baking. This helps the butter firm up. You can also add a bit more flour to the dough. Start with an extra tablespoon or two. This will help your cookies hold their shape while baking. You now have all the steps to make delicious cookies. We covered the ingredients, preparation, baking, and tips for perfect results. Remember: don't overmix and watch your baking time for soft and chewy cookies. You can even try different flavors or frostings. Store any extras well to keep them fresh. Enjoy your baking! These cookies will surely bring smiles to everyone.

Soft and Chewy Cinnamon Roll Cookies Delightfully Simple

Are you ready to indulge in the warm, cozy flavors of cinnamon rolls in cookie form? My Soft and Chewy

When making mini tarts with roast beef and Gruyère, the right ingredients make all the difference. Here’s what you need for this savory delight: - 1 sheet of puff pastry, thawed - 200g roast beef, thinly sliced - 150g Gruyère cheese, grated - 1 small onion, finely sliced - 2 cloves garlic, minced - 1 teaspoon fresh thyme leaves - 2 tablespoons Dijon mustard - 1 egg, beaten (for egg wash) - Salt and pepper to taste - Olive oil for sautéing Each ingredient plays a key role in creating these tasty bites. The puff pastry gives a flaky base. Roast beef adds rich flavor and protein. Gruyère cheese melts beautifully, adding creaminess. Onions and garlic elevate the taste with sweetness and depth. Thyme adds a fresh note, while Dijon mustard brings a hint of sharpness. The egg wash helps the tarts turn golden brown. Lastly, salt and pepper round out the flavors perfectly. For a full guide on making these mini tarts, refer to the Full Recipe. Start by preheating your oven to 200°C (400°F). This step is key. A hot oven helps the pastry puff up nicely. While the oven heats, get your baking tray ready by greasing it lightly. Take your sheet of puff pastry and place it on a lightly floured surface. Roll it out gently to smooth any creases. Next, use a round cookie cutter, about 3 inches wide, to cut out circles. You should end up with around 12 circles. Keep them spaced out on the tray to avoid sticking. In a skillet, pour a splash of olive oil and heat it over medium heat. Add the finely sliced onion. Sauté for about 3-4 minutes until they turn soft and clear. Then, add the minced garlic and thyme leaves, cooking for another minute. Your kitchen will smell amazing! Let this mixture cool for a moment. Now it’s time to put everything together. Lay the puff pastry circles on your greased tray. Brush a thin layer of Dijon mustard on each circle. This adds great flavor. Evenly distribute the cooled onion and garlic mix over each pastry. Next, add a slice or two of roast beef on top. Finish with a generous sprinkle of grated Gruyère cheese. Before baking, brush the edges of each tart with the beaten egg. This gives them a beautiful golden finish. Place the tray in your preheated oven and bake for 15-20 minutes. Keep an eye on them! They are ready when the pastry is puffed and golden, and the cheese is melted and bubbling. Once done, remove the tarts from the oven and let them cool slightly before serving. For the full recipe, check out the ingredients and other details. Enjoy your savory mini tarts! Using puff pastry can seem tricky, but I have some tips. Always keep it cold. If it warms up, it won’t puff well. When rolling it out, use a light touch. This way, you won’t flatten the layers. Cut your circles evenly for nice, uniform tarts. This helps them bake evenly. Also, don’t skip the egg wash. It gives a beautiful golden color. Seasoning is key to great flavor. I love using fresh thyme. It adds a bright taste to the savory beef. You can also try adding a pinch of smoked paprika for a smoky touch. Don’t forget to salt and pepper the filling well. Taste as you go. This way, you can adjust the flavors to your liking. A touch of Dijon mustard under the filling gives a nice tang, making each bite pop. When serving the mini tarts, keep it fun and simple. Arrange them on a wooden board. Garnish each tart with a sprig of fresh thyme. This adds color and a nice herb scent. You can pair them with a light salad for balance. A simple arugula salad with lemon vinaigrette works well. It cuts through the richness of the tarts. For a drink, try a nice red wine or sparkling water with lemon. For the full recipe, check out the details to make these savory delights! {{image_2}} You can swap the roast beef for other meats. Try shredded chicken for a lighter touch. Turkey works well too, especially with the same spices. If you want something bold, use smoked ham. For a twist, consider duck or lamb. Each adds a unique flavor to your mini tarts. Gruyère cheese has a rich taste, but you can change it. Swiss cheese melts well and offers a milder flavor. Cheddar gives a sharp bite that many love. For a creamier option, try Brie or cream cheese. Each cheese brings its own charm to the dish. You can easily make these tarts vegetarian. Replace roast beef with sautéed mushrooms. Portobello mushrooms add a hearty texture. You could also use roasted vegetables like bell peppers and zucchini. For protein, consider adding crumbled feta or goat cheese. This will keep the tarts satisfying and full of flavor. To explore more ideas, check the Full Recipe for inspiration on how to craft these mini tarts your way. To keep your mini tarts fresh, store them in an airtight container. Place a piece of parchment paper between layers to avoid sticking. Keep them in the fridge for up to three days. Make sure they cool completely before sealing the container. Reheating is simple. Preheat your oven to 180°C (350°F). Place the tarts on a baking sheet. Heat for about 10-15 minutes until warm. This method helps keep the pastry crispy. Avoid using the microwave, as it can make the crust soggy. If you want to freeze mini tarts, let them cool first. Wrap each tart in plastic wrap and then in foil. This keeps them fresh for up to two months. When ready to eat, thaw them overnight in the fridge. Reheat in the oven for the best texture. Follow the Full Recipe for detailed steps to make your mini tarts! Yes, you can use store-bought puff pastry. It saves time and effort. Store-bought options often yield great results. Just make sure to thaw it properly before use. This will help it puff up nicely when baked. You can tell the tarts are done when they turn golden brown. The pastry should puff up and be crispy. If the cheese is melted and bubbly, that’s a good sign too. Keep an eye on them during the last few minutes of baking. Mini tarts pair well with a fresh salad or roasted veggies. A side of dipping sauce, like horseradish cream, adds a nice touch. You can also serve them with a light soup for a complete meal. For more ideas, check the Full Recipe for serving suggestions. In this article, we covered how to make delicious mini tarts using puff pastry, roast beef, and Gruyère cheese. You learned about the key ingredients, step-by-step instructions, and tips for the best results. We also discussed variations, storage methods, and common questions. Mini tarts are fun to make and share. They can suit any taste or diet. Enjoy exploring different flavors and impressing your friends with your skills!

Mini Tarts with Roast Beef & Gruyere Savory Delight

Looking to impress at your next gathering? These Mini Tarts with Roast Beef & Gruyère are the perfect savory treat!

To make pumpkin shakshuka, gather these items: - 1 medium pumpkin, peeled and diced (about 4 cups) - 1 large onion, finely chopped - 2 garlic cloves, minced - 1 red bell pepper, diced - 1 teaspoon ground cumin - 1 teaspoon smoked paprika - 1/2 teaspoon cayenne pepper (adjust to taste) - 1 can (14 oz) diced tomatoes - 4 large eggs - 2 tablespoons olive oil - Salt and pepper to taste - Fresh parsley or cilantro, for garnish When it comes to ingredient substitutions, you have options. If you can't find pumpkin, you can use butternut squash or sweet potatoes. These alternatives keep the dish sweet and warm. For the spices, if you don’t have smoked paprika, regular paprika works too. It changes the flavor slightly, but you'll still enjoy a tasty shakshuka. Now, let’s talk about fresh versus canned ingredients. Fresh pumpkin shines in this dish, giving a bright flavor and texture. But if you're short on time, canned pumpkin can save the day. Just remember, canned pumpkin is smoother, so it may change the dish's texture. Using fresh herbs like parsley or cilantro adds a burst of flavor at the end. They give your shakshuka a fresh touch. If fresh herbs aren't available, dried herbs can still work, but the flavor won't be as strong. You can find the full recipe in the article. Enjoy making your pumpkin shakshuka! 1. Heat the Oil: Start by heating 2 tablespoons of olive oil in a large skillet over medium heat. This creates a nice base for your shakshuka. 2. Sauté the Onion: Add 1 large finely chopped onion to the skillet. Cook it for about 5 minutes until it looks soft and clear. 3. Add Garlic and Pepper: Next, throw in 2 minced garlic cloves and 1 diced red bell pepper. Stir it all together and let it cook for another 3-4 minutes. The bell pepper should be tender by now. 4. Mix in the Pumpkin: Now, add 4 cups of diced pumpkin. Sprinkle in 1 teaspoon of ground cumin, 1 teaspoon of smoked paprika, and 1/2 teaspoon of cayenne pepper. You can adjust the cayenne to your taste. Stir everything well and cook for 8-10 minutes. You want the pumpkin to start softening. 5. Pour the Tomatoes: Open a can of diced tomatoes (14 oz) and pour it into the skillet. Stir it in and let it simmer. Reduce the heat, cover the skillet, and let it cook for 10-15 minutes. The pumpkin should be fully tender by now. 6. Add the Eggs: Make 4 small wells in the sauce. Gently crack an egg into each well. Cover the skillet again and let it cook for 6-8 minutes. The egg whites should be set, but the yolks still runny. If you want firmer yolks, cook a bit longer. 7. Final Touches: Once your eggs are perfect, take the skillet off the heat. Add salt and pepper to taste. 8. Garnish: Finish by garnishing with fresh parsley or cilantro. This adds a nice pop of color. - Keep the Heat Low: Cooking on low heat helps the eggs cook evenly without overcooking the yolks. - Cover the Skillet: This traps steam and helps cook the eggs faster while keeping the yolks runny. - Check Frequently: Watch the eggs closely. Once the whites are set, they are ready to eat. For more detailed instructions, check the Full Recipe. Enjoy your cooking! To elevate your pumpkin shakshuka, try different seasonings. You can add coriander for a fresh taste. A dash of nutmeg will give a warm, cozy feeling. If you like it spicy, add more cayenne. For a smoky flavor, consider adding chipotle powder. Each spice adds a unique twist. To ensure your shakshuka has the best texture, cook the pumpkin until it’s just soft. This keeps it from getting mushy. Stir occasionally to prevent sticking. When you crack the eggs, make small wells for even cooking. Cover the skillet to steam the eggs gently. This step helps keep the yolks runny while setting the whites. For the perfect finish, garnish with fresh herbs. Parsley or cilantro adds color and brightness. Serve your shakshuka hot directly from the skillet. This dish is best enjoyed fresh, so gather your family or friends for a cozy meal. For a complete guide, check the Full Recipe for all the details. {{image_2}} You can change up pumpkin shakshuka in many ways. Start by swapping the pumpkin. Try zucchini, sweet potatoes, or even eggplant. Each of these will add a unique taste and texture. Next, consider the spices. If you want more heat, add more cayenne or chili flakes. For a different flavor, try adding curry powder or turmeric. Both of these spices bring warmth and depth. If you are vegan or vegetarian, you can skip the eggs. Instead, add chickpeas or black beans for protein. These options make the dish filling and nutritious. You can also substitute the eggs with tofu. Crumble firm tofu and cook it in the sauce until heated through. Lastly, feel free to play with the herbs. Instead of parsley or cilantro, try basil or dill. These fresh herbs can change the whole feel of the dish. For the full recipe, be sure to check out the complete ingredients and instructions. After enjoying your pumpkin shakshuka, store leftovers in a sealed container. This keeps them fresh and tasty. Allow the dish to cool down before placing it in the fridge. It will stay good for about 3-4 days. If you want to freeze shakshuka, it’s best to do so without the eggs. Cook the pumpkin and sauce, then let it cool. Pour it into a freezer-safe container. It will last about 3 months in the freezer. When ready to eat, thaw it overnight in the fridge. Reheat it gently on the stove. For the eggs, you can cook them fresh each time. This way, they stay soft and delicious. Just add eggs to the reheated shakshuka and cook until they are done to your liking. Check out the Full Recipe for more tips on making this dish. How to make pumpkin shakshuka spicier? To add spice, you can increase the cayenne pepper. Start with just a bit more, then taste. If you want more heat, mix in chili flakes or fresh jalapeños. You can also use spicy smoked paprika for a different kick. Can I prepare shakshuka in advance? Yes, you can make shakshuka ahead of time. Cook the dish up to the point of adding eggs. Then, store it in the fridge for up to three days. When ready to serve, reheat the mixture and add the eggs. Cook them fresh for the best taste. What to serve with pumpkin shakshuka? This dish pairs well with warm bread, like crusty sourdough or pita. You can also serve it with a fresh salad to balance the meal. For a heartier option, add some roasted potatoes or grains like quinoa or farro on the side. For the full recipe, check out the provided link. In this post, we explored pumpkin shakshuka from ingredients to storage tips. You learned about ingredient options, cooking steps, and flavor enhancements. We also covered variations for all diets and answered common questions. To wrap it up, pumpkin shakshuka is versatile and delicious. It’s easy to make, share, and store. Enjoy this dish now and explore its many flavors!

Pumpkin Shakshuka Flavorful and Simple Recipe Guide

Are you ready to spice up your breakfast? Pumpkin shakshuka is the perfect dish! It’s simple, flavorful, and packed with

- 1 block (14 oz) firm tofu - 2 tablespoons olive oil - 1 small onion, finely chopped - 2 cloves garlic, minced - 1 tablespoon chili powder - 2 teaspoons cumin - 1 teaspoon smoked paprika - 1 teaspoon salt - 1 teaspoon black pepper - 1 tablespoon soy sauce or tamari - 1 tablespoon nutritional yeast (optional) - 1/2 cup corn (fresh or frozen) - 1/2 cup black beans, rinsed and drained To create tasty tofu taco meat, you need some basic items. First, you need firm tofu. This gives the right texture. You also need olive oil, onion, and garlic to build flavor. Next, the spices are key. Chili powder, cumin, and smoked paprika add depth. Salt and black pepper enhance the taste. Soy sauce or tamari gives umami, while nutritional yeast adds a cheesy flavor. If you want to add more to your dish, corn and black beans work great. They boost nutrition and flavor. You can find the full recipe in the recipe section. Pressing the tofu Start by pressing the tofu. This step helps remove extra water. Wrap the tofu in a clean kitchen towel. Place a heavy pan on top. Let it sit for about 15-20 minutes. This makes the tofu firmer and better for crumbling. Crumbling the tofu Once pressed, take the tofu and crumble it into small pieces. You can use your hands or a fork. Aim for a texture similar to ground meat. This will help it mix well with other ingredients. Heating the olive oil and sautéing onion In a skillet, heat 2 tablespoons of olive oil over medium heat. Add the finely chopped onion. Sauté for about 3-4 minutes until the onion becomes soft and clear. Adding garlic to the mix Next, add 2 cloves of minced garlic. Cook for another minute. You want to smell the garlic but not burn it. This adds great flavor to the base. Mixing spices thoroughly Now it’s time to add the crumbled tofu to the skillet. Stir well to combine it with the onions and garlic. Then, sprinkle in 1 tablespoon of chili powder, 2 teaspoons of cumin, 1 teaspoon of smoked paprika, 1 teaspoon of salt, and 1 teaspoon of black pepper. Mix everything thoroughly to coat the tofu with the spices. Incorporating soy sauce or tamari Drizzle in 1 tablespoon of soy sauce or tamari. If you like, you can add 1 tablespoon of nutritional yeast for extra flavor. Cook this mixture for about 5-7 minutes. Stir occasionally until the tofu starts to brown a bit. Adding corn and black beans Now, fold in 1/2 cup of corn and 1/2 cup of black beans. If you want, you can skip the beans. Cook for another 2-3 minutes until everything is heated through. Adjusting seasoning to taste Finally, taste your tofu taco meat. Adjust the seasoning if needed. You can add more salt or spices to make it just right. Enjoy your tofu taco meat as a filling for tacos, burritos, or on top of salads! For detailed cooking steps, check out the Full Recipe. For tofu taco meat, always choose firm tofu. Firm tofu holds its shape well. It gives the dish a nice texture. Soft tofu can turn mushy and watery. Pressing the tofu is key. You want to remove as much moisture as possible. Wrap your tofu in a clean towel. Place a heavy pan on top for 15-20 minutes. This step helps the tofu absorb flavors better. Spices make tofu taco meat pop with flavor. I recommend using chili powder, cumin, and smoked paprika. These spices add depth and warmth. You can adjust the spice levels based on your taste. If you like it hot, add more chili powder. For milder flavor, reduce the spices a bit. Always taste as you go to find your perfect mix. You can cook tofu taco meat in a skillet or bake it. A skillet gives you nice browning. Heat olive oil over medium heat before adding the tofu. Cook until it’s golden brown. Stir it often for even cooking. If you prefer to bake, spread the tofu on a baking sheet. Bake at 400°F for 20-25 minutes. Both methods are tasty, but skillet cooking adds a crispy texture. {{image_2}} You can change your tofu taco meat in many ways. One easy swap is to add different beans or lentils. Black beans, pinto beans, and chickpeas all work well. They add protein and a nice texture. You can also mix in lentils for a hearty bite. If you're feeling adventurous, try substituting tofu with tempeh. Tempeh has a nutty taste and a firmer texture. Just crumble it like tofu and follow the same recipe. This gives you a new twist on your taco meat. To make your tofu taco meat even tastier, try different spice blends. Taco seasoning is a classic choice. It brings warmth and depth to the dish. You can also create your own blend with chili powder, cumin, and smoked paprika. Adding fresh herbs is another great way to brighten flavors. Chopped cilantro or parsley can make your dish feel fresh. You can add herbs right at the end of cooking. This keeps their bright flavor intact. This tofu taco meat is super versatile. Use it in tacos, burritos, or even salads. You can layer it with your favorite toppings, like avocado, salsa, or cheese. Try creating a taco bar for friends. Set out bowls of toppings, and let everyone build their own. This makes for a fun and interactive meal! For the complete recipe, check out the Full Recipe. To keep your tofu taco meat fresh, store it in an airtight container. Place it in the fridge after it cools down. It stays good for about 3 to 5 days. If you want to save it for later, freezing is a great option. Use a freezer-safe bag or container. Make sure to remove as much air as possible. Your taco meat will last for about 2 months in the freezer. When you are ready to eat the leftovers, reheat them gently. Use a skillet over medium heat. Stir occasionally to avoid burning. This will help keep the texture nice. You can also add a splash of vegetable broth or water. This adds moisture and keeps the flavors bright. If you want to refresh the flavors, add a squeeze of lime juice or a dash of hot sauce when reheating. This little trick brings the dish back to life! For all the steps and details, check out the Full Recipe. To press tofu, I recommend using a clean kitchen towel. Wrap the tofu block and place a heavy pan on top. This method removes excess moisture. Press for about 15-20 minutes for the best results. You can also use a tofu press if you have one. You can use soft tofu, but it changes the texture. Soft tofu is creamier and may not hold up in tacos. Firm tofu is better for a meat-like texture. It crumbles nicely and absorbs flavors well. This choice makes your taco meat more satisfying. Popular toppings include diced tomatoes, lettuce, and avocado. You can also add shredded cheese or sour cream. For a taco bar, try setting out different options. Creative ideas include pickled onions, fresh cilantro, or spicy salsa. These add flavor and color to your meal. This blog post guides you through making tasty tofu taco meat. We covered main ingredients, step-by-step instructions, and helpful tips. Remember, firm tofu gives the best texture, and seasonings make it flavorful. You can customize it with different beans and spices to suit your taste. Store leftovers properly, so you enjoy them later. Have fun getting creative with serving ideas and toppings. You’ll impress anyone with these vegan tacos!

How To Make Tofu Taco Meat Simple and Savory Meal

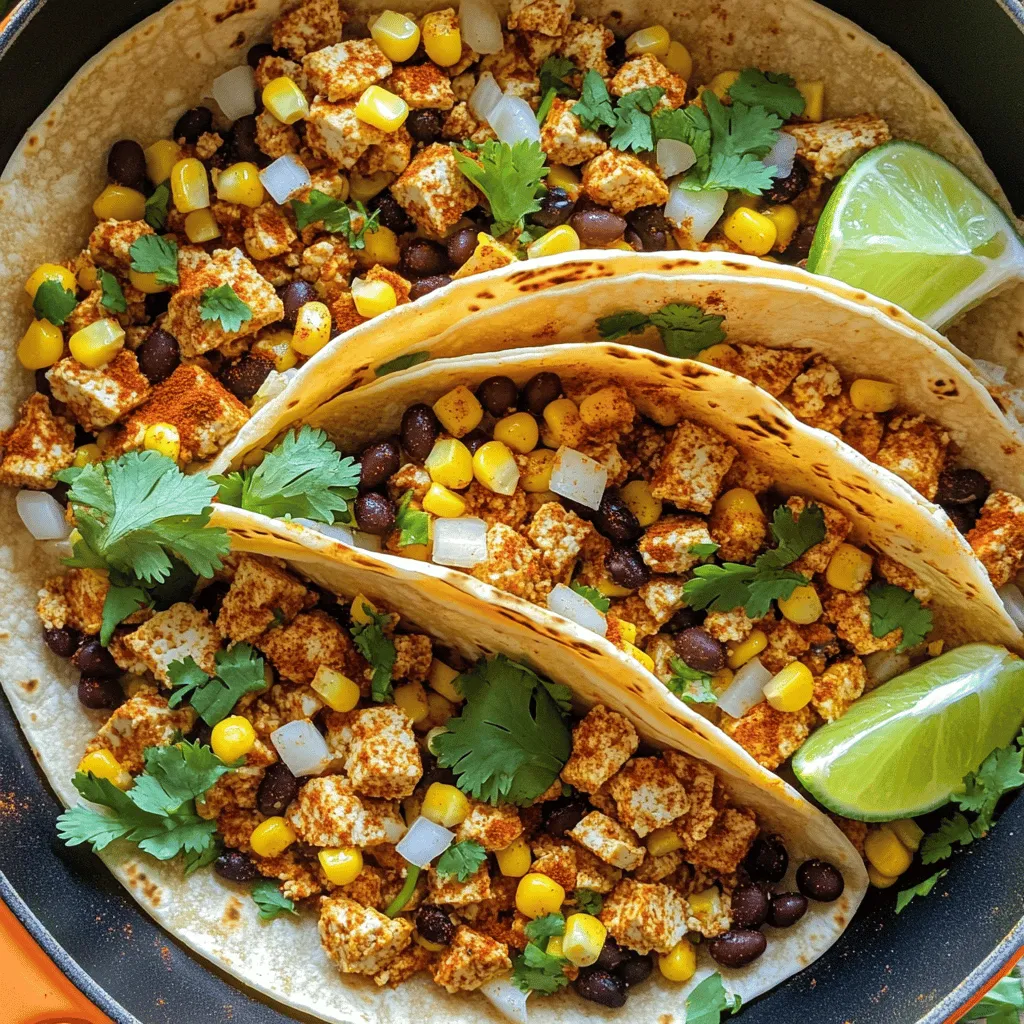
Are you ready to impress your taste buds with a plant-based twist on taco night? In this article, I’ll show

Older posts
Newer posts
← Previous Page1 … Page46 Page47 Page48 Page49 Next →

dsad

© 2025 savorystride • Built with GeneratePress

Our Policies

  • Copyright Policy
  • Cookie Policy
  • GDPR Policy
  • Privacy Policy
  • Disclaimer
  • Terms Of Use

More Information

  • Home
  • About
  • Contact
  • Appetizers
  • Dessert
  • Dinner
  • Drinks
©2025, savorystride About Back To Top