Skip to content
DisclaimerTerms Of UseGDPR PolicyCookie Policy

savorystride

  • Home
  • Drinks
  • Appetizers
  • Dinner
  • Dessert
  • About
  • Contact
  • Privacy Policy
DisclaimerTerms Of UseGDPR PolicyCookie Policy

Hazel

To make the best croissant breakfast sandwiches, gather these ingredients: - 4 fresh croissants - 4 large eggs - 1 cup fresh spinach - 1 avocado, sliced - 1 medium tomato, sliced - ½ cup shredded cheese (cheddar or your choice) - Salt and pepper to taste - 2 tablespoons butter - Optional: Hot sauce for serving The star of this dish is the croissant. Choose fresh, flaky croissants for the best taste. They should be golden and soft. Fresh eggs add protein and flavor. You can cook them however you like. Spinach gives a nice green touch and is full of nutrients. Avocado adds creaminess and healthy fats. Tomatoes bring juiciness, while cheese melts perfectly, adding richness. Butter enriches the flavor when you sauté the spinach. If you want to swap ingredients, here are some great ideas: - Use whole-grain bread if you prefer something denser. - Try kale or arugula instead of spinach for a different green. - Replace avocado with hummus for a unique spread. - Experiment with different cheeses, like feta or mozzarella, for varied flavors. - Add cooked bacon or sausage if you want extra protein. For the full recipe, check the detailed instructions above. To make croissant breakfast sandwiches, gather your ingredients first. You need: - 4 fresh croissants - 4 large eggs - 1 cup fresh spinach - 1 avocado, sliced - 1 medium tomato, sliced - ½ cup shredded cheese (cheddar or your choice) - Salt and pepper to taste - 2 tablespoons butter - Optional: Hot sauce for serving Start by preheating your oven to 350°F (175°C). This will warm the croissants. Next, wash the spinach and set it aside. Slice the avocado and tomato for easy layering later. In a skillet, melt the butter over medium heat. Once melted, add the spinach. Cook for about 2-3 minutes until it wilts. Remove the spinach from the skillet and set it aside. Now, crack the eggs into the same skillet. Cook them how you like best—sunny-side-up, scrambled, or over-easy. Don’t forget to season with salt and pepper. While the eggs cook, slice each croissant in half. Place them on a baking sheet and toast them in the oven for about 5 minutes. This step makes them warm and slightly crispy. Once the croissants are ready, build your sandwich. Start with the bottom half of a croissant. Layer it with sautéed spinach, then add a few slices of tomato. Next, place the cooked egg on top. Add the avocado slices and sprinkle some shredded cheese over it. Finally, close your sandwich with the top half of the croissant. If you like a bit of heat, drizzle on some hot sauce before serving. Enjoy your croissant breakfast sandwiches made from the Full Recipe! To make the best croissant breakfast sandwich, focus on key steps. First, use fresh croissants. They should be flaky and soft. Preheat your oven to 350°F (175°C) to warm them. This keeps them light and airy. While the croissants warm, sauté the spinach in butter. This adds flavor. Cook the eggs just how you like them. You can make them scrambled or sunny-side-up. Serve your croissant breakfast sandwich warm. You can add a drizzle of hot sauce for spice. Pair it with fresh fruit or a side salad. A cup of coffee or tea can also complement the meal. These drinks balance the rich flavors of the sandwich. Avoid overcooking the eggs. This makes them dry and rubbery. Also, don’t skip toasting the croissants. Toasting adds a nice crunch. Lastly, add too much filling can make your sandwich messy. Keep it balanced for easy eating. For the complete recipe, check the Full Recipe section. {{image_2}} You can get creative with the fillings in your croissant breakfast sandwiches. Try using different meats like bacon, ham, or sausage. Each will add its own flavor. You can also swap out the spinach for arugula or kale. For a twist, use smoked salmon with cream cheese. You can even add some fresh herbs, like basil or chives, for a burst of flavor. Don't be afraid to mix and match to find your perfect combination. To make your sandwich pop, consider adding some flavor enhancements. Spread a layer of pesto or hummus inside the croissant. This gives it a fresh taste. You can also add a slice of cheese that melts well, like gouda or mozzarella. Another great option is to sprinkle some everything bagel seasoning on top. It adds a great crunch and flavor. If you like a kick, drizzle some hot sauce or sriracha on top. If you need to make dietary adjustments, you have options. For a vegetarian sandwich, skip the meat and load up on veggies. You can add mushrooms or roasted red peppers. If you want a lighter option, use egg whites instead of whole eggs. For gluten-free needs, look for gluten-free croissants or use lettuce wraps. You can still enjoy a delicious meal that fits your diet. For a full recipe, feel free to check the Flaky Croissant Breakfast Delight. After making your croissant breakfast sandwiches, you may have some left. To keep them fresh, wrap each sandwich in plastic wrap. Place them in an airtight container. This helps keep the croissants soft and the fillings tasty. Store them in the fridge for up to three days. If you want to keep them longer, consider freezing them. When you are ready to eat your leftovers, it's easy to reheat them. Remove the plastic wrap before reheating. You can use the oven for the best results. Preheat your oven to 350°F (175°C). Place the sandwiches on a baking sheet and heat for about 10 minutes. This method keeps the croissants flaky. If you are short on time, you can use the microwave. Heat them for about 30 seconds, but this may make the croissant softer. Croissant breakfast sandwiches taste best when fresh. However, they can last a few days in the fridge. For longer storage, freeze them. They can last up to three months in the freezer. Just remember to wrap them well to avoid freezer burn. When you want to eat them, thaw in the fridge overnight before reheating. This way, you enjoy a delicious meal any day! To make good croissant breakfast sandwiches, start with fresh croissants. Slice them open gently. Use a skillet to cook eggs to your liking. I recommend sunny-side-up or scrambled eggs. Add sautéed spinach for a nice touch. Layer in sliced tomatoes and avocado next. Top it off with cheese. Finally, close the sandwich and enjoy! The Full Recipe has all the steps for you. Yes, you can use different types of bread. Bagels, English muffins, or even regular bread work well. Just make sure the bread can hold the filling without getting soggy. Each type adds its own flavor and texture to your sandwich. Experiment with what you like best! You can serve croissant breakfast sandwiches with many side dishes. Fresh fruit like berries or sliced apples pairs nicely. A small salad can add some crunch. You might also enjoy crispy hash browns or roasted potatoes. Yogurt is another great option. These sides balance the richness of the sandwich perfectly. In this blog post, we explored the essential ingredients for croissant breakfast sandwiches. I covered details on key ingredients and alternatives. You learned step-by-step how to prepare, cook, and assemble your sandwiches. I shared tips to perfect your dish and common mistakes to avoid. We also discussed variations in fillings and dietary adjustments. Lastly, I provided storage tips to keep your leftovers fresh. Remember, the key to a great sandwich is to enjoy the process and get creative. Happy cooking!

Croissant Breakfast Sandwiches Rich and Savory Recipe

If you love warm, flaky croissants and a hearty breakfast, you’re in the right place! This rich and savory croissant

- 1 box chocolate cake mix - 1/2 cup unsalted butter, melted - 3 large eggs, divided - 1 cup creamy peanut butter - 8 oz cream cheese, softened - 2 cups powdered sugar - 1 teaspoon vanilla extract - 1 cup semi-sweet chocolate chips - 1/4 cup chopped peanuts (optional, for garnish) Each ingredient plays a special part in this cake: - Chocolate cake mix: This gives the cake its rich, chocolate flavor and structure. - Unsalted butter: Adds moisture and richness to the cake base. - Eggs: They bind the ingredients together and help the cake rise. - Creamy peanut butter: This ingredient brings a smooth texture and nutty flavor. - Cream cheese: It adds creaminess and a slight tang to the filling. - Powdered sugar: This sweetens the filling and helps it stay thick. - Vanilla extract: It enhances the flavors of the cake and filling. - Semi-sweet chocolate chips: These provide bursts of chocolate in every bite. - Chopped peanuts: They add a crunchy texture and a nutty finish (if used). If you need substitutes, here are some easy ideas: - Gluten-free: Use gluten-free chocolate cake mix. - Dairy-free: Swap cream cheese with a dairy-free cream cheese. - Egg-free: Use flax eggs in place of regular eggs (1 tablespoon flaxseed meal + 2.5 tablespoons water = 1 egg). - Nut-free: Replace peanut butter with sun butter or soy nut butter. These swaps help you enjoy this delight, even with dietary needs! Check the Full Recipe for more details. 1. Preheat your oven to 350°F (175°C). Grease a 9x13-inch baking pan. 2. In a large bowl, mix the chocolate cake mix, melted butter, and 1 egg. Stir until smooth. 3. Spread the thick batter evenly in the pan. Press it down to form a solid base. 4. In another bowl, beat the cream cheese, peanut butter, 2 eggs, powdered sugar, and vanilla. Mix until creamy. 5. Pour the peanut butter mix over the chocolate base. Spread it evenly. 6. Sprinkle chocolate chips on top of the peanut butter layer. 7. Place the pan in the oven and bake for 40-45 minutes. The edges should set, and the center should stay gooey. 8. Take the cake out and let it cool for 10 minutes. Then, refrigerate until fully cool. 9. Cut into squares and add chopped peanuts on top if you like. - Always measure your ingredients accurately. This step helps ensure the right texture. - Use room-temperature cream cheese for a smoother mix. Cold cream cheese can create lumps. - Don’t skip chilling the cake before cutting. This helps with clean slices. - If you want a sweeter taste, add more powdered sugar to the cream cheese mix. - Bake just until the edges set. The center should still jiggle slightly. - Let the cake cool completely before slicing. This helps the ooey gooey texture shine. - Adding a bit of extra peanut butter can enhance the gooeyness. - Keep an eye on the baking time. Every oven is different, so check as it gets close to 40 minutes. For the complete recipe, don't forget to check out the Full Recipe. To make your Chocolate Peanut Butter Ooey Gooey Butter Cake shine, use fresh ingredients. Fresh eggs and creamy peanut butter give the best flavor. Always measure your ingredients accurately. Too much flour can make your cake dry. The goal is a thick and gooey texture, so don’t overbake it. Check the cake at 40 minutes. The edges should be set but the center should jiggle slightly. This jiggle means the cake is perfectly gooey. Serving this cake is fun! Cut it into small squares for easy sharing. You can drizzle melted chocolate on top for extra flair. A scoop of vanilla ice cream pairs perfectly with the rich flavors. The cold ice cream balances the warm cake. You can also serve it with whipped cream and a sprinkle of chopped peanuts. This adds crunch and makes it look pretty. If your cake is too dry, you may have overbaked it. Always check for doneness early. If it’s too gooey, it may not have baked long enough. Make sure to let it cool before slicing. This helps it set. If you notice cracks, don’t worry! They add character. Just serve the cake with a drizzle of chocolate to hide them. These tips will help you enjoy your baking adventure! For the complete recipe, check out the [Full Recipe]. {{image_2}} You can twist this recipe to match your taste. Try adding different flavors to the cake mix. For a minty kick, use a mint chocolate cake mix. If you love coffee, swap in a chocolate espresso mix. You can also add a dash of coffee or mint extract to the cream cheese layer for extra flavor. Changing the toppings is another fun idea. Use white chocolate chips or butterscotch chips for a new twist. These small changes can create a totally different dessert! You can adapt this cake for different diets. To make it gluten-free, use a gluten-free chocolate cake mix. Check the labels to ensure all other ingredients are gluten-free too. For a vegan version, swap out the eggs for flax eggs. Mix one tablespoon of ground flaxseed with three tablespoons of water for each egg. Use dairy-free cream cheese and peanut butter. For the butter, you can use coconut oil. These swaps keep the cake tasty for everyone! How you serve this cake can make it even more special. Try serving it warm with a scoop of vanilla ice cream. The hot cake and cold ice cream create a nice contrast. You can drizzle chocolate sauce on top for extra sweetness. Another cool idea is to turn it into a sundae. Layer cake pieces with chocolate sauce, ice cream, and whipped cream in a glass. Add some sprinkles or crushed peanuts on top for fun. These ideas can make your dessert stand out at any gathering! You can find the full recipe for this delightful dessert to try these variations yourself! After you enjoy this delicious cake, store any leftovers properly. Let the cake cool completely before you store it. Use an airtight container to keep it fresh. You can also wrap it tightly in plastic wrap. Make sure it is sealed well to avoid drying out. This cake stays moist and tasty when stored correctly. In the fridge, your cake lasts about five days. If you want to keep it longer, freeze it. Wrapped well, it can last up to three months in the freezer. When ready to eat, you can thaw it in the fridge overnight. This helps keep the texture nice and gooey. To enjoy your cake warm, reheat it gently. Use the microwave for quick heating. Place a slice on a microwave-safe plate and heat for about 10-15 seconds. Check it often to avoid overheating. You can also warm it in an oven. Preheat to 350°F (175°C) and heat for about 10 minutes. This keeps the cake's gooey center intact and enhances the rich flavors. An ooey gooey butter cake is a rich dessert. It has a thick, creamy layer on top of a dense cake base. The top layer is soft and almost custard-like. This cake often has a sweet and buttery flavor. People love it for its unique texture and taste. The chocolate peanut butter version adds a twist with chocolate and peanut butter flavors. Yes, you can make this cake ahead of time. It stores well in the fridge for several days. This makes it great for parties or gatherings. Just cover it with plastic wrap or foil to keep it fresh. You can also freeze it. Wrap pieces in plastic and place them in a freezer bag. It will stay good for up to three months. Thaw it in the fridge before serving. To check if your cake is done, look at the edges. They should be set and slightly pulled away from the pan. The center should be slightly gooey but not liquid. You can also use a toothpick. Insert it in the center; it should come out with some moist crumbs, not wet batter. If it comes out clean, the cake may be overbaked. Trust your instincts and enjoy the gooeyness! This guide covered everything about making a Chocolate Peanut Butter Ooey Gooey Butter Cake. We explored the key ingredients and how to use them. You learned step-by-step directions along with helpful tips for texture and serving. We also shared variations and storage tips to extend your cake's life. As you bake, remember that small changes can create big flavors. Enjoy your creation and share it with others!

Chocolate Peanut Butter Ooey Gooey Butter Cake Delight

If you love rich flavors and sticky textures, you’ll adore this Chocolate Peanut Butter Ooey Gooey Butter Cake Delight! Imagine

- 4 cups watermelon, cubed - 1 cup cucumber, diced - 1/2 cup red onion, finely diced - 1/2 cup fresh cilantro, chopped - 1 jalapeño, deseeded and minced - Juice of 2 limes - 1/4 cup crumbled cotija cheese (or feta) - Salt and black pepper to taste - 1 tablespoon olive oil - Optional: Tajín seasoning for sprinkling The main ingredients for Mexican Watermelon Salad create a refreshing and vibrant dish. Watermelon is sweet and juicy, perfect for summer. Cucumber adds crispness and coolness. The red onion gives a nice bite, while cilantro brings in fresh flavor. Jalapeño adds heat, but you can adjust it to your taste. Lime juice brightens the dish, making it zesty and fresh. Cotija cheese adds creaminess and saltiness. Olive oil ties everything together and enhances the flavors. - Other cheeses for variation - Additional herbs or spices - Alternative dressings You can switch things up with optional ingredients. Try using different cheese like goat cheese for a tangy twist. Fresh herbs like mint or basil can also add a new flavor. You might want to try other dressings, like a honey-lime combo, for a sweet touch. - Health benefits of watermelon - Benefits of cucumbers - Importance of fresh herbs This salad is not just tasty but also healthy. Watermelon is high in water and low in calories, helping keep you hydrated. Cucumbers are refreshing and packed with vitamins. Fresh herbs like cilantro boost flavor and provide antioxidants. Eating this salad can support your health while you enjoy its bright flavors. For the complete recipe, check out the Full Recipe section. - Start by cutting the watermelon into bite-sized cubes. You want about 4 cups. - Next, dice 1 cup of cucumber and finely chop 1/2 cup of red onion. - Chop 1/2 cup of fresh cilantro. For some heat, mince 1 jalapeño after removing the seeds. - In a large bowl, mix all the prepared ingredients. - Squeeze the juice of 2 limes over the salad. Drizzle 1 tablespoon of olive oil for flavor. - Gently toss everything together. Be careful not to crush the watermelon. - Present the salad in a large, colorful bowl. Garnish with cilantro sprigs and lime wedges. - This salad pairs well with grilled meats or fish. Serve alongside tacos for a complete meal. - For gatherings, consider using individual cups for fun, easy servings. You can find the full recipe in the earlier section to guide you through each step! To find a ripe watermelon, look for these signs: - Color: The outside should be deep green and slightly dull. - Field Spot: Check for a yellow spot. This shows it ripened in the field. - Sound: Tap it. A ripe watermelon sounds hollow. For size, pick one that feels heavy for its size. This means it has more water and is juicier. Adjust the jalapeño to control the heat: - Mild: Use less jalapeño or remove the seeds. - Medium: Use one jalapeño with seeds. - Spicy: Add more jalapeños or try serrano peppers. You can also add other spicy ingredients like hot sauce or chili powder. These can enhance the flavor without adding too much heat. Different dressings can change the taste of your salad: - Citrus dressing: Mix lime juice with olive oil for brightness. - Honey vinaigrette: This adds sweetness to balance the heat. Consider adding fruits or nuts for texture. Try: - Mango: For a sweet twist. - Pine nuts: For a crunchy bite. These enhancements make the salad unique and flavorful. For the full recipe, refer to the provided section. {{image_2}} You can switch out cotija cheese for feta cheese. Feta adds a creamy taste. If you want a dairy-free option, try nutritional yeast. It gives a cheesy flavor without cheese. Fresh herbs can change the salad's taste. Instead of cilantro, use mint for a cool twist. Basil also adds a lovely flavor to the mix. Want a tropical twist? Add ripe mango cubes to the salad. The sweetness pairs well with watermelon. Another fun idea is a Southwestern version. Add black beans for protein and a hearty feel. For winter parties, add roasted sweet potatoes. They add warmth and color. You can even include pomegranate seeds for a pop of flavor. In summer, keep it light and fresh. Use baby spinach for extra greens. This makes the salad even more refreshing for hot days. For the full recipe, check out the section above! To keep your Mexican watermelon salad fresh, store it in an airtight container. This helps prevent moisture loss and keeps the flavors intact. Glass containers work best as they do not absorb odors. If you use plastic, make sure it is BPA-free. Always cool the salad to room temperature before sealing to avoid condensation inside. You can keep the salad in the fridge for up to three days. After that, its freshness may fade. Look out for signs that it has gone bad. If the watermelon looks mushy or smells sour, it's time to toss it. The colors of the salad should remain bright and vibrant. Can you reheat watermelon salad? The answer is no. This salad is best enjoyed cold. Try serving it straight from the fridge for a refreshing bite. If you have leftovers, consider making a smoothie with them. Blend the salad with some yogurt for a tasty drink. Mexican Watermelon Salad is a bright and tasty dish. It combines fresh watermelon, cucumber, and red onion. This salad gets a flavor boost from lime juice and jalapeño. Crumbled cotija cheese adds creaminess. The dish is often topped with cilantro and a sprinkle of Tajín. It’s a refreshing choice for summer meals. Yes, you can prepare this salad in advance. However, I suggest adding the dressing later. This keeps the salad crisp and fresh. Chop the watermelon, cucumber, and onion a few hours ahead. Store them in the fridge until ready to serve. Mix the salad together just before eating. Absolutely! This salad is low in calories and high in nutrients. Watermelon helps hydrate your body. Cucumbers add crunch and vitamins. Fresh herbs like cilantro provide antioxidants. Cotija cheese gives protein and calcium. Overall, it’s a healthy and delicious dish for any meal. If you don’t have lime juice, try lemon juice. It has a similar tangy taste. You can also use vinegar, like apple cider or white wine vinegar. These options will still add the needed acidity. Adjust the amount to fit your taste preference. You can use frozen watermelon, but it may change the texture. Frozen fruit often becomes mushy when thawed. If you decide to use it, let it thaw first. Then, drain any excess liquid. This helps keep the salad from becoming too watery. Fresh watermelon is always the best choice for crunch. For the full recipe, check out the previous sections. This blog post covered how to make a refreshing Mexican watermelon salad. We discussed the main and optional ingredients, detailed preparation steps, and clever tips for enhancing the dish. I also shared fun variations and smart storage tips to keep your salad fresh. In conclusion, this salad is versatile and packed with nutrients. You can enjoy it during hot days or as a side dish for gatherings. By customizing ingredients, you can make it your own! Enjoy every bite of this colorful dish.

Mexican Watermelon Salad Refreshing Summer Delight

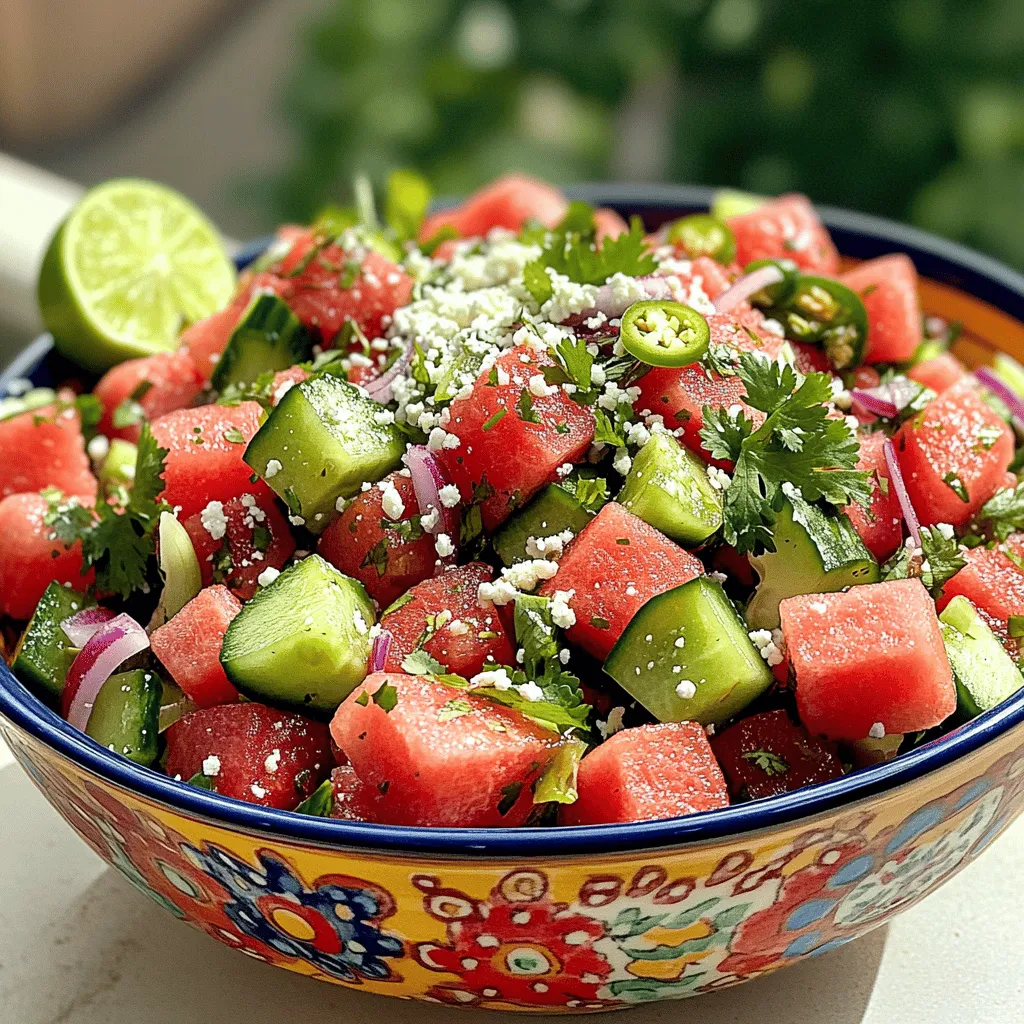
If you’re looking for a cool, tasty treat for summer, then you need to try Mexican Watermelon Salad. This vibrant

- 2 cups all-purpose flour - 1/2 teaspoon baking soda - 1 teaspoon sea salt The first step to making pan-banging chocolate chip cookies is gathering your essential ingredients. You start with all-purpose flour, baking soda, and sea salt. Each plays a key role in making your cookies rise and taste great. - 3/4 cup unsalted butter, melted - 1 cup brown sugar, packed - 1/2 cup granulated sugar Next, you need sweeteners and fats. Use unsalted butter, which adds moisture. Brown sugar gives a soft texture, while granulated sugar helps with crispiness. Together, they create a delicious balance in flavor. - 1 tablespoon vanilla extract - 1 large egg & 1 large egg yolk - 2 cups chocolate chips, semi-sweet or dark - Flaky sea salt for topping Finally, we have the add-ins and toppings. Vanilla extract boosts the cookie's flavor. The egg and yolk provide richness and binding. Chocolate chips are a must for that gooey center. Sprinkling flaky sea salt on top creates a nice contrast to the sweet cookie. You can find the full recipe [here](#). 1. Preheat the oven and prepare the baking sheet. Set your oven to 350°F (175°C). Line a baking sheet with parchment paper. This helps the cookies release easily after baking. 2. Combine dry ingredients in a medium bowl. In a medium bowl, whisk together: - 2 cups all-purpose flour - 1/2 teaspoon baking soda - 1 teaspoon sea salt Mixing these ensures even distribution of the leavening agent and salt. 1. Whisk together melted butter and sugars. In a large bowl, combine: - 3/4 cup unsalted butter, melted and slightly cooled - 1 cup brown sugar, packed - 1/2 cup granulated sugar Whisk until smooth and well blended. The mixture should be glossy. 2. Incorporate eggs and vanilla extract. Add to the sugar mixture: - 1 tablespoon vanilla extract - 1 large egg - 1 large egg yolk Whisk until everything is fully mixed. This adds flavor and richness. 1. Combine wet and dry ingredients without overmixing. Gradually add the dry ingredients to the wet mix. Stir gently until just combined. Do not overmix; a few lumps are okay. 2. Employ the pan-banging technique during baking. Fold in: - 2 cups chocolate chips, semi-sweet or dark Scoop the dough onto the baking sheet, spacing them well. Bake for 10 minutes. Then, remove the pan and bang it against the counter. This flattens the cookies slightly. Return the pan to the oven and bake for another 5-7 minutes. The edges should be golden, and the centers look a bit underbaked. Top each cookie with a pinch of flaky sea salt right after baking. Enjoy the mix of sweet and salty! For the complete guide, see the Full Recipe. To get the best texture from your cookies, chilling the dough is key. I recommend chilling it for at least 30 minutes. This helps the cookies rise better and stay thicker. If you skip this step, your cookies might spread too much. Baking time can vary by oven. I find that my oven bakes cookies faster than others. Start with the suggested time, but keep an eye on them. The edges should be golden, while the centers stay soft. If you need alternatives for all-purpose flour, try using oat flour or almond flour. These can change the taste a bit but still work well. For sweeteners, you can use coconut sugar or honey in place of brown sugar. Remember, these swaps may alter the texture and flavor. Mix-ins can add fun to your cookies. Try adding nuts, dried fruits, or even different types of chocolate. This creates a unique flavor and makes each batch special. Serving your cookies can be just as fun as baking them. Stack them high on a rustic wooden board for a lovely display. You can also use a decorative plate. A small bowl of extra chocolate chips on the side adds a nice touch. For cookie photography, natural light is best. Aim for soft, diffused light to make your cookies shine. A simple backdrop, like a clean table or colorful cloth, can make your cookies pop in photos. {{image_2}} You can take your pan-banging chocolate chip cookies to the next level. Use different types of chocolate. Try white, milk, or dark chocolate chips. Each type adds a unique taste. You can even mix them for a fun twist. Adding nuts or dried fruits can enhance these cookies, too. Chopped walnuts or pecans give a nice crunch. Dried cherries or cranberries add a sweet and tart flavor. Mix and match to find your favorite combo! If you need gluten-free options, don't worry! You can use gluten-free flour blends. Just make sure to check the ratio. Many brands have their own recommendations for baking. For a vegan version, swap the butter with coconut oil or a vegan butter substitute. Use flax eggs instead of regular eggs. Just mix one tablespoon of ground flaxseed with three tablespoons of water. Let it sit for a few minutes to thicken. This keeps the cookies soft and tasty while making them plant-based. Seasonal flavors can make these cookies even more special. In fall, add spices like cinnamon or nutmeg for warmth. These spices pair well with the chocolate and make your kitchen smell amazing. During the holidays, mix in peppermint extract or crushed candy canes. This gives a festive touch and a burst of flavor. Get creative and have fun with these seasonal ideas! To store your cookies at room temperature, place them in an airtight container. This keeps them soft and chewy. Use parchment paper between layers to avoid sticking. Keep them in a cool, dry spot away from sunlight. For best freshness, enjoy your cookies within three days. After that, they may start to lose their wonderful taste. You can freeze cookies and dough for later use. To freeze baked cookies, let them cool completely first. Then, place them in a freezer-safe bag or container. They can last up to three months in the freezer. For cookie dough, scoop the dough onto a baking sheet. Freeze until solid, then transfer to a bag. When you're ready to bake, thaw the dough in the fridge overnight. Cookies stored at room temperature last about three days. In the fridge, they can stay fresh for about a week. Frozen cookies last for up to three months. Always check for any signs of spoilage before eating. What does pan-banging do for cookie texture? Pan-banging helps cookies spread and flatten. This creates a crisp edge and soft center. The method gives a chewy texture that you will love. It also helps to form beautiful, puddles of melted chocolate. How can I tell when my cookies are done baking? Look for golden edges and a soft center. The center should look slightly underbaked. This means they will continue to cook after you take them out. If the edges are brown, they are likely ready. Why are my cookies flat or spreading too much? Flat cookies can happen for a few reasons. Too much butter or not enough flour can cause this. Also, if the dough is warm when you bake, it can spread too much. Chilling the dough helps prevent this issue. How can I fix underbaked cookie centers? If your cookies have underbaked centers, bake them longer. You can return them to the oven for a few minutes. Check them often to avoid overbaking. Remember, they will firm up as they cool. What goes well with pan-banging chocolate chip cookies? These cookies pair perfectly with a glass of milk. You can also enjoy them with coffee or tea. For a fun twist, try them with ice cream for a delicious dessert. How do I make a cookie sandwich? To make a cookie sandwich, take two cookies. Place a scoop of ice cream or frosting between them. Gently press together. You can roll the edges in sprinkles or mini chocolate chips for extra fun. This blog post covered all you need to make perfect cookies. We talked about must-have ingredients, easy steps, and helpful tips. I shared ways to change flavors for any season and advice for storing cookies. Remember, chilling the dough is key to better texture. With the techniques and tricks provided, you can enjoy fresh, delicious cookies any time. Now, get ready to bake and impress friends and family with your cookie skills!

Pan-Banging Chocolate Chip Cookies Simple and Tasty

If you love cookies that are gooey, chewy, and oh-so-chocolatey, you’re in the right place! Pan-banging chocolate chip cookies are

- Pasta and Seafood Options - I use rotini pasta for this dish. It holds the dressing well. Cooked shrimp and scallops add a lovely ocean flavor. You can choose fresh or frozen seafood based on what you like. - Vegetables and Herbs Contribution - Cherry tomatoes bring sweetness and color. Diced cucumber adds a refreshing crunch. Red onion gives a mild bite, while parsley brightens the dish. Each ingredient works together to create a fresh and tasty salad. - Flavor Profile Enhancers - Olive oil is the base for the dressing. It adds richness and smoothness. Fresh lemon juice gives a zesty kick. Garlic powder adds depth without overpowering other flavors. - Seasoning Notes - Salt and pepper are key for balance. Taste and adjust the seasoning as needed. You can add more lemon juice for extra zing. This combination makes the seafood and veggies shine. For the complete step-by-step preparation, check the Full Recipe. Importance of Rinsing Rinsing pasta is key. It stops the cooking process. This helps keep the pasta firm. If you skip this step, the pasta may become mushy. Rinse it under cold water right after draining. Cooking Tips for Perfect Texture Cook the rotini pasta until it is al dente. This means it should still have a slight bite. Follow the package instructions carefully. Stir the pasta occasionally to prevent it from sticking. Once done, drain and rinse! Prepping Techniques for Freshness Use fresh seafood for the best flavor. Chop the shrimp and quarter the scallops. Halve the cherry tomatoes, and dice the cucumber. Finely chop the red onion and parsley. Fresh ingredients make a big difference. Combining Ingredients Efficiently In a large bowl, mix the seafood with the veggies. This helps them blend well. Make sure every piece is evenly distributed. A good mix means great taste in every bite. Whisking Tips In a separate bowl, whisk the olive oil, lemon juice, garlic powder, salt, and pepper. Use a fork or a whisk for a smooth blend. This dressing adds flavor and keeps the salad fresh. Adjusting for Flavor Taste the dressing. If it needs more zing, add extra lemon juice. For a kick, add more garlic powder. Adjust until you love the flavor! Combining Ingredients Smoothly Add the cooled pasta to the seafood and vegetable mix. Pour the dressing over it all. Gently toss to combine everything. Make sure each piece gets coated with the dressing. Importance of Refrigeration Cover the bowl with plastic wrap and chill in the fridge. Let it marinate for at least 30 minutes. This time helps the flavors meld together beautifully. Enjoy your Ocean Breeze Seafood Pasta Salad! Fresh vs. Frozen Options You can choose between fresh and frozen seafood. Fresh seafood tastes great but may not always be available. Frozen seafood is often just as good and lasts longer. When buying frozen seafood, look for vacuum-sealed packages. This helps keep the flavor and texture intact. Always check the expiration date before buying. Best Seafood Pairings For this pasta salad, shrimp and scallops work well together. They are mild and soak up flavors nicely. You can also add crab or lobster for a richer taste. Pair your seafood with bright veggies like cherry tomatoes and cucumbers. These add color and crunch to your dish. Additional Seasoning Suggestions To boost flavors, consider adding fresh herbs like basil or dill. You can also sprinkle in some capers or olives for a salty kick. A dash of hot sauce can add heat if you prefer. Play around with seasonings to find your perfect blend. Recommended Serving Additions Serve your salad with lemon wedges to squeeze on top. This adds freshness. You can also include crusty bread on the side. This helps soak up any leftover dressing. For extra flavor, top with grated cheese like Parmesan or feta. It enhances the dish and makes it even more delightful. Explore more tips and tricks to make your Ocean Breeze Seafood Pasta Salad shine with the [Full Recipe]. {{image_2}} If you want to switch things up, consider using other proteins in your seafood pasta salad. Chicken or turkey works great as a substitute. Just cook the meat until it’s done, then chop it into small pieces. You can also use canned tuna for a quick fix. For those who prefer vegetarian options, tofu is a fantastic choice. Firm tofu absorbs flavors well. Simply dice it and add it to your salad. You can also use chickpeas for a protein boost. They add a nice texture and are very filling. Changing the dressing can make your seafood pasta salad feel fresh. A creamy dressing adds richness. You might mix mayonnaise with Greek yogurt and lemon juice. This creates a tasty, tangy base. If you crave some heat, try adding hot sauce or chili flakes. A spicy vinaigrette with olive oil, vinegar, and chili paste can bring excitement. Just whisk these ingredients together and pour it over your salad. Using seasonal veggies can elevate your seafood pasta salad. In spring, toss in peas or asparagus for a crisp bite. Summer is perfect for fresh corn or bell peppers. They add color and crunch. As the seasons change, adjust your dressing too. In fall, a hint of maple syrup can add sweetness. In winter, consider adding roasted garlic for a warm flavor. This keeps your dish feeling new and exciting throughout the year. Refrigerator Storage Tips Store your seafood pasta salad in an airtight container. This keeps it fresh and prevents odors from other foods. Always refrigerate the salad after serving. It will stay tasty for up to three days. Make sure to check the temperature of your fridge. It should be at or below 40°F (4°C) to keep your food safe. Freezing Options Freezing seafood pasta salad is not the best choice. Seafood can change texture and taste when frozen. If you must freeze it, do so without the seafood. You can add seafood after you thaw. Store the salad base in a freezer-safe container for up to a month. How Long Will It Last? When kept in the fridge, your salad will last about three days. If you notice it smells off or looks different, it's best to toss it. Signs of Spoilage Watch for these signs: - Off smells - Slimy texture - Discoloration If you see any of these signs, do not eat the salad. Always trust your senses. Fresh food makes the best meals! I love using rotini pasta for this salad. It holds dressing well. Penne or fusilli are great too. They also trap bits of seafood and veggies. Use any pasta you enjoy; just cook it until al dente. To keep it fresh, rinse the pasta with cold water. This stops the cooking and cools it down. Always dry your seafood before adding it. Keep the dressing separate until you serve. This helps maintain the right texture. Yes, you can prep this salad a day before. Just mix all the ingredients, but skip the dressing. Store the salad in the fridge. Add the dressing right before serving. This keeps everything crisp and tasty. Consider adding diced bell peppers or celery for crunch. You can also use toasted nuts or seeds. These add great texture and flavor. Try adding some croutons for a fun twist too! You can find the full recipe for Ocean Breeze Seafood Pasta Salad [here](#). In this post, I covered the key ingredients and step-by-step directions for a tasty seafood pasta salad. We explored how to choose fresh seafood, enhance flavors, and mix ingredients for the best results. Remember, the right dressing and storage will keep your salad fresh. Feel free to change ingredients based on your taste and season. This dish is versatile and easy to make. Enjoy experimenting with it and share your delicious results!

Easy Seafood Pasta Salad Fresh and Flavorful Dish

Are you ready to make a delicious seafood pasta salad that’s both easy and fresh? This dish combines tender pasta

To make authentic lo mein, you need a few key items. Start with: - 8 oz lo mein noodles - 2 tablespoons vegetable oil - 1 red bell pepper, sliced - 1 cup broccoli florets - 1 cup snap peas - 2 carrots, julienned - 3 cloves garlic, minced - 1 inch ginger, grated - 2 green onions, chopped - Sesame seeds for garnish These ingredients create a base rich in flavor and texture. The lo mein noodles are soft and chewy, which is a must for this dish. The fresh veggies add color and crunch. Next, we need sauces to elevate the taste. The key sauces are: - 3 tablespoons soy sauce - 2 tablespoons oyster sauce (or mushroom sauce for a vegetarian option) - 1 tablespoon sesame oil Soy sauce gives a salty kick. Oyster sauce adds depth and umami. If you prefer a vegetarian option, mushroom sauce works well too. Sesame oil is the finishing touch, adding a nutty flavor. For the best flavor, use fresh, seasonal veggies. I recommend: - Red bell pepper - Broccoli florets - Snap peas - Carrots These vegetables not only taste great but also look appealing. They add crunch and sweetness, making your lo mein a delight to eat. You can mix in other veggies like bok choy or mushrooms for more variety. For the full recipe, refer to the sections above. To make the perfect lo mein, start with the noodles. Boil a large pot of water. Once it boils, add 8 oz of lo mein noodles. Cook them until they are al dente, which usually takes about 4-5 minutes. After cooking, drain the noodles. Toss them with a bit of sesame oil to keep them from sticking. This step is key for great texture. Next, let’s get the veggies and aromatics ready. Slice 1 red bell pepper and julienne 2 carrots. Chop 1 cup of broccoli florets and 1 cup of snap peas. Mince 3 cloves of garlic and grate 1 inch of ginger. These ingredients bring vibrant colors and flavors. Having them prepped makes cooking easier and faster. Now for the fun part! Heat 2 tablespoons of vegetable oil in a large skillet or wok over medium-high heat. Add the minced garlic and ginger. Sauté for about 30 seconds until fragrant. Then, toss in your sliced bell pepper, broccoli, snap peas, and carrots. Stir-fry everything for about 5 minutes until the veggies are tender yet crisp. After the veggies are cooked, add the lo mein noodles. Mix everything well to combine. Then drizzle 3 tablespoons of soy sauce and 2 tablespoons of oyster sauce over the dish. Stir again to ensure the noodles and veggies are coated. Cook for an additional 2-3 minutes for the flavors to meld. Finally, remove the skillet from heat. Drizzle with 1 tablespoon of sesame oil and add 2 chopped green onions. Toss everything one last time. Your savory vegetable lo mein is almost ready to serve. Plate it up and sprinkle sesame seeds on top for that extra crunch. For the full recipe, you can check the earlier sections. Enjoy your delicious meal! To get lo mein just right, focus on the noodles. Use fresh lo mein noodles if you can find them. They have a great bite and taste. If you use dried noodles, cook them until al dente. That means they should be firm, not soft. Rinse them under cold water after cooking. This helps stop the cooking process. Toss them in sesame oil to keep them from sticking together. Authenticity shines through simple sauces and fresh ingredients. Soy sauce is a must. It adds saltiness and depth. Oyster sauce brings a hint of sweetness and umami. If you prefer a vegetarian option, use mushroom sauce. Add fresh ginger and garlic for a fragrant base. Using fresh vegetables adds color and crunch. Try a mix of bell peppers, broccoli, and snap peas. This not only tastes great but looks amazing on the plate too. Timing is key in stir-frying. Start with high heat to get that wok hei flavor. Heat your oil until it shimmers before adding ingredients. Aromatics like garlic and ginger cook fast, so keep an eye on them. Add vegetables in stages, starting with the ones that take longer to cook. Stir-fry quickly to keep them crisp. Finally, combine everything, allowing the flavors to meld without overcooking. For the best flavor, serve immediately after cooking. For the full recipe, refer to the recipe section above. {{image_2}} You can make a delicious vegetarian or vegan lo mein. Replace the oyster sauce with mushroom sauce. This swap keeps the dish rich and full of flavor. You can add more veggies like bell peppers, mushrooms, and bok choy. These choices add variety and texture. For protein, consider using tofu. Tofu absorbs flavors well, making each bite satisfying. If you want more protein, add chicken or shrimp. Slice chicken breast into thin strips. Cook it in the pan before adding the veggies. For shrimp, toss them in when the veggies are nearly done. If you prefer tofu, use firm tofu. Cut it into cubes and sauté it until golden. This gives a nice crunch and adds a hearty touch. Lo mein varies across regions. In New York, you might find a sweeter sauce. On the other hand, San Francisco styles often use fresh seafood. In China, some regions add spicy chili oil for a kick. Each style brings its unique twist, making lo mein fun to explore. You can try different sauces to match your taste or mood. Enjoy experimenting with these variations in your authentic lo mein recipe! For the full recipe, check out the detailed instructions. To store leftover lo mein, let it cool first. Then, place it in an airtight container. Make sure to keep it in the fridge. It will stay fresh for about three to four days. Label the container with the date. This helps you remember when you made it. When you reheat lo mein, the stove is best. Heat a bit of oil in a pan. Add the lo mein and a splash of water. Stir it around over medium heat. This keeps your noodles from getting dry. You can also use a microwave. Cover the bowl with a damp paper towel. This adds moisture while it heats. You can freeze lo mein for later meals. First, let it cool down completely. Then, divide it into single servings. Use freezer-safe bags or containers. Remove as much air as possible. Lo mein can stay frozen for up to three months. When you’re ready to eat, thaw it overnight in the fridge. I recommend using lo mein noodles for the best results. They are soft and chewy. You can find them in most grocery stores. Fresh noodles give a great texture. Dried noodles work too, but they may need extra cooking time. If you can't find lo mein noodles, you can use egg noodles as a substitute. Yes, you can make Lo Mein without oyster sauce. Use soy sauce as a base for flavor. Many people like to add a splash of mushroom sauce instead. This option gives a nice umami kick. You can also add a bit of hoisin sauce for sweetness. Your dish will still taste delicious without oyster sauce. To make Lo Mein gluten-free, choose gluten-free noodles. Rice noodles are a great option. Make sure to check the labels on sauces. Many soy sauces contain wheat. Use tamari or gluten-free soy sauce instead. This way, you can enjoy the flavors without gluten. You learned how to make authentic Lo Mein with simple steps and key ingredients. I shared essential tips for perfect texture and rich flavors. You also discovered tasty variations, from vegetarian options to different protein choices. Plus, I covered storage and reheating methods for leftovers. Making Lo Mein at home is fun and rewarding. With practice, you can impress anyone with your dish. Enjoy cooking and savor the flavors of your homemade Lo Mein!

Authentic Lo Mein Recipe Flavorful and Easy Dish

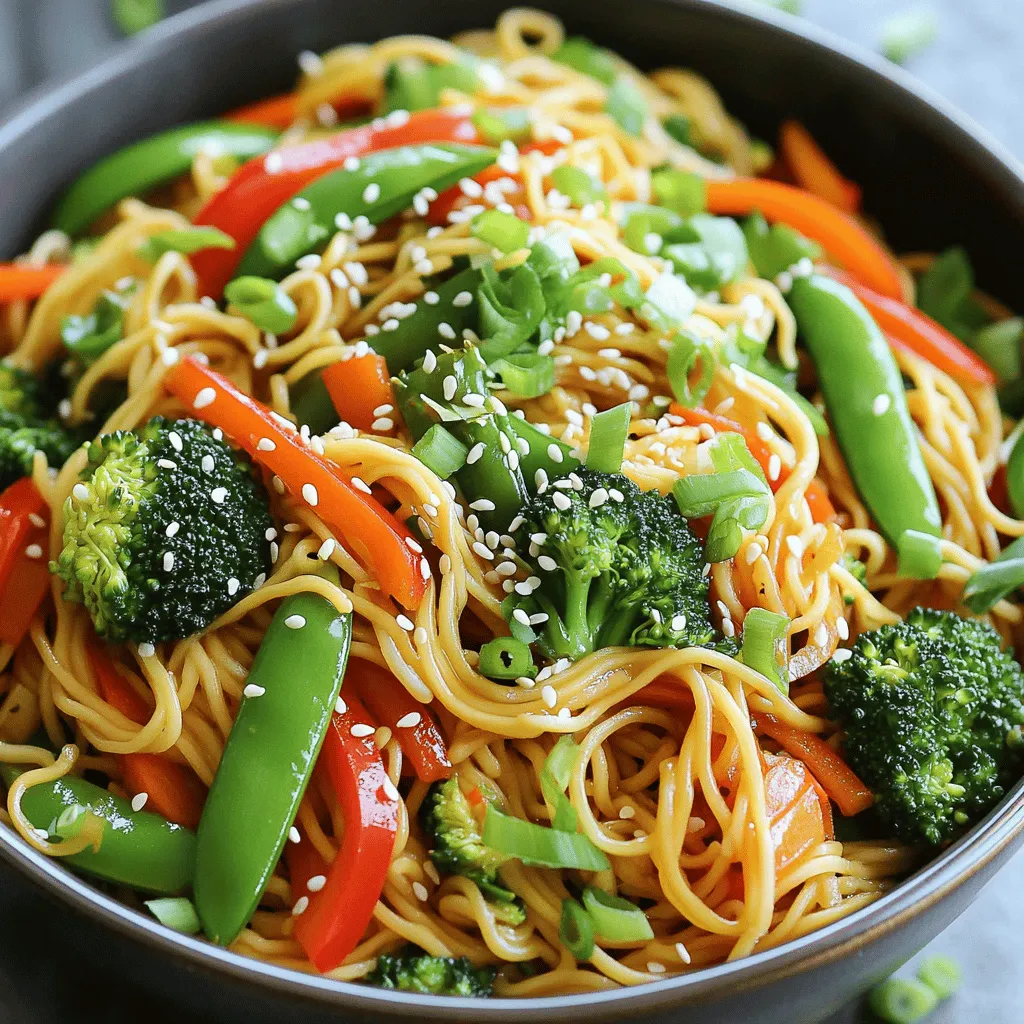
If you crave a dish that’s bursting with flavor, you’ve come to the right place! In this Authentic Lo Mein

- 4 large eggs - 1 cup granulated sugar - 1 teaspoon vanilla extract - 1 cup all-purpose flour - 1/4 cup unsweetened cocoa powder - 1 teaspoon baking powder - 1/4 teaspoon salt - 1/2 cup creamy peanut butter - 1 cup heavy whipping cream - 1/2 cup powdered sugar - 1 cup mini Reese's peanut butter cups, chopped - 1/2 cup chocolate ganache for drizzling The eggs give the cake structure and moisture. If you're vegan, try using flax eggs. The granulated sugar adds sweetness. For a healthier option, you can use coconut sugar. Vanilla extract boosts flavor. You can swap it with almond extract for a twist. The all-purpose flour is essential for the cake's texture. If you're gluten-free, use a gluten-free flour blend. Cocoa powder gives that rich chocolate flavor. Ensure you use unsweetened cocoa for the best taste. Baking powder helps the cake rise. If you don't have it, baking soda works too, but use less. Salt balances the sweetness and enhances flavor. Peanut butter is the star of this cake. If you want a nut-free version, try sun butter instead. Heavy whipping cream creates a rich filling. You can use coconut cream for a dairy-free option. Powdered sugar adds sweetness and helps stabilize the whipped cream. Mini Reese's peanut butter cups are a fun and tasty addition. If you can't find them, regular Reese's cups chopped up work well. Finally, chocolate ganache adds a lovely finish. You can use store-bought ganache to save time. To make this cake, you need a few key tools. A large mixing bowl is essential for mixing the batter. You'll also need a whisk for beating eggs and sugar. A separate bowl for dry ingredients is helpful. A sifter is great for cocoa and flour. Use a jelly roll pan to bake the cake. Parchment paper makes it easy to lift the cake out. A clean kitchen towel dusted with powdered sugar helps roll the cake. A sharp knife cuts the cake into slices. Finally, a serving platter presents your beautiful creation. For the full recipe, check out the details above. Start by gathering your ingredients. You’ll need eggs, sugar, vanilla, flour, cocoa powder, baking powder, and salt. In a large mixing bowl, whisk the eggs and sugar together. Beat them until they turn pale and fluffy. This should take about five minutes. Next, add in the vanilla extract and mix it well. In another bowl, sift together the flour, cocoa powder, baking powder, and salt. Once mixed, gently fold this dry mix into the egg mixture. Be careful not to overmix. You want a light and airy batter. Now it’s time to bake! Preheat your oven to 350°F (175°C). Line a 15x10-inch jelly roll pan with parchment paper. Leave some overhang for easy lifting later. Pour the batter into the pan and spread it evenly. Bake for 12 to 15 minutes. Check by inserting a toothpick in the center; it should come out clean. As soon as the cake is done, prepare a clean kitchen towel. Dust it lightly with powdered sugar. Invert the cake onto the towel, then peel off the parchment paper carefully. Starting at one end, tightly roll the cake with the towel into a log shape. Allow it to cool completely while it’s rolled. While the cake cools, let’s make the filling. In a mixing bowl, whip the heavy cream and powdered sugar together. Keep mixing until stiff peaks form. Then, fold in the creamy peanut butter until it’s smooth and well mixed. After the cake cools, gently unroll it. Spread the peanut butter whipped cream evenly over the cake. Don’t forget to sprinkle chopped mini Reese's cups on top! Carefully re-roll the cake without the towel. Keep it tight, but not squished. Place it seam side down on a serving platter. Finally, drizzle chocolate ganache over the top and add extra chopped Reese's cups for garnish. Slice it up and enjoy your decadent treat! For the full recipe, check the details above. To keep your cake from sticking, line your jelly roll pan with parchment paper. Leave some paper hanging over the edges. This makes lifting the cake easy. After baking, let the cake cool for a few minutes. Then, flip it onto a powdered sugar-dusted towel. This step helps keep the surface soft. Remember, cooling it while rolled helps keep the shape. When whipping cream, start with a cold bowl and cold beaters. This helps the cream whip faster. Pour the heavy cream into the bowl, then add powdered sugar. Start on low speed to mix, then increase to high. Whip until stiff peaks form. Be careful not to over-whip; it can turn grainy. If this happens, gently fold in a bit more fresh cream to save it. If your cake cracks while rolling, don't worry. This can happen if it's not cool enough. Always let the cake cool in the towel. If your filling is too runny, add more peanut butter or whipped cream. This will thicken it up. Lastly, if the ganache is too thick, warm it slightly to make it easier to drizzle. Following these tips will help you make the perfect Decadent Reese's Peanut Butter Cup Roll Cake! For the complete recipe, check the Full Recipe section. {{image_2}} You can make this roll cake gluten-free! Use a gluten-free flour blend instead of all-purpose flour. Make sure the blend has xanthan gum for better texture. This change keeps the cake soft and tasty for everyone. You will still enjoy the same rich flavors. While the peanut butter and chocolate are great, you can mix it up. Try adding a few drops of mint extract for a fresh twist. You can also fold in some chopped nuts, like pecans or almonds, for crunch. For a fruity touch, add some mashed bananas to the filling. Each of these options gives a unique taste. Toppings make this dessert even more fun. You can drizzle caramel sauce over the top with the chocolate ganache. Shredded coconut or crushed cookies also add nice texture. Serve slices with a dollop of whipped cream for extra creaminess. A scoop of vanilla ice cream pairs perfectly with this cake too. For the full recipe, check out the step-by-step guide. To keep your roll cake fresh, wrap it tightly in plastic wrap. Place it in an airtight container. This helps keep moisture in and air out. Your cake will stay good for up to three days in the fridge. If you want it to last longer, consider freezing. To freeze your cake, first wrap it in plastic wrap. Make sure it is tight. Then, wrap it in aluminum foil for extra protection. You can freeze the cake for up to two months. When you’re ready to enjoy it, let it thaw in the fridge overnight. When you want to serve your roll cake, avoid reheating it in the microwave. This can make the cake tough. Instead, let it sit at room temperature for about 30 minutes. This will restore its softness. If you prefer it warm, place slices in the oven at 300°F for about 5-10 minutes. Check often to avoid drying it out. Enjoy your decadent Reese's peanut butter cup roll cake! For the full recipe, check the details above. Yes, you can make this cake in advance. It’s great for parties. Prepare the roll cake and fill it. Then, wrap it tightly in plastic wrap. Store it in the fridge overnight. This helps the flavors blend. You can also freeze it for a longer time. Just remember to thaw it before serving. The cake lasts about 3 to 4 days in the fridge. Keep it wrapped well to avoid drying out. Check for any changes in texture or smell before serving. If any leftovers remain, enjoy them quickly. This cake is best fresh but still tasty after a few days. To slice a roll cake, use a sharp, serrated knife. This helps cut through the layers easily. Start at one end and slice gently. Aim for about 1-inch thick slices for the best presentation. Wipe the knife clean between slices for neat cuts. Enjoy each piece with a drizzle of chocolate ganache! For the full recipe, check out the Decadent Reese's Peanut Butter Cup Roll Cake. You learned about making a delicious cake. We covered key ingredients, tools, and step-by-step instructions. You also found tips to avoid sticking and ways to enhance flavor. Variations, like gluten-free options and serving ideas, open up new possibilities. Finally, we discussed storage and common questions. Enjoy making this cake with confidence, knowing you have all the tools for success!

Decadent Reese’s Peanut Butter Cup Roll Cake Delight

If you love chocolate and peanut butter, you’re in for a treat! My Decadent Reese’s Peanut Butter Cup Roll Cake

To make Bavarian cream, you need a few key ingredients. Here’s a list: - 2 cups heavy cream - 1 cup milk - 3/4 cup granulated sugar - 1 tablespoon vanilla extract - 1 tablespoon gelatin powder - 3 tablespoons cold water - 1/2 cup Greek yogurt These items create a rich and creamy base for your dessert. The heavy cream gives it a smooth texture, while the yogurt adds a slight tang. The gelatin helps it set, making it easy to serve. Berries add fresh flavor and color to your Bavarian cream. I like using: - 1 cup mixed berries (strawberries, blueberries, raspberries) When picking berries, look for vibrant colors and firm textures. Fresh berries taste best, but frozen can work too. Just thaw and drain them before using. You can mix and match berries based on what you enjoy. Garnishes make your dessert look pretty and add extra taste. Here are some ideas: - Mint leaves for garnish - Honey for drizzling Mint leaves offer a bright touch that refreshes the palate. A drizzle of honey gives a lovely sweetness to the berries. These simple additions can elevate your dish and impress your guests. For the full recipe, check out the details and enjoy making this delightful dessert! To start, you need to prepare the gelatin. In a small bowl, sprinkle 1 tablespoon of gelatin powder over 3 tablespoons of cold water. Let it sit for about 5 minutes. This process is called blooming. It helps the gelatin dissolve well later. Next, we create the cream base. In a saucepan, combine 1 cup of milk and 1/2 cup of granulated sugar. Heat over medium heat, stirring until the sugar dissolves. Do not boil the mixture. Once warm, remove it from the heat. Add the bloomed gelatin and stir until it fully dissolves. Then, add 1 tablespoon of vanilla extract for flavor. Now, it’s time to whip the cream. In a large bowl, pour 2 cups of heavy cream. Use a hand mixer to whip it until soft peaks form. This means the cream should hold its shape but still be smooth. Next, gently fold the whipped cream into the milk-gelatin mixture. Be careful not to deflate the whipped cream. Finally, add 1/2 cup of Greek yogurt and fold until smooth. This will add creaminess and tang. Once combined, pour the mixture into serving glasses or a mold. Refrigerate for at least 4 hours, or until set. When ready, top with mixed berries and mint leaves. Enjoy your delightful dessert! For more details, check the Full Recipe. To get the best texture for Bavarian cream, timing is key. Make sure to let the gelatin bloom for about 5 minutes. This step helps it dissolve better. When you mix the warm milk and sugar, do not let it boil. Heat it just enough to dissolve the sugar. If you rush this, your cream may not set well. Lastly, chill the cream for at least 4 hours. This waiting time lets it firm up perfectly. One common mistake is not allowing the gelatin to bloom properly. If you skip this step, it can clump. Another mistake is overwhipping the cream. You want soft peaks, not stiff peaks. Overwhipping can make your cream too dense. Also, don’t skip the Greek yogurt. It adds a nice tang and creaminess. Lastly, don’t forget to fold gently. Stirring too hard can deflate the cream. You can enhance your Bavarian cream with extra flavors. Try adding a bit of lemon zest for brightness. A splash of almond extract can give it a nice twist too. You can also mix in some cocoa powder for a chocolate version. For a fun touch, add a splash of liqueur, like Grand Marnier. This adds a sophisticated flavor boost. If you want to keep it simple, fresh vanilla is always a great choice. For the full recipe, check out the detailed steps above. {{image_2}} You can use any berry you like for this dessert. Strawberries, blueberries, and raspberries work great. You can mix and match them too! Blackberries and even cherries can add fun flavors. Fresh berries taste best, but frozen ones are good in a pinch. You can also make a berry sauce by cooking down some berries with sugar. Pour this sauce over the Bavarian cream for a fruity twist. Want to change the flavor? Try adding zest from a lemon or orange. This will give your Bavarian cream a bright and zesty kick. If you love chocolate, melt some dark chocolate and mix it in. This adds a rich taste that pairs well with the cream. Just remember to let the chocolate cool before adding it to the cream. You can also try using flavored extracts, like almond or coconut, for something unique. You can easily make this dessert fit your diet. For a dairy-free option, use coconut milk instead of cream and milk. Replace the Greek yogurt with a dairy-free yogurt. To make it sugar-free, use a sugar substitute that measures like sugar. Always check if the substitute works well in desserts. These options keep the dessert tasty while meeting your dietary needs. Try these variations to make the Bavarian cream your own! For the complete recipe, check out the Full Recipe section. To keep your Bavarian cream fresh, store it in the fridge. Use an airtight container to prevent odors from other foods. You can also cover each glass with plastic wrap. This keeps the cream smooth and creamy. You can freeze Bavarian cream if you have leftovers. Pour it into an airtight container. Leave some space at the top for expansion. When you want to eat it, thaw it in the fridge overnight. Stir well before serving. Bavarian cream lasts about 3 to 5 days in the fridge. Check for any changes in smell or texture. If it looks watery or smells sour, it’s time to toss it. For frozen Bavarian cream, it stays good for up to 2 months. Enjoy it while it’s fresh for the best taste! For more details, check the Full Recipe. Bavarian cream is a light and creamy dessert. It has a smooth texture with a rich flavor. This dessert is made with cream, milk, sugar, and gelatin. The gelatin helps it set. Often, people mix in flavors like vanilla. You can serve Bavarian cream with fruits, like berries, for a tasty treat. Yes, you can make Bavarian cream ahead of time. It needs time to set in the fridge. I recommend making it at least four hours before serving. You can even make it a day in advance. Just cover it well to keep it fresh. This way, you can enjoy a stress-free dessert on the day you serve it. To prevent gelatin from clumping, always bloom it first. Start by sprinkling the gelatin powder over cold water. Let it sit for about five minutes. This helps it dissolve better later. When you add it to the warm milk mixture, stir until it fully dissolves. If you follow these steps, you'll have a smooth Bavarian cream every time. For the full recipe, check out the detailed steps. Bavarian cream offers a rich, creamy treat that can dazzle any dessert table. We explored its main ingredients and how to select the best berries and toppings. The step-by-step guide showed how to prepare gelatin and create a smooth cream. I shared tips to achieve the right texture and avoid mistakes. Variations let you play with flavors and dietary needs. Proper storage keeps your cream fresh and delicious. Enjoy crafting this delightful dessert that can impress friends and family!

Bavarian Cream and Berries Delightful Dessert Recipe

Are you ready to impress your friends and family with a stunning dessert? Bavarian Cream and Berries bring together rich

- 12 oz rigatoni pasta - 1 lb Italian sausage (mild or spicy) - 1 medium onion, finely chopped - 3 cloves garlic, minced - 1 red bell pepper, diced - 1 teaspoon dried oregano - 1 teaspoon red pepper flakes (optional, for extra heat) - ½ cup grated Parmesan cheese - Olive oil for cooking - Salt and black pepper to taste - Fresh basil leaves for garnish To create my Easy Italian Sausage Rigatoni, gather these simple ingredients. The rigatoni pasta acts as a hearty base, holding on to the rich sauce. Italian sausage brings a savory depth, whether you choose mild or spicy. Fresh vegetables like onion, garlic, and red bell pepper add flavor and color. For spices, dried oregano is a must. It brings that classic Italian taste. If you want some heat, red pepper flakes work great. Don’t forget Parmesan cheese; it adds a creamy touch that ties everything together. You will need olive oil for cooking. It helps the ingredients cook evenly. Salt and black pepper enhance the flavors. Fresh basil leaves add a nice touch right before serving. This dish is not just tasty; it's also easy to make. You can find the full recipe in the article above. - Cook rigatoni pasta until al dente. This means it should be firm but not hard. - Drain and reserve 1 cup of pasta water. This water helps the sauce stick. - Sauté Italian sausage in olive oil. Use just enough oil to coat the pan. - Break apart sausage and cook until browned. This usually takes about 5-7 minutes. - Add onions and bell peppers to the skillet. Let them cook for 5 minutes until soft. - Stir in garlic and crushed tomatoes. These add flavor and moisture to the dish. - Mix pasta with sauce and add cheese. Stir well to ensure every piece is covered. - Adjust consistency with reserved pasta water. This will help achieve your desired sauce thickness. For the full recipe, check out the instructions to ensure you get each step right and enjoy your cooking journey! To make your Easy Italian Sausage Rigatoni taste great, balance your seasonings. Use enough salt to enhance the flavors. Start with one teaspoon of salt and adjust to your taste. For a bit of heat, add red pepper flakes. If you like spice, feel free to add more. Just remember, a little goes a long way! I recommend using a skillet for cooking the sausage. This method gives it a nice golden color. Break the sausage apart as it cooks. This helps it brown evenly. To create a richer sauce, let it simmer longer. The longer it cooks, the more the flavors blend. If the sauce gets too thick, add some reserved pasta water. To take your dish to the next level, serve it with garlic bread. A side salad also pairs well, adding freshness. For presentation, use a large bowl. Top with fresh basil leaves and an extra sprinkle of Parmesan cheese. This not only looks great but also adds flavor. Enjoy your meal! For the full recipe, check out [Full Recipe]. {{image_2}} You can switch up the pasta in this dish. Try penne or fusilli if you like. They hold sauce differently and add fun shapes. You can also change the sausage. Ground turkey or plant-based sausage works well. This makes the dish lighter or suitable for vegetarians. Need a gluten-free option? Use gluten-free pasta instead of regular rigatoni. It tastes great and keeps the dish friendly for those with gluten issues. If you want a vegetarian twist, use mushrooms or lentils. These ingredients add texture and flavor without the meat. Want to make your dish even better? Add more vegetables! Spinach or zucchini boosts nutrition and color. You can also spice things up with different seasonings. Italian seasoning or fresh parsley adds a lovely touch. Feel free to experiment and make it your own! For the full recipe, check out the details above. To refrigerate leftovers, let the rigatoni cool down first. Place it in an airtight container. This keeps it fresh and tasty. Use clear glass or plastic containers for easy viewing. Make sure to seal them well to prevent air from getting in. For long-term storage, freeze the cooked rigatoni and sauce separately. This helps keep the texture just right. Use freezer bags or containers. When you’re ready to eat, thaw in the fridge overnight. Reheat in a pot over low heat. Add a splash of water if it seems dry. For best freshness, eat the leftovers within three to four days. Check for signs of spoilage. If it smells sour or has an odd color, it’s time to toss it. Always trust your nose and eyes. Keeping track of storage dates helps avoid waste. To add spice, use hot Italian sausage instead of mild. You can also add red pepper flakes. Start with a pinch, then taste. If you want more heat, add more flakes. This way, you control the spice level just right. Yes, you can make this dish ahead. Cook the rigatoni and sauce, then let them cool. Store them in separate containers. When ready to serve, just reheat them together in a pot. Add a splash of reserved pasta water to keep it moist. This dish pairs well with a simple green salad. You can also serve garlic bread on the side. If you want more veggies, try steamed broccoli or sautéed spinach. These sides balance the hearty pasta nicely. Absolutely! This recipe makes four servings. It is great for kids, too. You can adjust the spice to suit their taste. Plus, it looks colorful and inviting, making it a hit at the dinner table. Easy Italian Sausage Rigatoni is a hearty dish packed with flavor. We covered the key ingredients, step-by-step cooking, and tips for the best results. You can easily adjust spice levels and make variations to suit your taste. Storing leftovers is straightforward with the right methods. In the end, this recipe brings comfort to any meal. Enjoy making it your own and sharing it with family and friends. Happy cooking!

Easy Italian Sausage Rigatoni Flavorful Dinner Delight

Craving a hearty meal that’s quick to make? Dive into my Easy Italian Sausage Rigatoni! This dish is flavorful, filling,

- 1.5 lbs beef stew meat - 3 tablespoons Ethiopian berbere spice blend - 2 large onions - 4 cloves garlic - 1 tablespoon fresh ginger - 1 can crushed tomatoes - 1 cup beef broth - 1/4 cup vegetable oil - 2 medium carrots - Fresh cilantro for garnish - Salt and pepper - Large pot or Dutch oven - Wooden spoon - Measuring cups and spoons - Add potatoes for extra heartiness - Use different kinds of meat or substitute with vegan options When it comes to making Sega Wat, the right ingredients set the stage for a great dish. The beef stew meat is key. It gives the stew its rich flavor. The Ethiopian berbere spice blend adds heat and depth. You can find this spice at specialty stores or make your own. Onions, garlic, and ginger build the base. They add layers of flavor that make Sega Wat special. Crushed tomatoes and beef broth give the stew its hearty body. Carrots add color and sweetness. Lastly, fresh cilantro brings a nice finish. For tools, a large pot or Dutch oven works best. A wooden spoon helps mix everything well. Measuring cups and spoons ensure you have the right amounts. You can tweak the recipe too. Adding potatoes makes the stew heartier. If you want a lighter option, use chicken or even tofu. This flexibility makes Sega Wat fun to customize. For the complete cooking process and tips, check the Full Recipe. - First, heat 1/4 cup of vegetable oil in a large pot over medium heat. - Add 2 large onions, finely chopped. Cook them for about 10 minutes until they are soft and clear. - Next, add 4 cloves of minced garlic and 1 tablespoon of grated fresh ginger. Stir for 2 minutes to bring out the flavor. - Now, stir in 3 tablespoons of the Ethiopian berbere spice blend. Let it cook with the onions for 1-2 minutes. - This will deepen the flavor and make your kitchen smell amazing. - After that, add 1.5 lbs of beef stew meat, cut into cubes. Season with salt and pepper. - Brown the beef on all sides for about 5-7 minutes. - Once the beef is browned, pour in 1 can of crushed tomatoes and 1 cup of beef broth. - Stir well to mix all the ingredients together. - Bring this mixture to a boil, then reduce the heat to low. Cover the pot and let it simmer for about 1.5 to 2 hours. - Stir occasionally and add water if the stew gets too thick. - During the last 30 minutes of cooking, add 2 medium carrots, sliced. This gives a nice sweetness to the dish. - Before serving, taste and adjust the seasoning as needed. - Now your Sega Wat is ready to enjoy! For the full recipe, check out the complete details. To get deep flavor, start by browning the meat. Heat your oil in the pot. When it's hot, add the beef cubes. Cook until they are brown on all sides. This step adds a rich taste to your sega wat. Let the stew simmer low and slow. This makes the beef tender and juicy. The longer it cooks, the better it tastes. Aim for at least 1.5 hours. Stir it occasionally to prevent sticking. To boost flavors, try adding more spices. A pinch of cumin or coriander can work wonders. You can also add some smoked paprika for a smoky kick. For marinating the beef, mix yogurt with berbere spice. Let it sit for 30 minutes before cooking. This adds great depth and helps to tenderize the meat. Serve sega wat with injera, a spongy Ethiopian bread. It soaks up the stew and is a must-have. If you prefer, you can also serve it with rice. When plating, use deep bowls. This helps with presentation. Garnish with fresh cilantro for a pop of color. Enjoy your dish warm for maximum flavor. For the full recipe, check the earlier section. {{image_2}} You can make vegan or vegetarian versions of Sega Wat. Use lentils or chickpeas instead of beef. These ingredients soak up flavors well. Low-carb alternatives are also easy to make. Swap out the carrots for zucchini or bell peppers for a lighter stew. Different spice blends give Sega Wat its unique taste. In some regions, people add more chili for extra heat. In others, they might use less spice for a milder flavor. Traditional side dishes from Ethiopia include injera, a flatbread that pairs perfectly with the stew. Injera helps soak up the rich sauce and adds a nice texture. You can substitute chicken or lamb for beef. Both options work well and change the flavor profile. If you want a vegetarian twist, use vegetable broth instead of beef broth. This swaps out the meat flavor while keeping the stew hearty and satisfying. For the full recipe, check out the Sega Wat Delight section. To keep your Sega Wat fresh, store leftovers in an airtight container. Glass or plastic containers work well. Make sure the stew cools down before sealing it. This will prevent moisture buildup and keep the flavors intact. You can freeze Sega Wat for later. Use freezer-safe containers or heavy-duty bags. Leave some space at the top for expansion. When ready to eat, thaw it in the fridge overnight. Reheat it on the stove over low heat, stirring often to avoid burning. In the fridge, your Sega Wat stays fresh for about 3 to 4 days. If it looks dull or has an off smell, it’s best to toss it. Always trust your senses when checking for spoilage. Sega Wat is a spicy Ethiopian beef stew. It is rich in flavor and history. This dish holds cultural importance in Ethiopia. Families often serve it during special occasions and gatherings. The base is made with berbere spice, which gives it a unique taste. The stew brings warmth and comfort to those who enjoy it, making it a staple in Ethiopian cuisine. Yes, you can make Sega Wat ahead of time. Preparing it in advance allows the flavors to blend better. The stew can sit in the fridge for a few days. This makes it great for meal prep. Just reheat it gently on the stove before serving. You can also freeze it for longer storage. This way, you can enjoy it whenever you want. Sega Wat pairs well with several sides. The best accompaniment is injera, a sourdough flatbread. It helps balance the heat and soak up the stew. You can also serve it with steamed rice for a milder option. Some people enjoy it with a side of vegetables or salad. Fresh cilantro on top adds a bright touch. Sega Wat can be quite spicy, but you can adjust the heat. The key ingredient, berbere spice, controls the spice level. If you prefer less heat, use less berbere in your stew. You can also add more tomatoes or broth to tone it down. Experimenting with the spice will help you find your perfect balance. To wrap up, this blog post covered how to make Sega Wat, a flavorful Ethiopian stew. We listed key ingredients like beef, berbere spice, and fresh veggies. You also learned essential kitchen tools, cooking steps, and tips for enhancing your dish. Variations allow for dietary needs and personal tastes. Lastly, proper storage keeps leftovers fresh. Sega Wat is rich in flavor and history, making it a dish worth trying. Enjoy your cooking adventure and share your delicious results!

Sega Wat Spicy Ethiopian Beef Stew Delight

Are you ready to spice up your dinner plate? Sega Wat, a flavorful Ethiopian beef stew, combines tender meat with

Older posts
Newer posts
← Previous Page1 … Page43 Page44 Page45 … Page49 Next →

dsad

© 2025 savorystride • Built with GeneratePress

Our Policies

  • Copyright Policy
  • Cookie Policy
  • GDPR Policy
  • Privacy Policy
  • Disclaimer
  • Terms Of Use

More Information

  • Home
  • About
  • Contact
  • Appetizers
  • Dessert
  • Dinner
  • Drinks
©2025, savorystride About Back To Top